Connect SPS Commerce
Connect SPS Commerce once, and purchase orders from the retailers you trade with through SPS start arriving in SKU.io as sales orders. You sign in to SPS Commerce during setup. SKU.io never sees or stores your SPS password.
Before you begin
- You need an SPS Commerce account, and the login you use for it.
- You need your receiver ID: the trading partner ID that SPS Commerce assigned to your business. Your SPS Commerce contact can confirm it.
- You need permission to add integrations in SKU.io.
- You can connect one SPS Commerce account. If one is already connected, opening the setup page takes you to its Settings instead.
Open the setup form
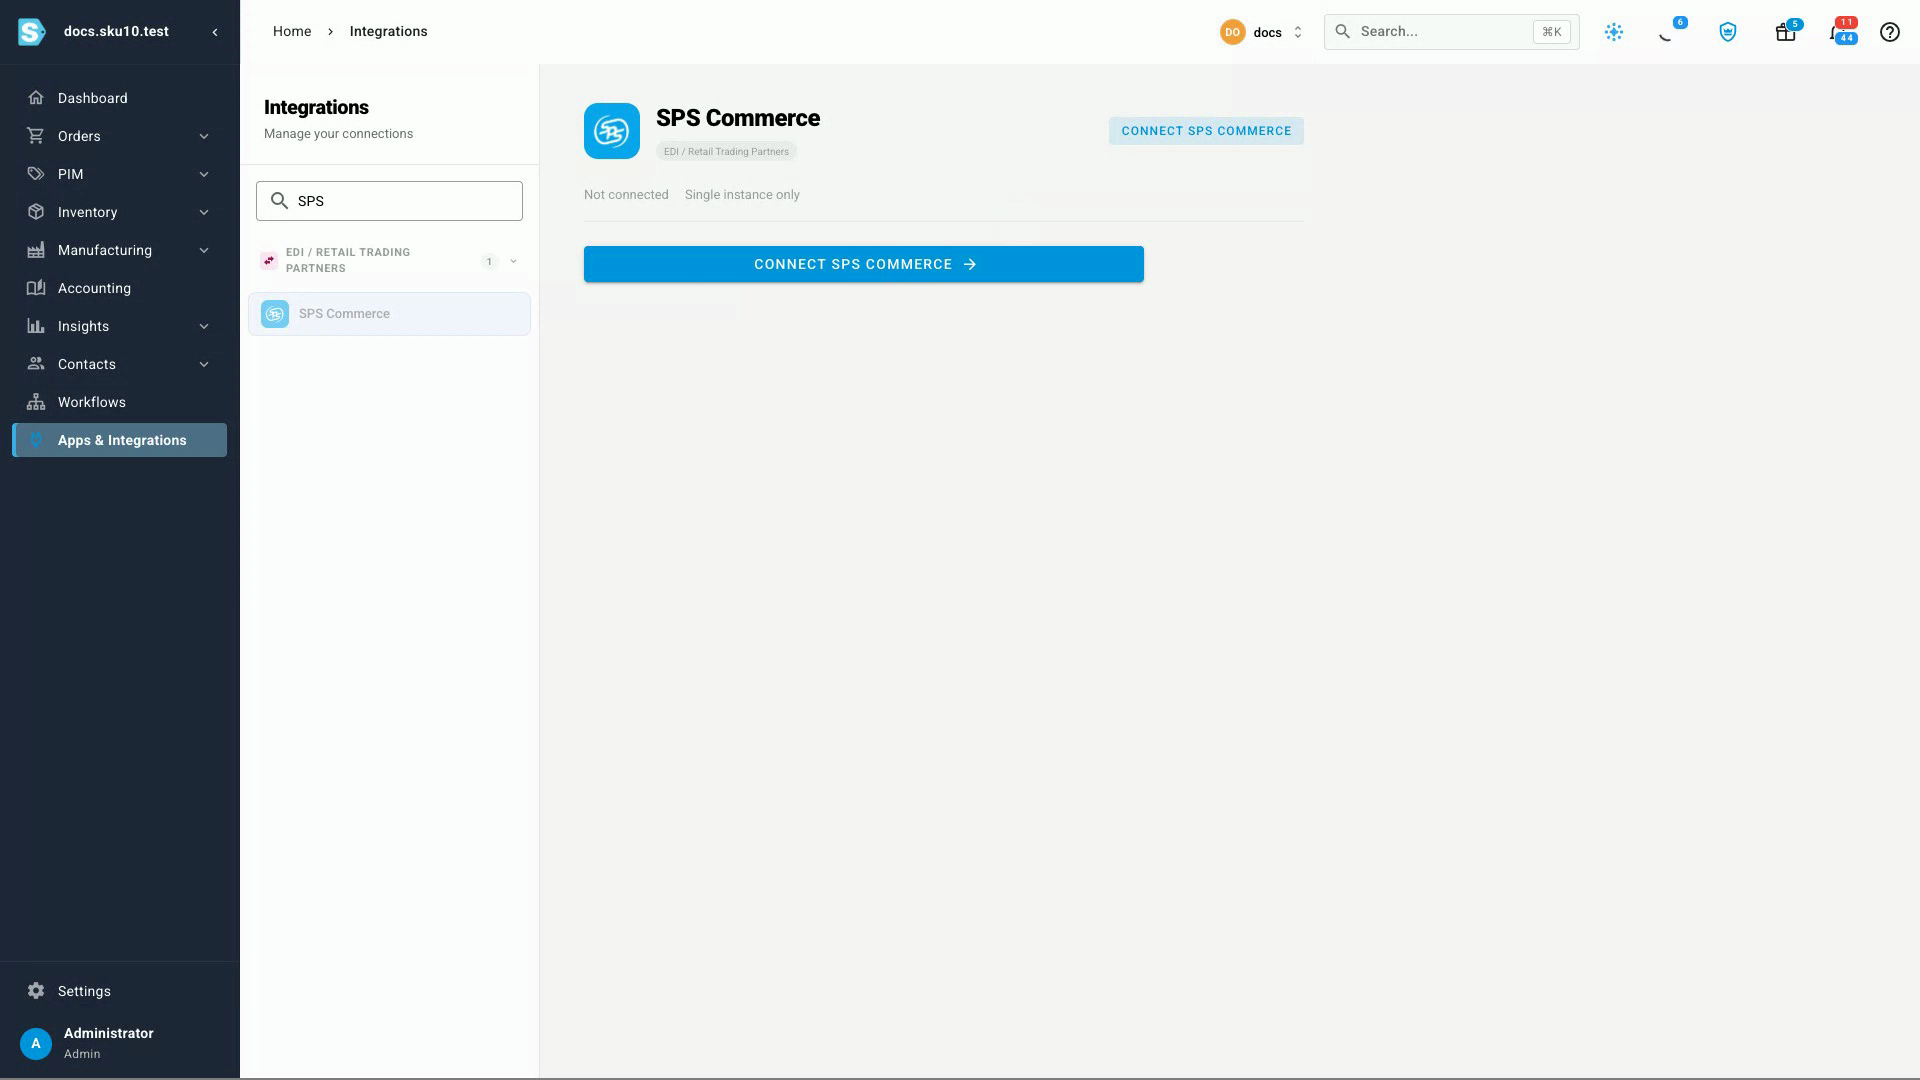
- Go to Apps & Integrations.
- Type SPS in Search integrations, and choose SPS Commerce. It's listed under EDI / Retail Trading Partners.
- Click Connect SPS Commerce. The Connect SPS Commerce page opens.
Enter your details
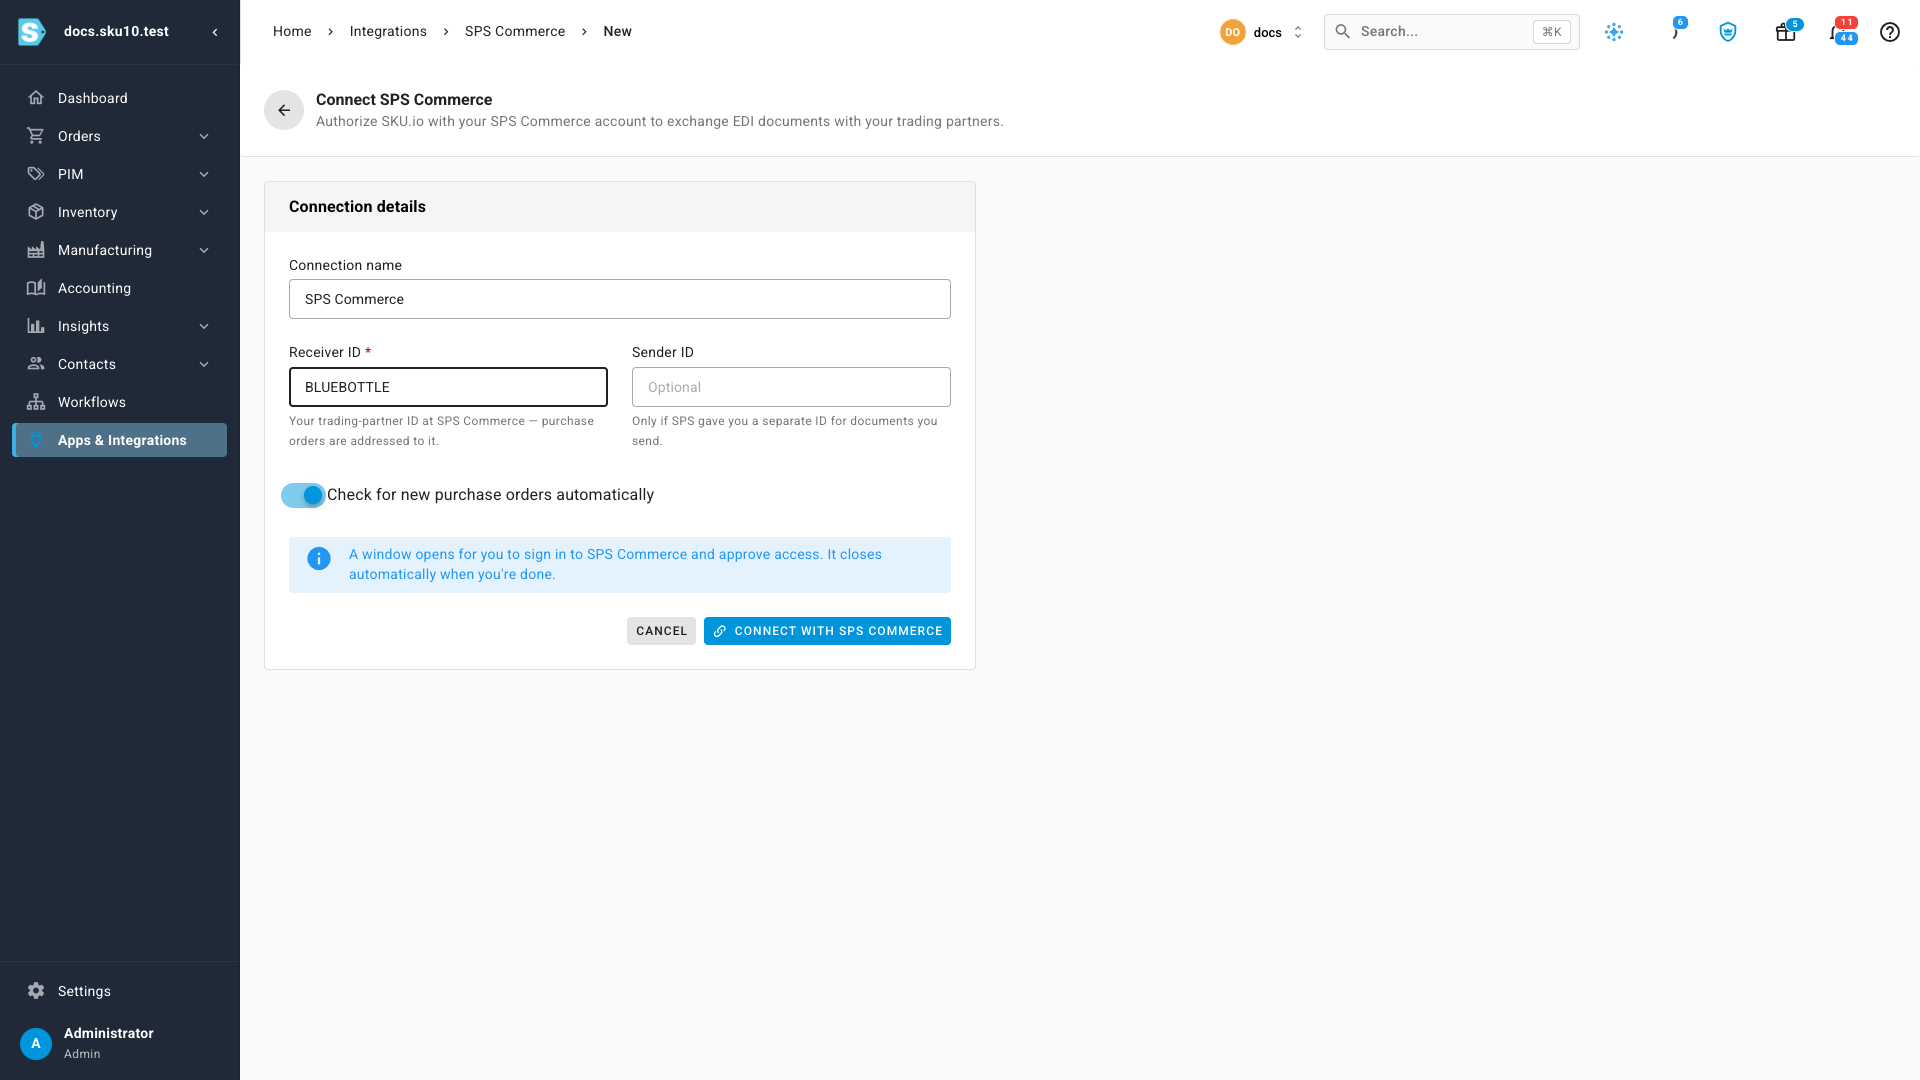
- Leave Connection name as SPS Commerce, or give the connection a name you'll recognize.
- Enter your Receiver ID. Purchase orders addressed to this ID are the ones SKU.io picks up. The field is required.
- Enter a Sender ID only if SPS Commerce gave you a separate ID for the documents you send. Otherwise leave it blank.
- Leave Check for new purchase orders automatically on, so SKU.io checks SPS Commerce every five minutes. Turn it off if you'd rather fetch orders yourself with Check SPS for new orders.
Sign in to SPS Commerce
- Click Connect with SPS Commerce. A window opens with the SPS Commerce sign-in page.
- Sign in to SPS Commerce, and approve access for SKU.io.
- The window closes on its own, and your new connection opens on its Dashboard. The header shows Connected.
If the window doesn't appear, your browser blocked the pop-up. Allow pop-ups for SKU.io and click Connect with SPS Commerce again.
SKU.io checks SPS Commerce right away, so purchase orders that are already waiting appear within a few minutes.
Check the connection
On the connection's Dashboard, the Connection card shows the receiver ID, the sender ID, and whether automatic checking is on. Click Test connection at any time to confirm SKU.io can still reach your SPS Commerce account.
The header also shows which SPS Commerce environment the connection uses: Production, or Sandbox for a test account.
Change or remove the connection
Open the connection's Settings tab to:
- Change the Connection name, Receiver ID, Sender ID, or automatic checking, then click Save changes.
- Click Reconnect to sign in to SPS Commerce again — for example, after the connection test fails or SPS Commerce asks you to re-approve access.
- Click Disconnect to remove the connection and the purchase orders it received. You can only disconnect before the connection has created any sales orders. After that, turn off automatic checking instead.
Next steps
- Handle purchase orders from SPS Commerce — map new items, and follow acknowledgments and ship notices.
- SPS Commerce — what moves between SKU.io and SPS Commerce.
Video transcript
To connect SPS Commerce, open Apps and Integrations from the menu on the left.
Type SPS into the search box, and choose SPS Commerce from the list.
Then click the Connect SPS Commerce button, and the setup form opens for your new connection.
Enter the receiver ID that SPS Commerce assigned to your business.
Add a sender ID only if SPS issued you a separate sender ID.
Leave automatic checking on to look for new purchase orders every five minutes.
When the details look right, click Connect with SPS Commerce.
Sign in through the window that opens, then approve access to your account.
It then closes on its own, and your new connection appears.