Connect a second Shopify store
You can connect every Shopify store you run to one SKU.io account, such as a retail store and a separate wholesale store. Each store is its own connection, with its own name, store, settings and orders, and both sell from your one product catalog and your warehouses.
If your wholesale buyers order from the same store through Shopify's B2B features, you don't need a second connection. See Set up B2B pricing for Shopify.
Before you begin
- You need permission to add an integration.
- Sign in to the second store's Shopify admin as its owner, or as a user with the App developer role. Each store needs its own custom app, created in that store.
- If the second store trades under a different name, create a SKU.io store for it first, such as Wholesale. See Set up your stores. Two connections can also share one store.
- Pick a name for each connection that tells them apart, such as Shopify Retail and Shopify Wholesale. No two connections can share a name.
Add the second store
-
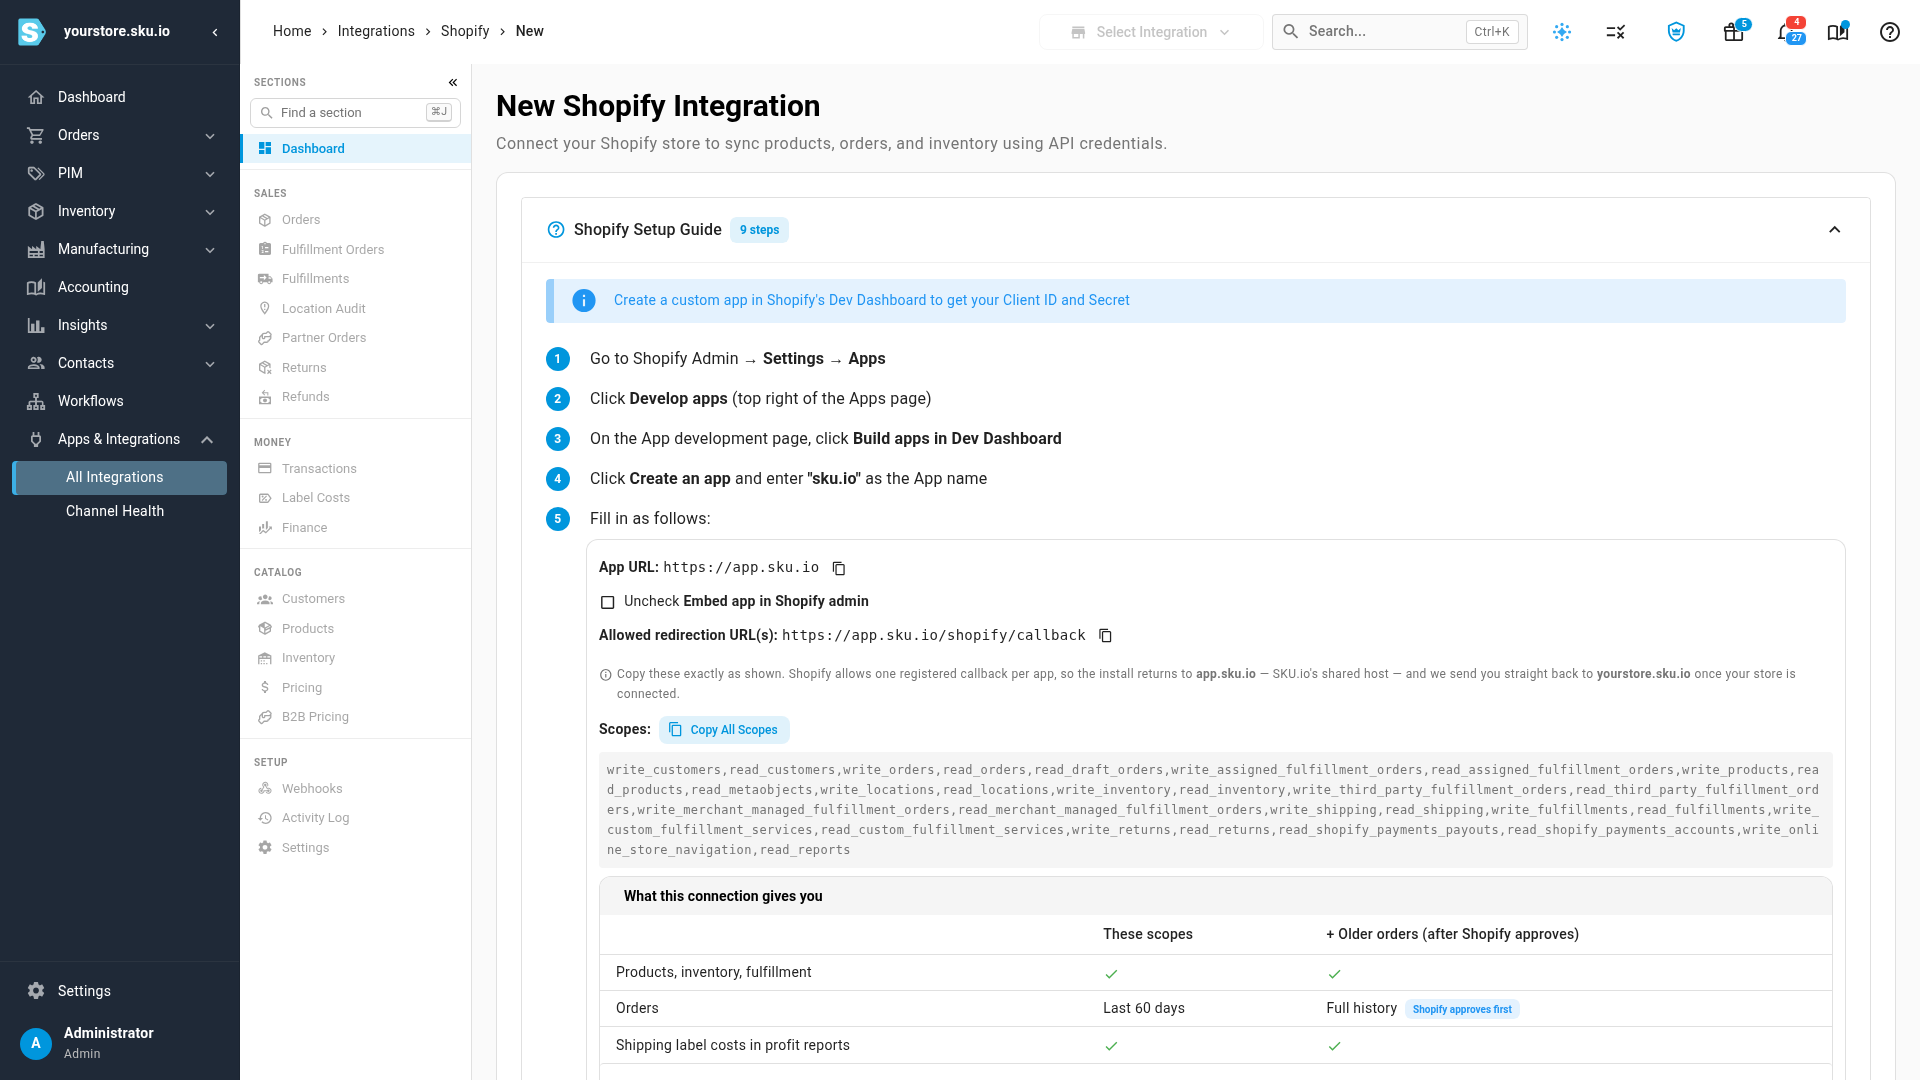
Go to Apps & Integrations and select Shopify. The store you already connected is listed under Instances.
-
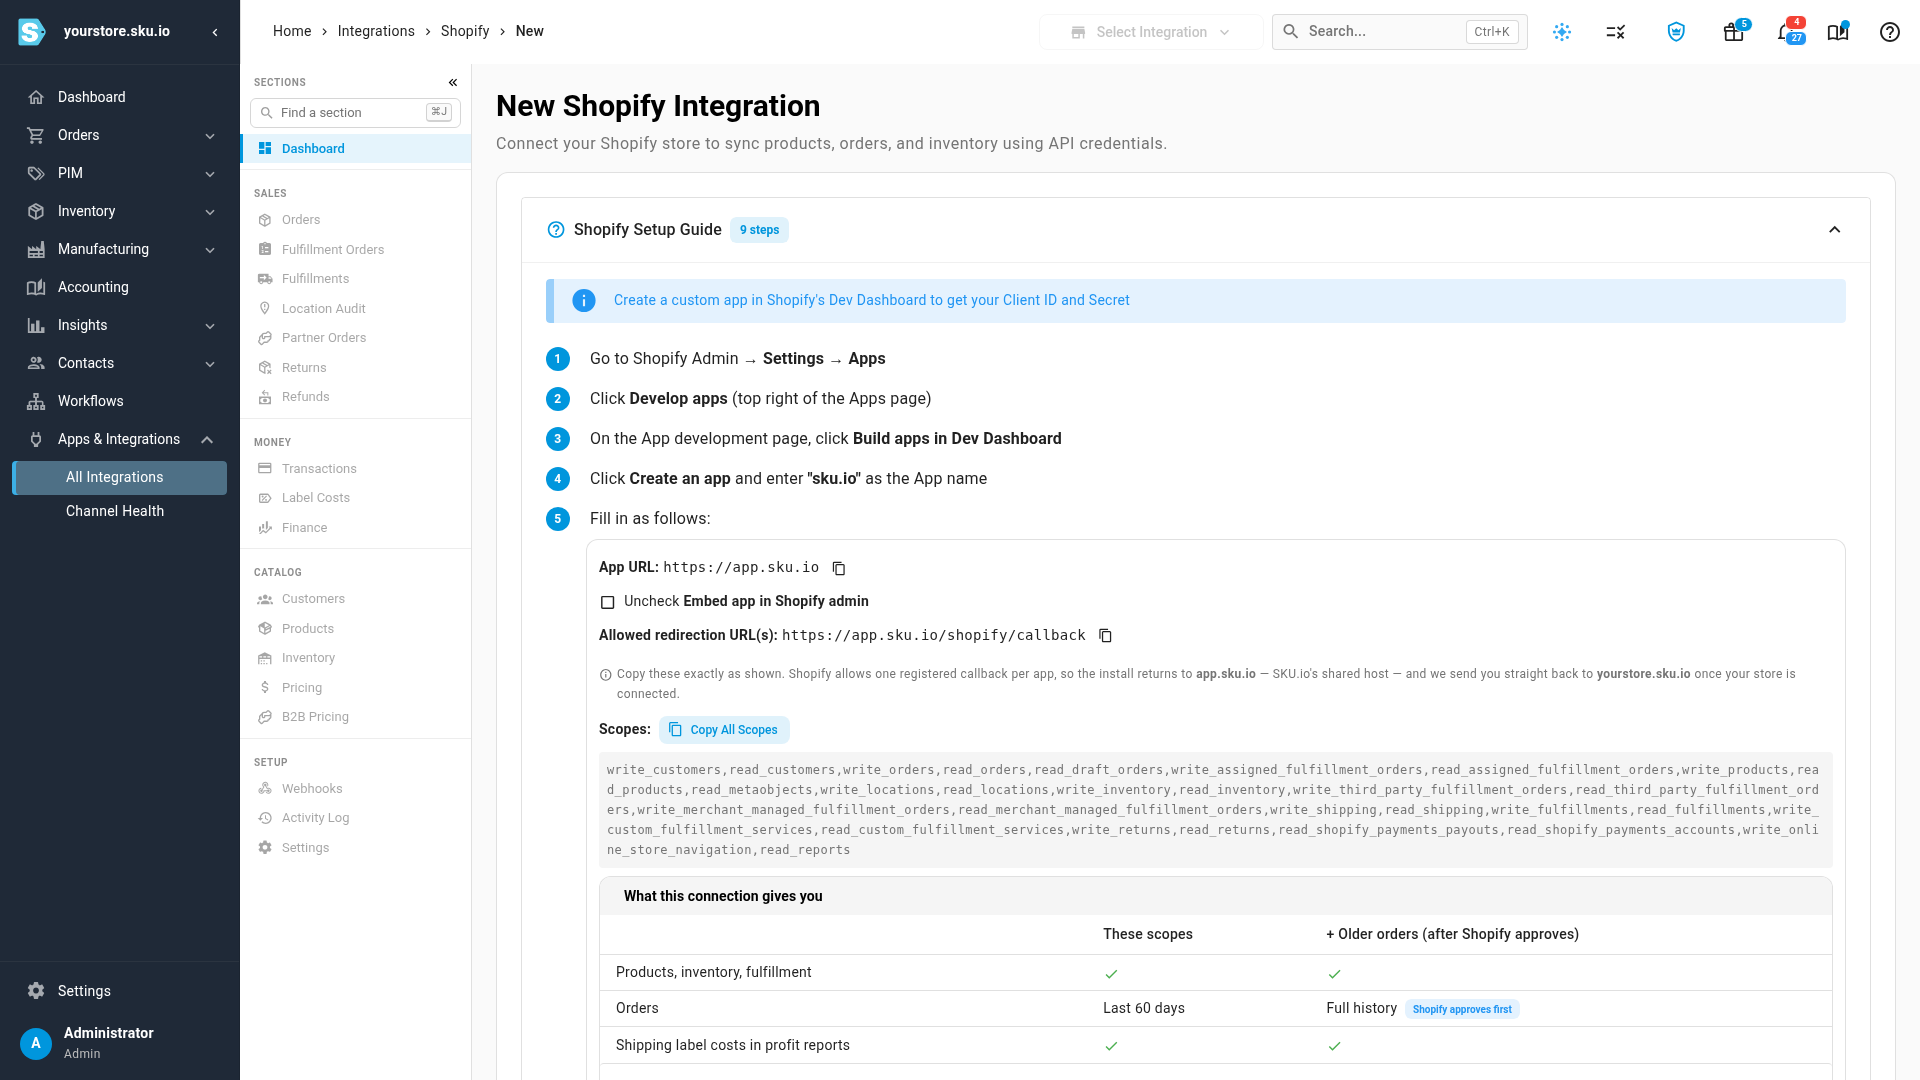
Click Add Instance. The New Shopify Integration page opens with the Shopify Setup Guide.
-
In the second store's Shopify admin, create a custom app by following the setup guide, the same way you did for your first store. Each step is in Connect a Shopify store.
-
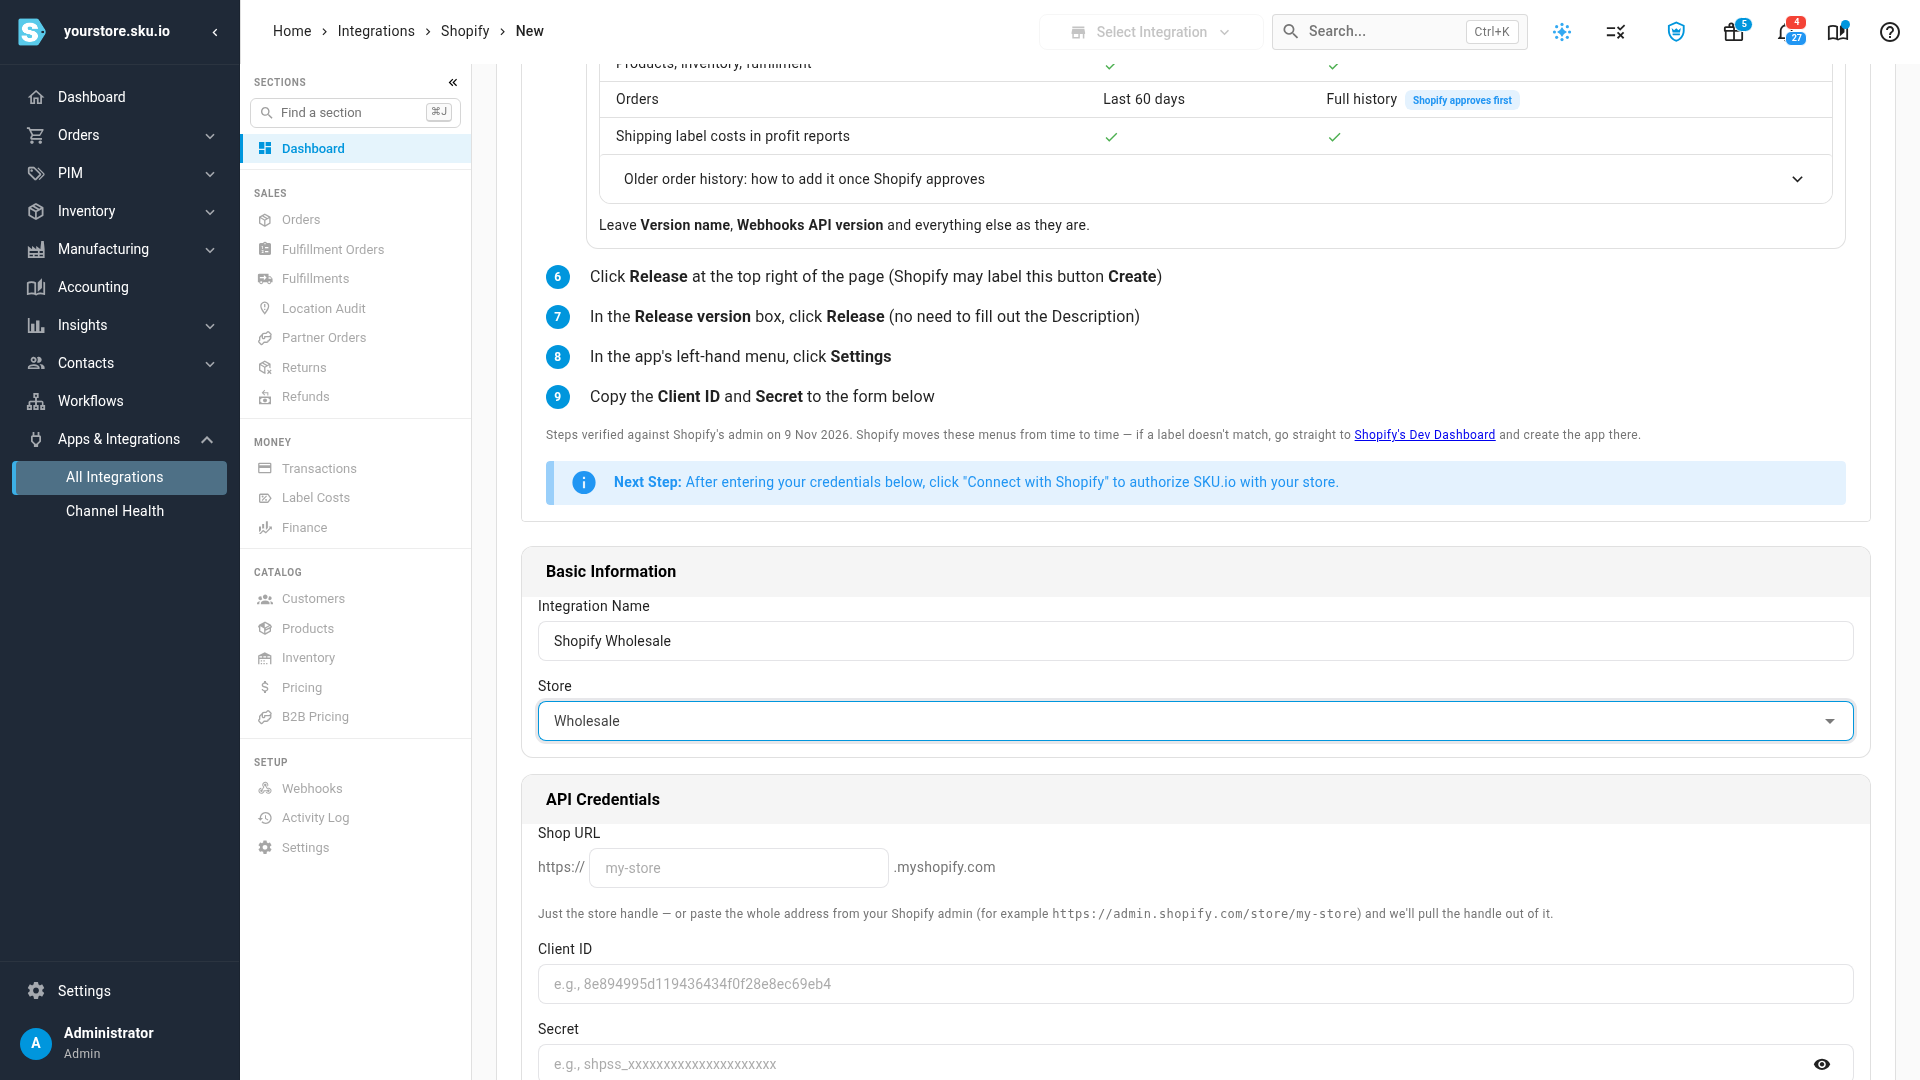
Back in SKU.io, under Basic Information, enter an Integration Name for this store, such as
Shopify Wholesale. If the name is already taken, the field says so and Connect with Shopify stays off until you change it. -
Choose the Store this connection sells under. Its orders, emails and packing slips use that store's details.
-
Under API Credentials, enter the second store's Shop URL, then paste the Client ID and Secret from that store's app.
-
Under Advanced Settings, set a Start Date. Orders and inventory changes before this date aren't synced.
-
Click Connect with Shopify, then approve the install in the second store's Shopify admin. SKU.io brings you back to finish setup.
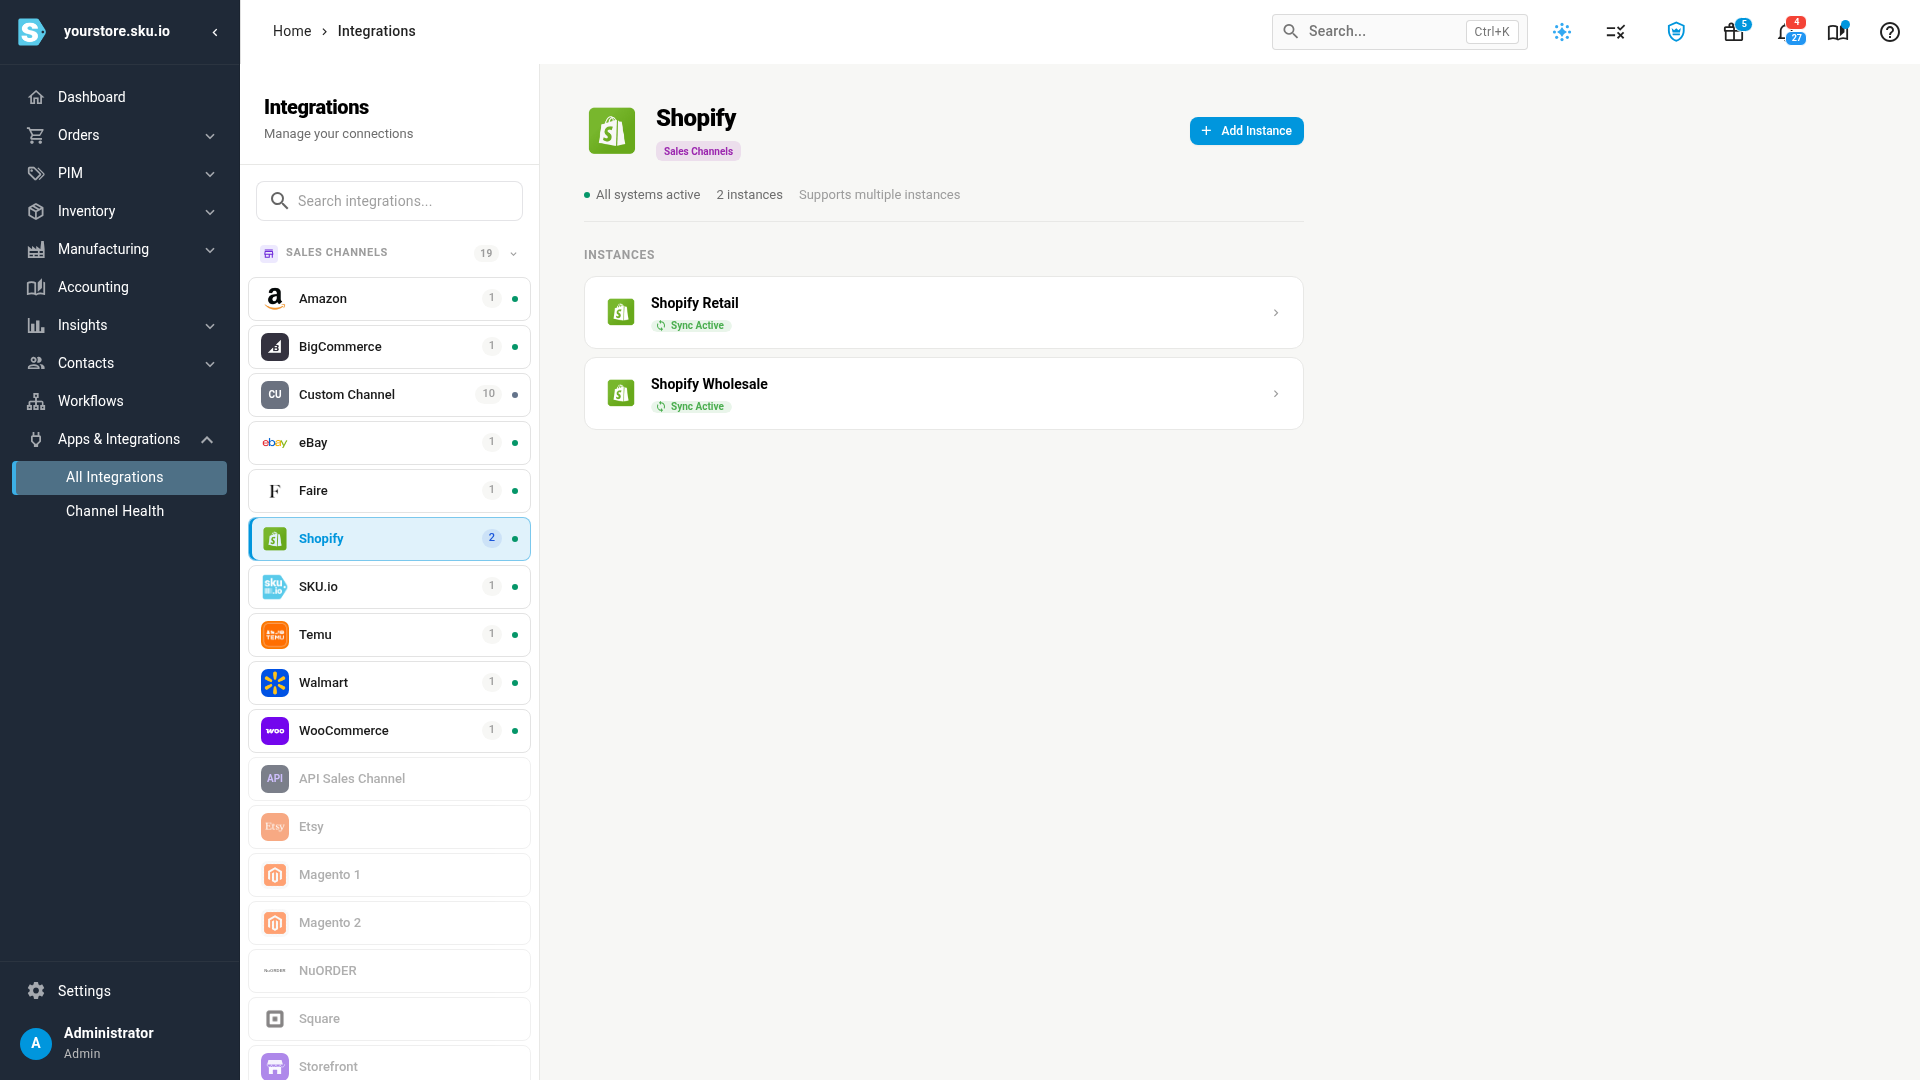
What you'll see: Shopify lists both stores under Instances, each with its own sync status.
Set up the second store
A new connection starts from its own defaults. Nothing is copied from your first store, so set up the second one the way you want it to work.
-
Map its locations. Map each of the store's Shopify locations to the warehouse that ships for it. Orders can't be downloaded until at least one location is mapped. See Map Shopify locations to warehouses.
-
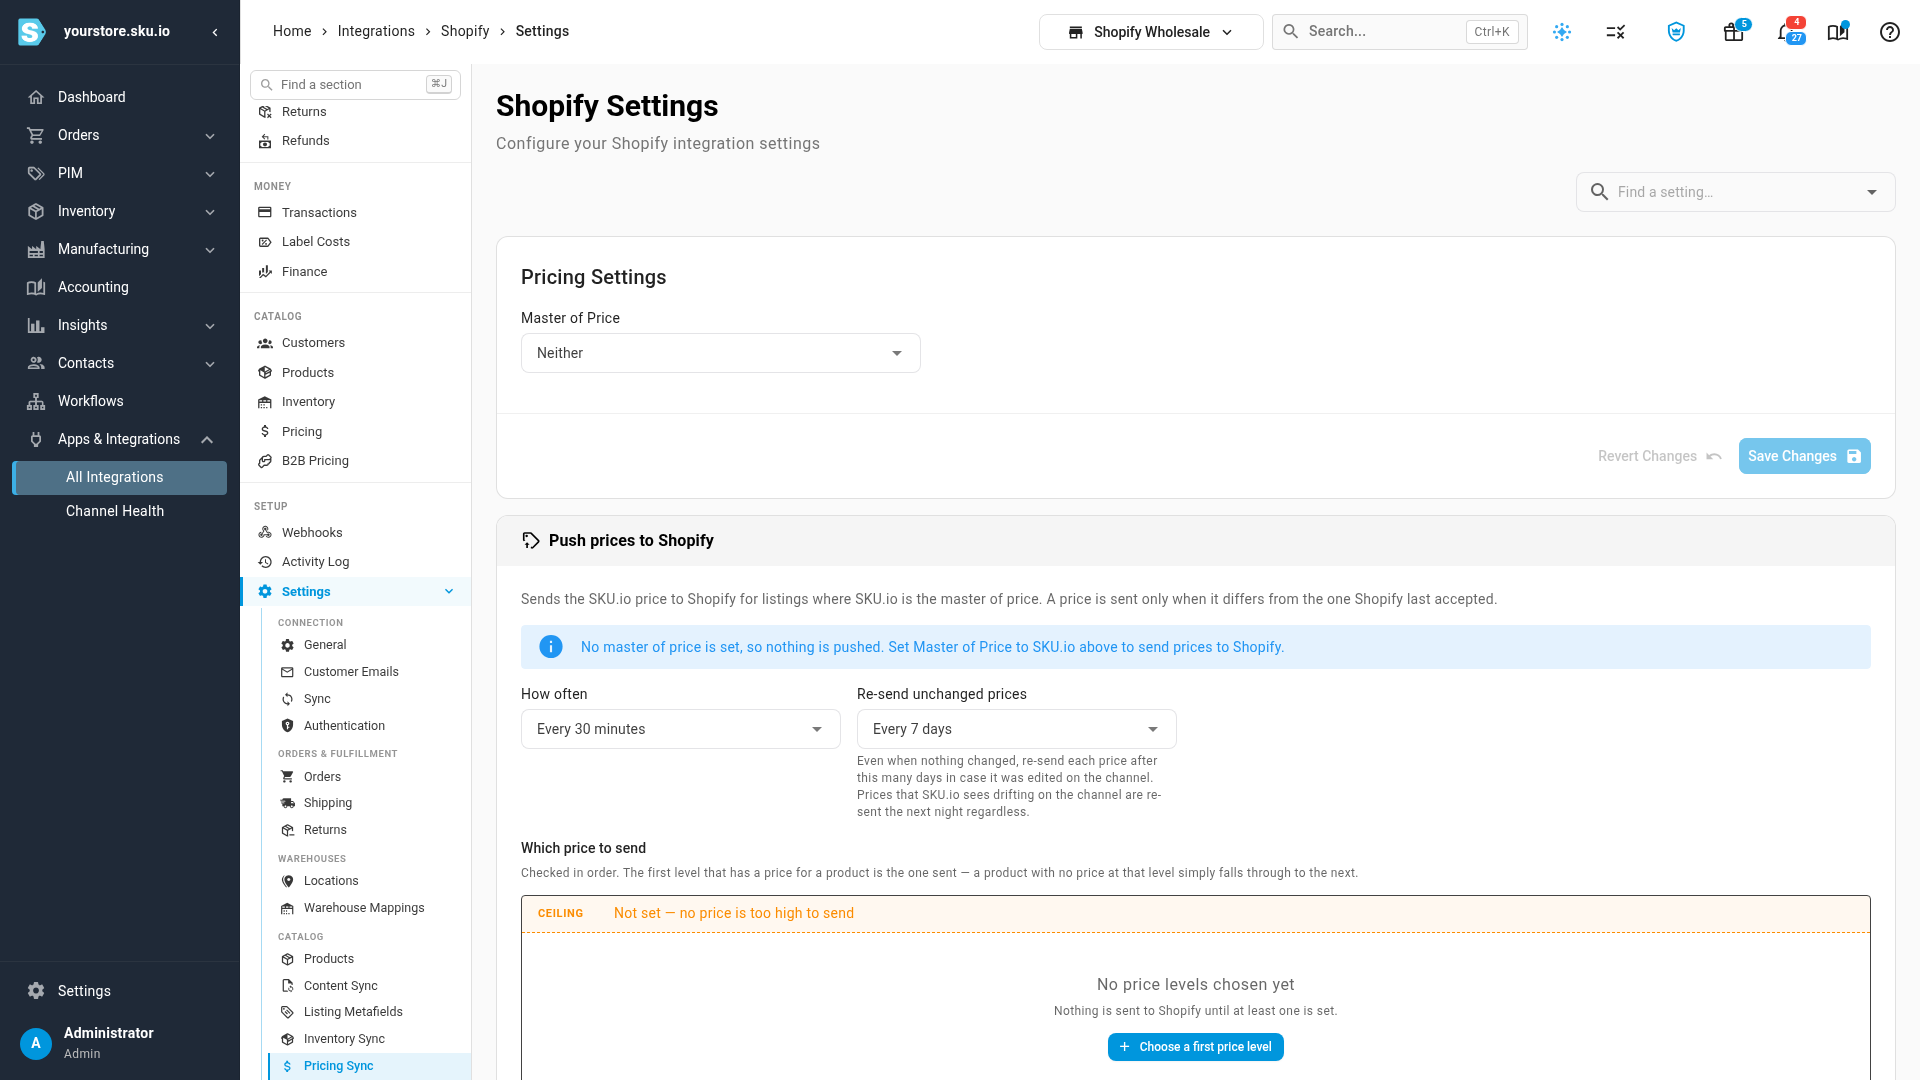
Pick the store you're changing. On any Shopify page, the store picker at the top of the page shows which store you're working on. Click it to switch to the other store.
-
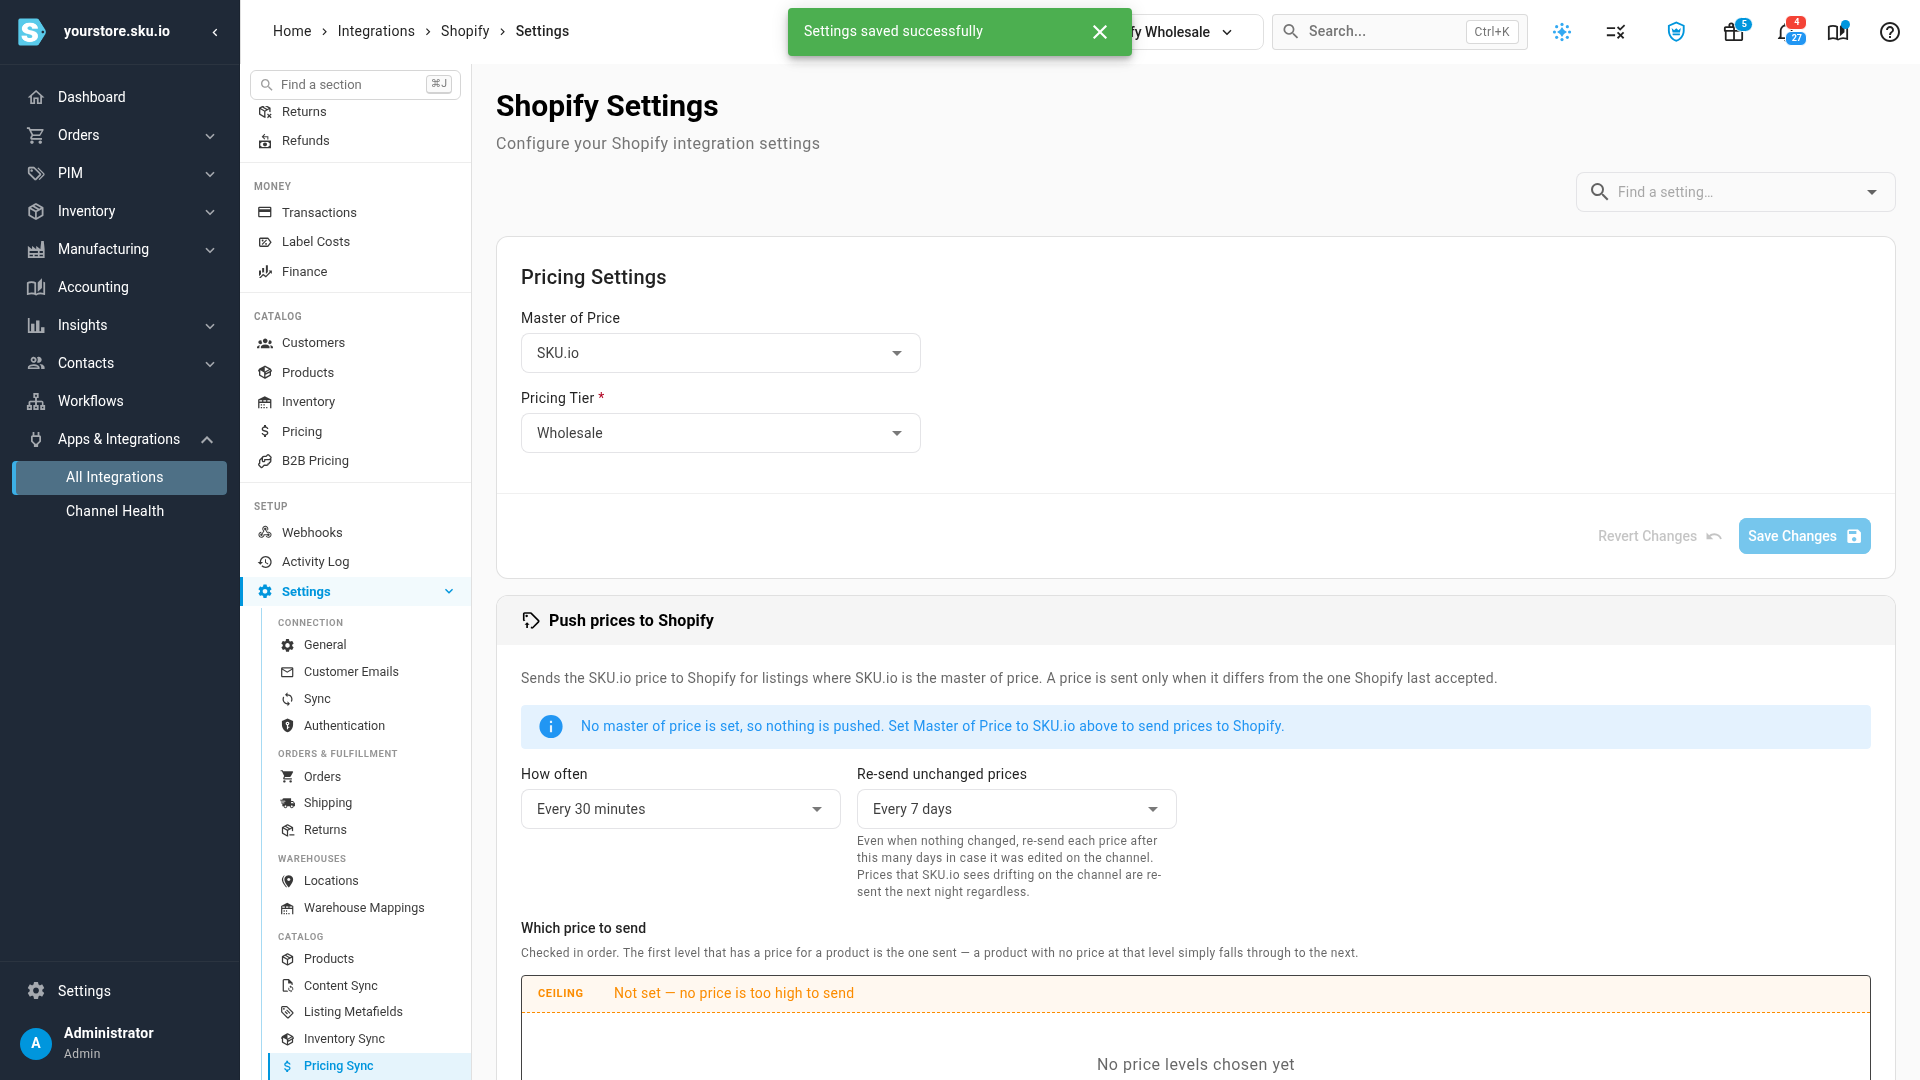
Send it its own prices. Open the store's Settings, then Pricing Sync. Set Master of Price to SKU.io, choose the Pricing Tier this store sells at, such as Wholesale, and click Save Changes. Your first store keeps sending its own tier. For price levels, guardrails and the first preview, see Sync prices with sales channels.
-
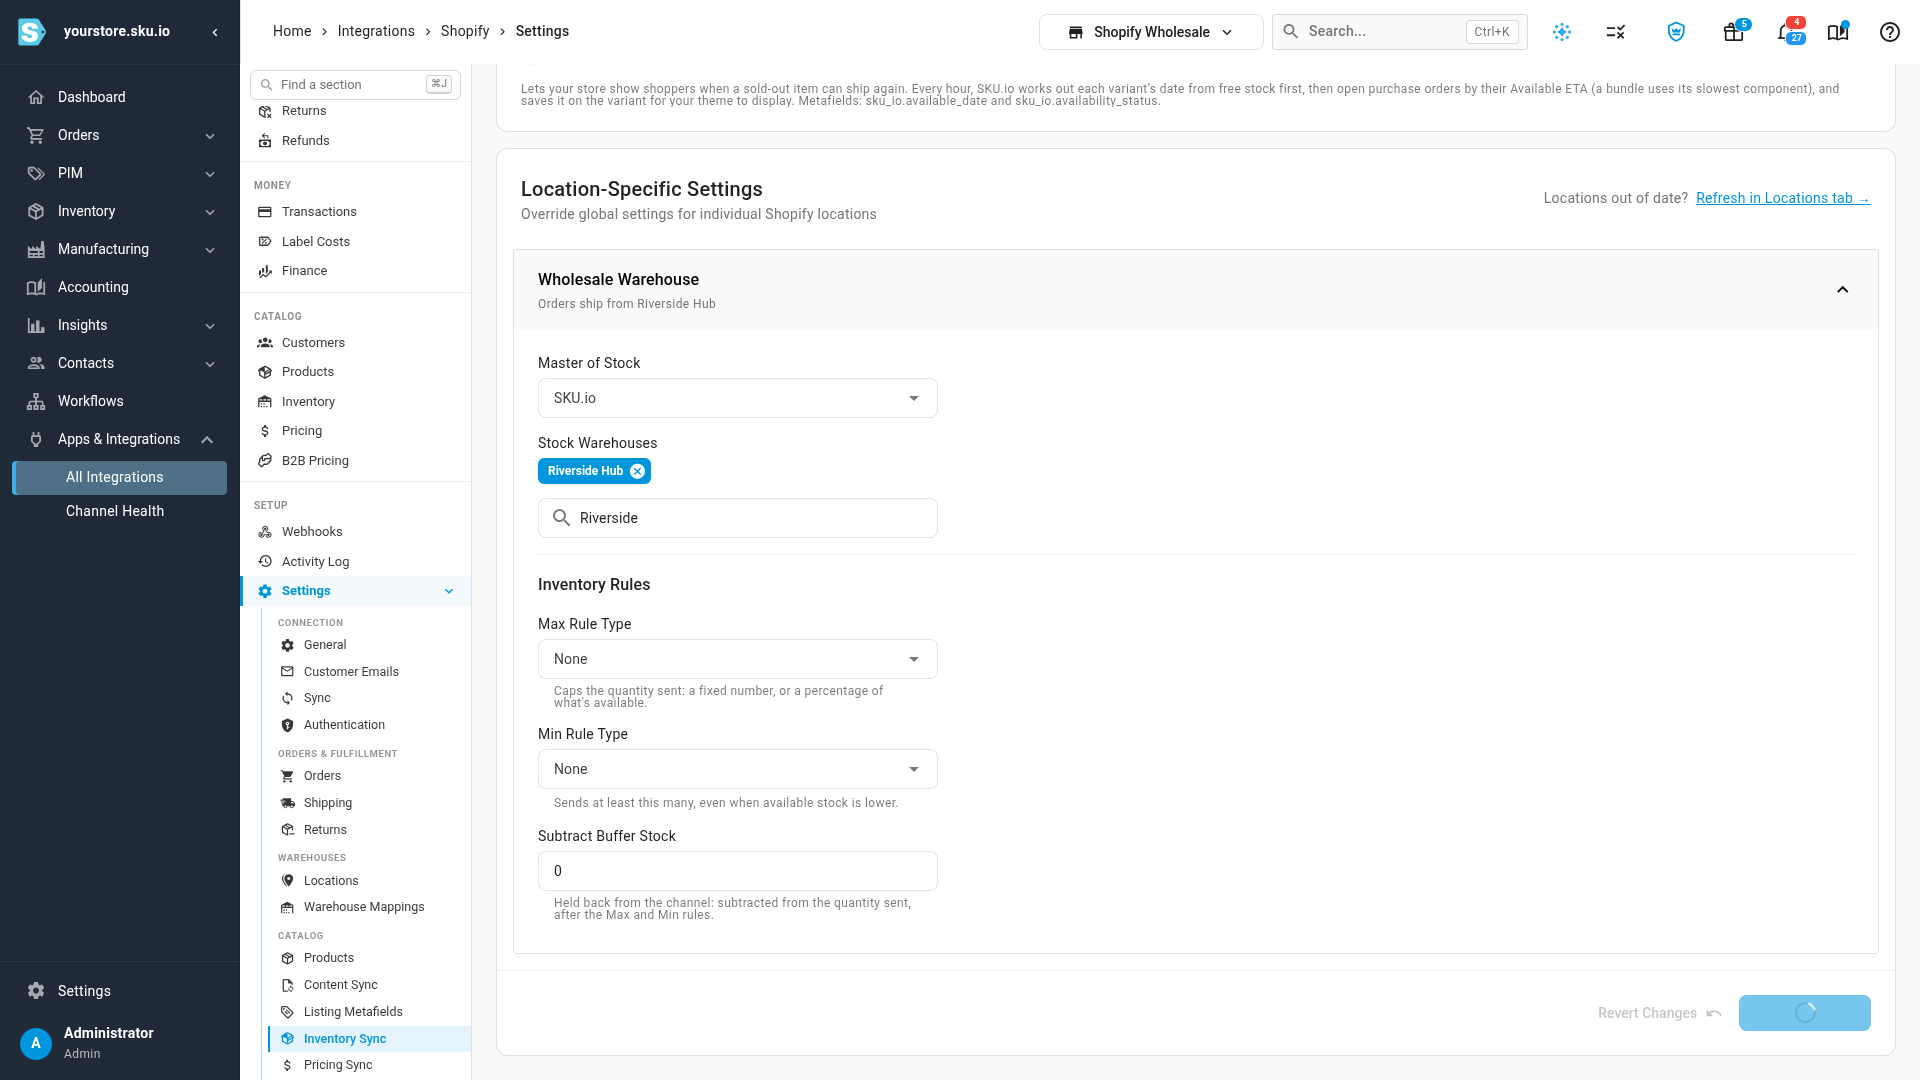
Choose where its stock comes from. Open Inventory Sync. Under Location-Specific Settings, set each location's Master of Stock to SKU.io, choose its Stock Warehouses, and click Save Changes.
How the two stores share your catalog and stock
- Products. One SKU.io product can be listed in both stores. A listing links to your product by itself when its SKU matches yours exactly. For any that don't, see Link a channel listing to a product.
- Stock. Each store shows the available stock of the warehouses you chose for it. Two stores that use the same warehouse sell from the same stock, so a sale in either store lowers what both show after the next inventory sync. To hold stock back from one store, give it its own warehouse, or set Subtract Buffer Stock on its location.
- Orders. Each store's orders arrive as their own sales channel, under the store you chose, and the connection's name is how they appear on orders, filters and reports. See Connect more than one store or account.
Next steps
- Map Shopify locations to warehouses — do this first for the new store, or its orders can't be downloaded.
- Use different accounts for each sales channel — post wholesale revenue to its own account.
- Set up B2B pricing for Shopify — publish each wholesale buyer's own prices to their Shopify company.
Video transcript
To connect a second Shopify store, open Apps and Integrations, and choose Shopify. Your first store is listed under Instances. Click Add Instance to connect the next one. The New Shopify Integration page opens, with its setup guide. Each Shopify store needs its own custom app, created in that store's admin. Then follow the same setup guide you used the first time. Give the connection a name that says which store it is, such as Shopify Wholesale. Then choose the store it sells under. Its orders, emails and packing slips use those details. Enter the Shop URL of your second store. Then paste the Client ID and the Secret from its app. Click Connect with Shopify, and approve the install in your second store's admin. Back in Apps and Integrations, Shopify now lists both stores. Each store has separate settings and orders. This is the wholesale store's Pricing Sync settings. The picker at the top shows which connection you are changing. Open it to switch to the other store. To give this store its own prices, set Master of Price to SKU.io. A Pricing Tier box appears below it. Choose the tier this store sells at. Then click Save Changes, at the bottom right of the card. Your first store keeps its own tier, untouched. Next, open Inventory Sync. For each location, set Master of Stock to SKU.io. Then choose the warehouses this store sells from, and close the list. Two stores that share a warehouse also share its units. Click Save Changes to finish.