Set up your stores
A store is a business identity you sell under: a name, an email address, a phone number, an address and a logo. If you trade under one name, you need one store. If you run a retail brand and a wholesale brand, or sell in two regions under different names, create a store for each. Sales channels, sales orders, emails and printed documents all pick up their store's details.
Before you begin
- You need permission to manage stores. Without it, the Create Store and Import buttons are hidden.
- Have each store's name and the email address customers and suppliers should see. Both are required.
Create a store
-
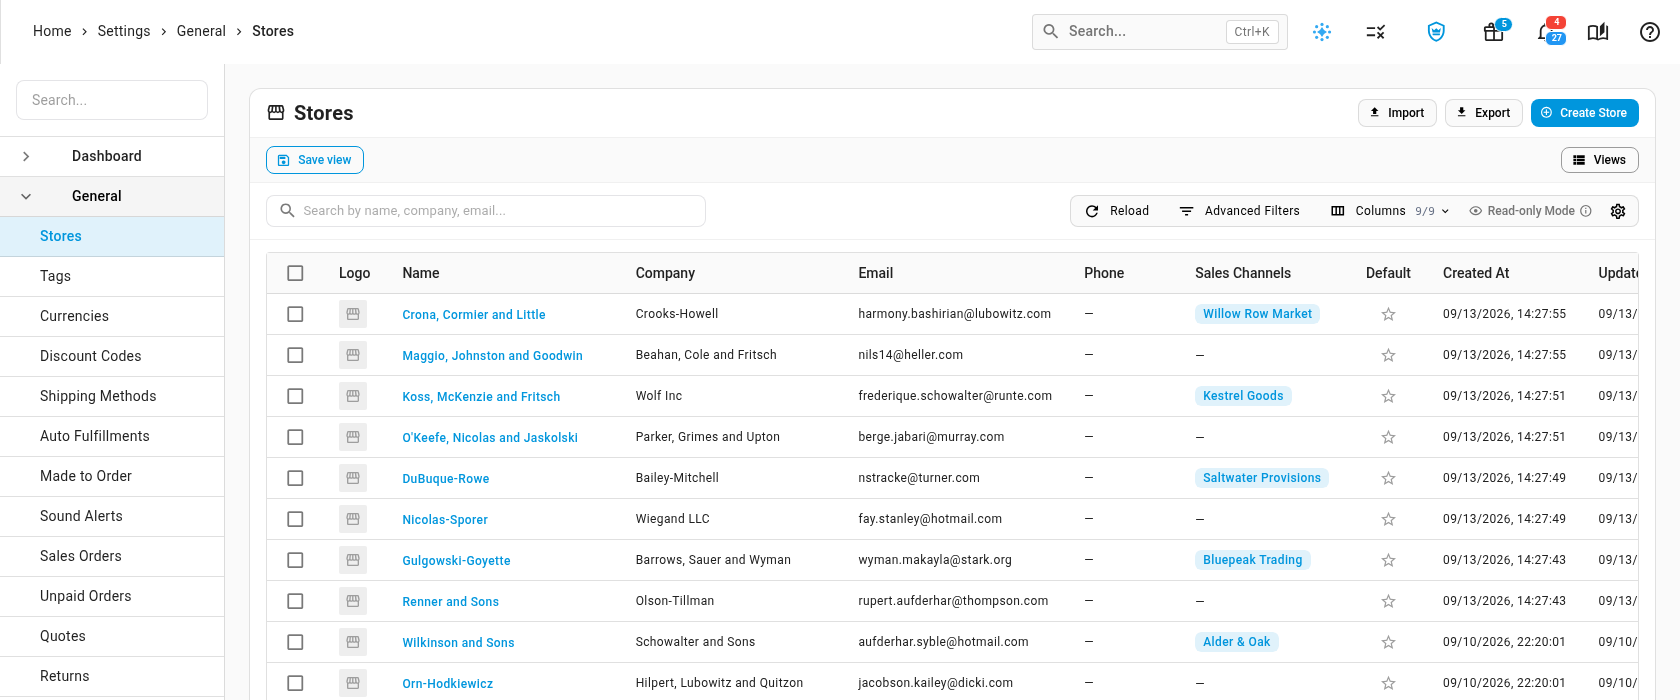
Go to Settings → General → Stores. The list shows every store with its company, email, phone and the sales channels that sell under it.
-
Click Create Store.
-
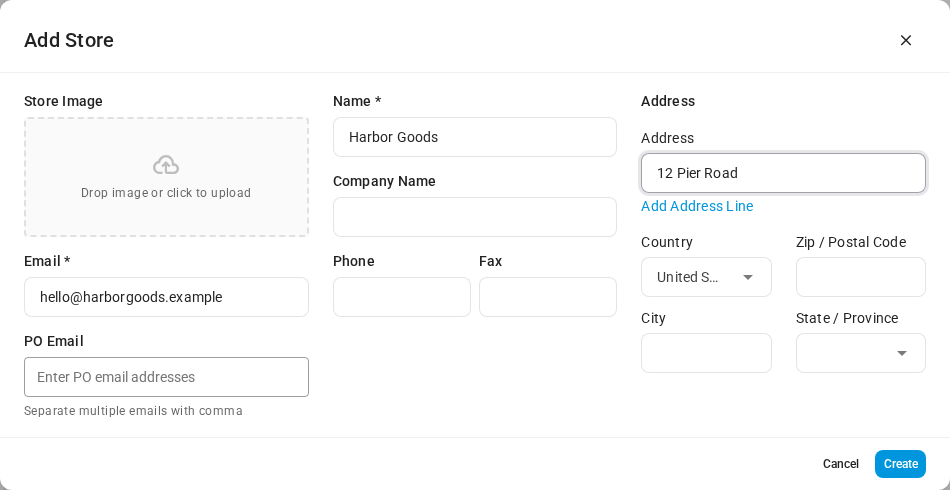
Enter a Name. Store names must be unique.
-
Enter the Email address customers and suppliers see on emails and documents from this store.
-
Fill in what else you have:
- Company Name, Phone and Fax.
- PO Email: the addresses that receive purchase orders for this store. Add several by separating them with commas.
- Store Image: drop in a logo, or click the box to upload one.
- Address: the address printed on the store's packing slips, invoices and purchase orders.
-
Click Create. The store is added to the top of the list.
Work with a store's page
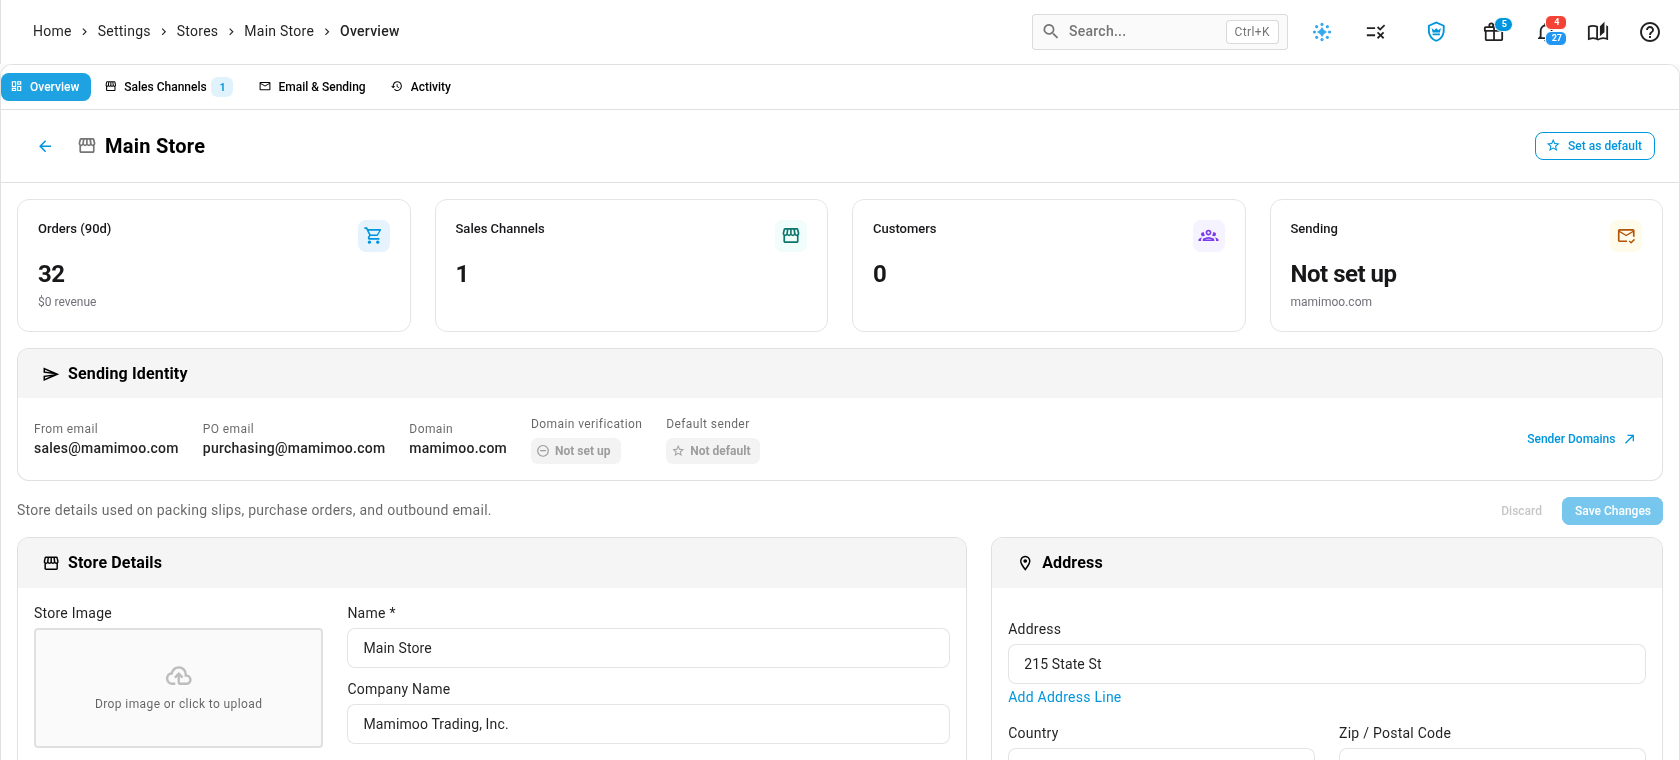
Click a store's name to open its page. Four tabs run across the top.
| Tab | What it shows |
|---|---|
| Overview | Cards for Orders (90d), Sales Channels, Customers and Sending, the store's Sending Identity, and the Store Details and Address forms. Edit a field and click Save Changes, or Discard to undo. |
| Sales Channels | Every sales channel that sells under this store, with its integration and sync status. You choose a channel's store in that channel's own settings. |
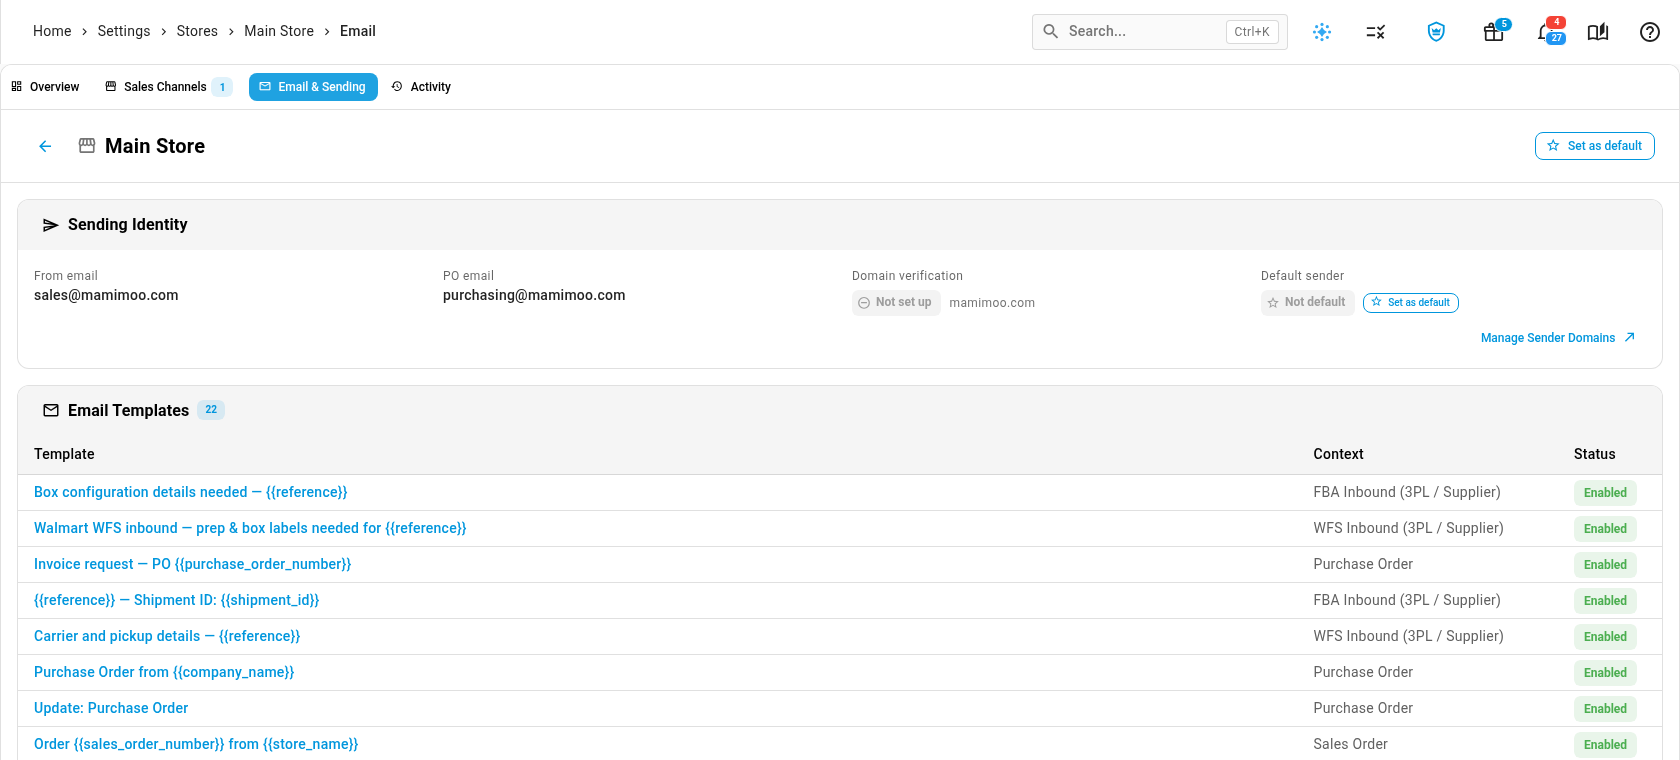
| Email & Sending | Who the store's emails come from (its From email and PO email), whether its domain is verified, and the email and PDF templates this store uses. |
| Activity | Every change made to the store, who made it, and when. |
Make a store the default
Click Set as default at the top of a store's page. The default store sends the emails that don't belong to a particular store, and its email templates are the versions every other store falls back to. Only one store can be the default; the Default column on the list marks it with a star.
Where SKU.io uses a store
- Sales channels. Each connected channel sells under one store, so its orders carry that store. See Connect more than one store or account.
- Sales orders and purchase orders. Orders you create in SKU.io start with the Default Store set under Settings → General → Sales Orders, and purchase orders with the one under Settings → Purchasing → Purchase Orders.
- Emails. A store can send its own wording of any email. See Customize email templates and Send email from your own domain.
- PDF documents. A store can have its own copy of a PDF template, such as a packing slip with its logo. See Find, save and restore templates.
Import or export stores
To add or update many stores at once, use a spreadsheet.
-
On the Stores list, click Export. SKU.io downloads a CSV of your active stores with every column below. Use it as your template.
-
Edit the file: change rows to update those stores, and add rows for new ones.
-
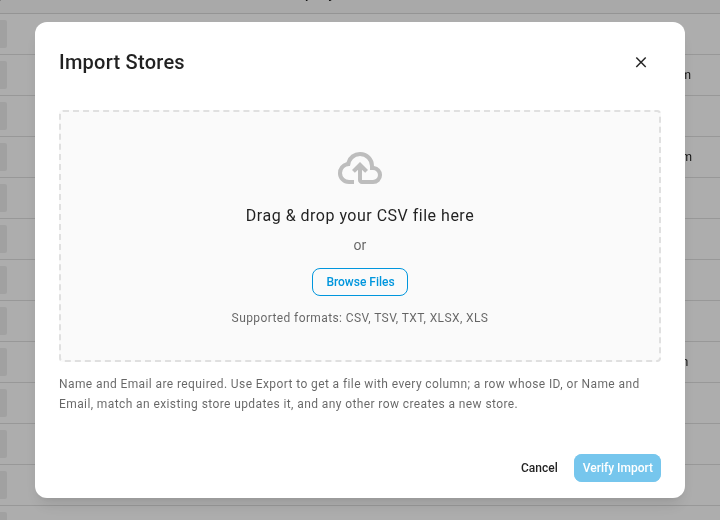
Click Import, then drag the file onto the dialog or click Browse Files. SKU.io reads CSV, TSV, TXT, XLSX and XLS files.
-
Click Verify Import. The dialog previews the first 10 rows under the column names it recognized. If the file is missing a required column, the dialog names it and won't import until you fix the file.
-
Click Import.
How rows are matched
- A row with an ID updates the store with that ID. If no store has that ID, the row is skipped and reported.
- A row without an ID updates the store whose Name and Email both match it exactly.
- Any other row creates a new store.
When some rows fail, the dialog says so and the rest are still imported. Files with more than 50 rows import in the background; the dialog tells you the data will be imported shortly.
Columns
Column headers are matched without regard to letter case. You can use the headers the export writes, or the short names in the second column.
| Header in the export | Also accepted | Required | Notes |
|---|---|---|---|
| ID | id | No | The store's ID. Leave it empty for new stores. |
| Name | name | Yes | The store name. |
email | Yes | The store's email address. | |
| Company Name | company_name | No | |
| Address Label | label | No | A label for the address. |
| Phone Number | phone | No | |
| Fax | fax | No | |
| Address Line 1 | address1 | No | |
| Address Line 2 | address2 | No | |
| Address Line 3 | address3 | No | |
| City | city | No | |
| Province | province | No | State or province name, for example Texas. |
| Province Code | province_code | No | State or province code, for example TX. |
| Zip | zip | No | ZIP or postal code. |
| Country | country | No | Country name, for example United States. |
| Country Code | country_code | No | Two-letter country code, for example US. |
An empty cell is imported as empty. Columns with any other header are ignored.
Archive or delete a store
Select stores on the list to Archive, Unarchive or Delete them. An archived store is hidden from the list and from store pickers, and you can bring it back from the Archived view at the bottom of the list. You can't delete a store that sales orders or sales channels still use, or the first store your account was created with. Archive those instead.
Next steps
- Customize email templates: give a store its own email wording.
- Find, save and restore templates: give a store its own packing slip or invoice.
- Connect more than one store or account: choose which store each sales channel sells under.
Video transcript
A store is a business identity you sell under, with its own name, email, address and logo. To manage them, open Settings, at the very bottom of the left sidebar. Click the General card at the top of the page to expand its list. Stores is the first entry, so choose it, and every store you have appears. Click Create Store at the top right, and a blank form appears. Give it a name, and the email address customers and suppliers see. Both are required. A company name, phone, address and logo are optional. When it's ready, click Create, and the new store appears at the top. To see how a store is used, search the list for it, and click its name to open its page. The Overview tab counts its recent orders, sales channels and customers. Below that, you can edit the store's details and address, then save your changes. Sales Channels lists every channel that sells under this store. Email and Sending shows who its messages come from, and the email templates it uses. Set as default makes this store the sender for emails that have no store of their own. To add or update many stores at once, start with Export, which downloads a spreadsheet with every column. Edit it in your spreadsheet app, then click Import. The dialog lists the required columns, and you verify your changes before anything is saved.