Connect Shipfusion
Connect Shipfusion with its API login, then link each Shipfusion warehouse you use to a SKU.io 3PL warehouse. Orders from a linked warehouse go to Shipfusion, and its packages come back with tracking.
Before you begin
- You need permission to connect integrations.
- Get your Shipfusion API username and password from Shipfusion.
- Ask Shipfusion to send their webhooks to SKU.io. SKU.io doesn't register them for you. Without webhooks, tracking still arrives through the hourly check.
Create the connection
-
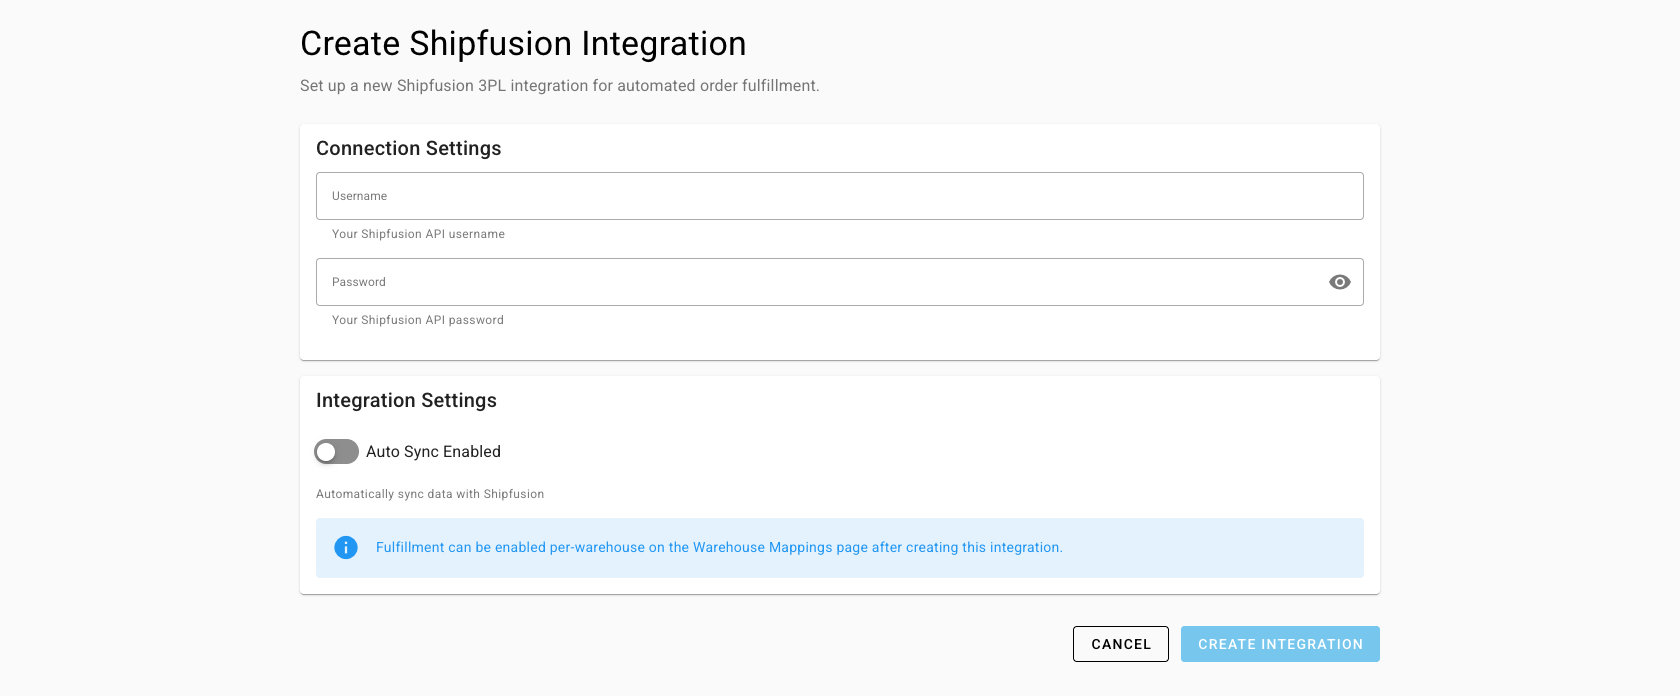
Go to Apps & Integrations, open Shipping & Fulfillment, and choose Shipfusion. The Create Shipfusion Integration page opens.
-
Enter the Username and Password.
-
Turn Auto Sync Enabled on.
-
Click Create Integration.
What you'll see: the Dashboard opens. SKU.io adds an empty mapping for each Shipfusion warehouse: IL - Illinois, LV - Las Vegas, PA - Pennsylvania, and TO - Toronto.
Auto Sync Enabled starts off. While it's off, SKU.io doesn't send orders to Shipfusion or pull tracking back. If you created the connection with it off, open Settings → Sync, set the Sync Schedule to Active, and turn on both switches.
Map warehouses
-
Open the Warehouse Mappings tab. There's a card for each Shipfusion warehouse.
-
Map only the warehouses you use. On each card, pick the SKU.io 3PL Warehouse. Only warehouses that are already 3PL warehouses appear.
-
If you don't have one yet, choose Create New 3PL Warehouse, enter a Warehouse Name, and click Create & Map.
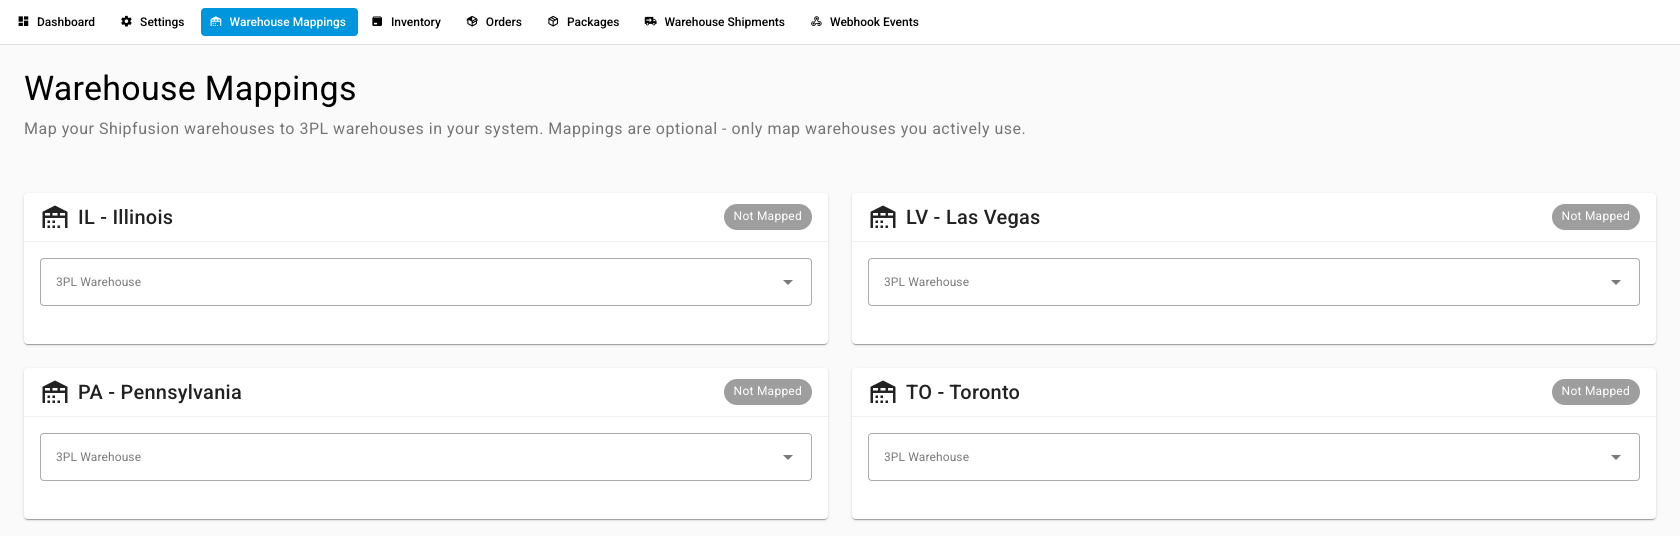
What you'll see: the mapping saves straight away, and the warehouse now ships through Shipfusion. Removing a mapping sets the warehouse back to manual fulfillment. An order from a warehouse with no mapping is refused, and the message asks you to map it.
Set what syncs
Open Settings:
- On General, turn on Pass Tags to Shipfusion to send the sales order's tags with each order.
- On Sync, the Sync Schedule pauses everything, and What syncs has Import tracking from Shipfusion and Push orders to Shipfusion. With pushing off, orders are refused until you turn it back on.
Reconcile inventory
- Open the Inventory tab and pick a Warehouse in the filters.
- Click Refresh Inventory. It pulls the warehouse you picked; with none picked, it pulls Illinois only. Refresh each warehouse you use.
- Open Discrepancies to see products where SKU.io and Shipfusion disagree, with the discrepancy and its value. In Shipfusion Only and In SKU.io Only list products only one side has.
- Select rows and choose Create Stock Take. Set the Stock Take Date and a Stock Take Status: Draft to review first, or Finalized (Closed) to apply it now.
What you'll see: a stock take that sets SKU.io's quantities to Shipfusion's. If it hits stock that open orders hold, SKU.io saves it as a draft and offers Review Draft Stock Take.