Connect Target Plus
Connect your Target Plus seller account to import your target.com marketplace orders into SKU.io and send shipments, stock and prices back to Target. You need two things from the Target Plus Partner Portal: your Seller ID and an API token. After you connect, you map each of Target's distribution centers to the SKU.io warehouse that ships its orders.
Before you begin
- You need a Target Plus Partner Portal admin login. Only admins can generate API tokens.
- You need permission to connect integrations in SKU.io.
- Decide which SKU.io store your Target Plus orders belong to. Its packing slip is used for them.
- Check your inventory start date under Settings → Inventory. The Target Plus start date can't be earlier.
Generating a new API token can disconnect another app that uses your Target Plus token. If another tool also pushes stock to Target, turn that off there so the two don't overwrite each other.
Open the connection page
-
Go to Apps & Integrations → All Integrations.
-
Type Target into the search box and choose Target Plus.
-
Click Connect Target Plus. The New Target Plus Integration page opens.
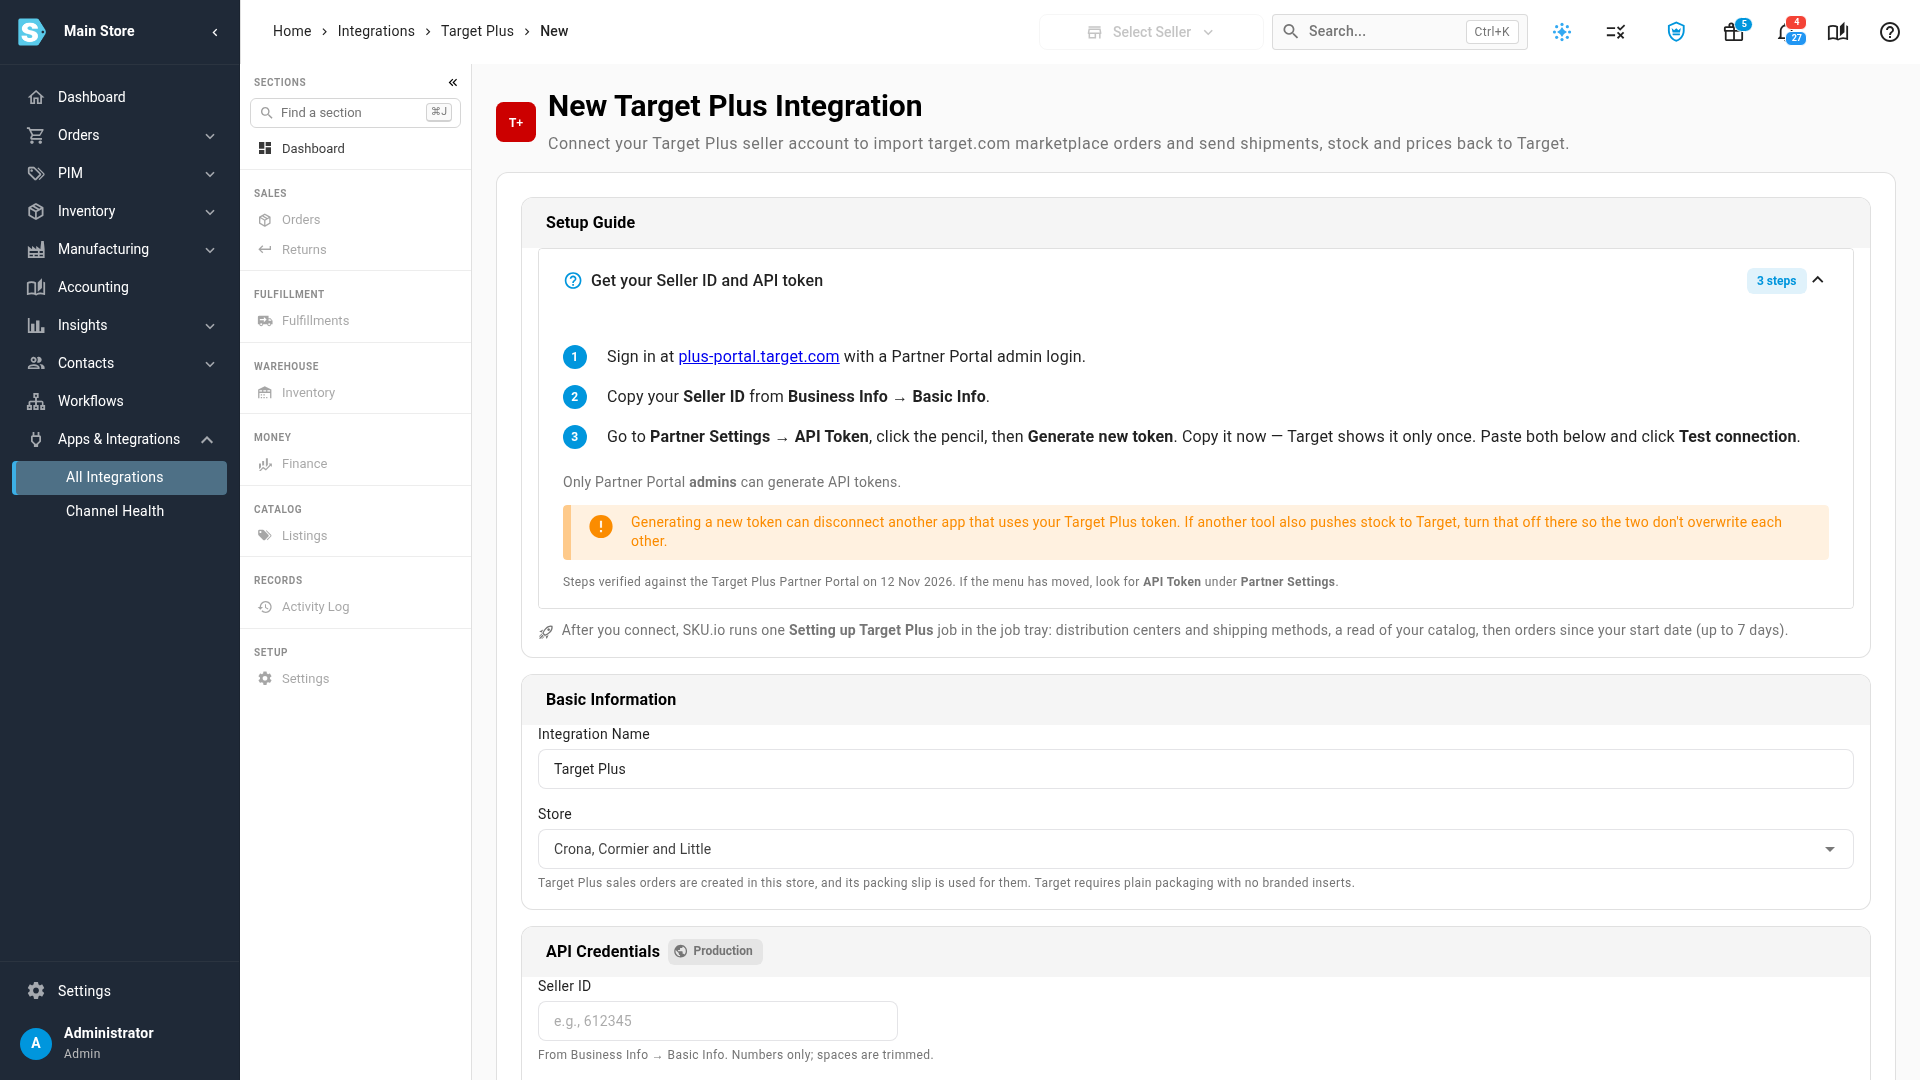
Get your Seller ID and API token
The Setup Guide at the top of the page lists the steps in the Target Plus Partner Portal:
- Sign in at plus-portal.target.com with a Partner Portal admin login.
- Copy your Seller ID from Business Info → Basic Info.
- Go to Partner Settings → API Token, click the pencil, then Generate new token. Copy the token right away: Target shows it only once.
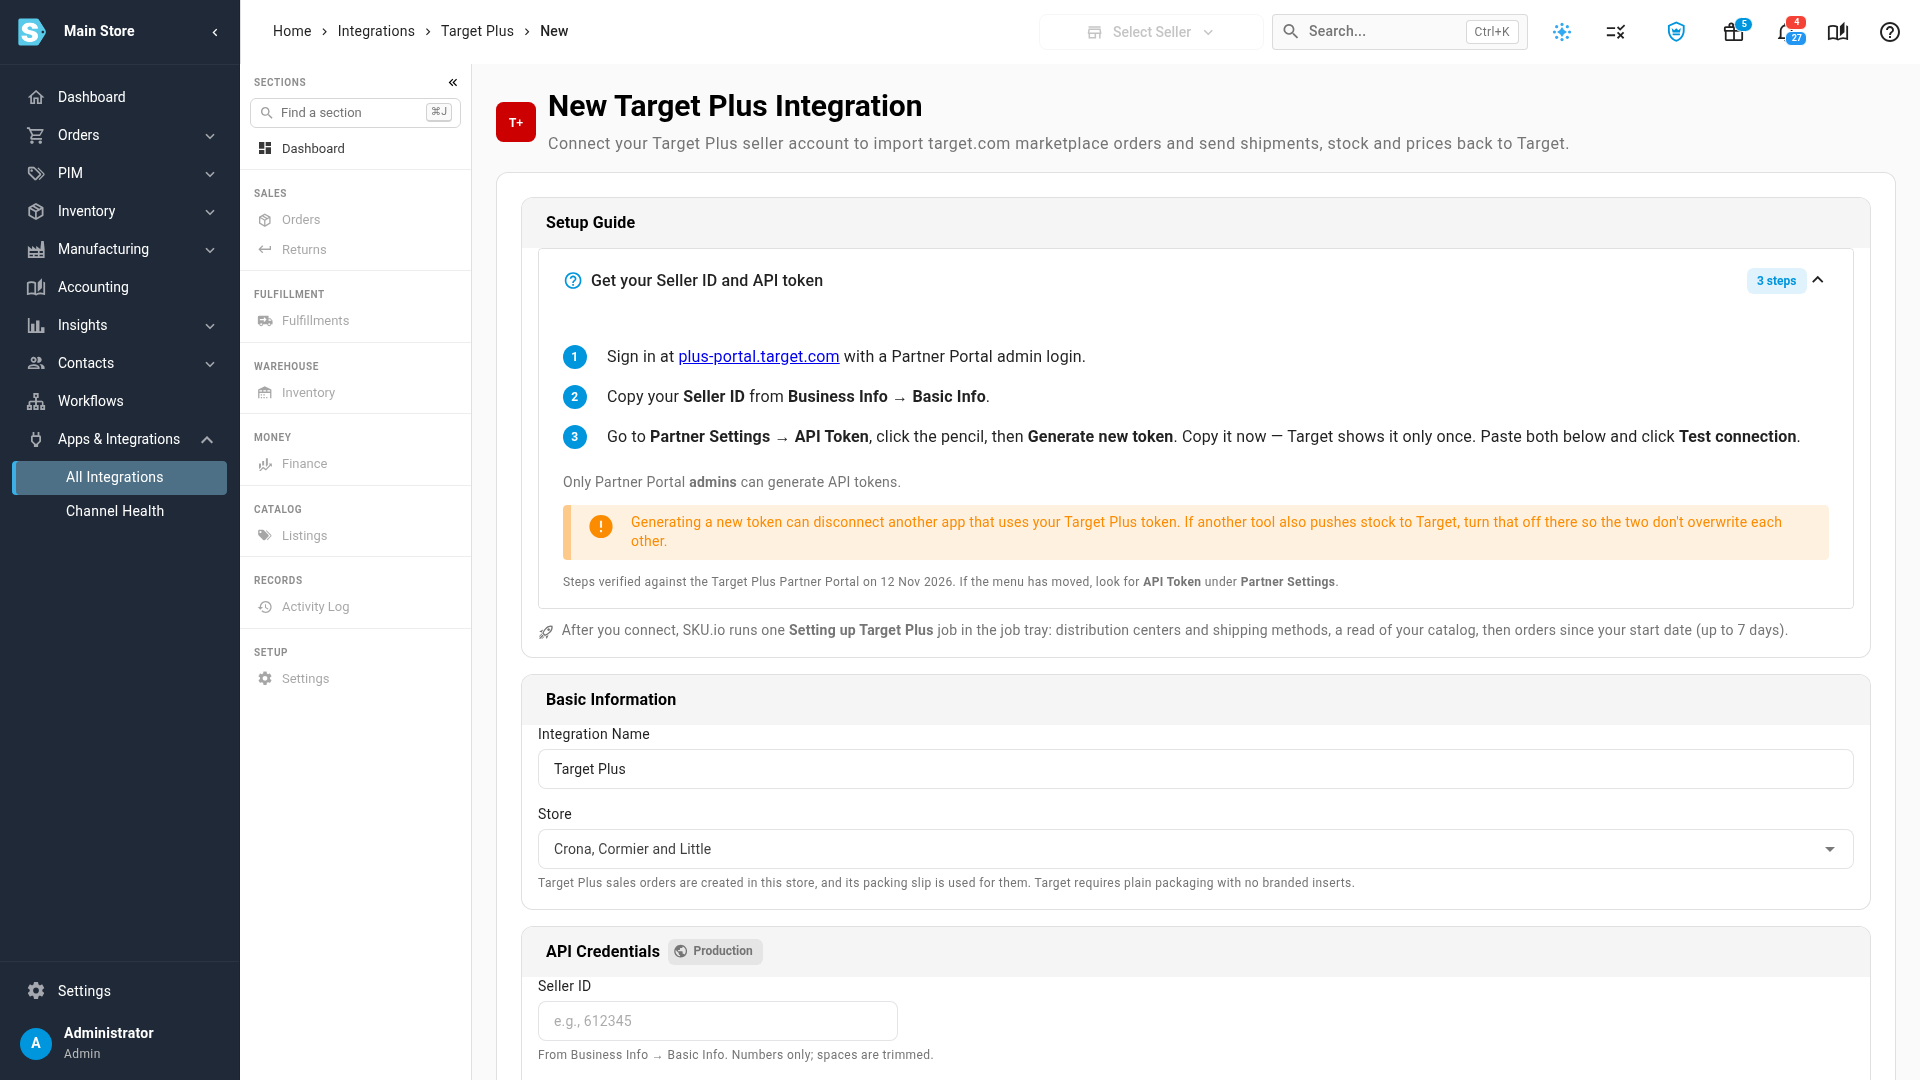
If the Partner Portal menu has moved, look for API Token under Partner Settings.
Fill in the details
-
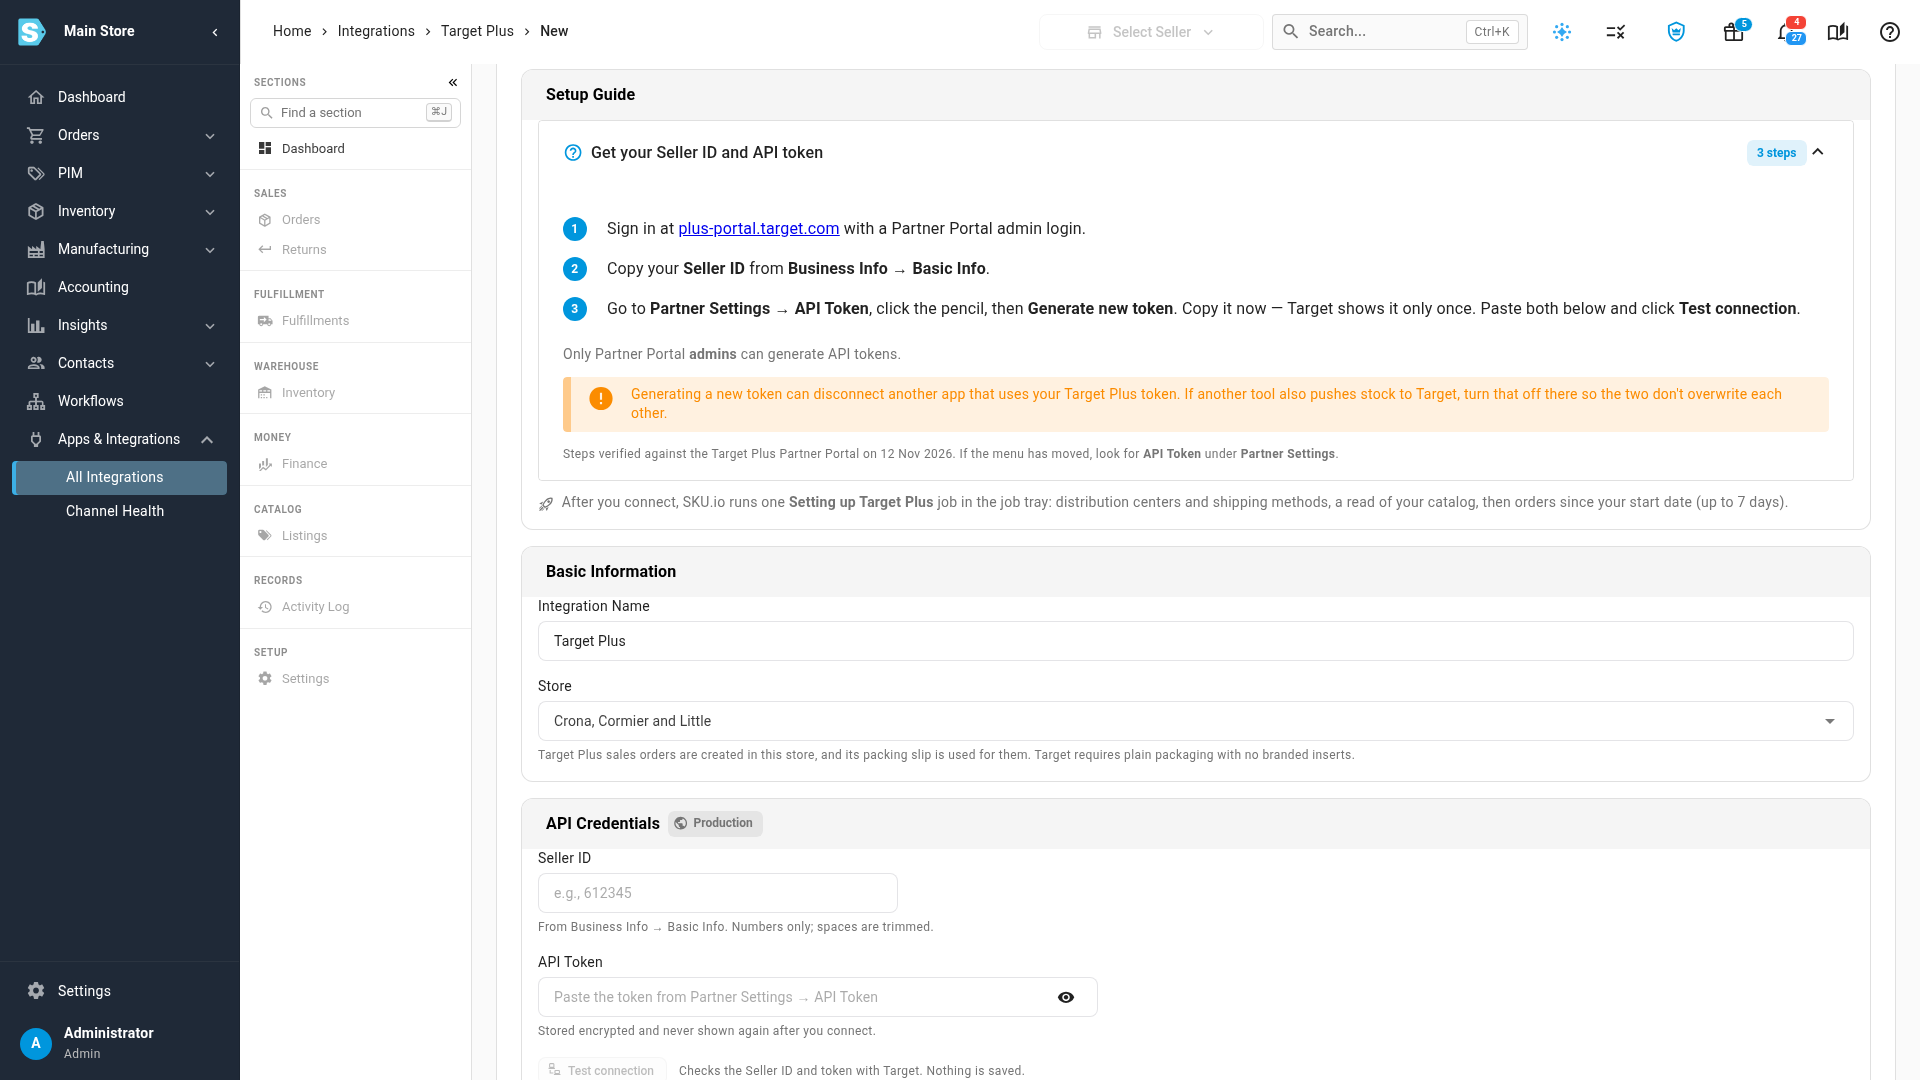
Under Basic Information, the Integration Name is filled in as Target Plus. Change it if you connect more than one seller account.
-
Pick the Store. Target Plus sales orders are created in this store.
-
Under API Credentials, paste your Seller ID (numbers only; spaces are trimmed) and your API Token. The token is stored encrypted and never shown again after you connect.
-
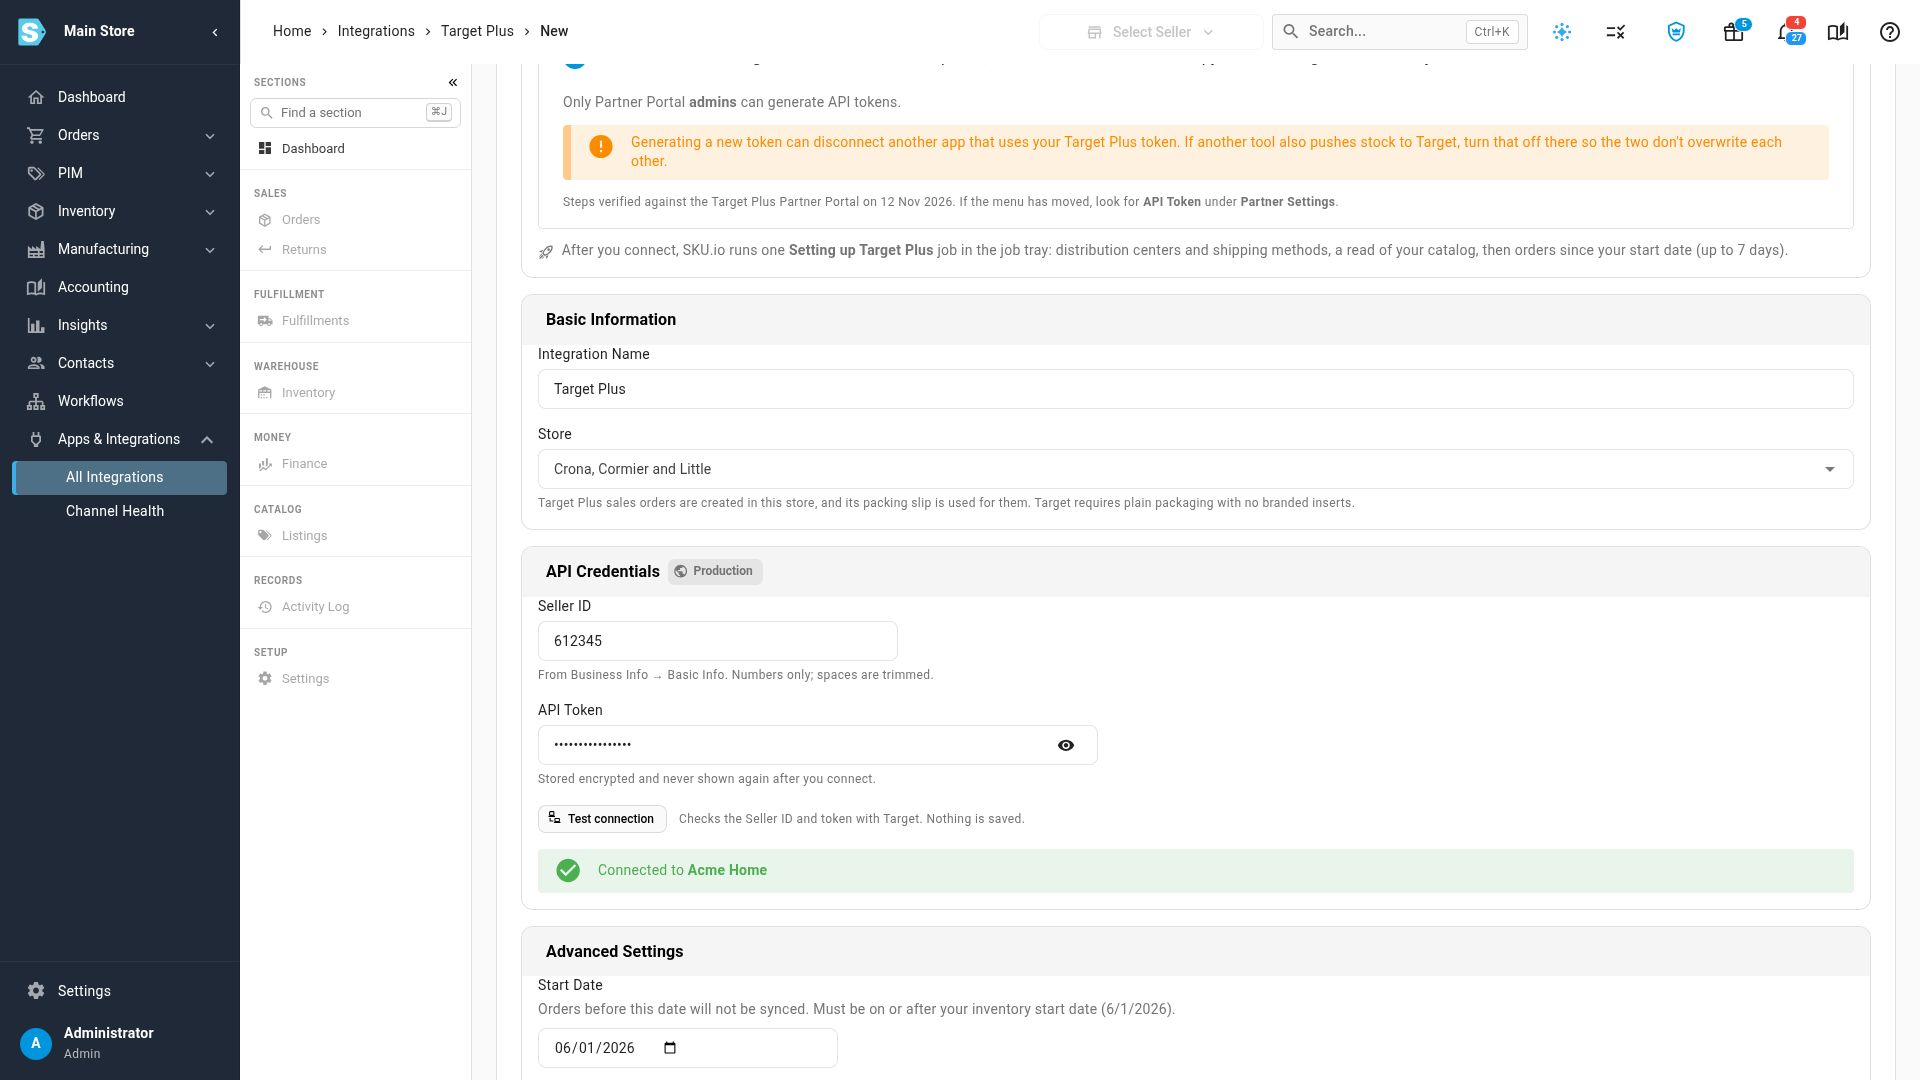
Click Test connection. It checks the Seller ID and token with Target and saves nothing. A green Connected to message names your seller account.
-
Under Advanced Settings, check these:
Setting What it does Start Date Orders before this date aren't synced. It must be on or after your inventory start date. Buyer-cancel hold (minutes) Buyers can cancel a new Target Plus order for a short while. SKU.io waits this long (0–120 minutes, 30 by default) before it creates the sales order, so a cancelled order never reaches your warehouse. Auto Link Products Links Target Plus listings to existing SKU.io products by seller SKU. Auto Create Products Creates an SKU.io product for listings that don't match one. Automatic Sync Syncs orders, stock and prices with Target Plus on a schedule. 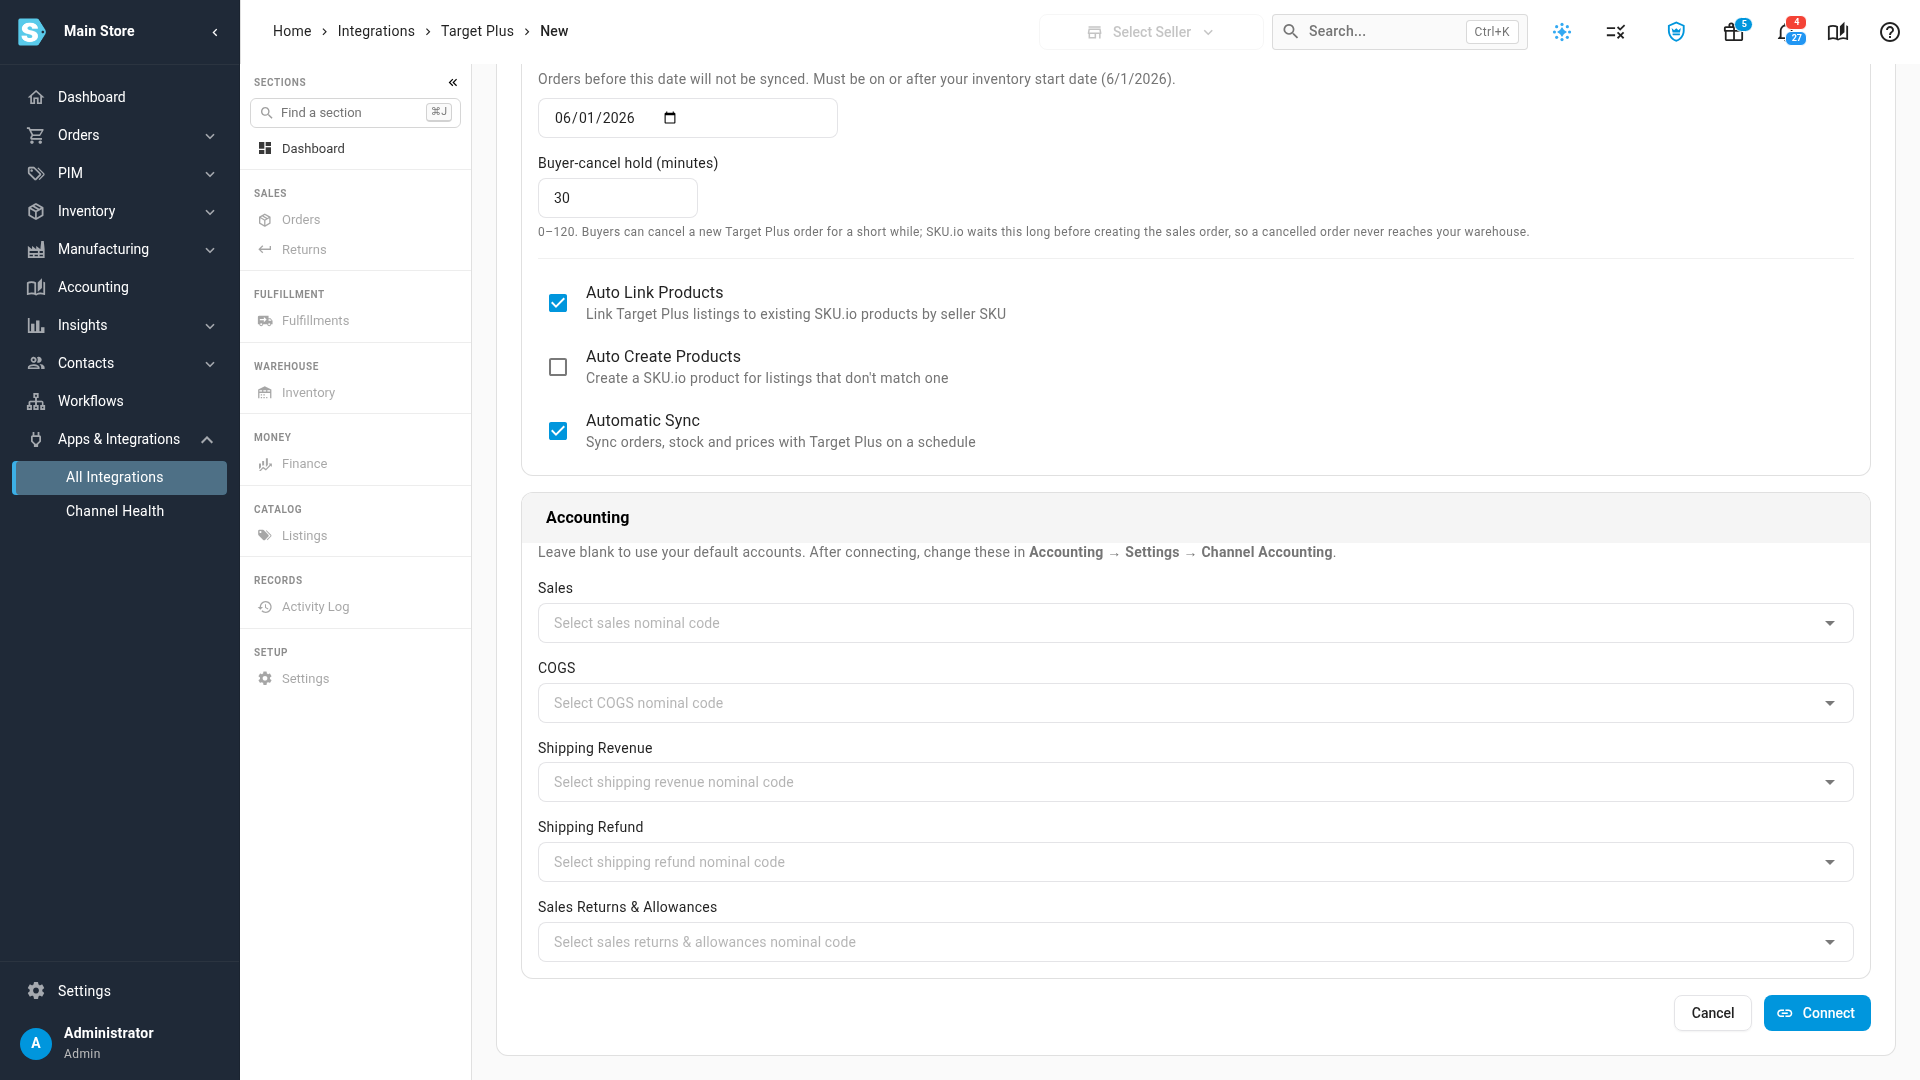
-
Optionally pick this channel's Sales, COGS, Shipping Revenue, Shipping Refund and Sales Returns & Allowances accounts under Accounting. Leave them blank to use your default accounts. You can change them later under Channel Accounting.
Connect
Click Connect. SKU.io saves the connection and opens the Target Plus Dashboard, where a Setting up Target Plus banner shows while the first sync runs. The same job appears in the job tray: it brings in your distribution centers and shipping methods, reads your catalog, then imports orders since your start date. When it finishes, SKU.io moves you to Settings → Distribution Centers. Until every distribution center has a warehouse, the dashboard also shows a Distribution Center Mappings Required banner with a Configure Distribution Centers button that takes you there.
If the Seller ID is already connected, SKU.io doesn't connect it twice: an Already connected message names the existing connection and links to it. If another connection already uses the same name, SKU.io suggests a new one, such as Target Plus 2, for you to check before you connect again.
Map your distribution centers
Target assigns every order to one of your Target Plus distribution centers. Each one needs the SKU.io warehouse that ships its orders. Orders from a distribution center that isn't mapped are held until it is.
- In the Warehouse column, click the box on a distribution center's row, type a few letters of the warehouse name, and pick it.
- Repeat for each distribution center.
- Click Save Changes. Each row shows Mapped.
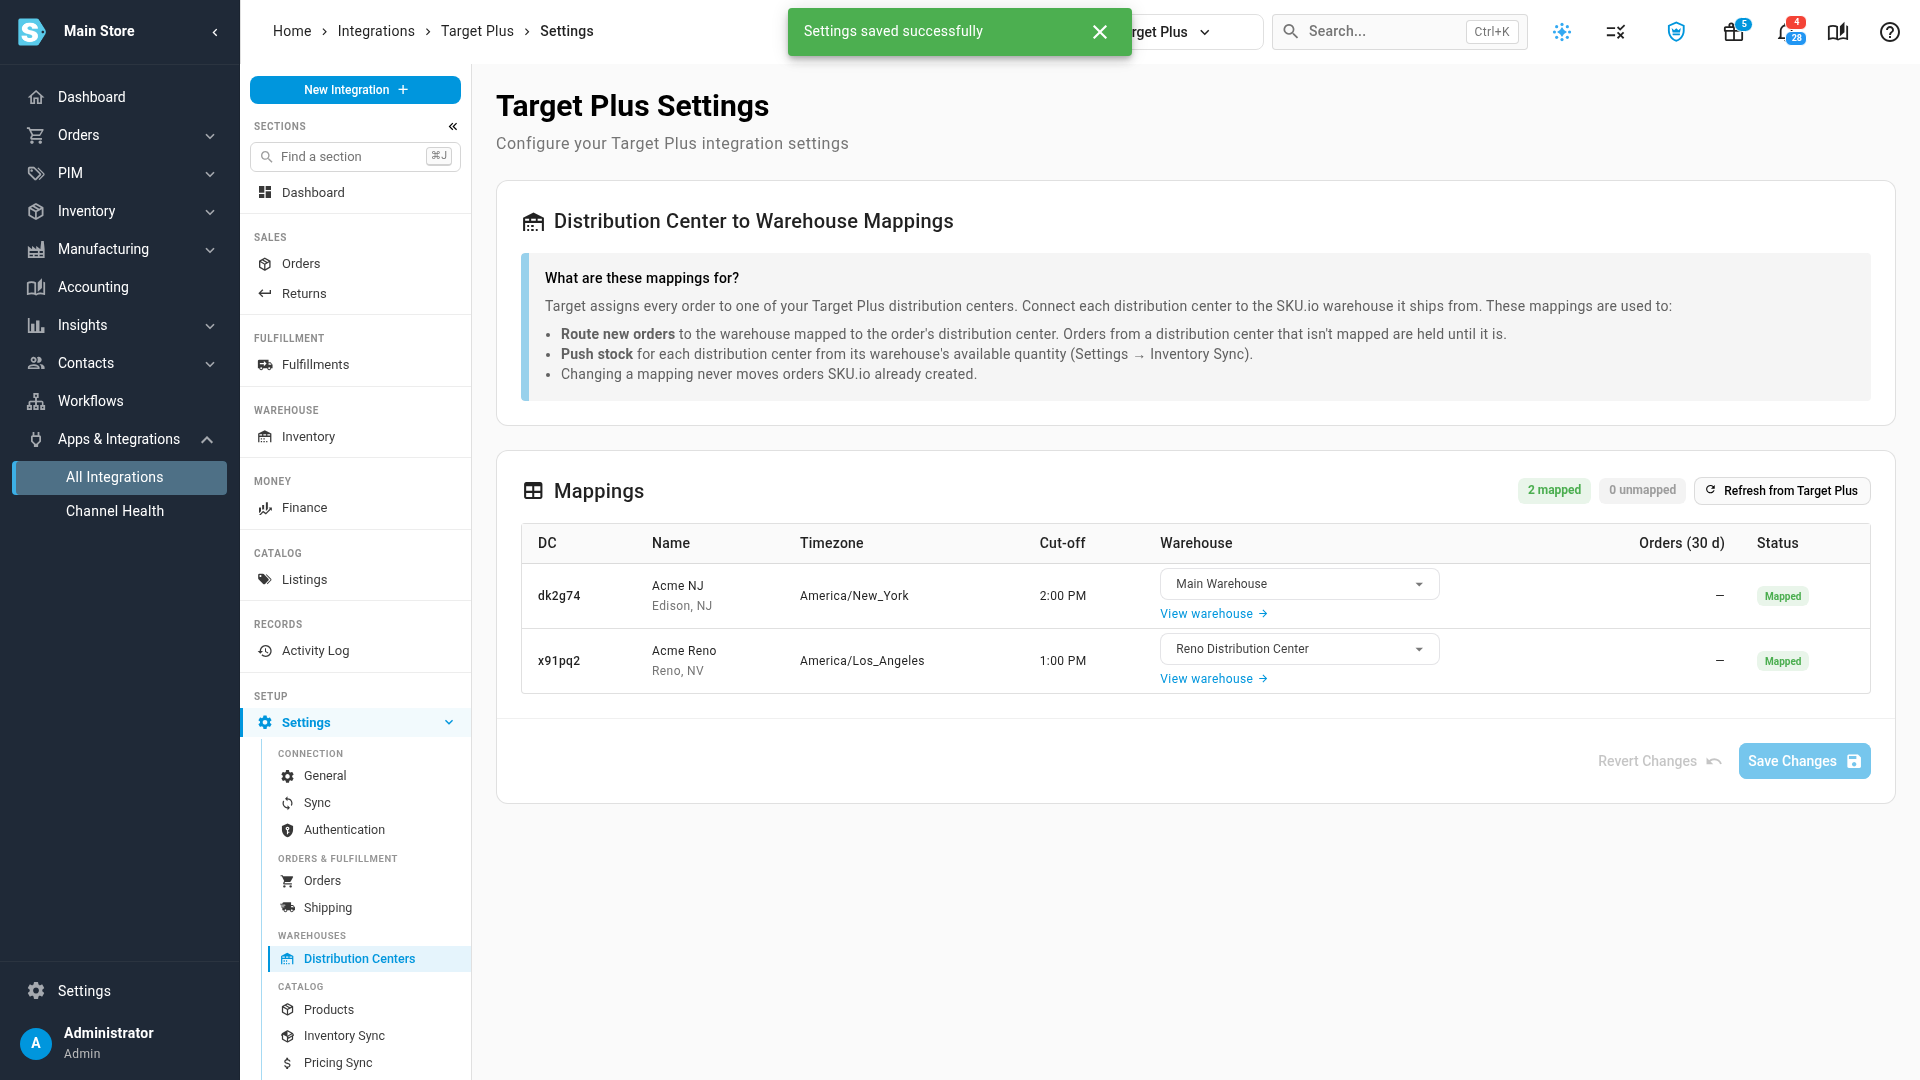
SKU.io also uses these mappings to send stock for each distribution center from its warehouse's available quantity. Changing a mapping later never moves orders SKU.io already created.
Check the dashboard
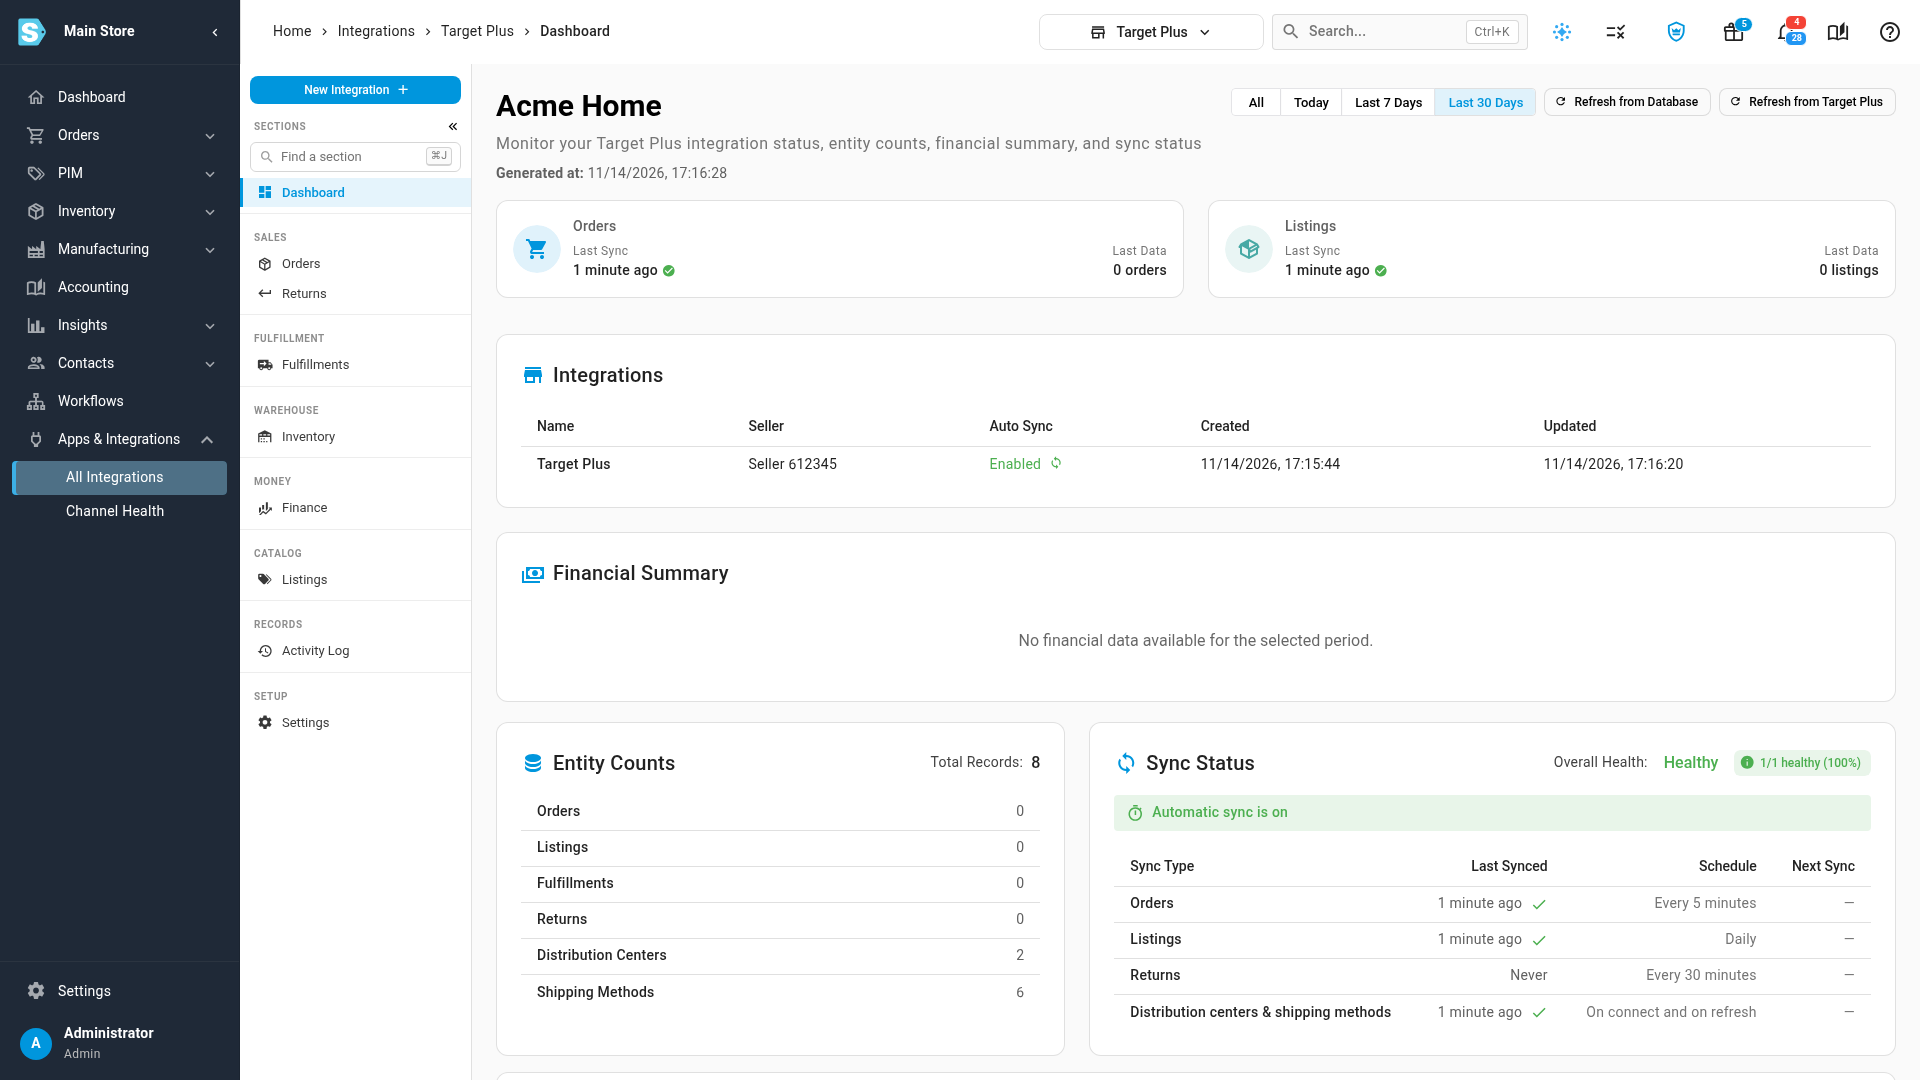
Open Dashboard from the sections on the left. It shows when orders and listings last synced, counts of your orders, listings, distribution centers and shipping methods, and the health of each sync.
Next steps
- Target Plus: every Target Plus page and what it's for.
- Sync prices with your sales channels: send SKU.io prices to Target Plus.
- Integration Basics: the controls every channel shares.
Video transcript
To connect Target Plus, open Apps and Integrations, then All Integrations.
Type Target into the search box, and choose Target Plus from the results on the left.
Then click Connect Target Plus.
The New Target Plus Integration page appears, with a setup guide at the top.
The Setup Guide shows where to find both credentials in the Target Plus Partner Portal.
Your Seller ID is under Business Info, then Basic Info.
Generate an API token under Partner Settings, then API Token.
Copy it right away, because Target shows it only once.
Only Partner Portal admins can generate tokens.
Under Basic Information, keep the suggested name, or change it to tell sellers apart.
Then check the store.
This connection creates its sales orders in that store.
Under API Credentials, paste your Seller ID and your API token.
Then click Test connection, which checks them with Target without saving anything.
A green message confirms that Target accepted them, and names your seller account.
Under Advanced Settings, the start date is the earliest order date SKU.io imports.
Buyers can cancel a new Target Plus purchase for a short while.
The buyer-cancel hold waits that long before creating the sales order.
Then choose how products link, and whether syncing runs on a schedule.
Under Accounting, pick this channel's accounts, or leave them blank to use your defaults.
When everything looks right, click Connect, and give SKU.io a moment to save the connection.
It starts a Setting up Target Plus job in the job tray.
The job brings in your distribution centers, shipping methods, catalog and recent orders.
When it finishes, SKU.io moves you to the Distribution Centers settings.
Target sends every order from one of your distribution centers.
Map each one to the SKU.io warehouse that ships its orders.
Click the warehouse box, type a few letters, and pick the warehouse.
Orders from an unmapped distribution center wait until it has a warehouse.
Click Save Changes, and both show as mapped.
Each row now has a View warehouse link.
Your Target Plus connection is ready.
Open Dashboard to see when orders and listings last synced.
Sync Status shows the health of each sync, and when the next one runs.