SKU.io for n8n — a verified node for your n8n workflows
If your team automates with n8n, connecting it to SKU.io used to mean building every step by hand: an HTTP request for each call, a token pasted into headers, and a webhook wired up separately for each event. SKU.io now has its own node in n8n. Search for SKU in the nodes panel, install it, connect your account once, and your workflows can start the moment something happens in SKU.io and create or find SKU.io records from any other step. The node carries n8n's verified badge, so it installs on n8n Cloud as well as on your own n8n server.
✨ What this means for you:
- Install from the nodes panel. Search for SKU, click SKU.io, then Install node. No package names to type and no server access needed.
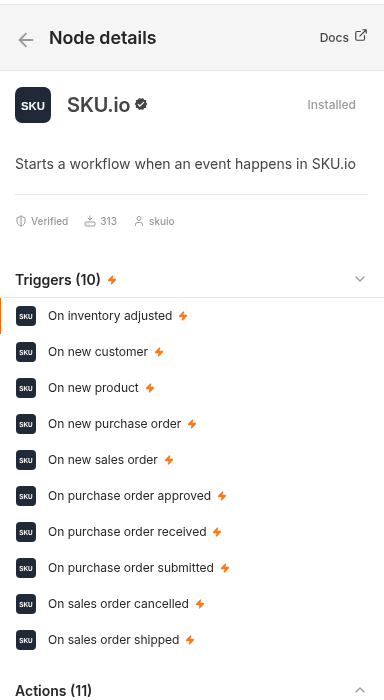
- Instant triggers. Ten events start a workflow the moment they happen in SKU.io: new, shipped and cancelled sales orders; new, submitted, approved and received purchase orders; inventory adjustments; new products; new customers.
- Eleven actions. Create customers, products, sales orders, purchase orders and suppliers, adjust inventory, update a product, and find customers, products, sales orders and suppliers.
- Your own data in every dropdown. Customer, product, store, supplier and warehouse lists load straight from your account.
- A connection you control. You approve exactly what n8n can do, and you can revoke it from SKU.io at any time.
Install the node
The node is listed in n8n as SKU.io. Search for SKU in the nodes panel, open it and click Install node. Once it's installed, the panel lists every trigger and action it brings.
Connect your account once
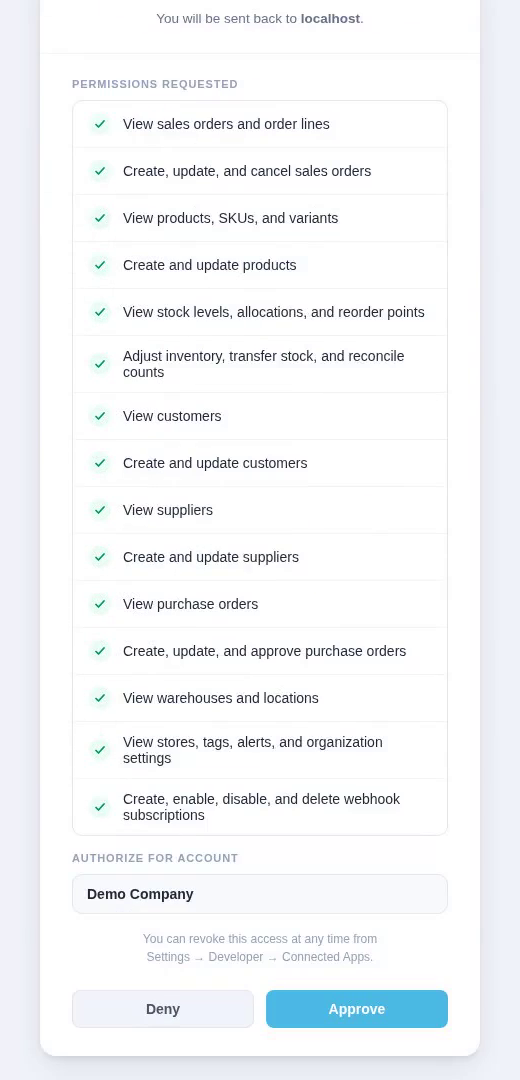
The node signs in to SKU.io the same way Zapier does: you approve it on SKU.io's own screen instead of pasting a password or a token into n8n. Register n8n under Settings → Developer → OAuth Applications, paste the Client ID and Client Secret into n8n, and click Connect. SKU.io lists the permissions n8n is asking for and the account it will reach. Click Approve and you're done.
Start building
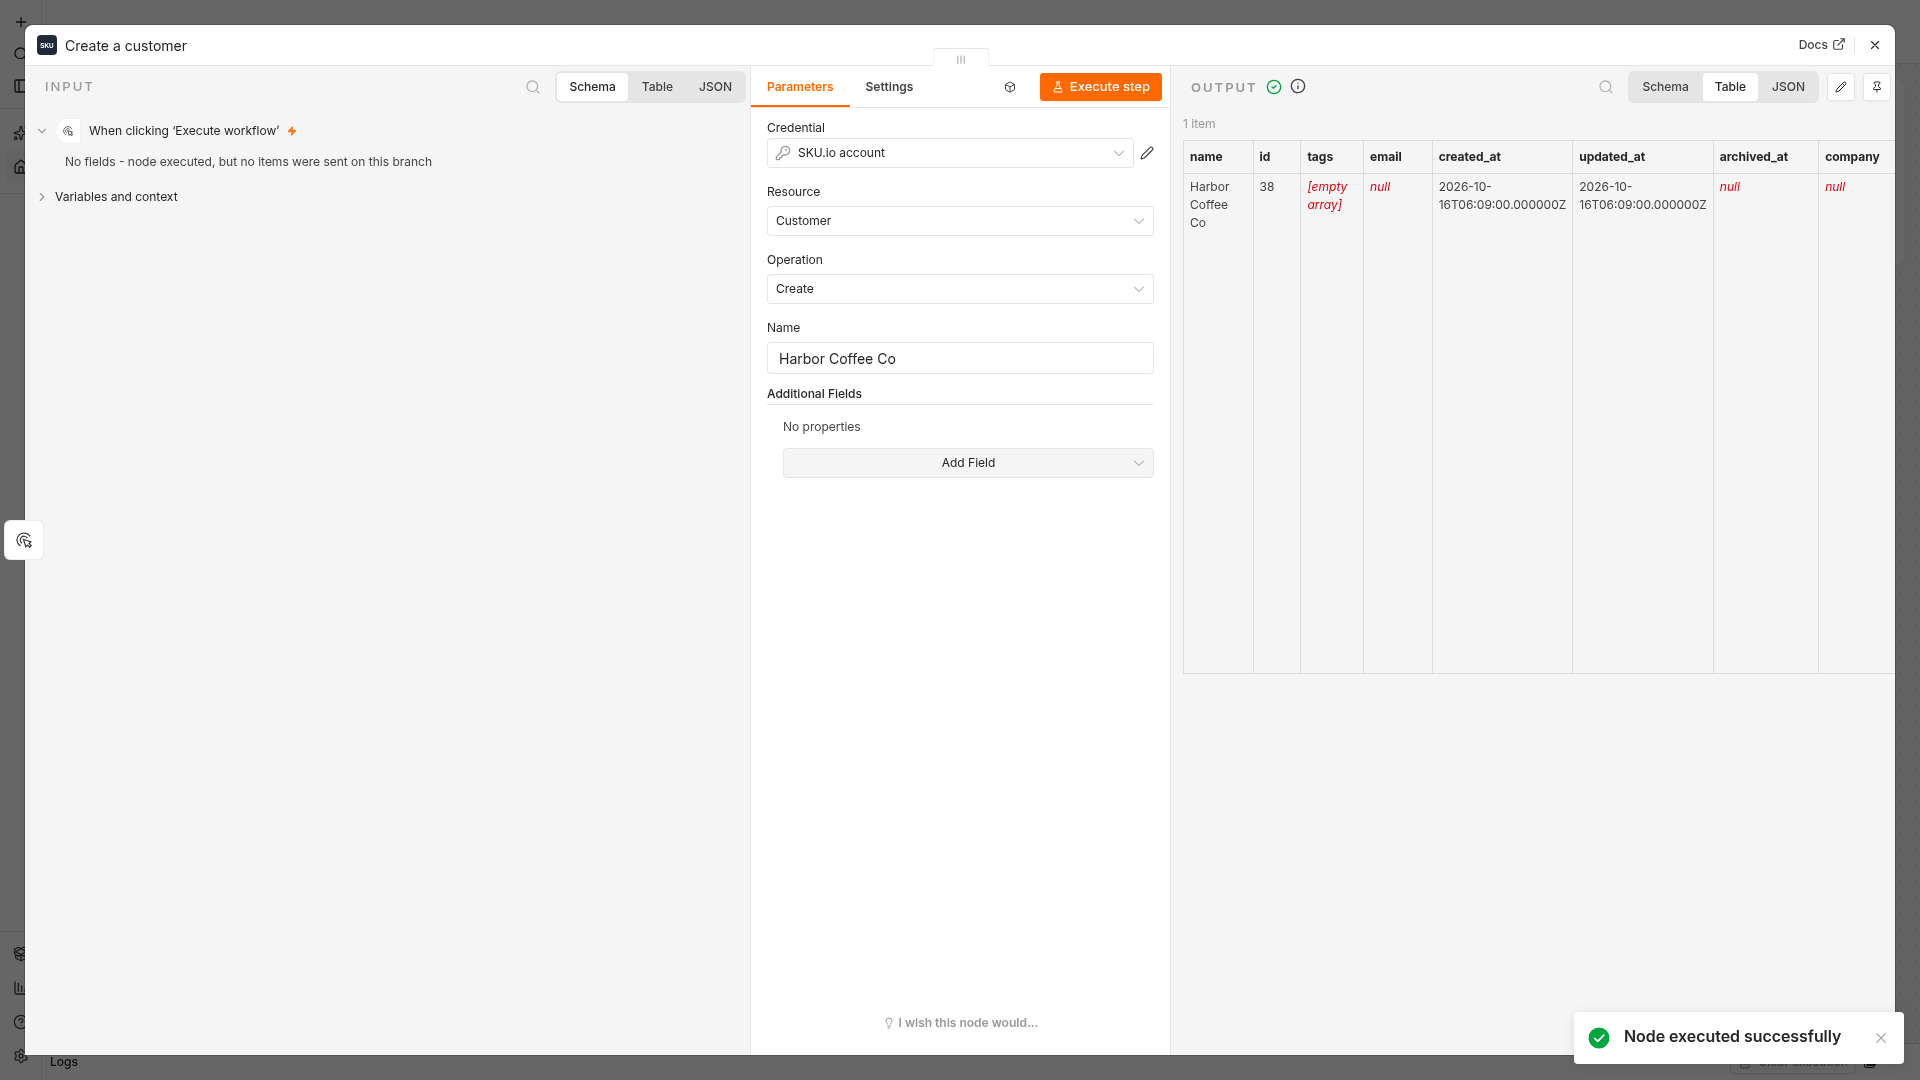
Pick an action, fill in its fields and run it. The output shows the record SKU.io created, ready for the next step in your workflow. Add a SKU.io trigger instead and publish the workflow: SKU.io registers a webhook for that event, and every new order, receipt or stock change starts the workflow on its own.
Where to find it
In n8n, open the nodes panel and search for SKU. In SKU.io, you register n8n under Settings → Developer → OAuth Applications, and you'll find the live connection under Settings → Developer → Connected Apps.
Full guide: Connect n8n or Make