Book shipping insurance as revenue
Shipping-insurance and package-protection apps add their charge to a Shopify order as an item of its own, for example Shipping Insurance at $2.98. That money is revenue. There is nothing to pick, ship, or count in stock for it.
Map the item to a revenue line and every new Shopify order books it as revenue under the type you choose, such as Shipping Insurance. It no longer lands on a generic Non Product Line, and you can see it under its own name in your financial reports.
Before you begin
- Your Shopify store is connected, and the insurance item has synced into its Products tab.
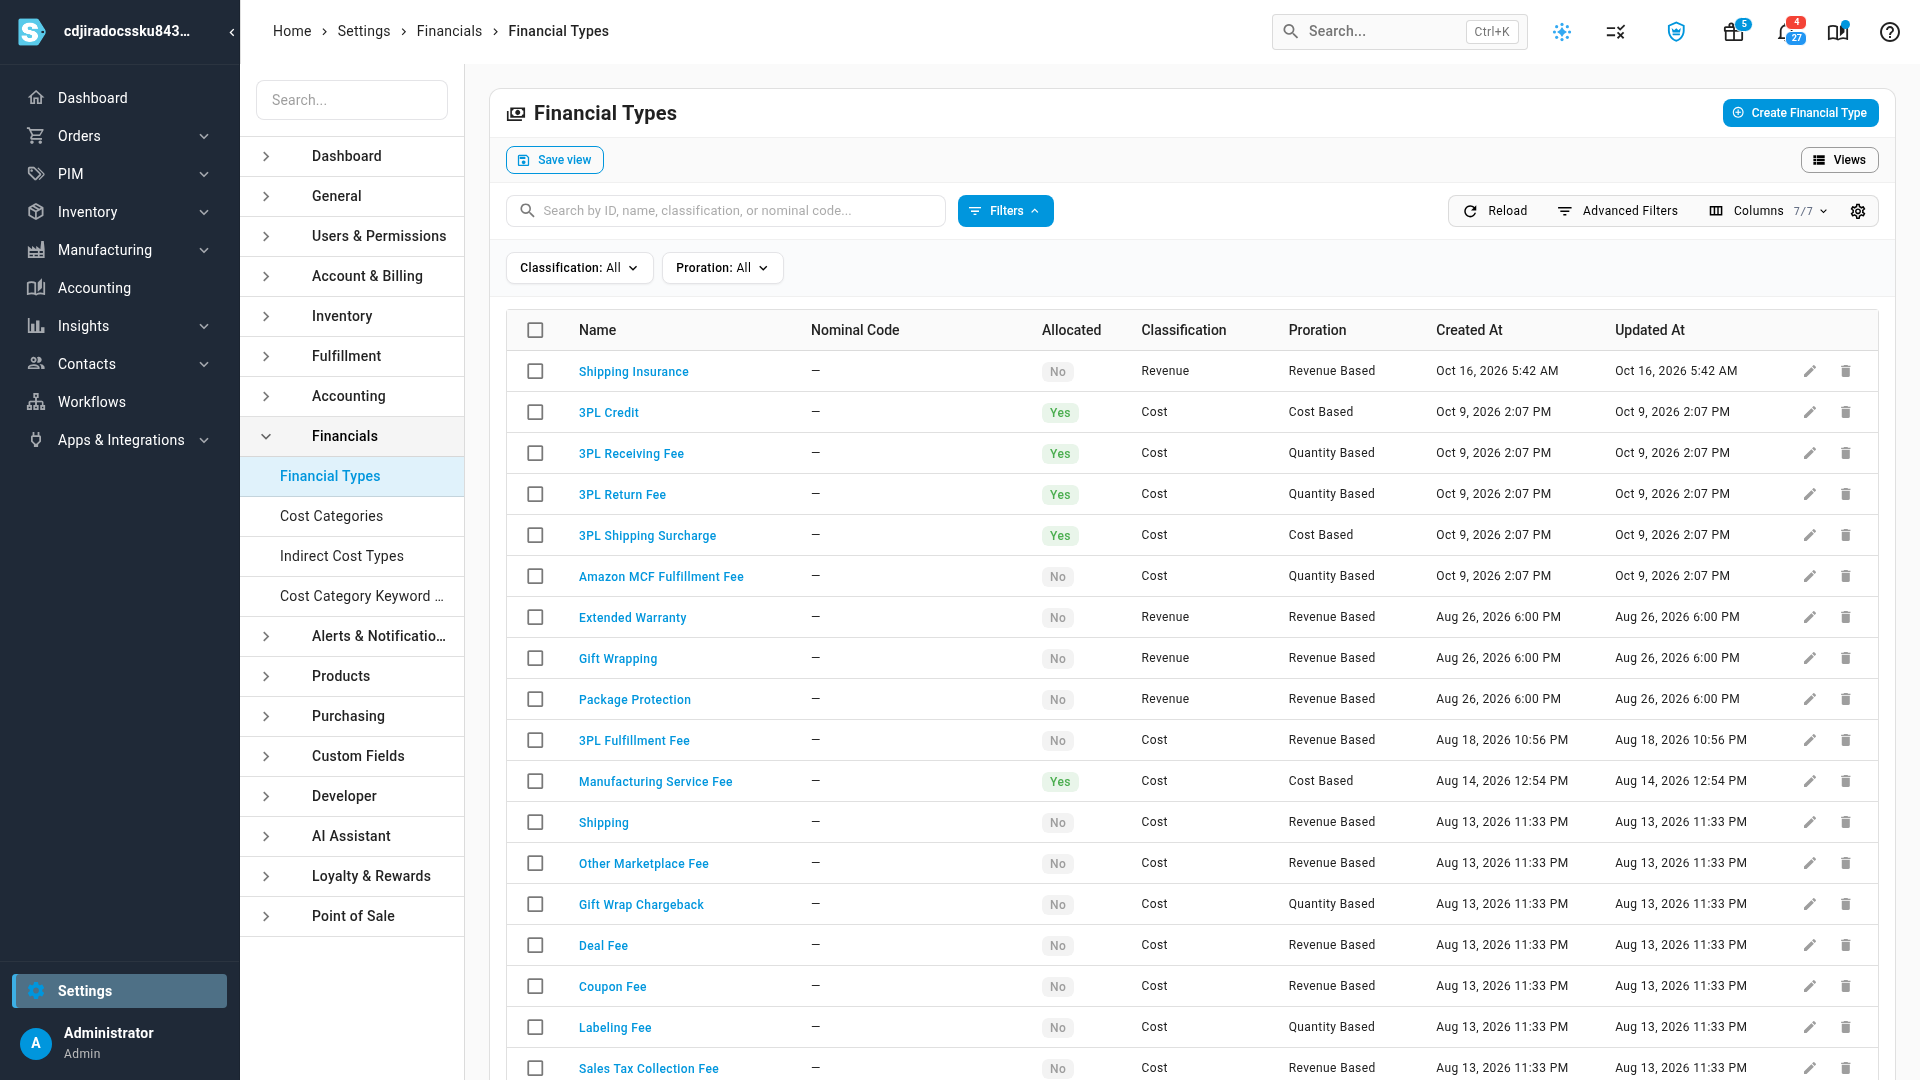
- You have a Revenue financial type for the insurance, for example Shipping Insurance. If you don't, create one under Settings → Financials → Financial Types: click Create Financial Type, enter the name, and choose Revenue as the Classification. See Manage financial line types.
- You need permission to manage the store's products.
Steps
-
In the sidebar, open Apps & Integrations and choose your Shopify store.
-
Open the Products tab.
-
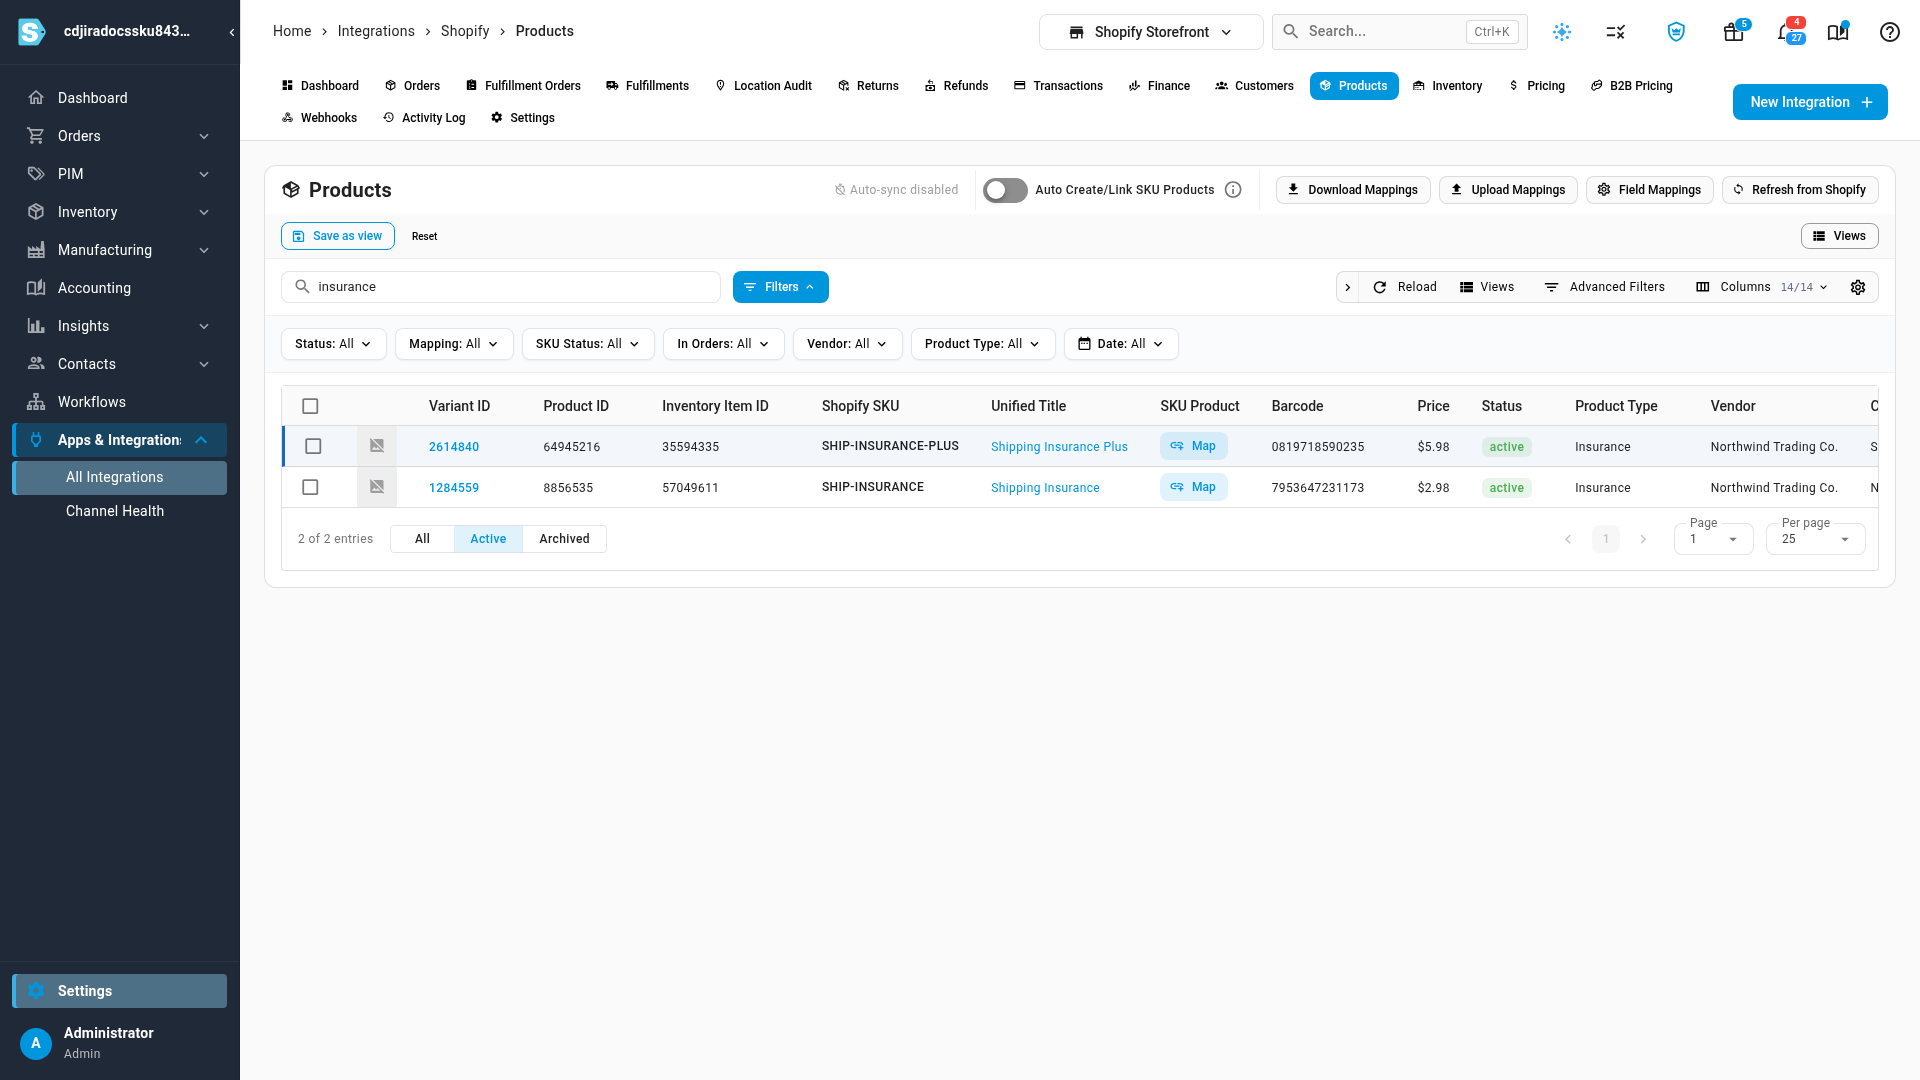
In the search box, type insurance and press Enter. The list narrows to the items your insurance app adds.
-
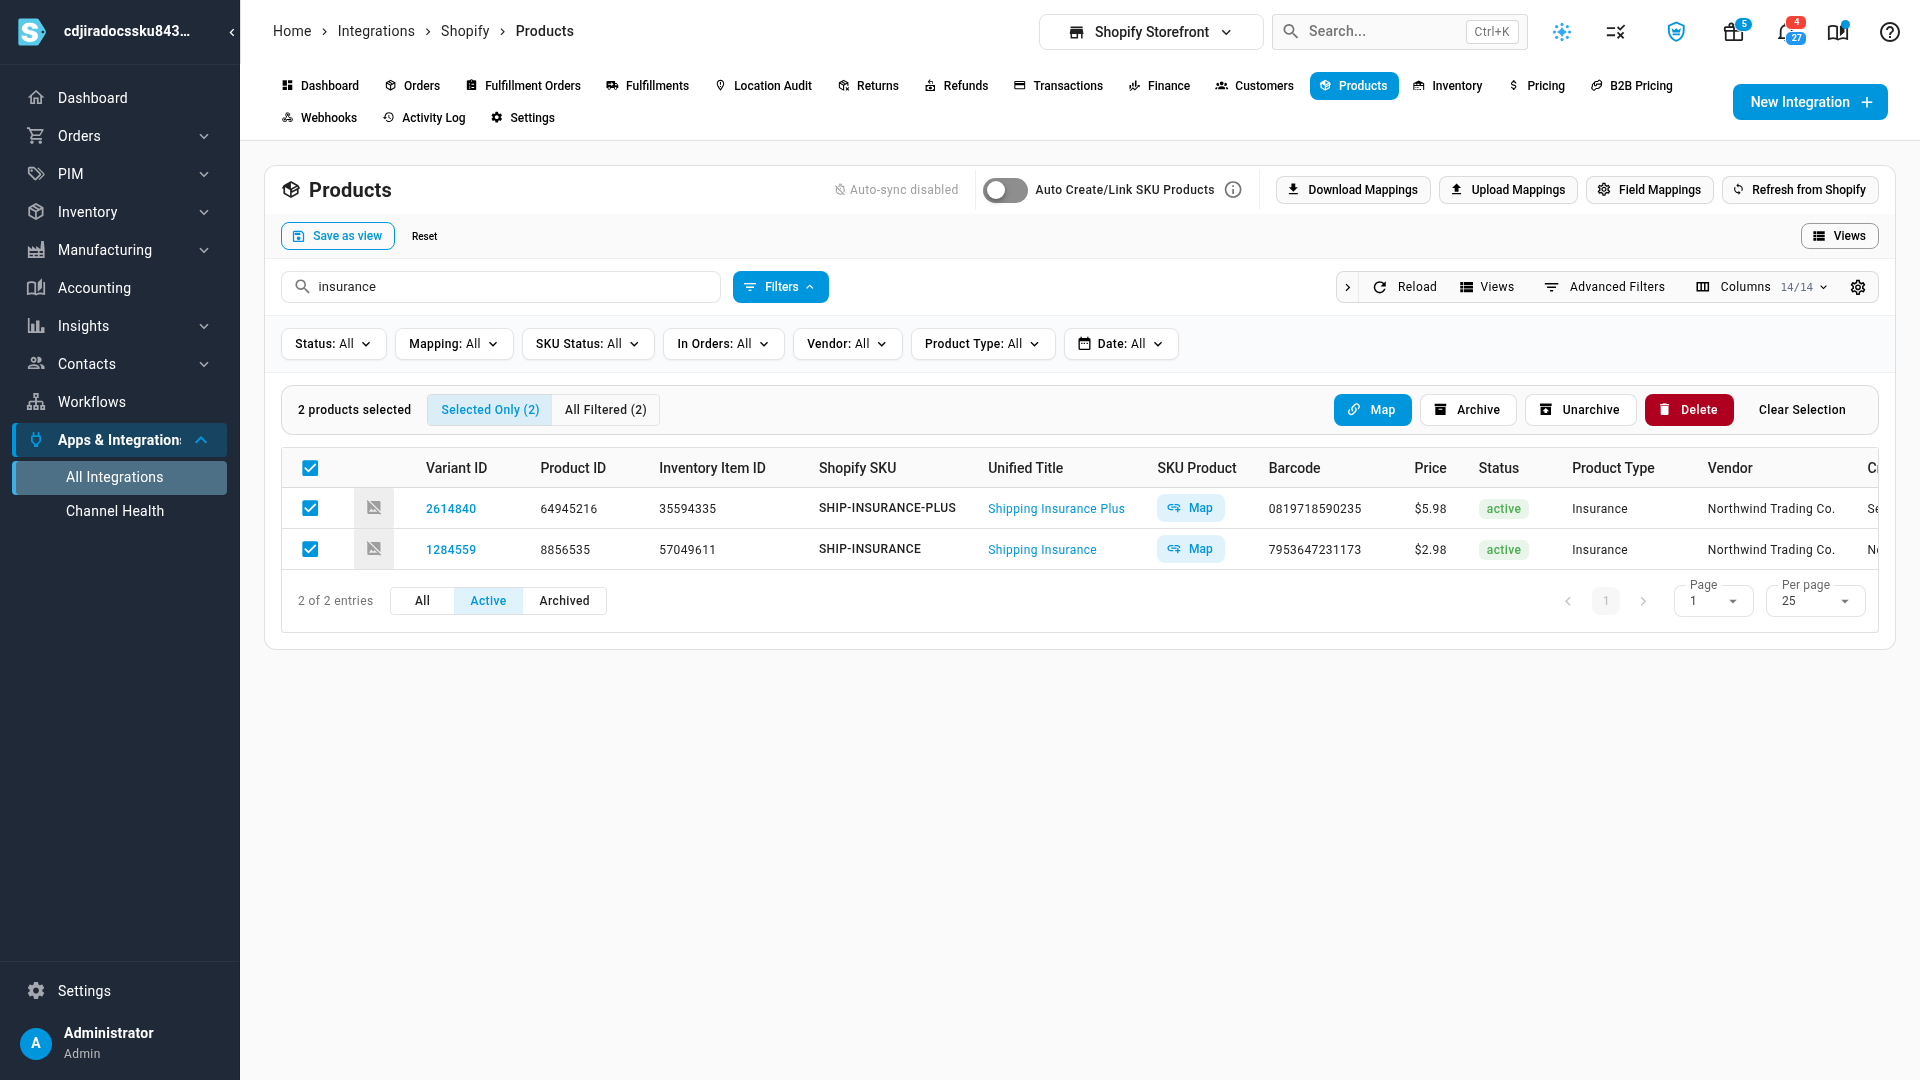
Tick the box on each insurance item. A bar appears above the list with the number you selected.
-
Click Map in that bar. The Map Products window opens.
-
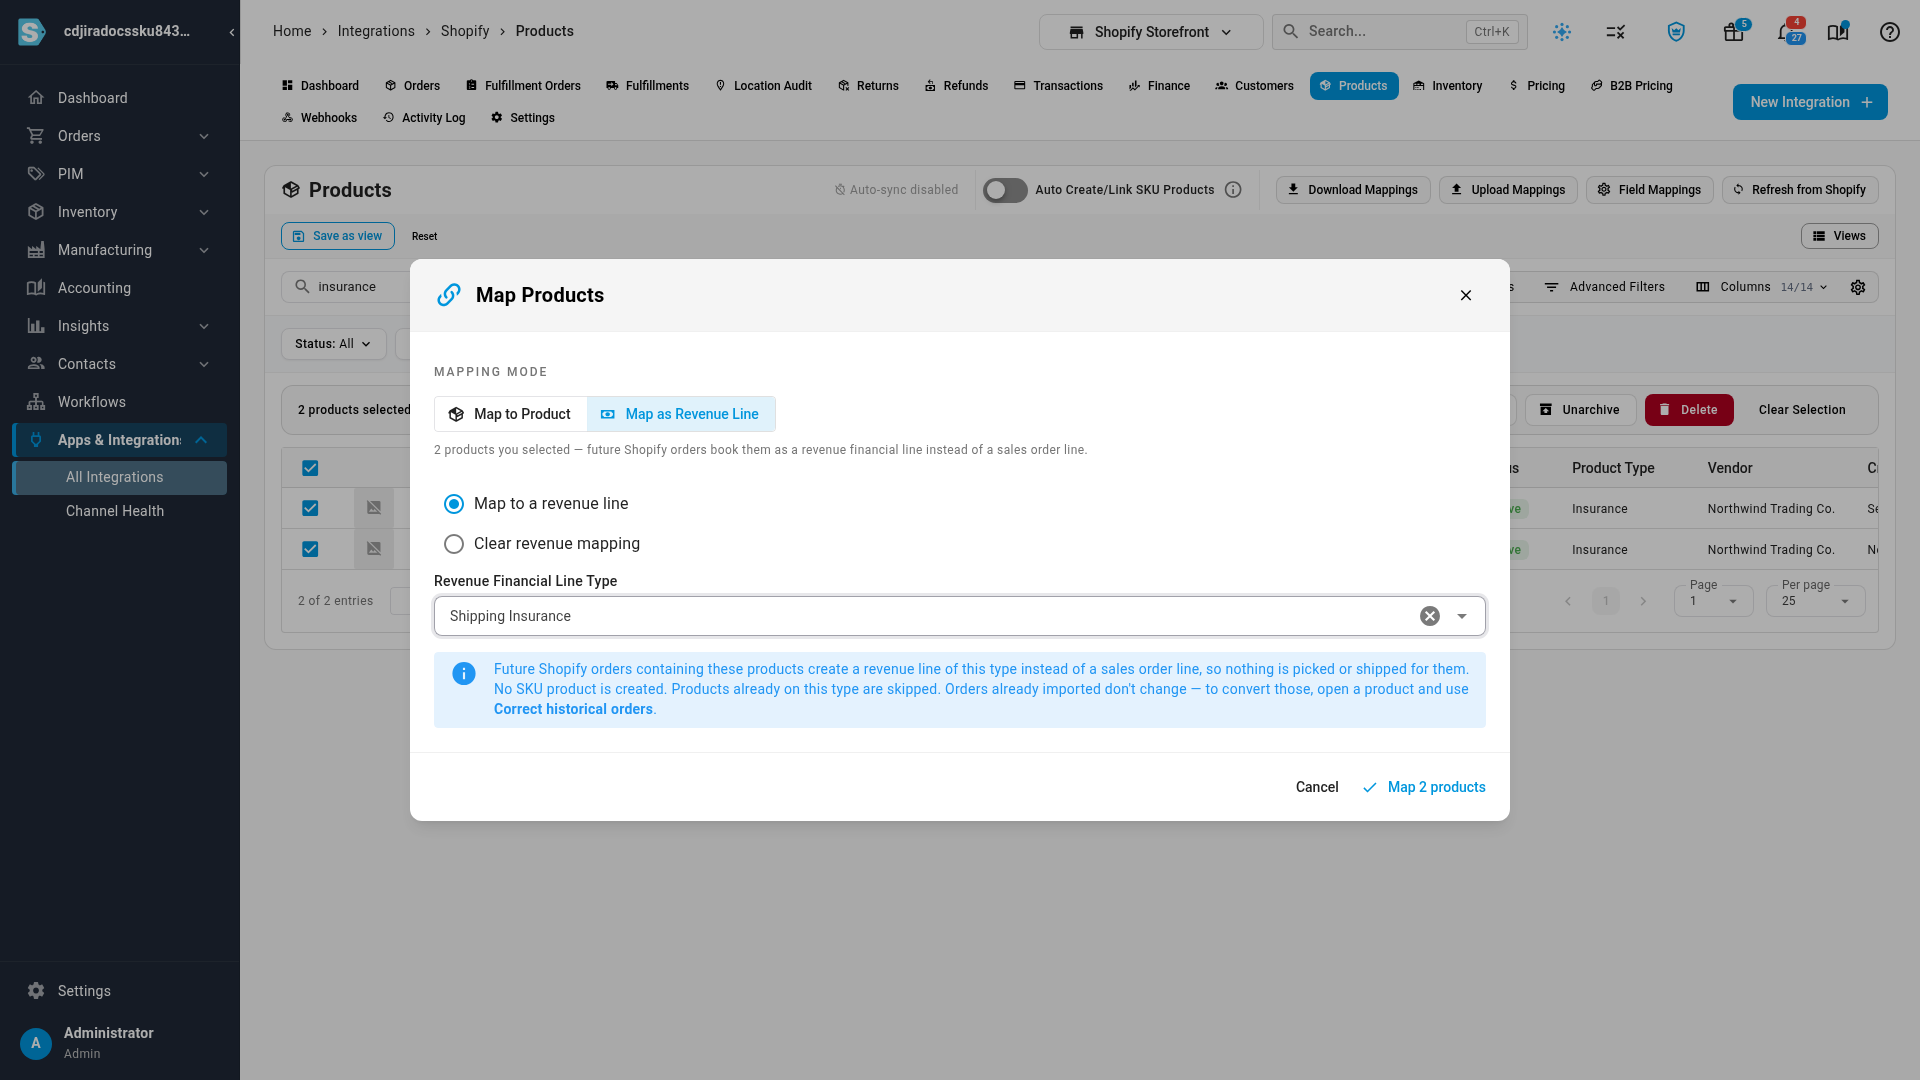
Under Mapping Mode, click Map as Revenue Line.
-
Leave Map to a revenue line selected, and in Revenue Financial Line Type choose Shipping Insurance.
-
Click Map 2 products. The button counts the items you selected.
What you'll see: a message that the products were mapped to a revenue line. In the SKU Product column, each item now reads Revenue Line with Shipping Insurance beneath it.
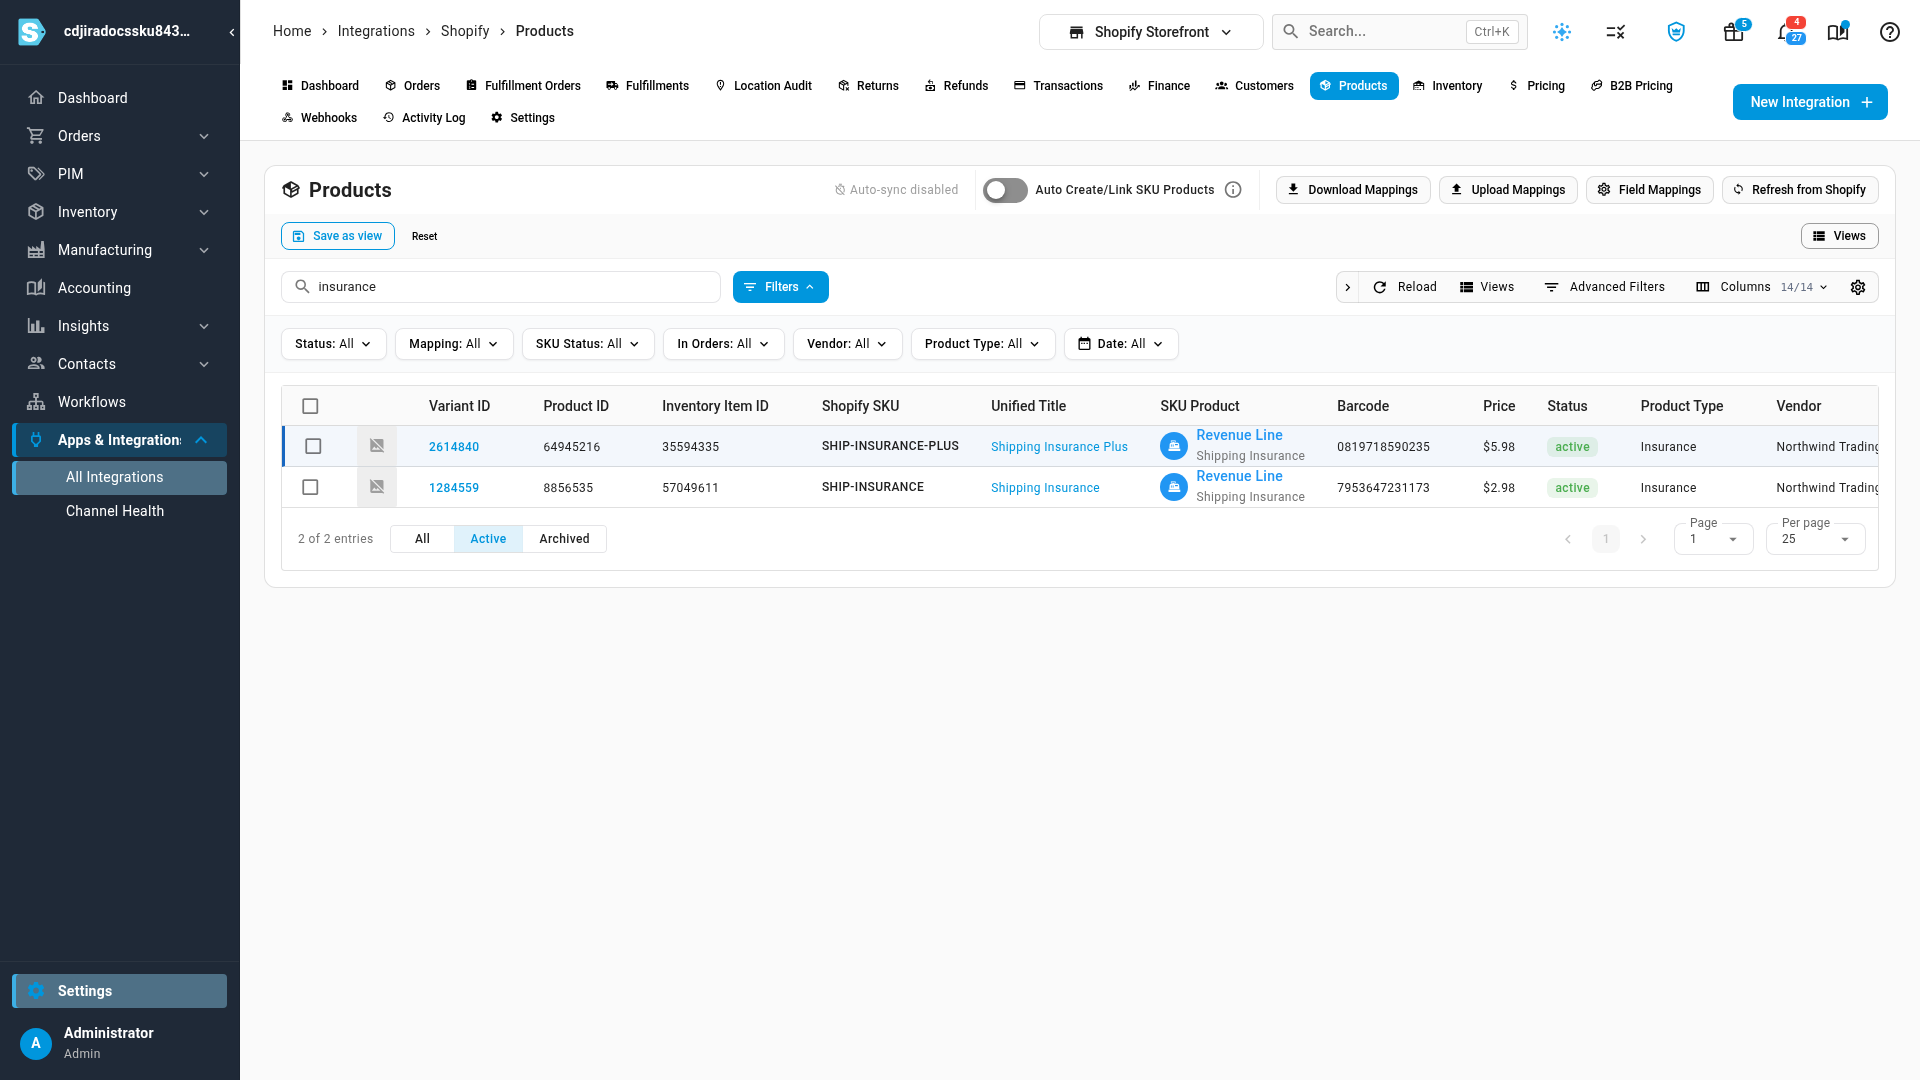
You can also map a single item from its own row: click Map in its SKU Product column and switch to Map as Revenue Line. See Map a channel product to a revenue line.
Check an order
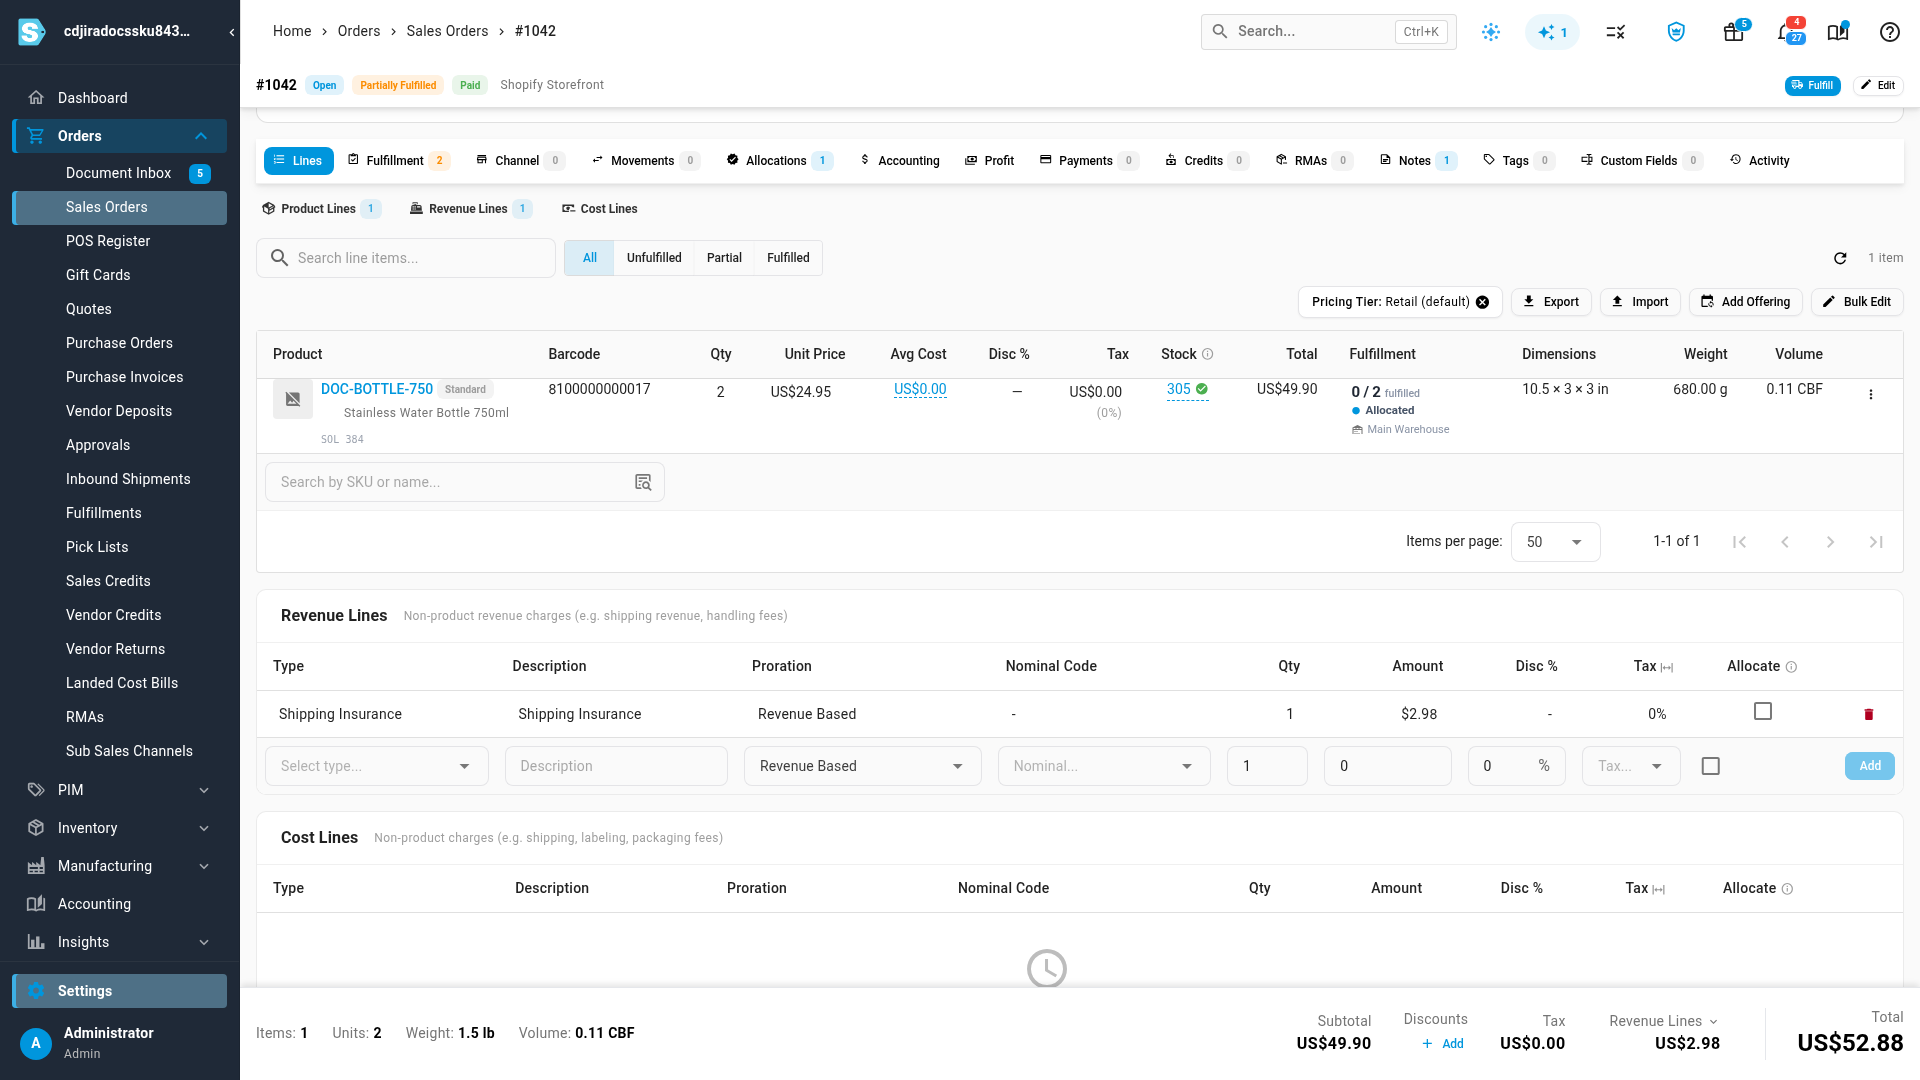
Open any Shopify order that came in after you mapped the item: go to Orders → Sales Orders and open the order. The products are on the Product Lines tab, where they are picked and shipped as usual. The insurance is on the Revenue Lines tab, under the type you chose, and nothing is picked or shipped for it. The order's total doesn't change.
Good to know
- Only new orders change. Orders imported before you mapped the item keep the lines they arrived with. The mapping applies to orders that come in after you save it.
- Without a mapping, an insurance item still books as revenue, but under the generic Non Product Line type, because the app adds it as an item that doesn't need shipping.
- Many items at once. To map every item your search or filters match, not only the ones you ticked, choose All Filtered in the bar before you click Map. From 20 items, the mapping runs in the background, and you can follow it in the job tray.
- Items already on the type are skipped, so running the same mapping again changes nothing.
- To undo it, select the items, click Map, choose Map as Revenue Line, then Clear revenue mapping. New orders then import the items as they did before.
- The mapping is per store. Mapping an item on one Shopify store doesn't change how the same item behaves on another.
- Gift cards always book under their own Gift Card type. A revenue mapping doesn't change them.
Next steps
- Manage financial line types: choose the account a revenue type posts to and how it's shared across products.
- Map a channel product to a revenue line: the same mapping for other add-ons and other sales channels.
- How Loop Returns exchanges from Shopify are handled: how shipping-protection lines from Redo are recorded.
Video transcript
Shipping insurance is money your customer pays you, not stock you ship. To book it as revenue, it needs a financial type of its own. Start in Settings, at the very bottom of the sidebar. Click the Financials card, so its list of settings opens below it. Then choose Financial Types, which lists every type in your account. This account already has one called Shipping Insurance, classified as Revenue. If yours doesn't, add one with Create Financial Type. Next, go to Apps and Integrations in the sidebar, and choose your Shopify store. Along the top of the store's pages, click the Products tab to list its items. In the search box, type insurance, and press Enter. Only your insurance app's items are left in the list. There are two in this store, a standard plan and a Plus plan. To map both at once, tick the box on the first row. Then tick the box on the second row as well. A bar appears above the list, showing your selection. Click Map in that bar, and the mapping window appears. Switch the mapping mode to Map as Revenue Line. From now on, orders book these items as income, not as goods for the warehouse. No new item is created in your catalog. Click the type field, and the list of revenue types opens. Choose Shipping Insurance, the revenue type made for this charge. When the field shows your choice, click Map 2 products to save the change. Both rows now read Revenue Line, with Shipping Insurance beneath. That's how you tell at a glance which items count as income. From then on, each new Shopify order books its insurance under that type. To check, go to Orders in the sidebar, and then on to Sales Orders. Open a recent sale that included insurance, near the top of the list. Its water bottles are product lines, which get picked and shipped. Below them, under Revenue Lines, sits the Shipping Insurance charge. The warehouse never sees that charge. Orders imported before the mapping keep their original lines. The mapping only changes orders placed after that point.