Connect Stripe
To bill sales orders through Stripe, you connect your Stripe account to SKU.io. You add the account in SKU.io, then sign in to Stripe and allow SKU.io to connect. There are no keys to copy. Once Stripe has turned on charges for the account, you can send Stripe invoices from your sales orders.
Before you begin
- You need a Stripe account, or you can create one while you connect.
- To add, connect and disconnect Stripe accounts, your SKU.io role needs Integrations → Manage. See Roles and permissions reference.
- Decide whether you're connecting Stripe in live mode, which takes real payments, or test mode, which takes test payments only. SKU.io connects the mode you're in when you sign in to Stripe.
- Allow pop-ups for SKU.io in your browser. Stripe signs you in through its own window.
Add a Stripe account
Each Stripe account you add gets its own card. Add one for each Stripe account you take payments with, for example one per store.
-
Go to Apps & Integrations → All Integrations, type Stripe in the search box, and choose Stripe under Payment Processors.
-
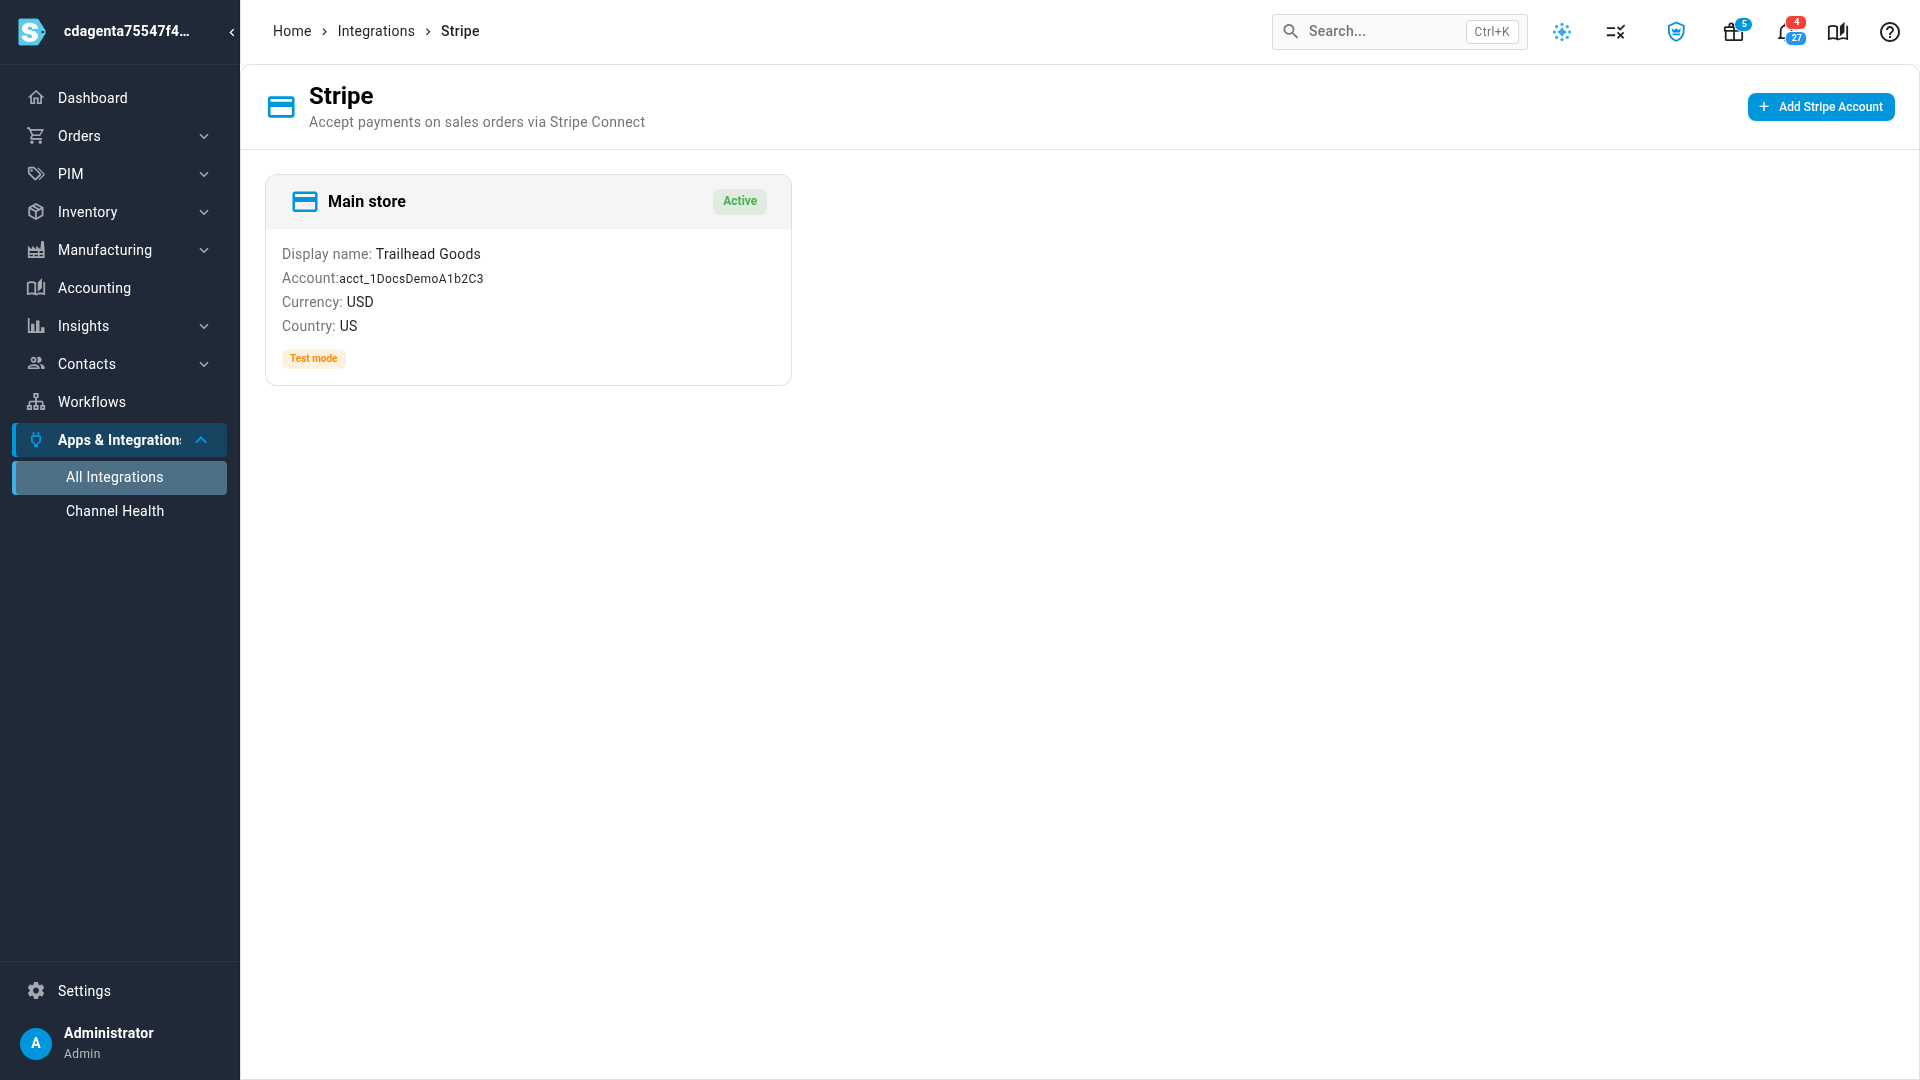
Click Add Instance. The Stripe page opens. It shows every Stripe account you've added as a card, with its status.
-
Click Add Stripe Account. On a phone, tap the + button instead.
-
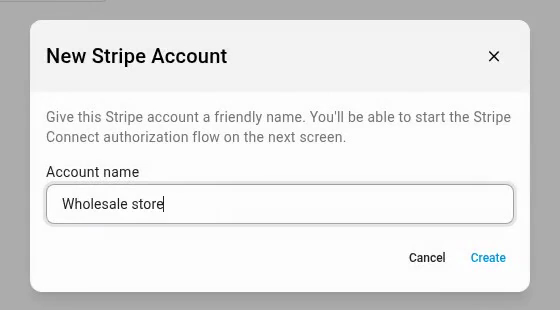
In New Stripe Account, type an Account name your team recognizes, such as the store it's for. The name is required.
-
Click Create.
You see Stripe account created. Connect it to start accepting payments. The new account opens on its Account tab, marked Not connected.
Sign in to Stripe
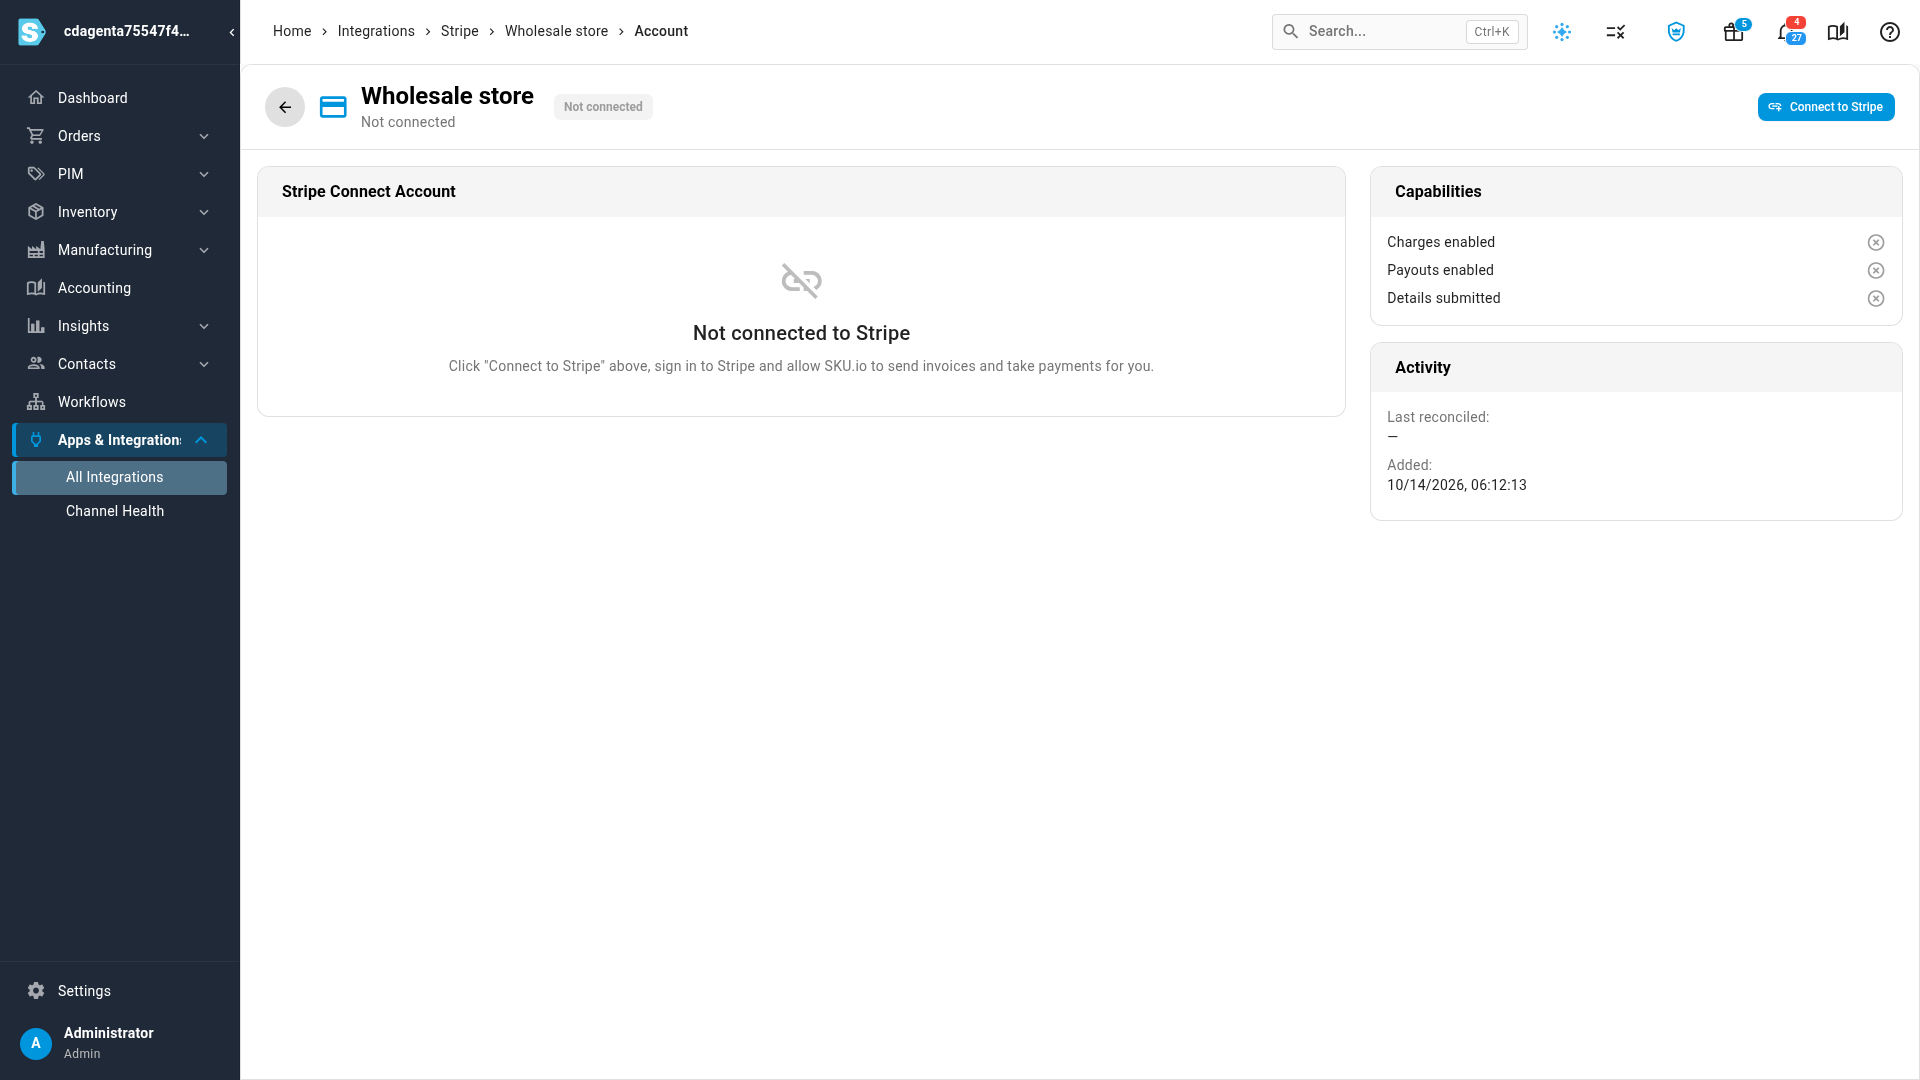
- Click Connect to Stripe at the top right of the account. A Stripe window opens.
- Sign in to Stripe, or create your Stripe account, and choose the business to connect.
- Allow SKU.io to connect to your Stripe account.
The Stripe window closes by itself, and you see Stripe account connected successfully. The account's header now shows its status and Test mode or Live mode.
If the window doesn't open, your browser blocked it: you see Failed to open popup. Please allow popups for this site. Allow pop-ups for SKU.io, then click Connect to Stripe again. If you decline in Stripe, a message gives Stripe's reason. If you close the Stripe window before you finish, nothing changes. Either way the account stays Not connected, and you can click Connect to Stripe again.
Check the connected account
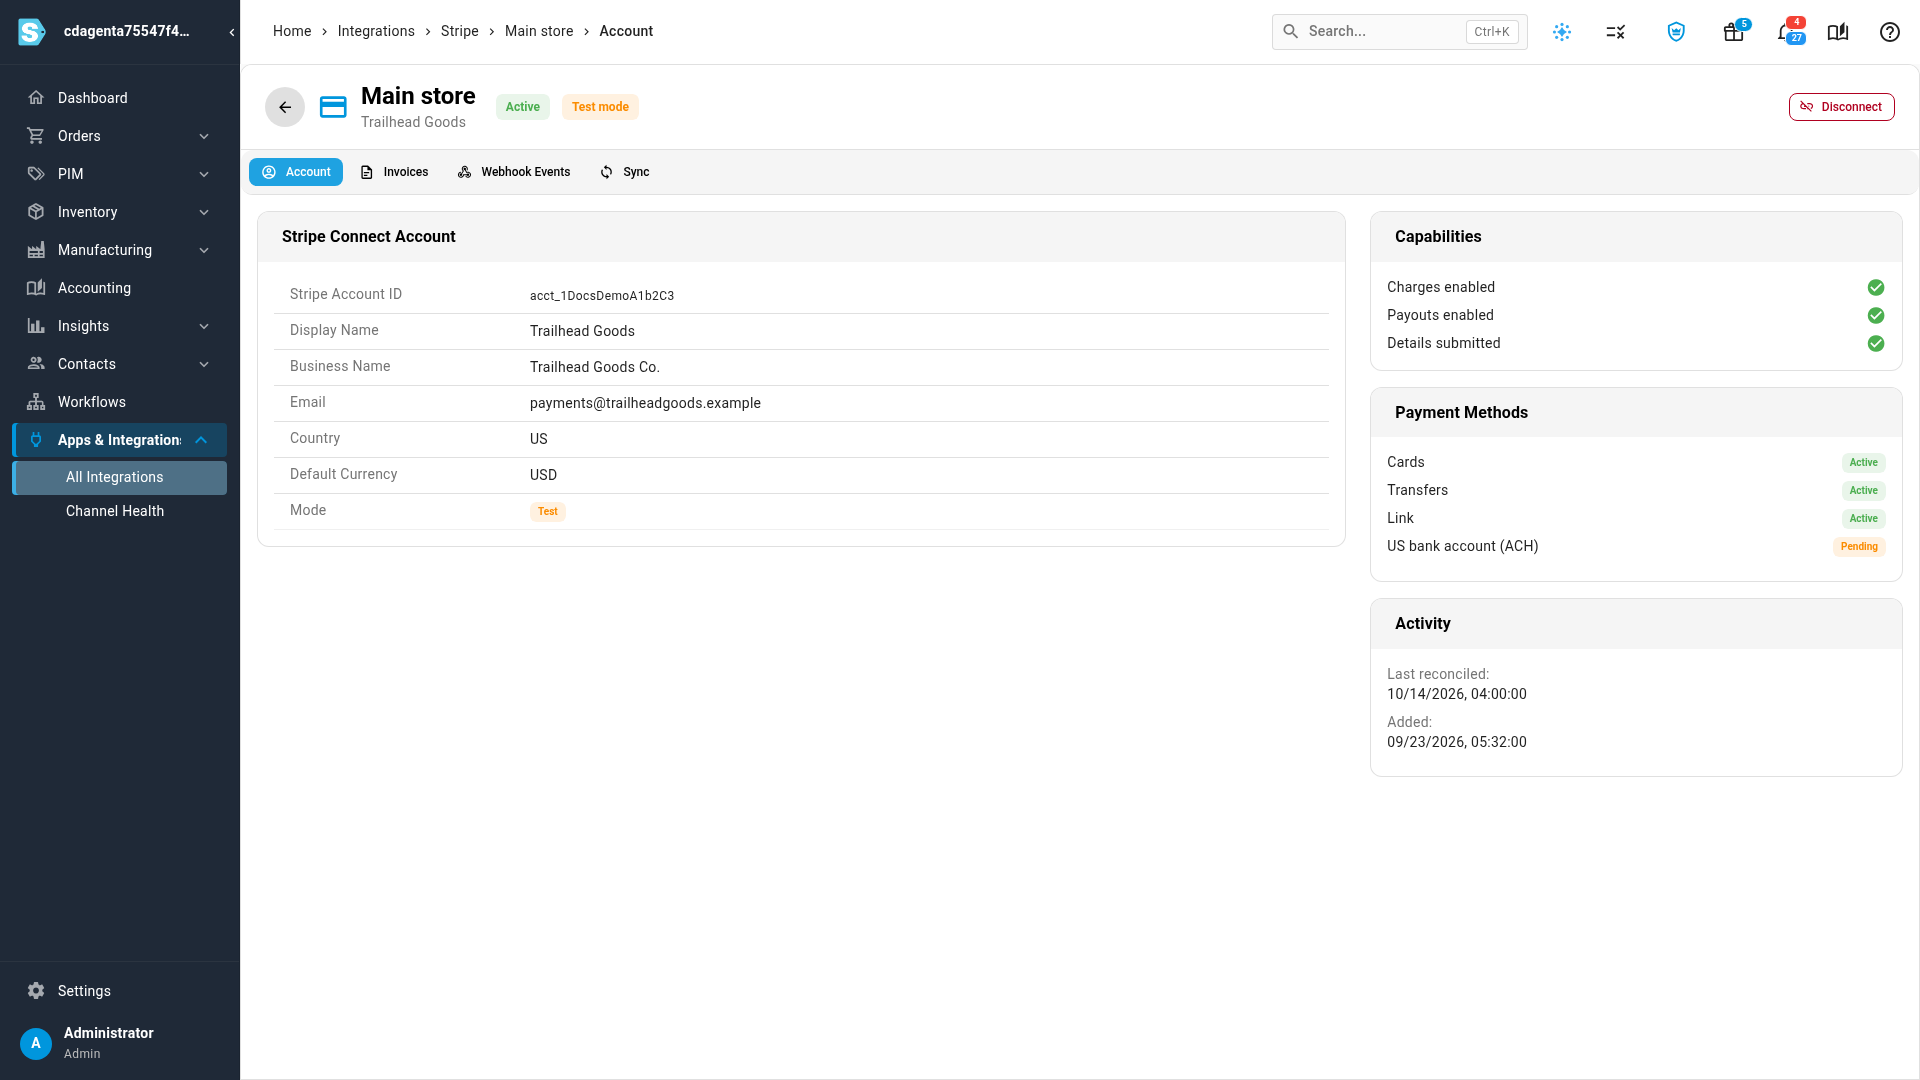
The status in the account's header tells you whether it can take payments:
| Status | What it means |
|---|---|
| Active | Stripe has turned on charges. You can send Stripe invoices from this account |
| Pending verification | Connected, but Stripe hasn't turned on charges yet. Finish your business details in your Stripe Dashboard. The status changes after SKU.io's next daily check |
| Not connected | You haven't signed in to Stripe for this account yet |
| Disconnected | Someone disconnected the account. Its invoices and webhook events are kept. See Disconnect a Stripe account |
Next to the status, Test mode or Live mode shows which kind of payments the account takes.
The Stripe Connect Account card shows what Stripe holds for the account: its Stripe Account ID, Display Name, Business Name, Email, Country, Default Currency and Mode.
On the right:
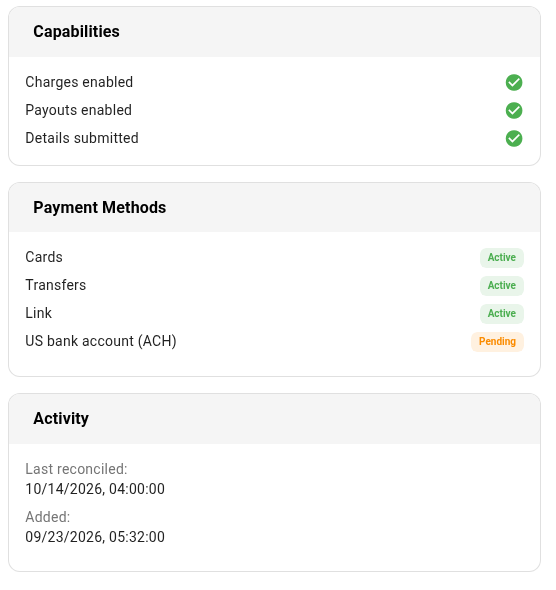
- Capabilities shows Charges enabled, Payouts enabled and Details submitted. Charges enabled must be ticked before you can send invoices. If it isn't, finish your business details in your Stripe Dashboard.
- Payment Methods lists the ways your customers can pay, such as Cards or US bank account (ACH), and whether each is Active or Pending at Stripe. You turn payment methods on and off in your Stripe Dashboard.
- Activity shows Last reconciled, when SKU.io last checked the account and its open invoices against Stripe, and Added, when the account was added to SKU.io.
The account's other tabs are Invoices, Webhook Events and Sync. See Track Stripe invoices and webhook events.
Keep the daily check on
Stripe tells SKU.io about each payment, refund and voided invoice as it happens. Every day, SKU.io also checks your open invoices and your account details against Stripe, in case an update was missed.
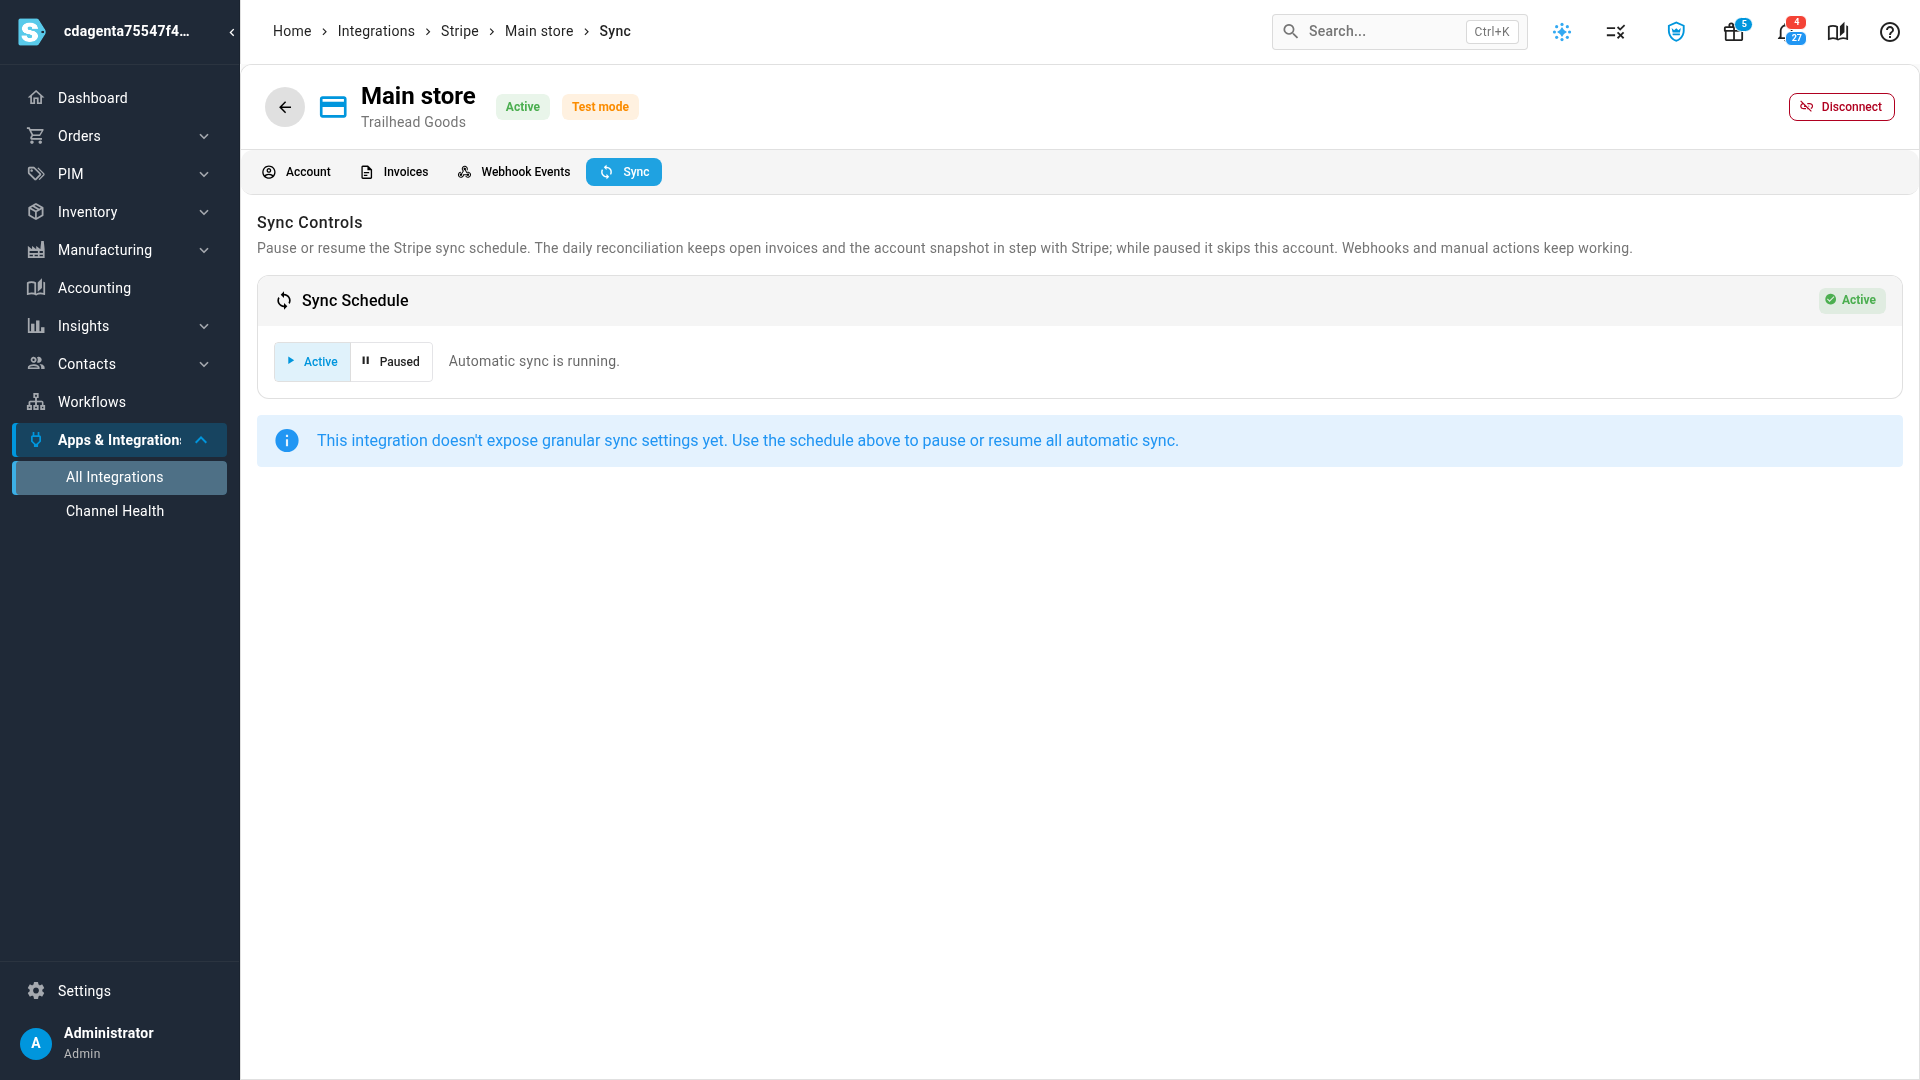
- Open the account's Sync tab.
- Under Sync Schedule, keep Active selected.
Choose Paused only to stop the daily check for this account. Stripe's instant updates, sending invoices and refunds keep working while it's paused.
Disconnect a Stripe account
- Open the account, and click Disconnect at the top right.
- In Disconnect Stripe, click Disconnect.
SKU.io stops using the account and tells Stripe to remove its access. Invoices you've already sent still work, and the account's Invoices and Webhook Events tabs keep their history. You can't send new invoices from it until you reconnect.
To reconnect, open the account and click Connect to Stripe, then sign in to Stripe again.
Next steps
- Collect payment through Stripe: send your first Stripe invoice from a sales order.
- Track Stripe invoices and webhook events: follow every invoice you've sent, and the updates Stripe sends back.
- Stripe: what Stripe does in SKU.io, and how to set it up.
Video transcript
To get paid for sales orders with invoices your customers pay online, connect a payment account first. Open Apps and Integrations from the menu on the left, where every connection lives. Type Stripe into the search box at the top of the list. Choose it under Payment Processors, and its panel appears on the right. Then click Add Instance, at the top of the panel, to add another account. The Stripe page opens, with a card for every account you've already added. To add one, click Add Stripe Account. Type a name your team will recognize, such as the name of the store. Then click Create, and the new account appears, on its Account tab. It's marked Not connected until you sign in. Click Connect to Stripe, and a sign-in window opens. Sign in, or create your account, and allow the connection. The window then closes by itself, and the account shows Active. Now use the arrow at the top left to go back, then open an account that's set up already. Its header shows its status, Active, so it can take payments. Next to it, Test mode means it takes test payments only. The account card on the left shows the business, email, country and currency. On the right, Capabilities shows which features are enabled for the account. Charges enabled must be ticked before you can send invoices. If it isn't, finish your business details in Stripe. Payment Methods lists the ways your customers can pay. Activity shows when the account was last reconciled. Next, open the Sync tab, at the end of the row of tabs. Under Sync Schedule, keep the setting at Active. Every day, your unpaid invoices are checked again, in case an update was missed. To stop using an account, click Disconnect at the top. Its invoices and webhook events are kept, and you can reconnect it later. Your account is ready, so send your first invoice from a sales order.