Switch your portal to the storefront layout
The Customer Portal comes in two layouts:
- App layout: a sidebar of functions down the left, as the portal starts.
- Storefront: a website-style shell, like an online shop. A thin top bar shows your phone number, the dealer's currency and a greeting. The header holds your logo, a search box, the wishlist, help, the cart and the dealer's account menu. A menu bar carries tabs you choose, with dropdowns, and a footer closes every page with your links, contact details and social links.
Everything the sidebar had (quick order, lists, quotes, orders, invoices, returns, my account) moves into the header's account menu, so dealers lose nothing when you switch. The pages themselves stay the same, including the home page you built.
You set it all up on one page and save once. A live preview shows the result as you go.
Before you begin
- You need permission to manage the Customer Portal.
- Put your logo on the portal first: the header uses it. See Brand your customer portal.
- Menu tabs and footer links can open categories, brands, collections and info pages. Set those up first if you want to link to them.
Turn on the storefront layout
- Go to CRM → Customers.
- Click Portal, then Appearance.
- In the Layout card, click Storefront.
- Optional: type a Contact phone. It shows in the top bar and the footer, as a tap-to-call link.
- Optional: pick a Top bar colour and a Header colour. They start as your brand colour and your navigation colour.
- Click Save at the top of the page.
The live preview on the right switches to the storefront as soon as you click Storefront.
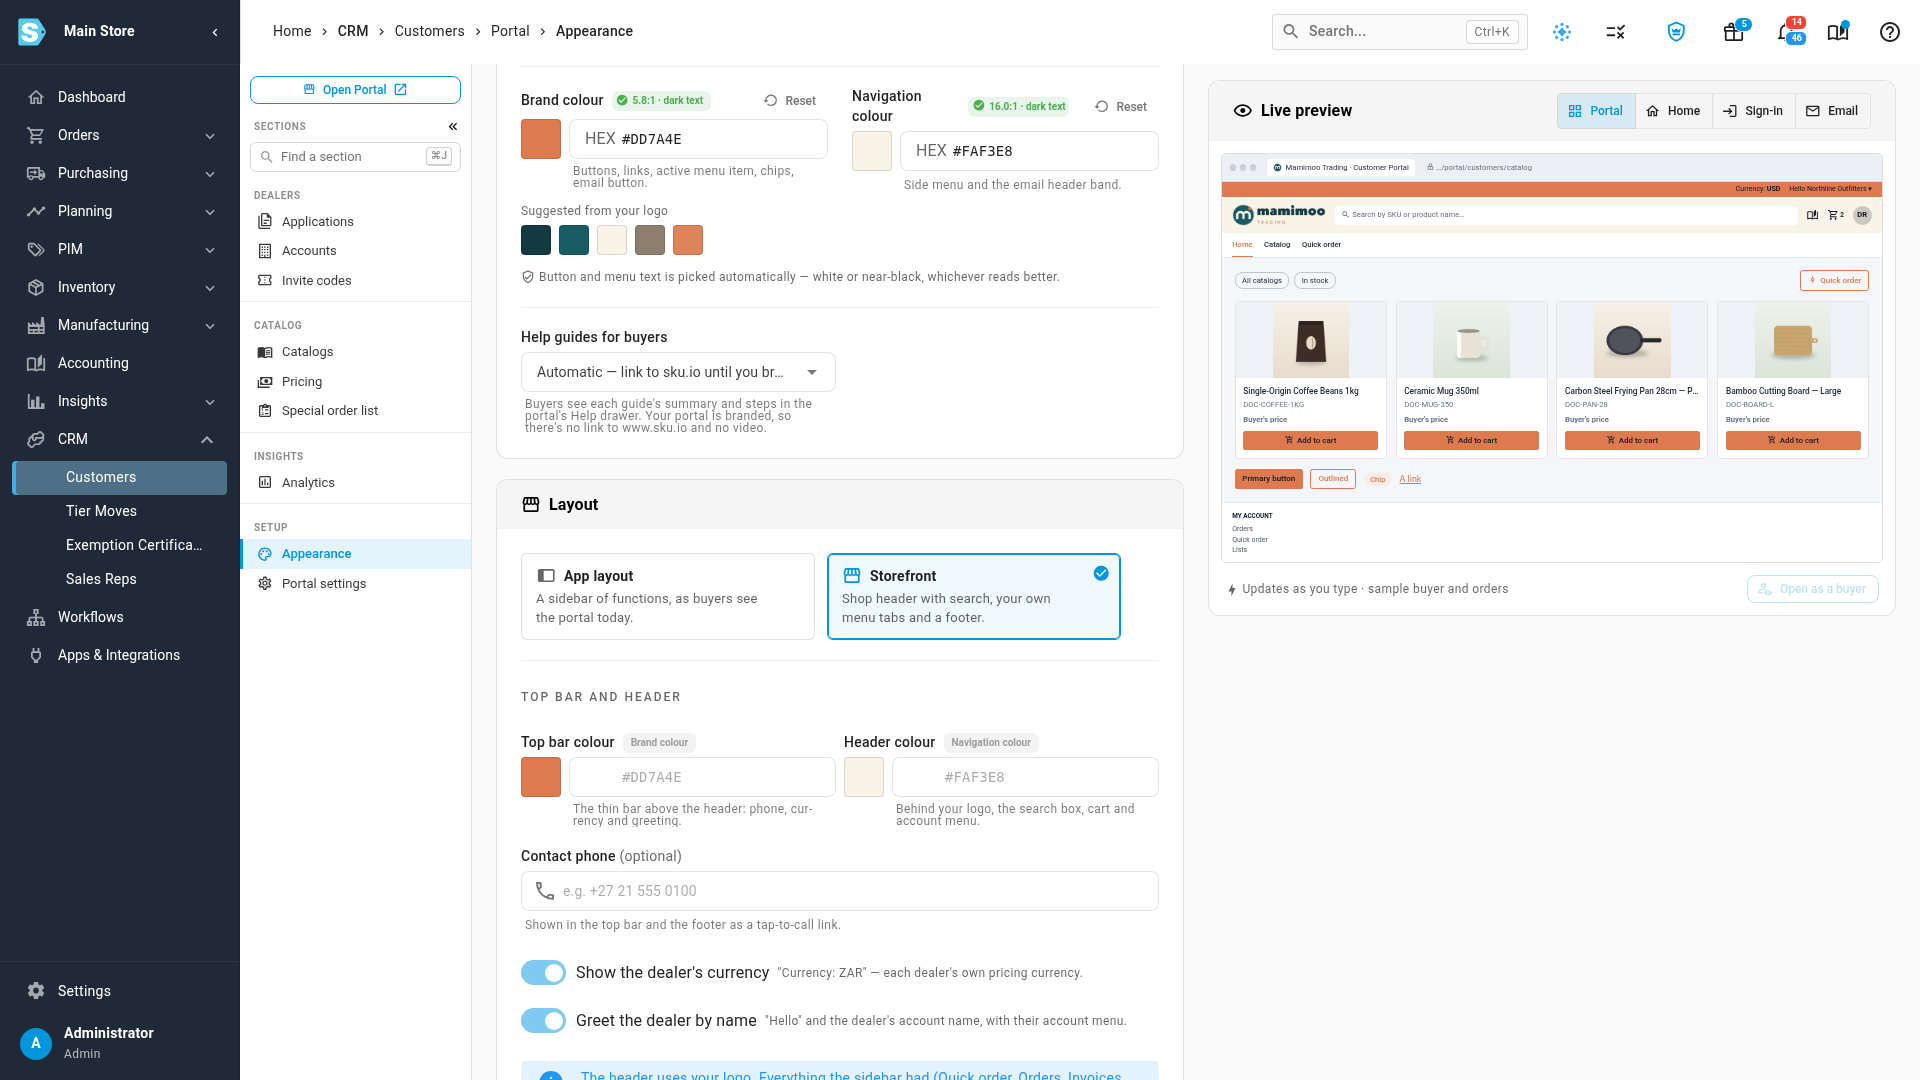
Two switches control the top bar:
- Show the dealer's currency shows "Currency:" and each dealer's own pricing currency.
- Greet the dealer by name shows "Hello" and the dealer's account name, with their account menu.
When the phone is empty and both switches are off, there's no top bar at all.
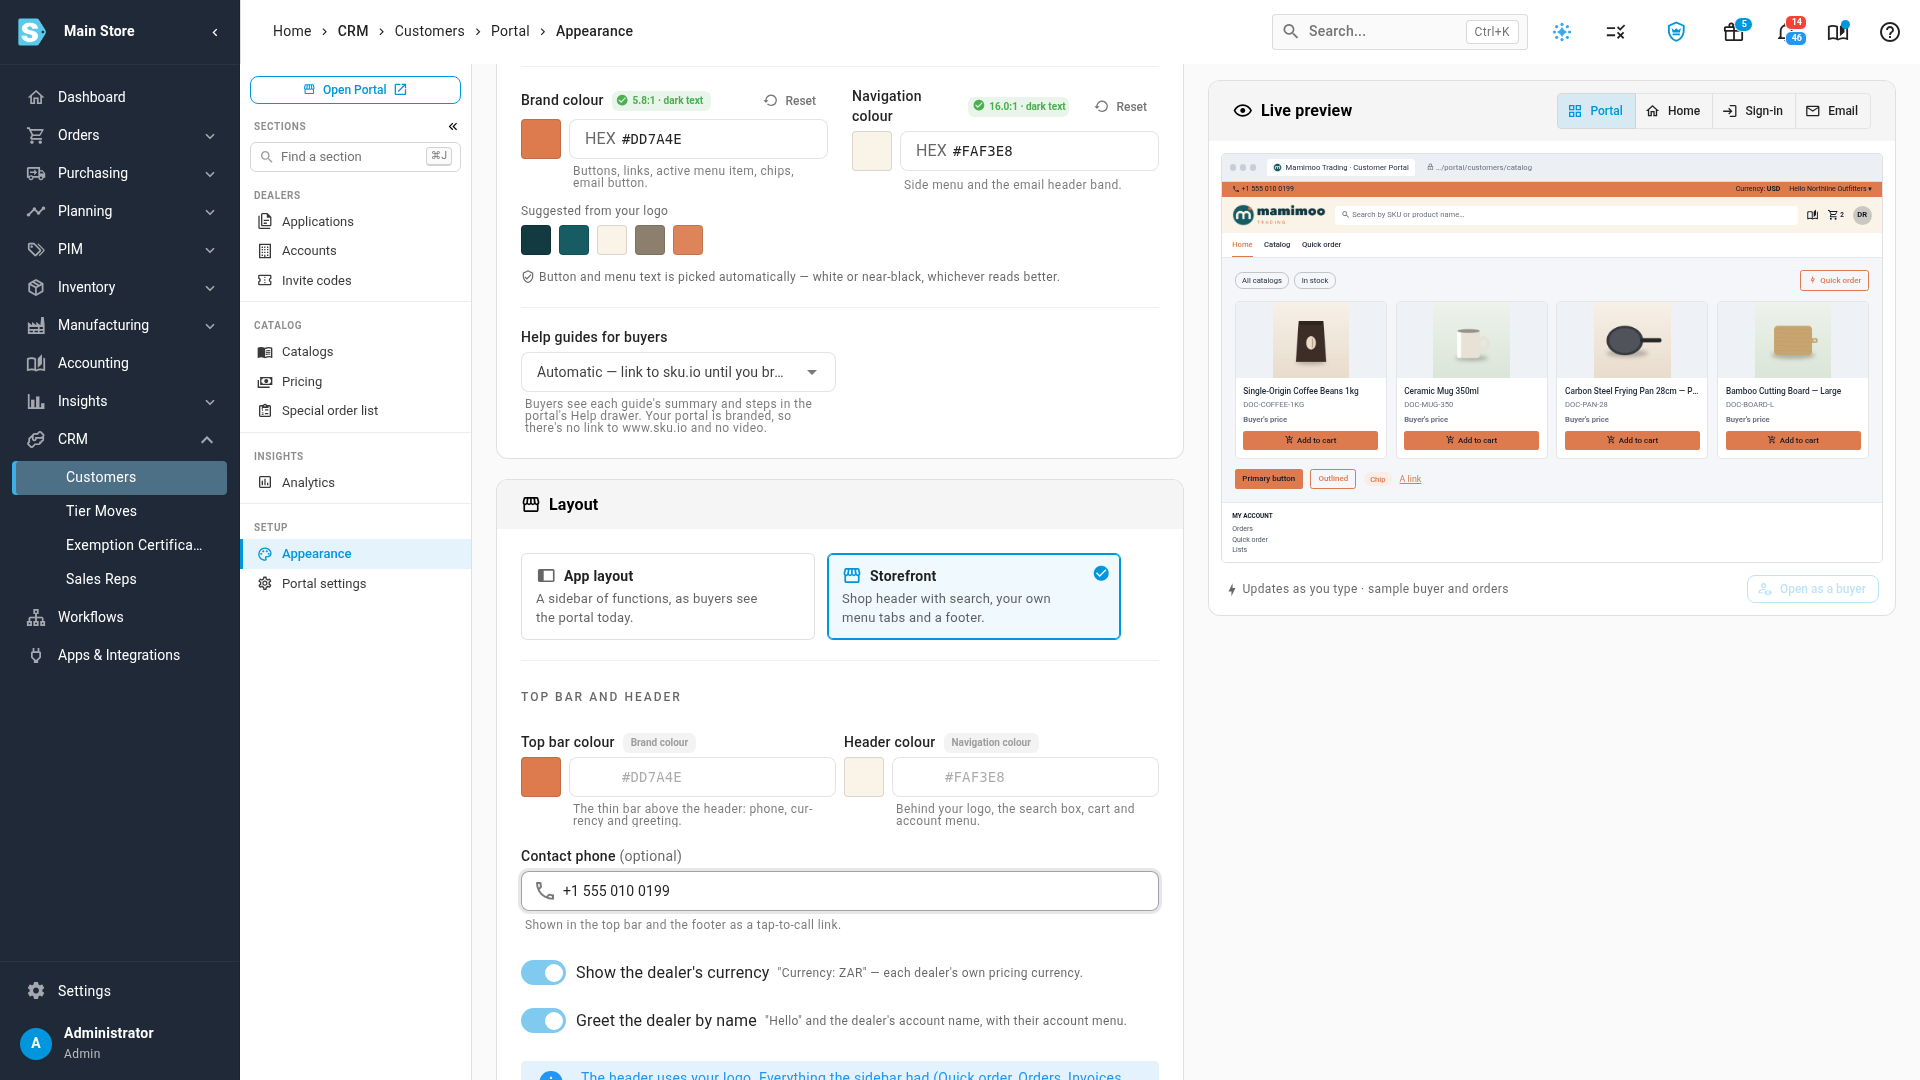
If you sell under more than one store, each store's brand can use its own layout, colours and phone. The menu tabs and the footer are the same for every store.
Add menu tabs
Until you add tabs of your own, dealers see Home, Catalog and Quick order in the menu bar.
- In the Menu tabs card, click Add tab.
- Type a Label, up to 40 characters.
- Under Links to, choose what the tab opens: a Category, a Brand, a Tag (collection), an Info page, a Portal page, the Whole catalog or a Web address. Then pick the category, brand or page, or type the address. A web address can open in a new tab.
- Click Add.
To make a tab that only opens a dropdown, turn off The tab itself opens a page, then add dropdown entries to it.
Add dropdown entries
- On the tab's row, click the arrow to add a dropdown entry.
- Type a Label and choose what it opens, the same way as for a tab.
- Click Add.
A tab holds up to 30 entries. Entries sit indented under their tab.
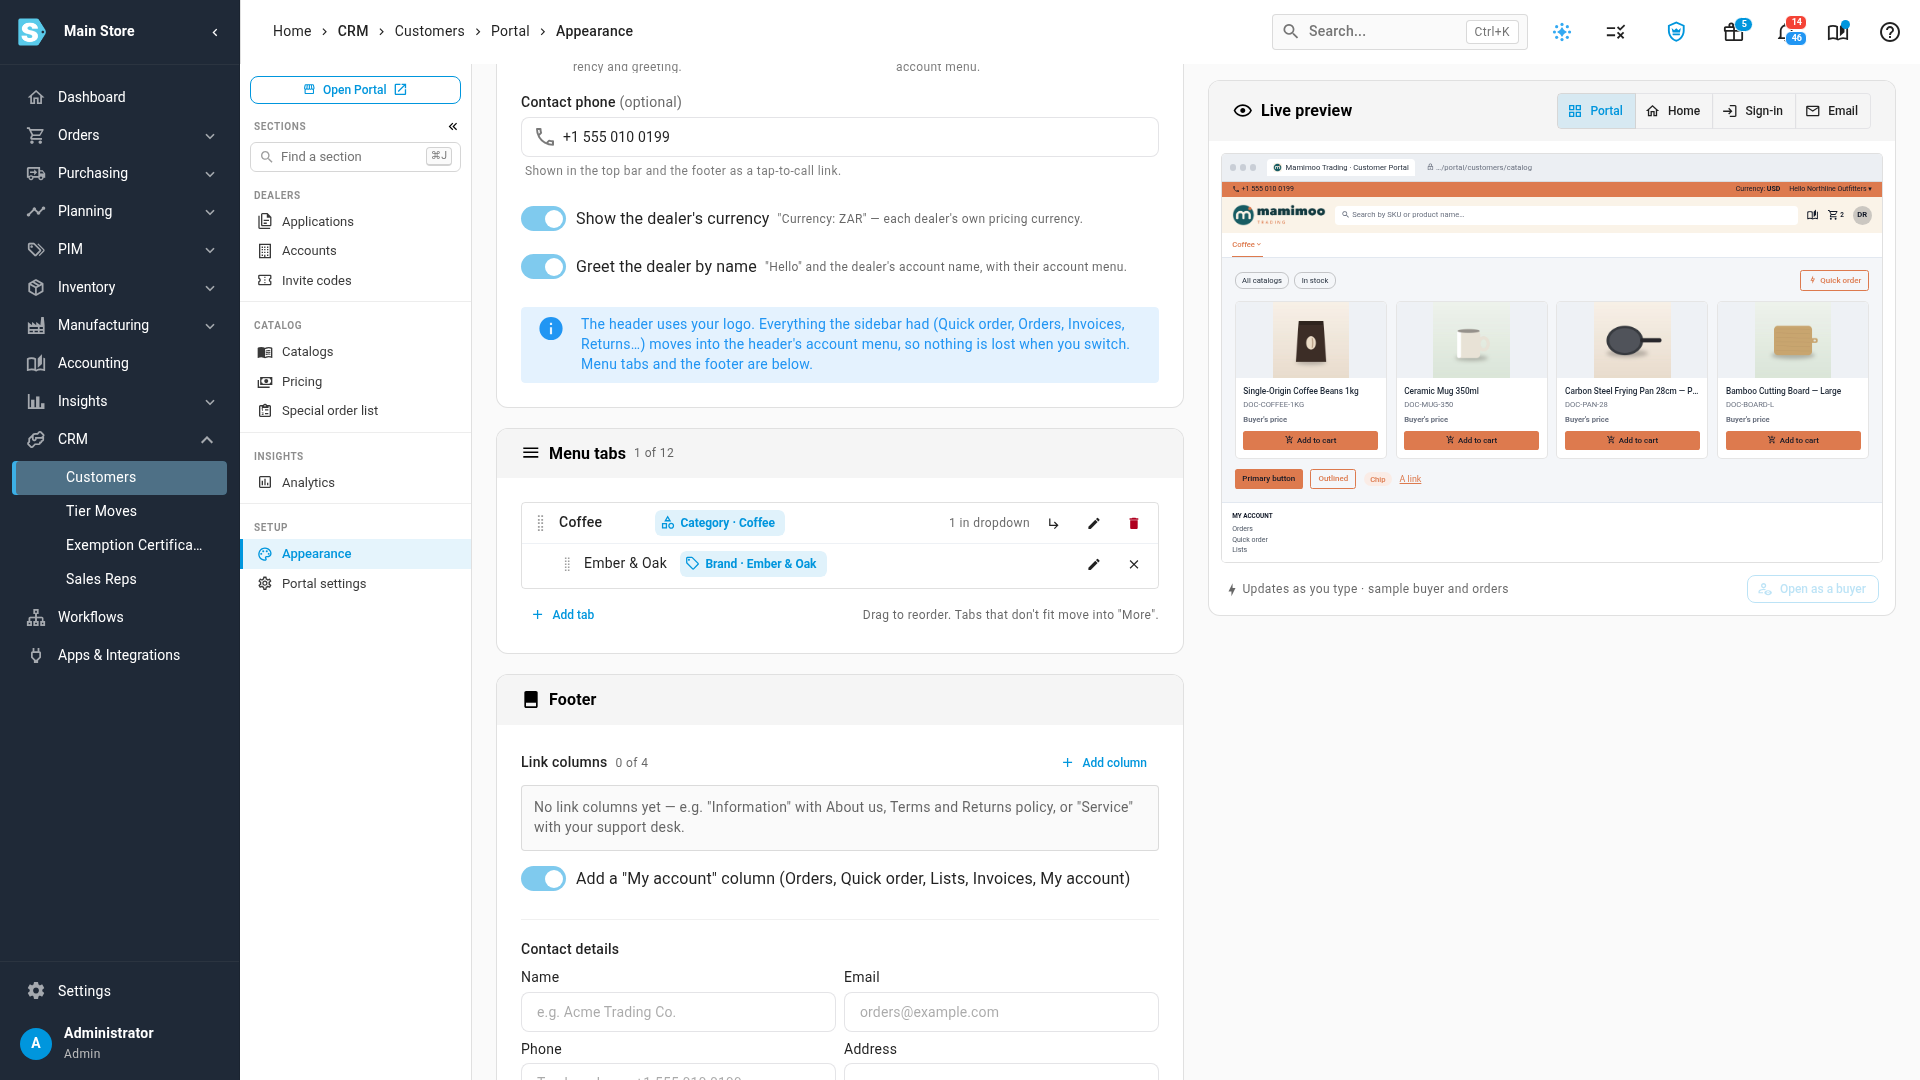
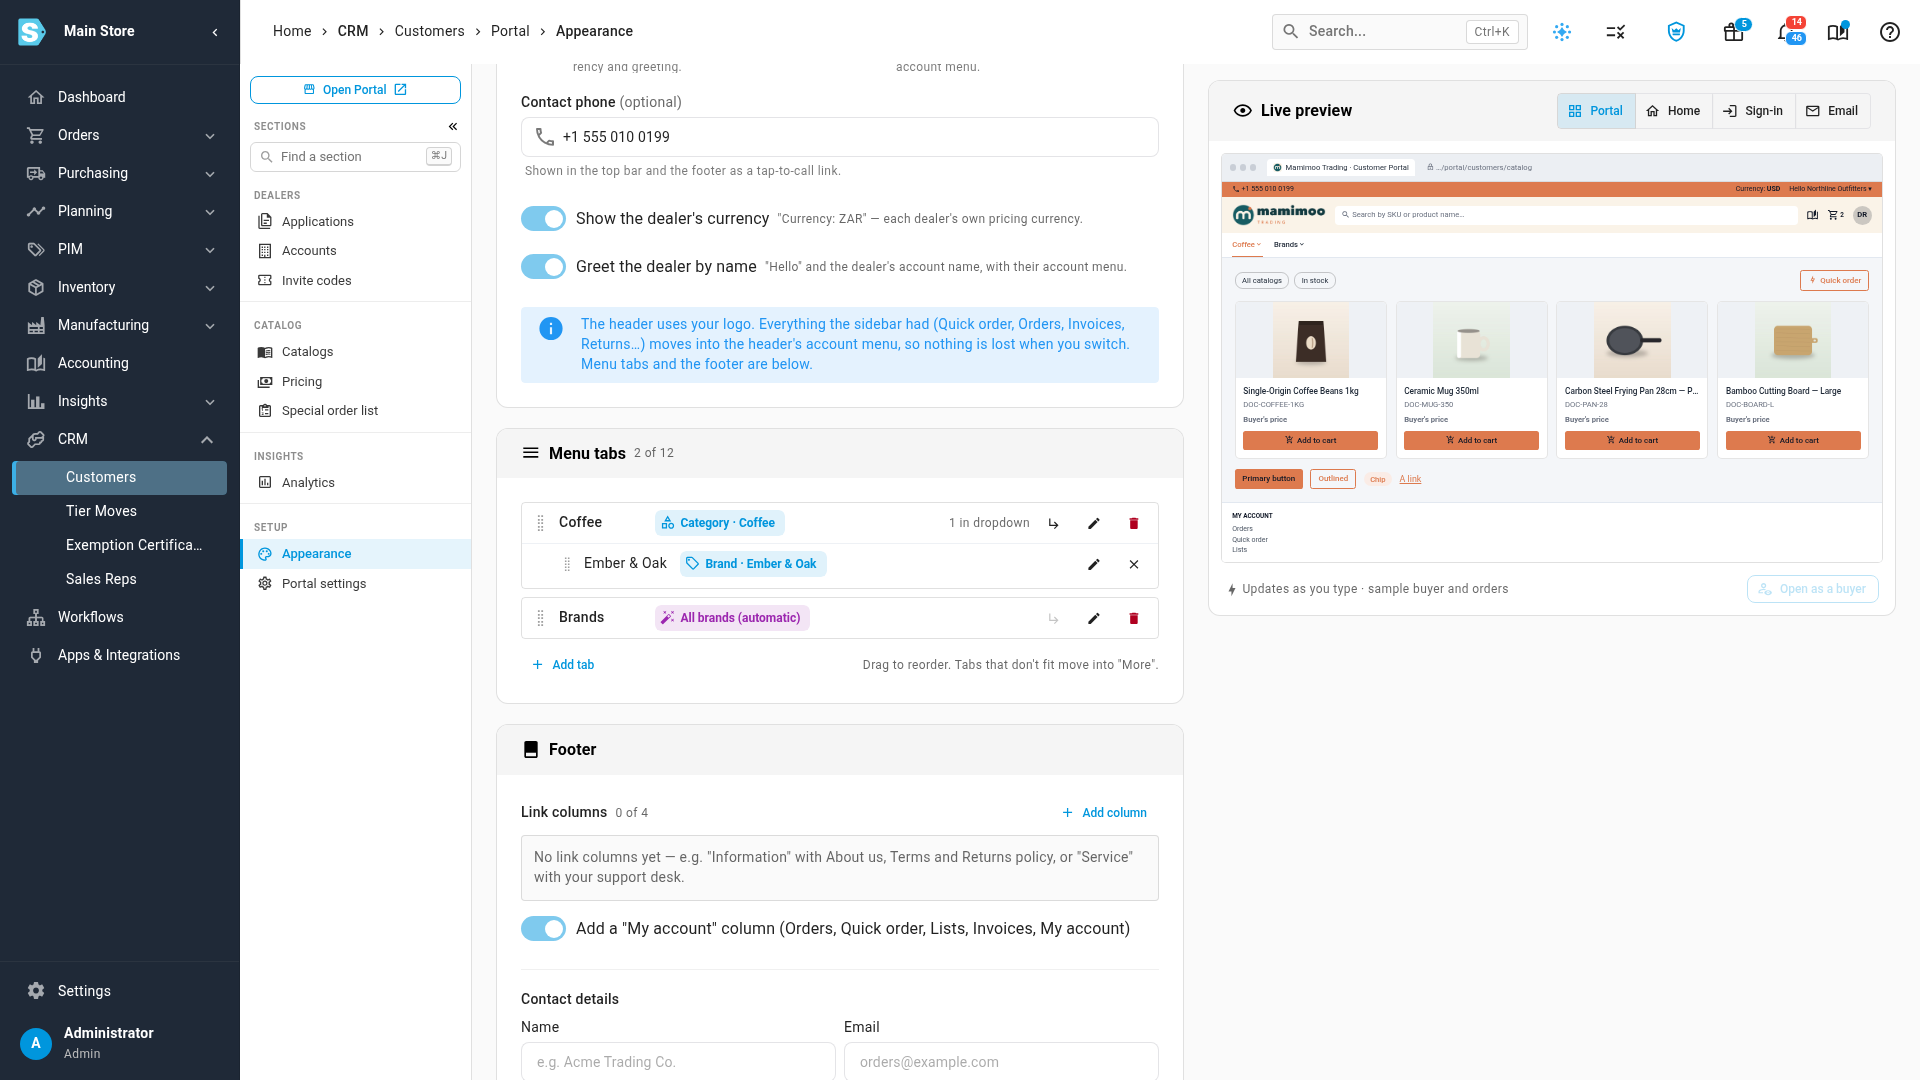
Add an automatic brands or categories tab
- Click Add tab and type a label, such as "Brands".
- Turn on Show every brand or category automatically.
- Choose All brands (Brands A–Z) or All categories (Categories A–Z).
- Click Add.
The tab's dropdown lists, A to Z in columns, the brands or categories in each dealer's own catalog. You never have to update it when you add a brand.
Order and tidy the tabs
- Drag a row by its handle to reorder tabs, or entries within a tab.
- Use the pencil to edit a tab or entry, and the bin or cross to remove it.
- Labels must be unique: two tabs, or two entries in one dropdown, can't share a label.
- You can have up to 12 tabs. Tabs that don't fit on a dealer's screen move under More, so the menu bar never wraps.
Each dealer sees only the tabs and entries they can use. A tab or entry that opens a category or brand outside a dealer's catalog is left out for that dealer, and a tab with nothing left to show disappears. If a category or brand you linked to is deleted, its row shows a warning so you can point it somewhere else; dealers never see the broken link.
Build the footer
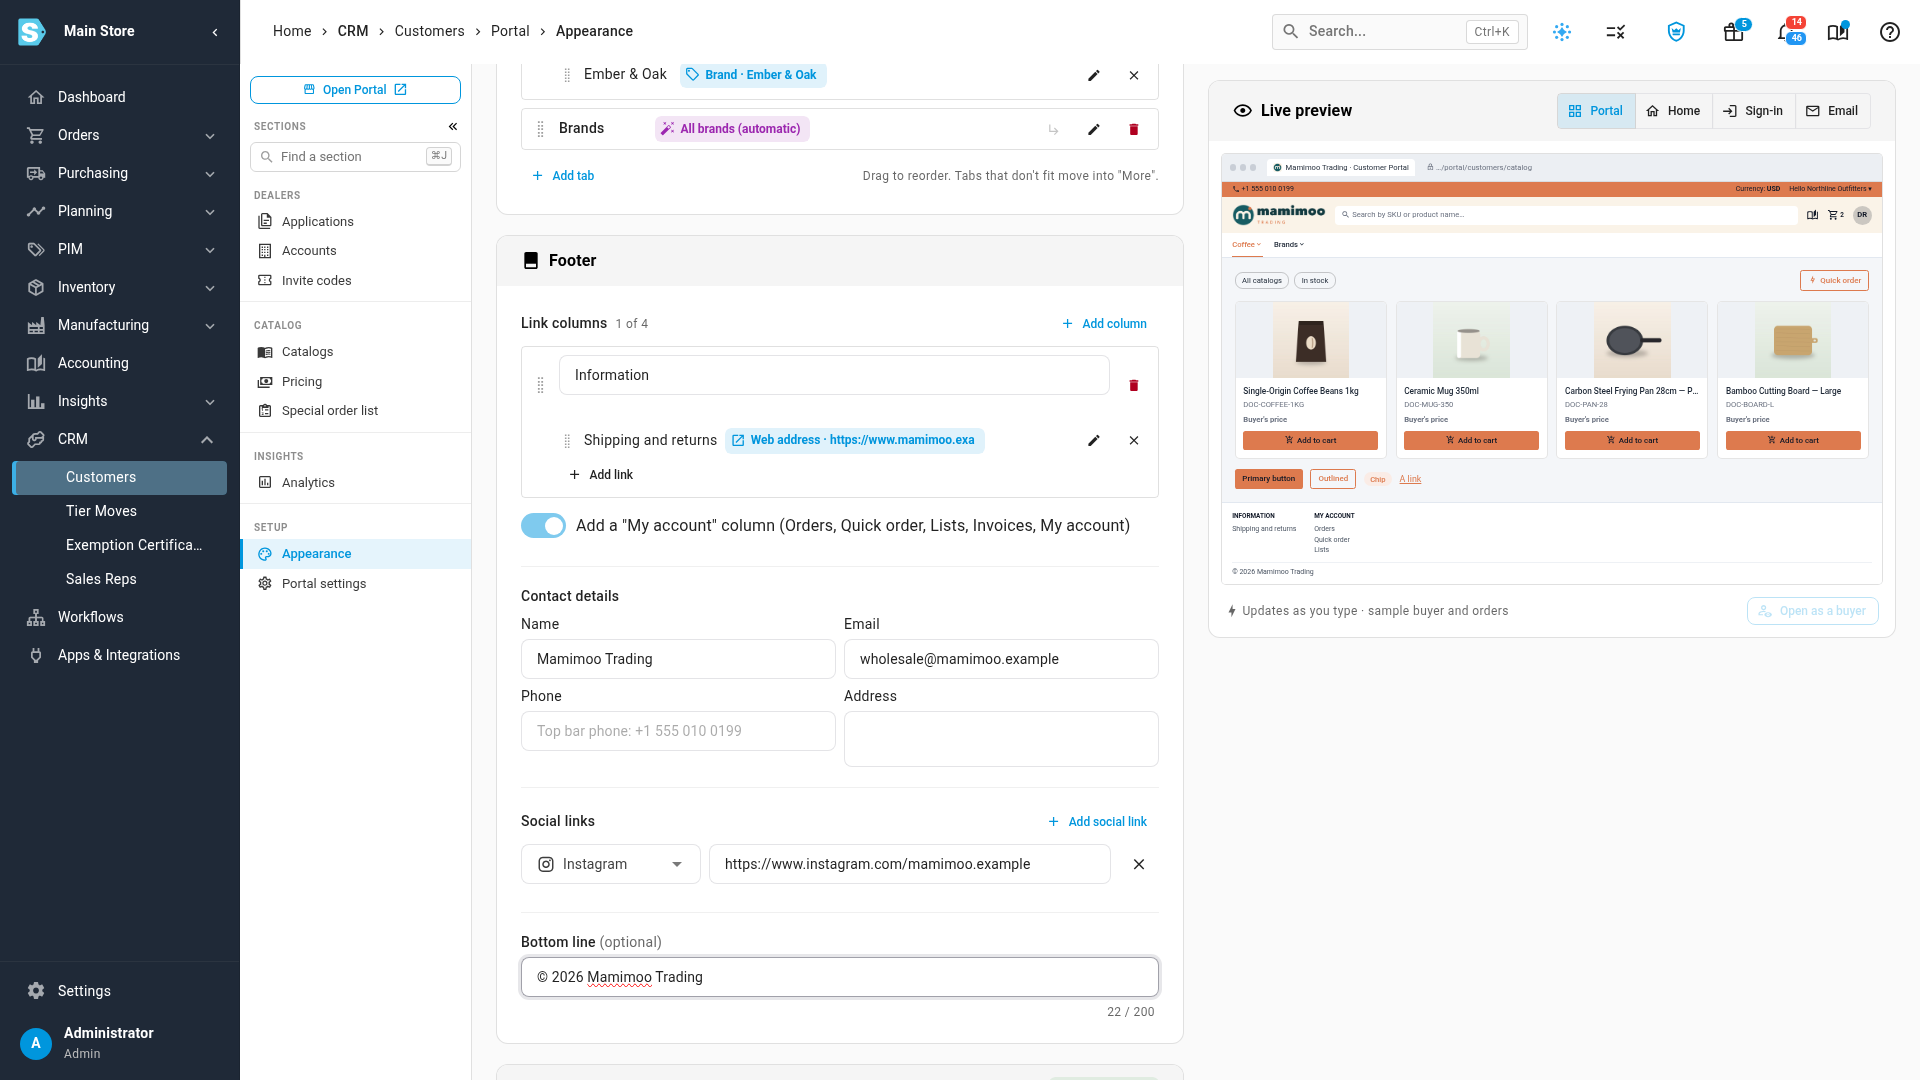
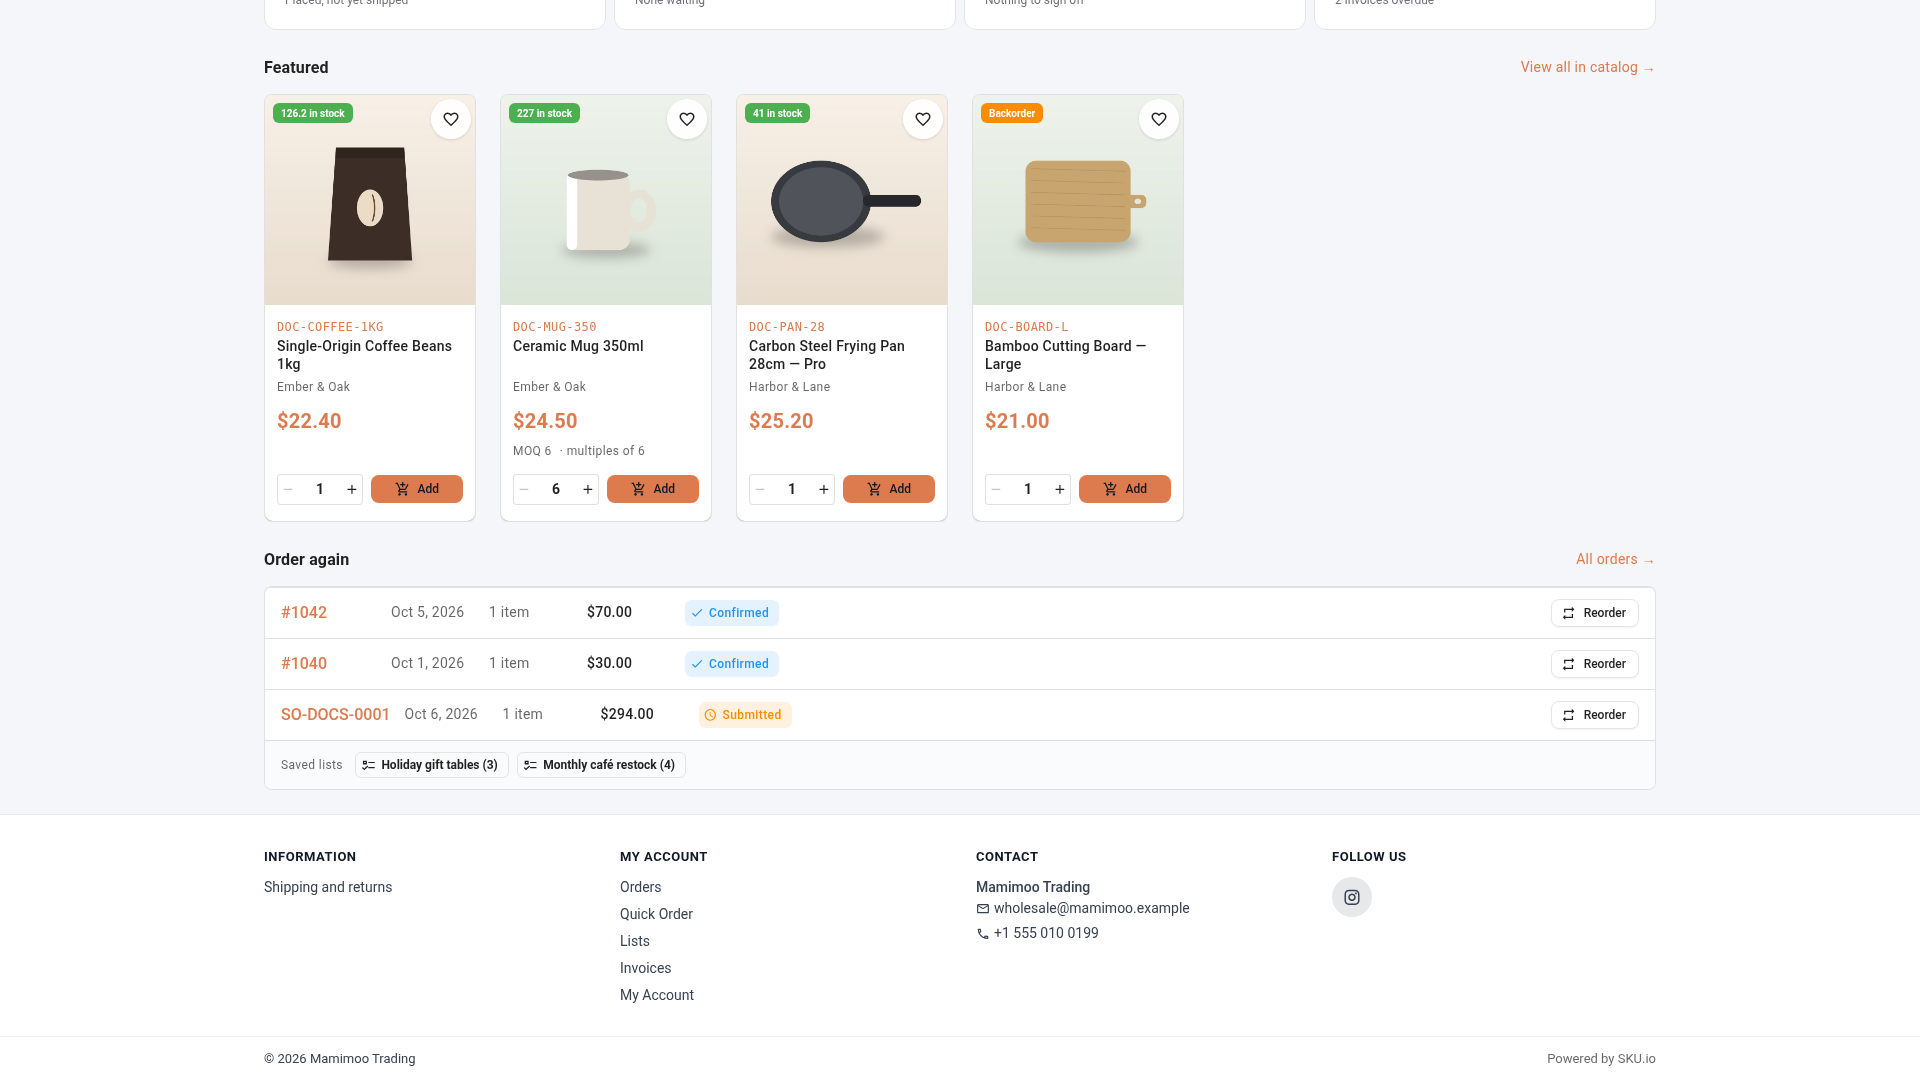
The footer sits at the bottom of every page. Set it up in the Footer card.
- Click Add column, type a title such as "Information", then click Add link to add the column's links. Each link opens a page the same way as a menu tab. You can have up to 4 columns of up to 10 links.
- Leave Add a "My account" column on to give dealers a column with their orders, quick order, lists, invoices and account.
- Under Contact details, add a Name, Email, Phone and Address. The phone defaults to your contact phone when you leave it empty.
- Under Social links, click Add social link, choose the network and paste the address.
- Optional: type a Bottom line, such as a copyright notice.
- Click Save at the top of the page.
A footer with no columns, no contact details, no social links, no bottom line and the account column off isn't shown. On the sign-in page, the footer shows only web-address and info-page links, your contact details and social links: the rest needs a signed-in dealer.
What your dealers see
After you save, dealers get the storefront on their next page load: the top bar with your phone number, their currency and a greeting, the header with your logo, search, cart and account menu, and your tabs along the menu bar.
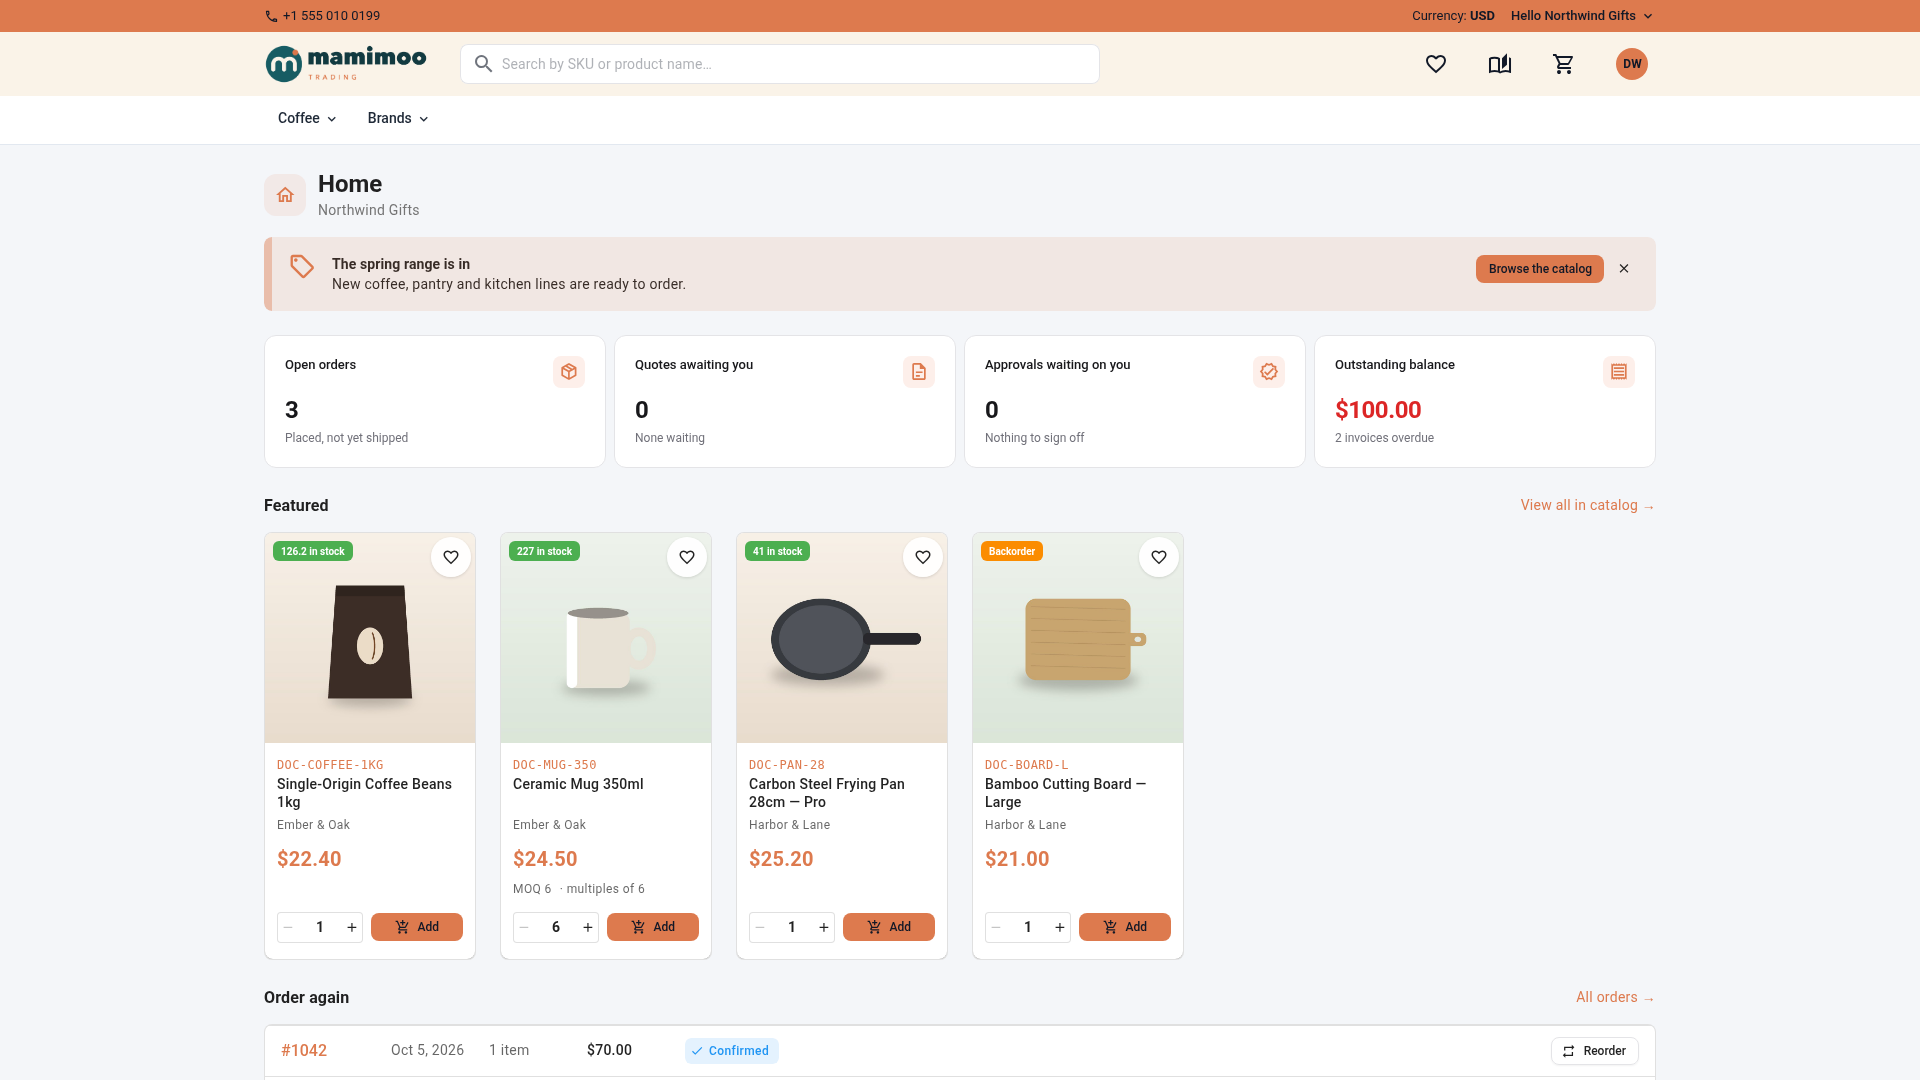
A tab with entries opens its dropdown, and the brands tab lists the brands that dealer can buy. Your footer closes every page.
On a phone, the header shrinks to a menu button, your logo and the cart. The menu holds the search box, your tabs and the account functions.
To go back, choose App layout and save. Your menu tabs and footer are kept, so switching back to Storefront restores them.
Next steps
- Build your portal home page: banners, tiles and category pictures on Home.
- Brand your customer portal: your logo, name and colours.
- Publish info pages on the portal to link from your tabs and footer.
- Show brands, collections and was-prices on the portal.
Video transcript
To change how your portal is laid out, open CRM in the sidebar, then choose Customers from the list. Then click the Portal tab, which sits at the top of the customer list.
On the portal pages, click Appearance, under Setup in the list on the left. The Layout card sits just under your brand settings, near the top of the page.
The app layout gives dealers a sidebar of functions. The storefront layout looks like a web shop instead. Click Storefront, and the live preview on the right redraws the portal in the new layout.
A thin top bar shows your phone number, the dealer's currency and a greeting. Below it, the header holds your logo, search, wishlist, help, cart and account menu. Type a contact phone for dealers to call, and pick colours for the top bar and header if you like.
These switches show or hide the currency and the greeting. Everything the sidebar had moves into the header's account menu.
Next, the Menu tabs card. Until you add tabs, dealers see Home, Catalog and Quick order. Click Add tab, and type a label for the tab, such as the name of a category. Then choose what the tab opens; here, a category, so search for its name. Select it from the list, and click Add to put the new tab on your menu bar.
A tab can also open a dropdown of links. Click the arrow on the tab's row to add an entry to its dropdown. Give the entry a label, the name dealers will see in the dropdown. Choose Brand from the list of link types, then search for the brand by name. Select it from the list of brands that comes up below the field. Click Add, and the entry sits under its tab, so dealers can jump straight to that brand.
Click Add tab again, and type a label for the next one, such as Brands. Then turn on Show every brand or category automatically, below the label. All brands lists each dealer's own brands, A to Z, in columns. Click Add to put it on the menu bar, next to the first tab.
Each tab needs its own label. Drag the handles to change the order. Tabs that don't fit on a dealer's screen move under More, so the menu bar never wraps.
The footer goes at the bottom of every page. Click Add column, and give the column a title, such as Information. Click Add link under the column title, and type a label for the first link. This link opens a page on your own website, so choose Web address as its type. Paste the address, then click Add to put the link in the column.
This switch adds a My account column with their orders, lists and invoices. Add your contact details, such as your company name and email, so dealers know how to reach your team. Then click Add social link, and paste the address of your social profile. Last, type an optional bottom line, such as a copyright notice.
Check the result in the live preview on the right, then scroll to the top and click Save, once for the whole page.
Now a dealer signs in to the portal. The top bar shows your phone number, their currency and a greeting. The header has your logo, the search box and their cart. Your tabs run along the menu bar.
When a dealer clicks a tab with entries, its dropdown of links appears below the tab. Close it, and click the brands tab, which lists every brand this dealer is able to buy. Scroll to the bottom of the page, and your footer is there, on every page.