Publish info pages on the portal
Dealers expect your terms, your returns policy and your contact details on the portal they order from. Info pages are simple pages you write yourself, in Markdown, under Appearance. Each page is either Public, readable by anyone including visitors who haven't signed in, or Buyers only, for signed-in dealers.
Before you begin
- You need permission to manage the Customer Portal.
- You can have up to 50 pages.
Add a page
-
Go to CRM → Customers, click the Portal tab, then Appearance.
-
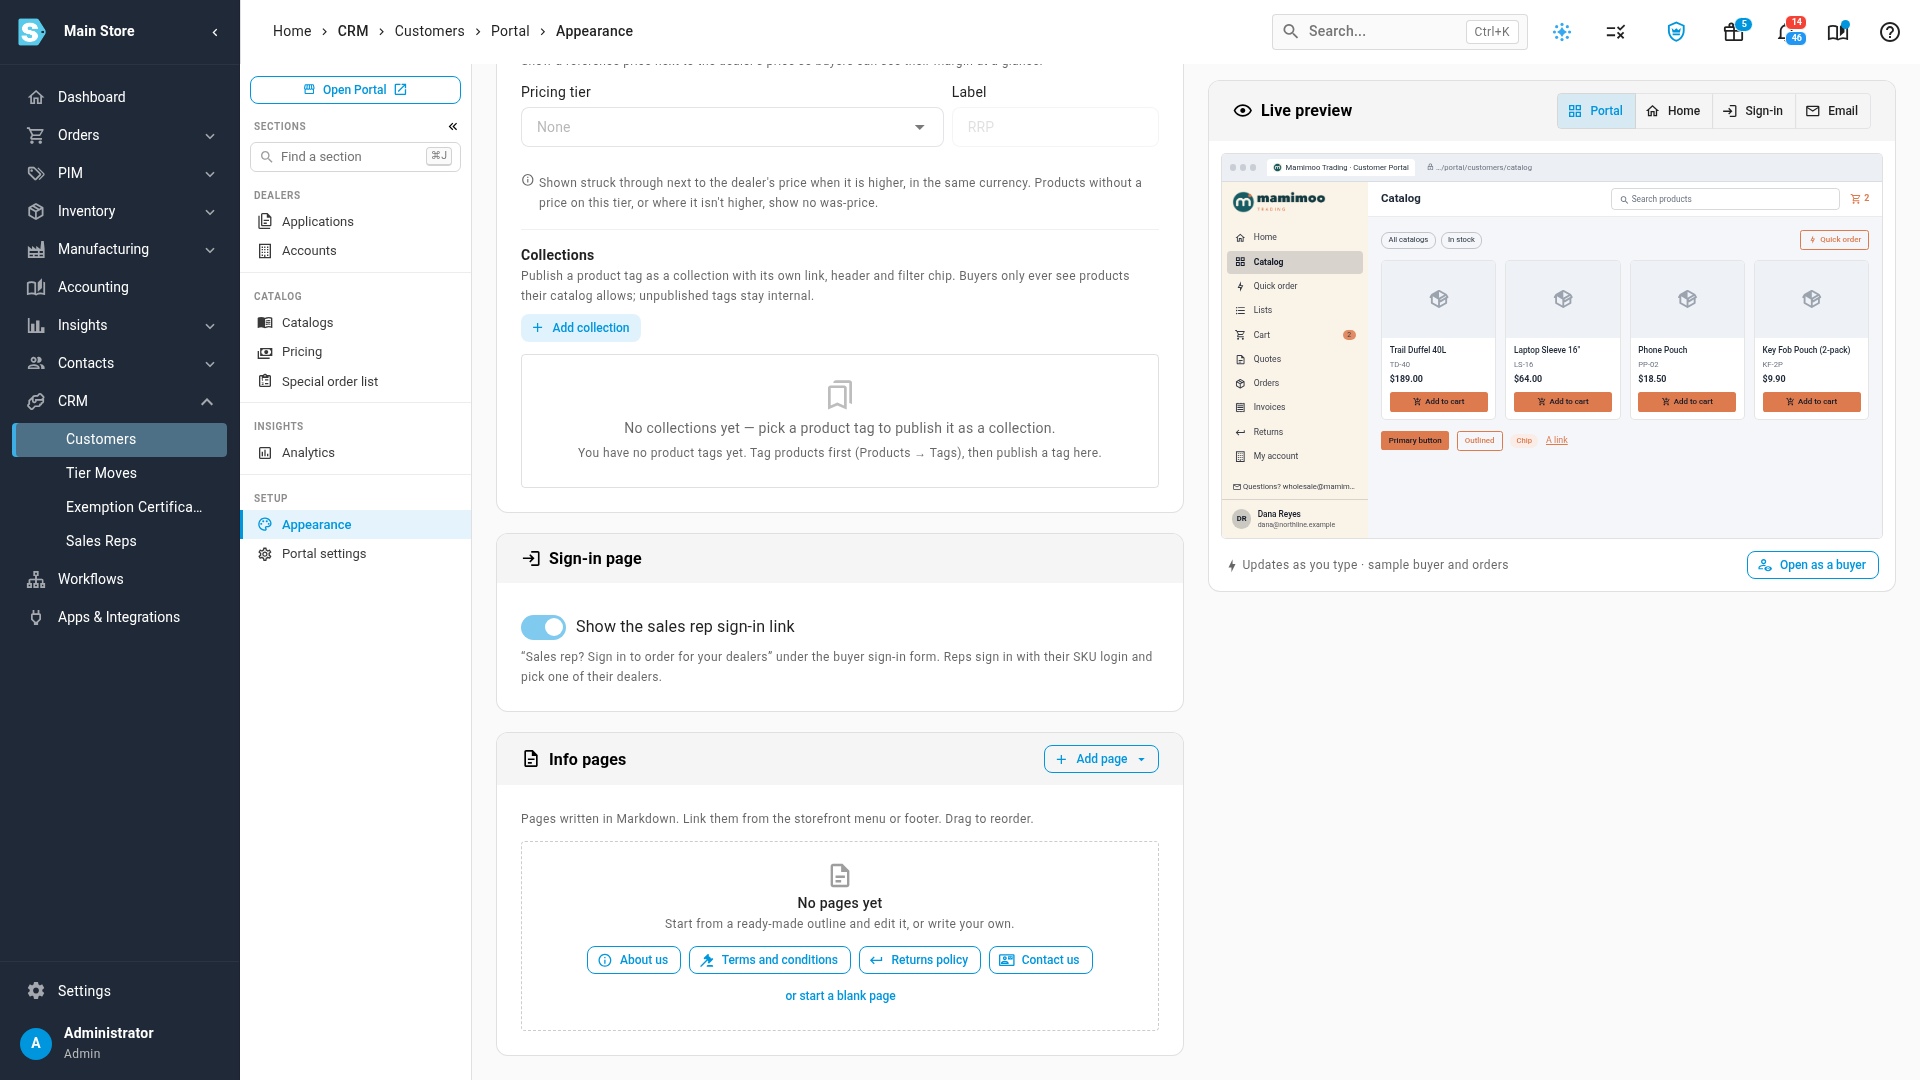
Scroll to the Info pages card. Until you add a page, it says No pages yet and offers the starters.
-
Click Add page and choose a starter, About us, Terms and conditions, Returns policy or Contact us, or Blank page. A starter is an outline with headings to fill in, not ready-made legal text.
-
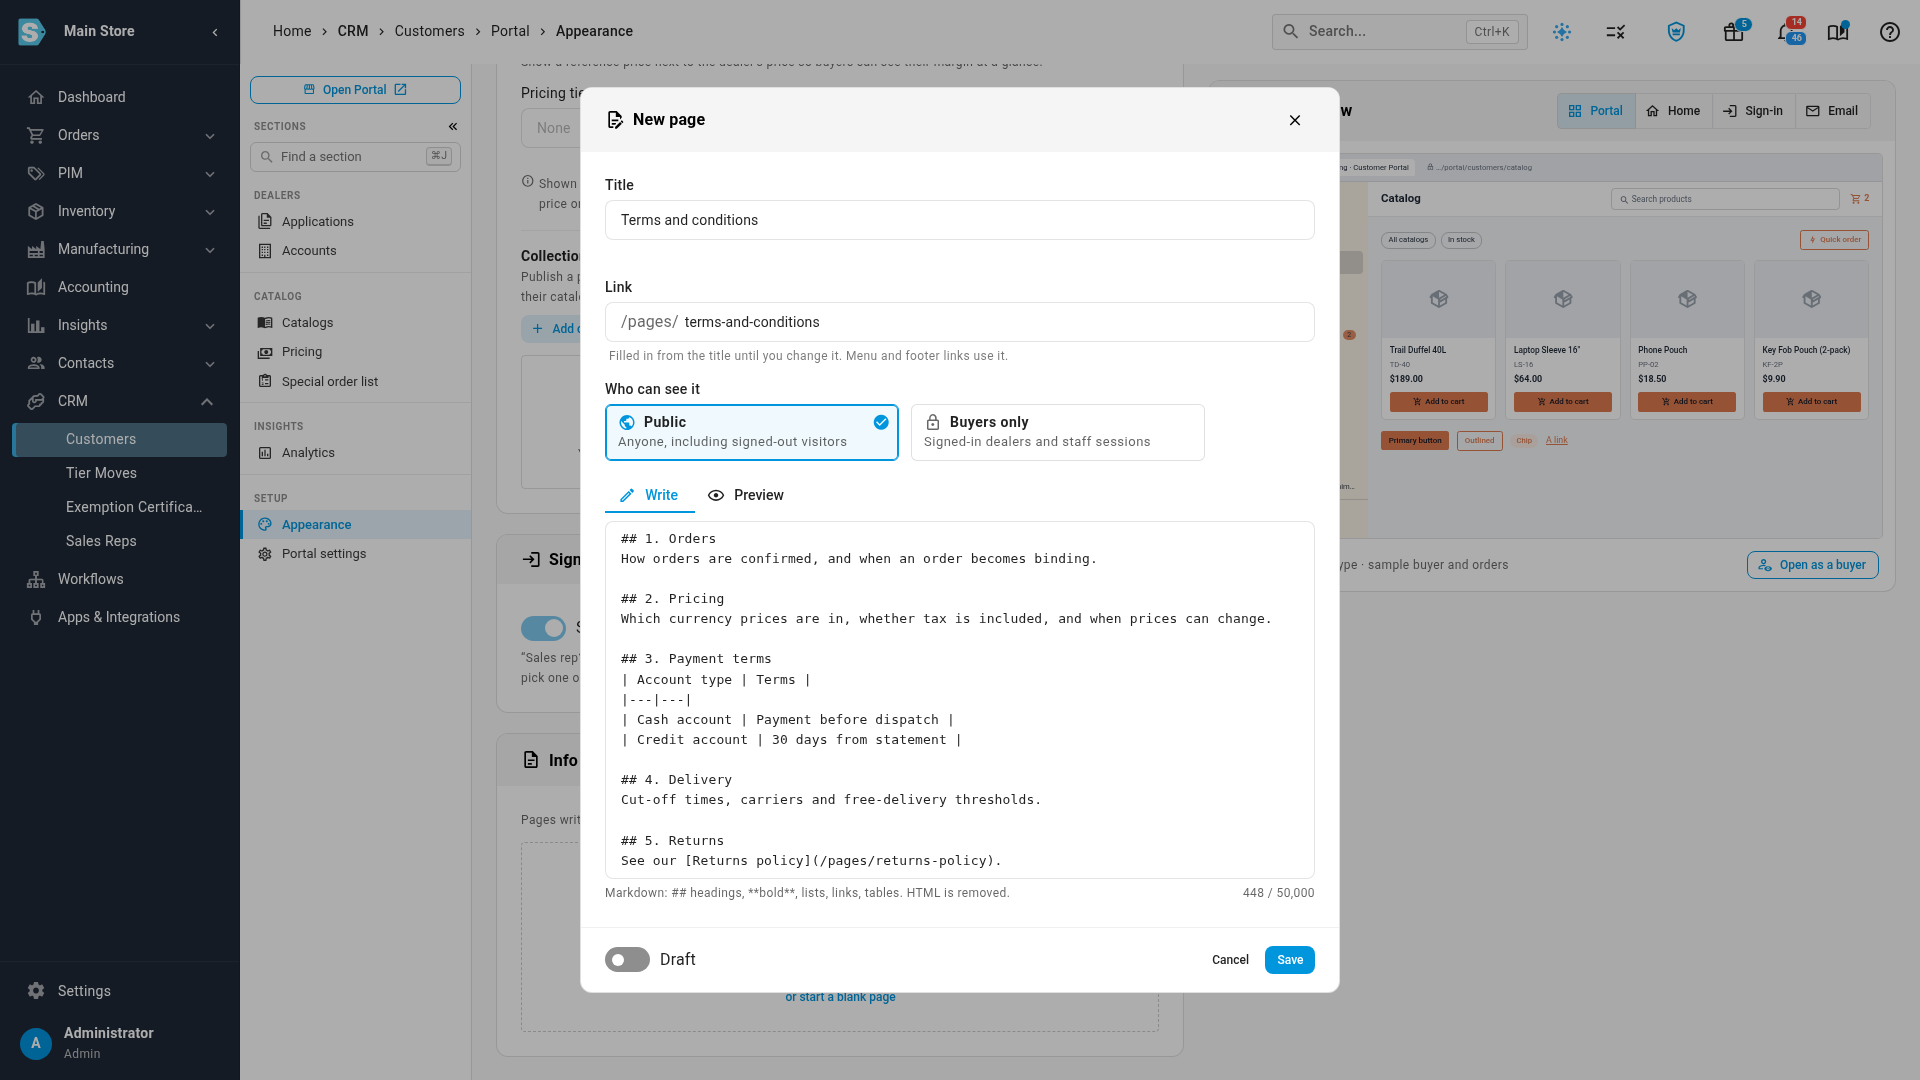
Check the Title. The Link fills in from it, as
/pages/<link>, until you change it. Menu and footer links use it. Use lowercase letters, numbers and dashes. -
Under Who can see it, choose Public or Buyers only.
-
Write the page in Markdown:
##headings,**bold**, lists, links and tables, up to 50,000 characters. HTML is removed. -
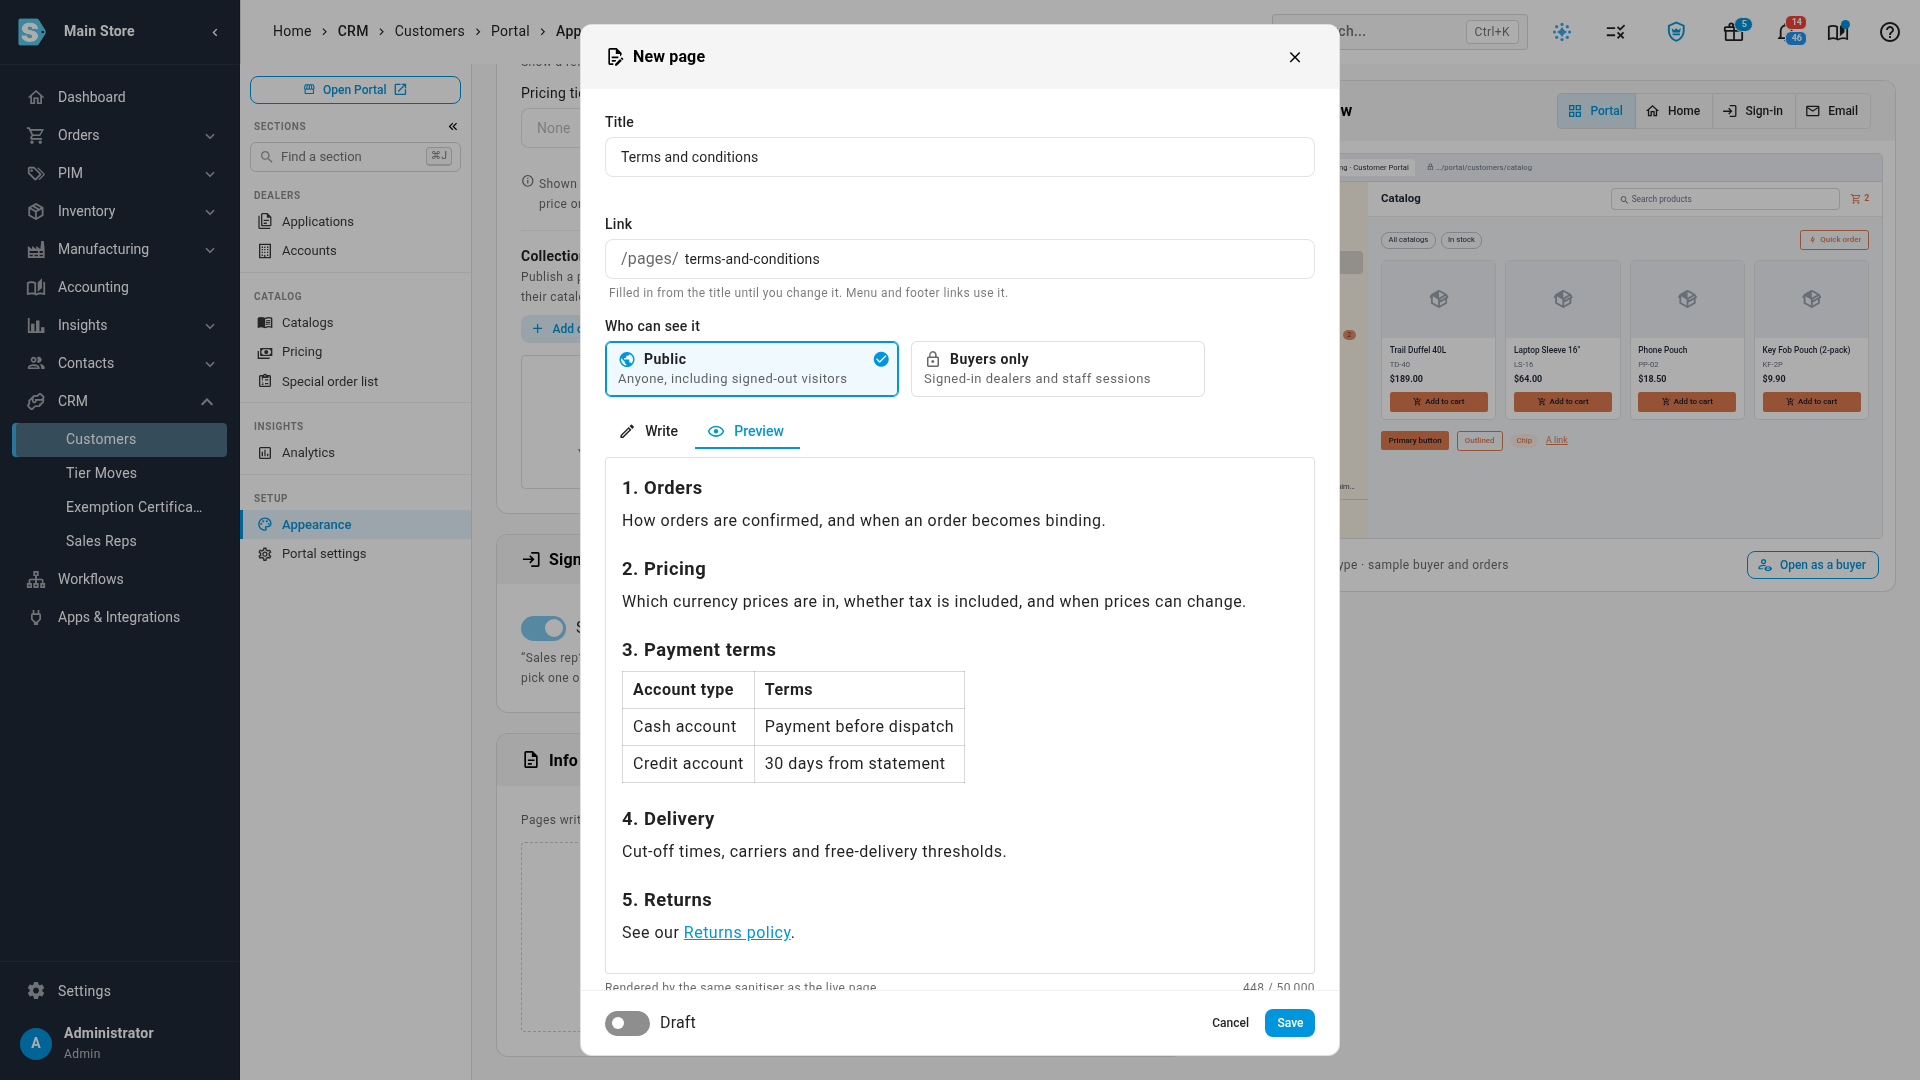
Click Preview to see the page exactly as buyers will.
-
Turn on Published, and click Save.
A page you save without publishing stays a Draft. Nobody can open it until you publish it.
Manage your pages
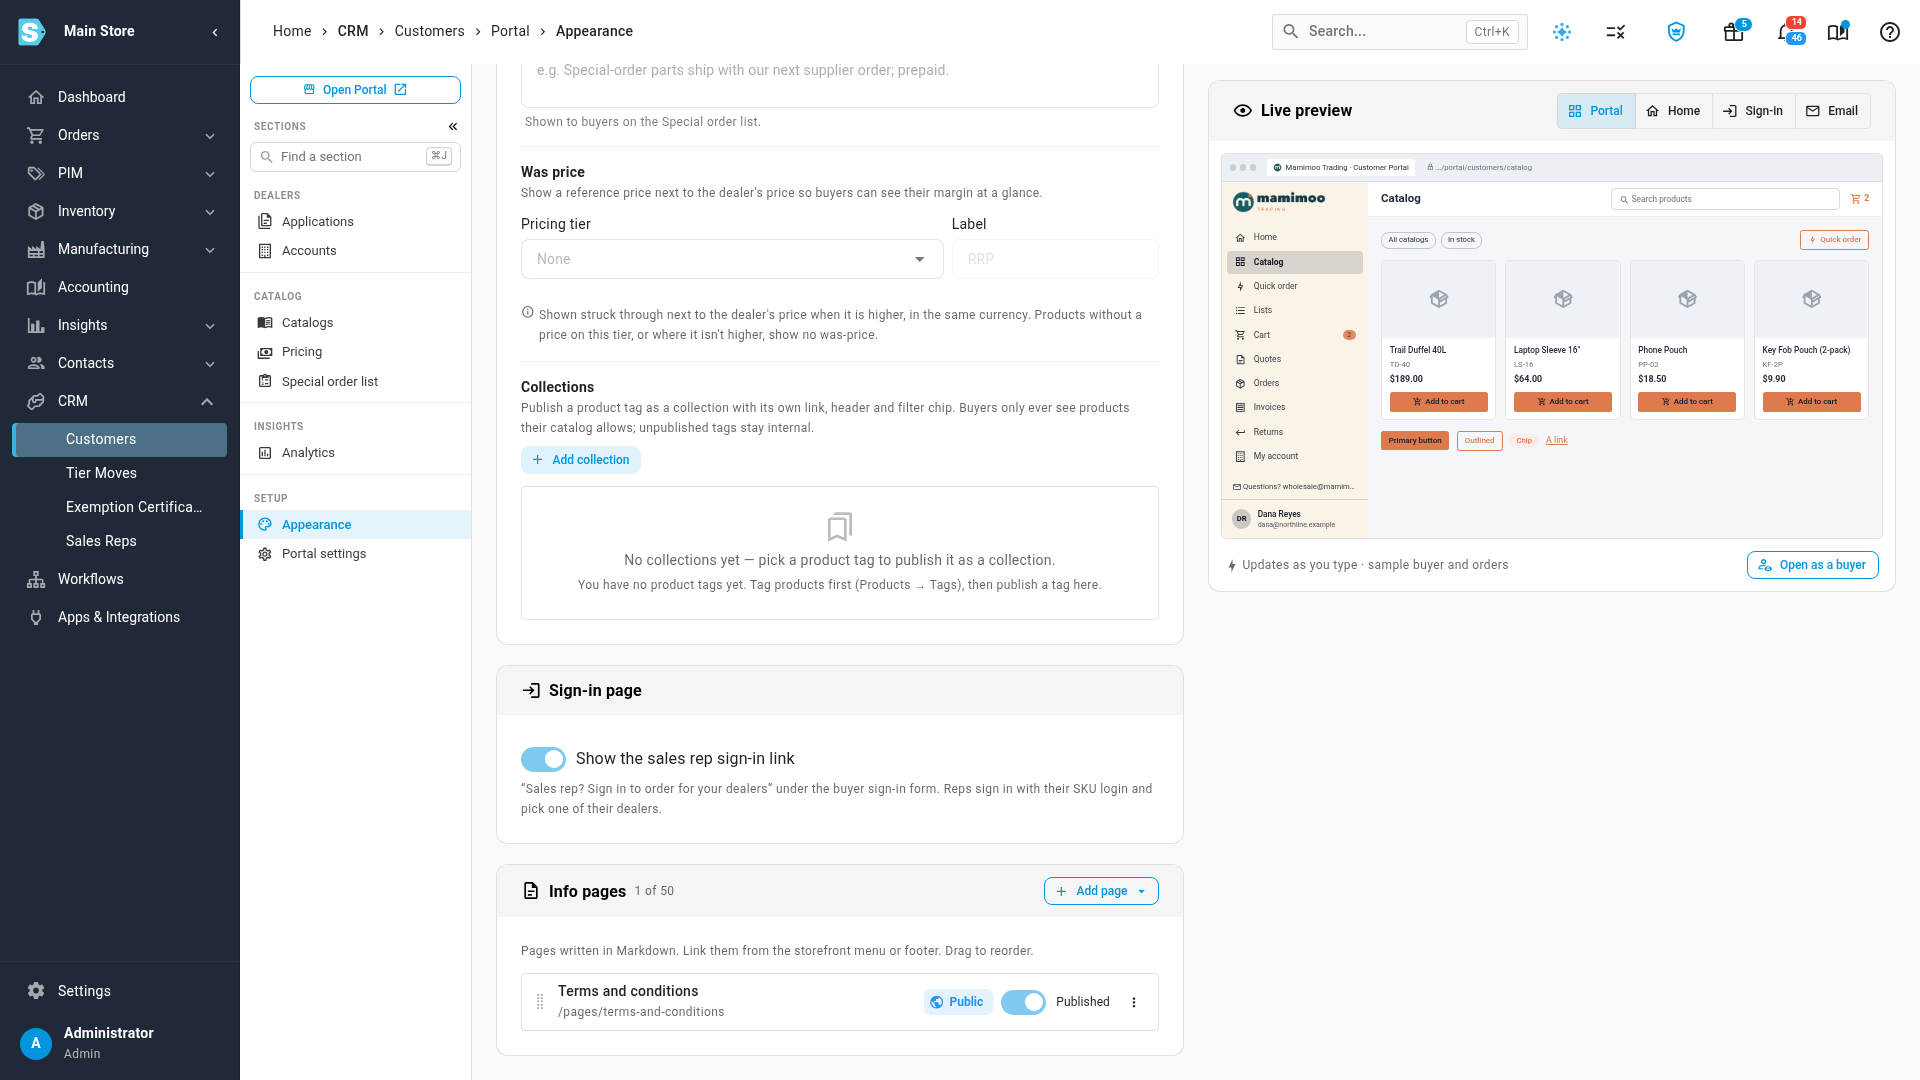
Each row shows the page's title, link and who can see it, with a Published switch.
- Drag rows by the handle to set their order.
- Use the row's menu to Edit the page, Copy link to paste it into an announcement or email, or Delete it. Deleting is permanent, and any menu or footer link to the page stops showing.
What buyers and visitors see
A page lives at /pages/<link> on your portal.
-
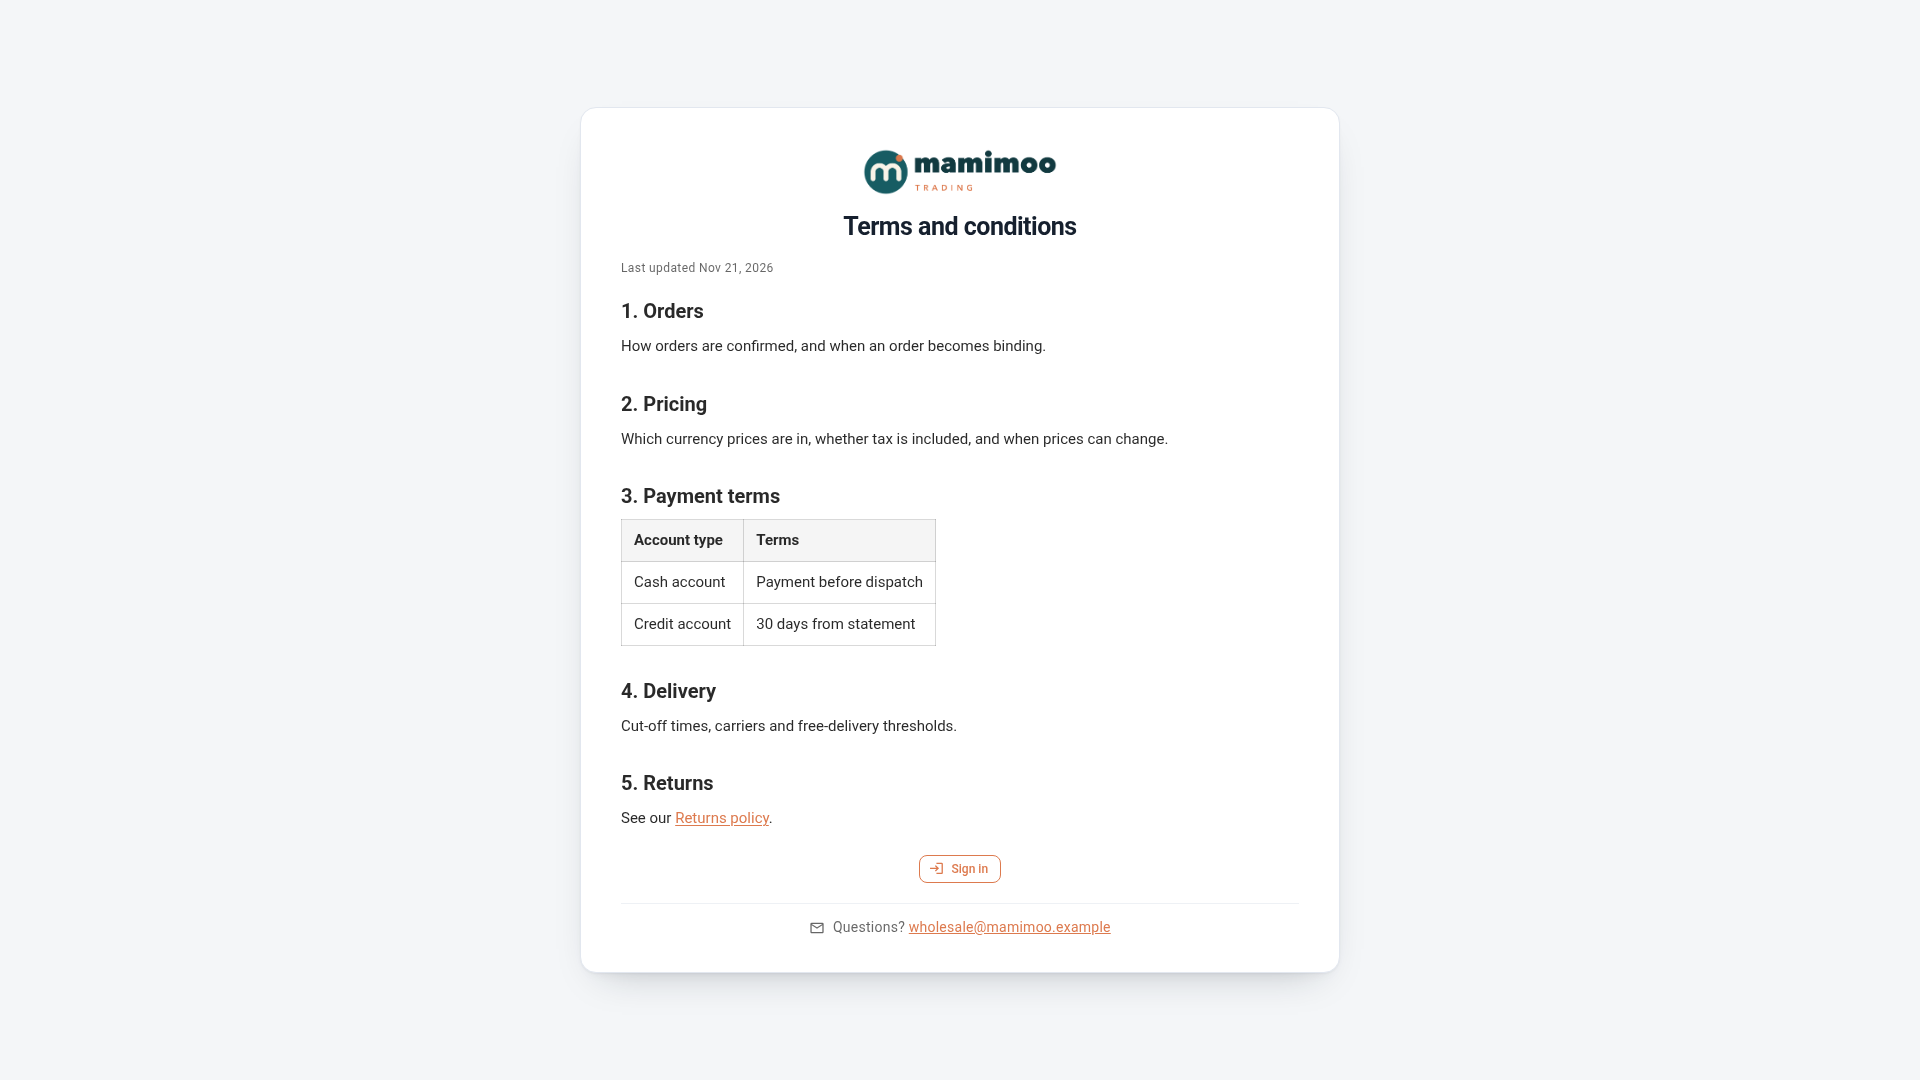
A Public page opens for anyone, with your portal's branding around it, signed in or not.
-
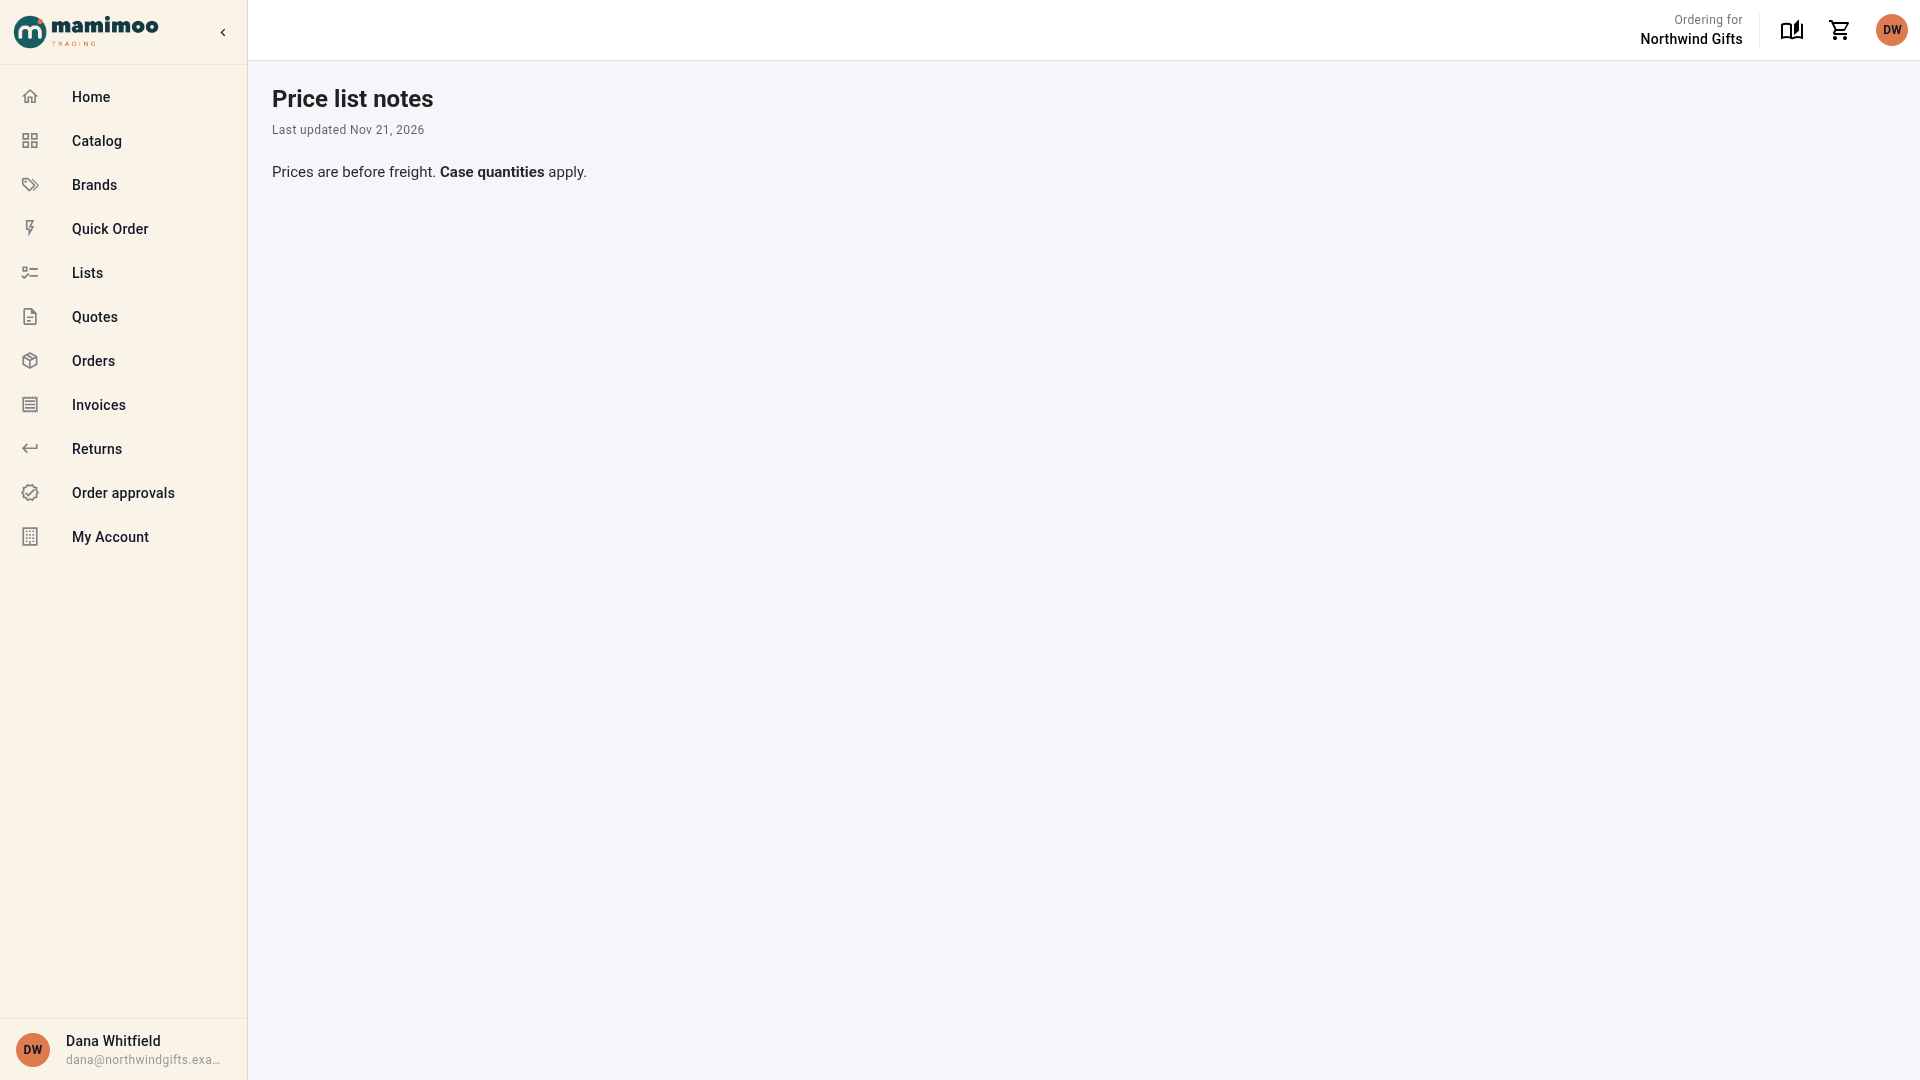
A Buyers only page asks a signed-out visitor to sign in, then opens.
-
A draft, deleted or unknown page shows "This page isn't available".
Staff viewing the portal as a buyer can open buyers-only pages too.
Next steps
- Brand your customer portal
- Set up your portal Home page, and link to a page from an announcement.
Video transcript
To add pages like your terms or returns policy, open CRM in the sidebar, and then choose Customers. Click the Portal tab at the top of the page. Then click the Appearance tab. Scroll down to the Info pages card, near the bottom of the page. Until you add one, it says there are no pages yet. The quickest start is a ready-made outline, such as the terms and conditions starter. It opens as a draft with headings to fill in. It's an outline, not legal text. The link comes from the title, and menus and footers use it. Under Who can see it, pick Public for anyone, or Buyers only for signed-in buyers. Terms should be public, so they're readable before an account is opened. Write the page in Markdown: headings, bold text, lists, links and tables. Click Preview to see the page exactly as buyers will. It's rendered the same way as the live page, tables included. Turn on Published, and then click Save at the bottom of the dialog. The page joins the list, with its link, who can see it, and its Published switch. A page you save without publishing stays a draft, which nobody can open until it's published. For a page only your dealers should read, click Add page. Then choose Blank page from the menu. Type a title for the page, and the link fills in from it as you type. Then, under Who can see it, choose Buyers only. Write the page in the box below, the same way as before, with headings and bold text where you need them. Then turn on Published, and click Save at the bottom of the dialog. Once it saves, the list shows a second page, and this one is marked for buyers only. A public page opens even for visitors who haven't signed in, with your branding around it. A buyers-only page asks visitors to sign in first. Once a buyer signs in, they go straight to the page they asked for.