Connect QuickBooks Desktop
If your books live in QuickBooks Desktop rather than QuickBooks Online, SKU.io sends its entries there through the QuickBooks Web Connector, a free Intuit app that runs on the PC with QuickBooks. You add SKU.io to the Web Connector once, with a connector file and a password. After that, the Web Connector checks in on a schedule and picks up whatever SKU.io has waiting.
Before you begin
- QuickBooks Desktop Pro, Premier or Enterprise, 2014 or later, US edition. Canadian and UK editions aren't supported.
- You can sign in to QuickBooks as the Admin, in single-user mode. You only need this for the first run, so QuickBooks can allow SKU.io access.
- The QuickBooks Web Connector is installed on that PC. It ships with most QuickBooks Desktop installs, and is a free download from Intuit.
- The PC stays on and signed in when syncs are due. The Web Connector runs there, and SKU.io can only reach QuickBooks when it checks in.
- No other accounting connection is active. SKU.io keeps one set of books, so disconnect QuickBooks Online or Xero first.
- You need permission to manage integrations in SKU.io.
Steps
-
Go to Apps & Integrations, type QuickBooks into the search box, and choose QuickBooks Desktop.
-
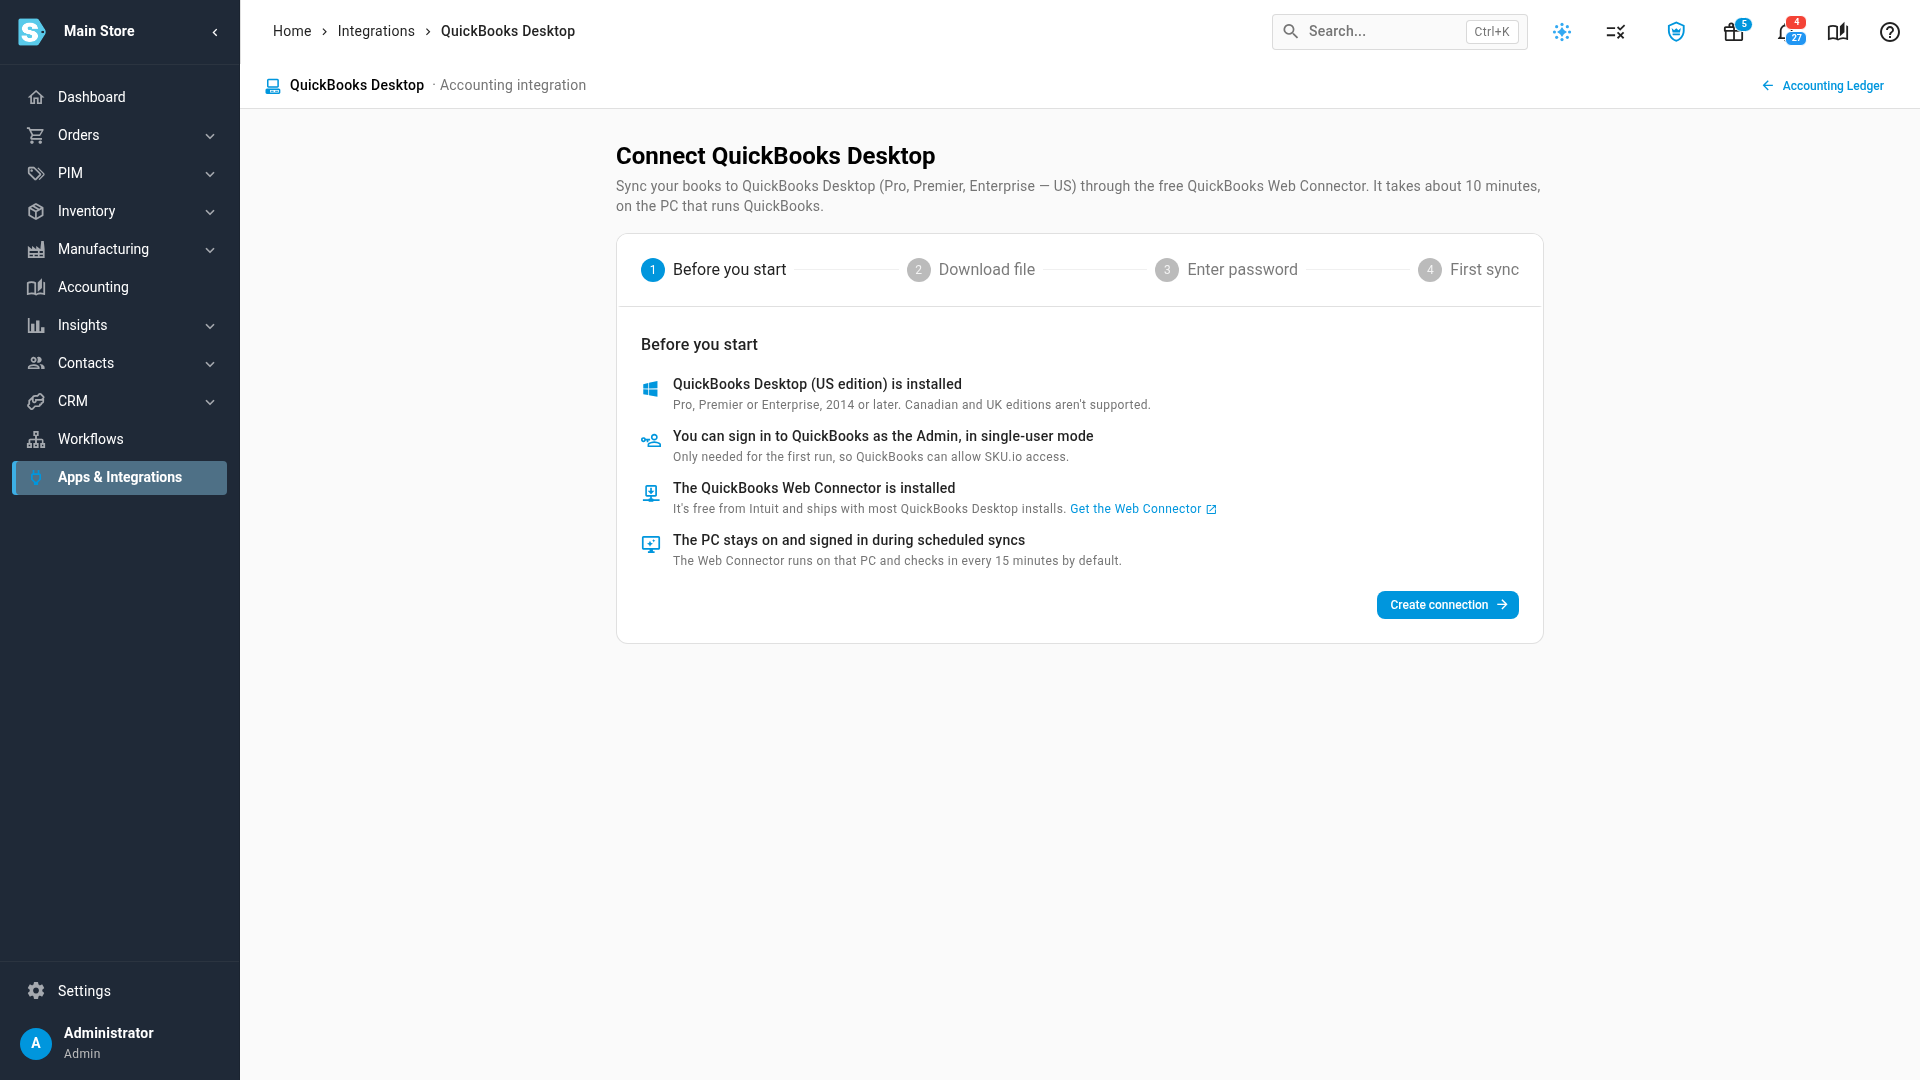
Click Connect QuickBooks Desktop. The connection guide opens on Before you start, which lists what the QuickBooks PC needs.
-
Click Create connection. SKU.io creates the connection and its Web Connector sign-in.
-
Click Download SKU.io.qwc, and open the file on the PC that runs QuickBooks. The Web Connector opens and asks QuickBooks to allow access. Choose "Yes, always; allow access even if QuickBooks is not running" and select the admin user. Then click Next in SKU.io.
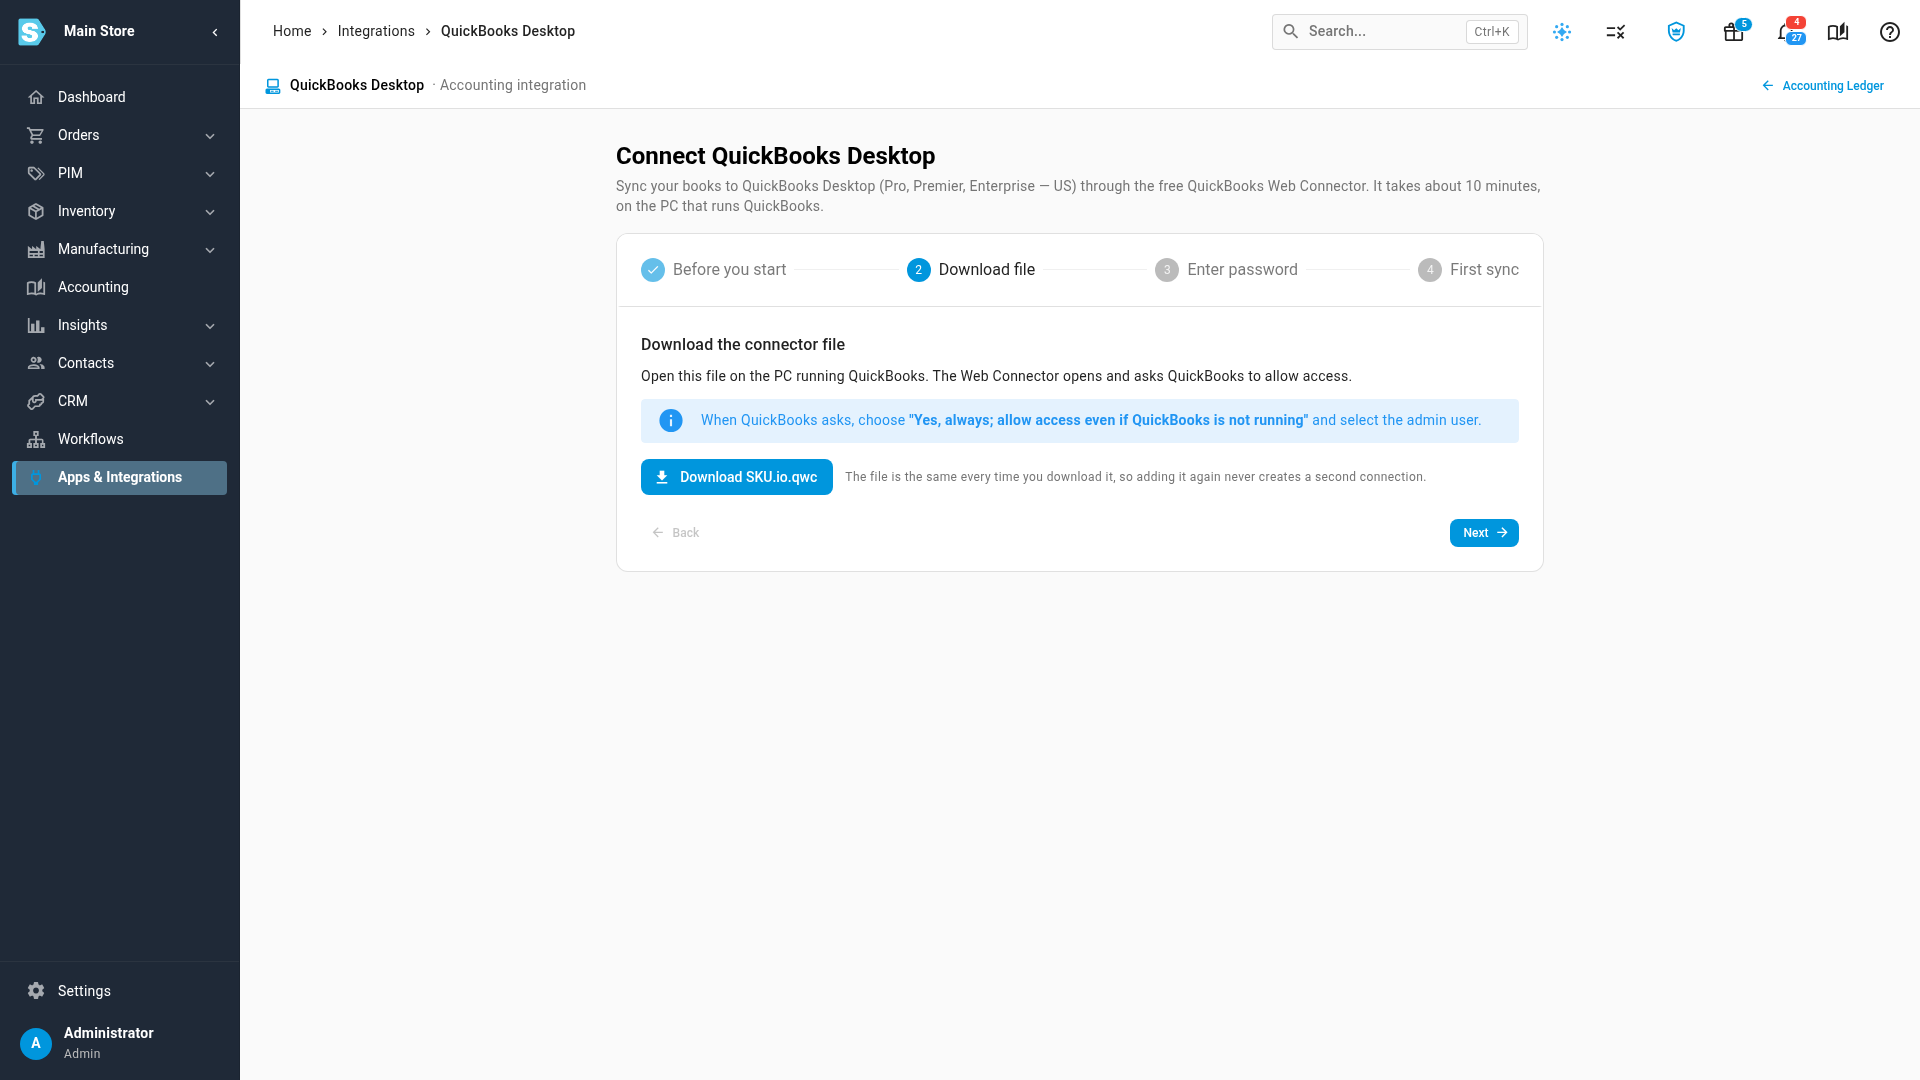
The file is the same every time you download it, so adding it again never creates a second connection.
-
Copy the password from the Enter the password step. In the Web Connector, paste it into the Password column next to SKU.io, then click Yes to save it.
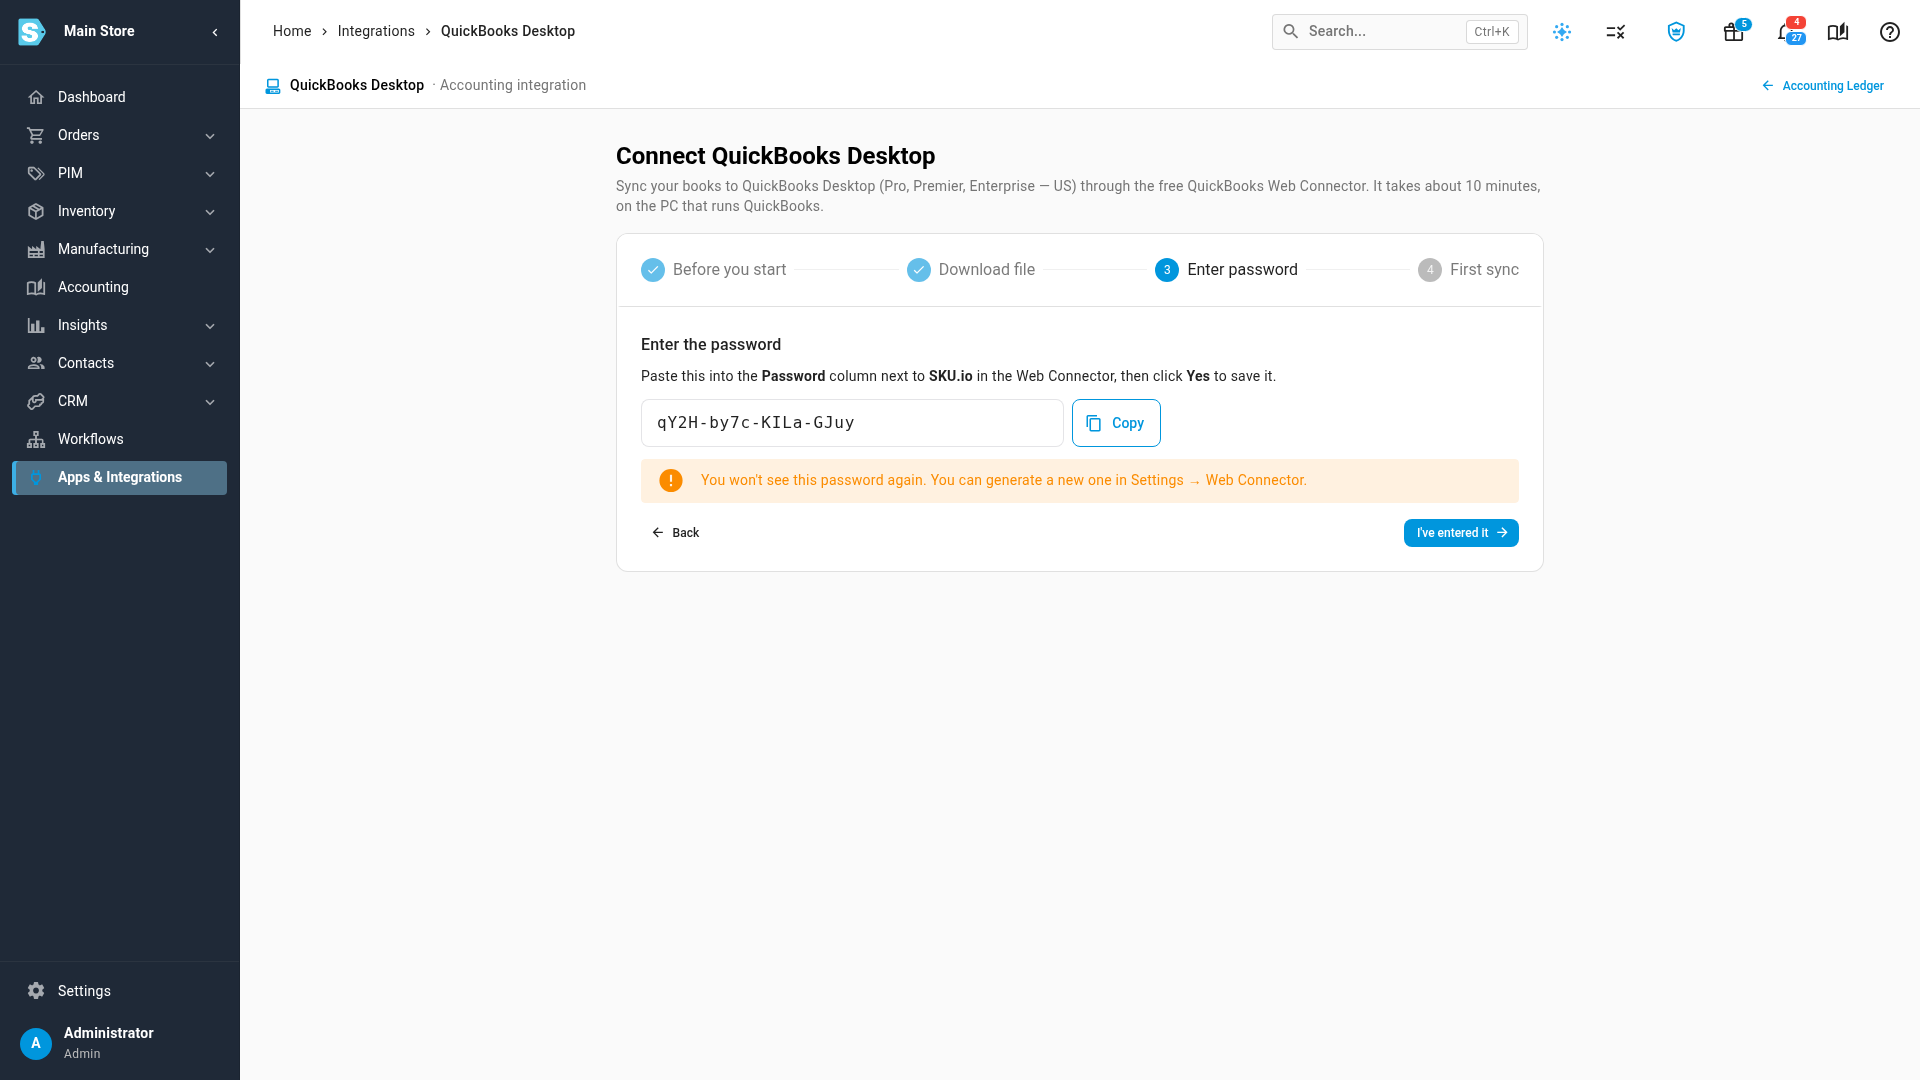
SKU.io shows the password only once. If you lose it, generate a new one under Settings → Web Connector.
-
Click I've entered it.
-
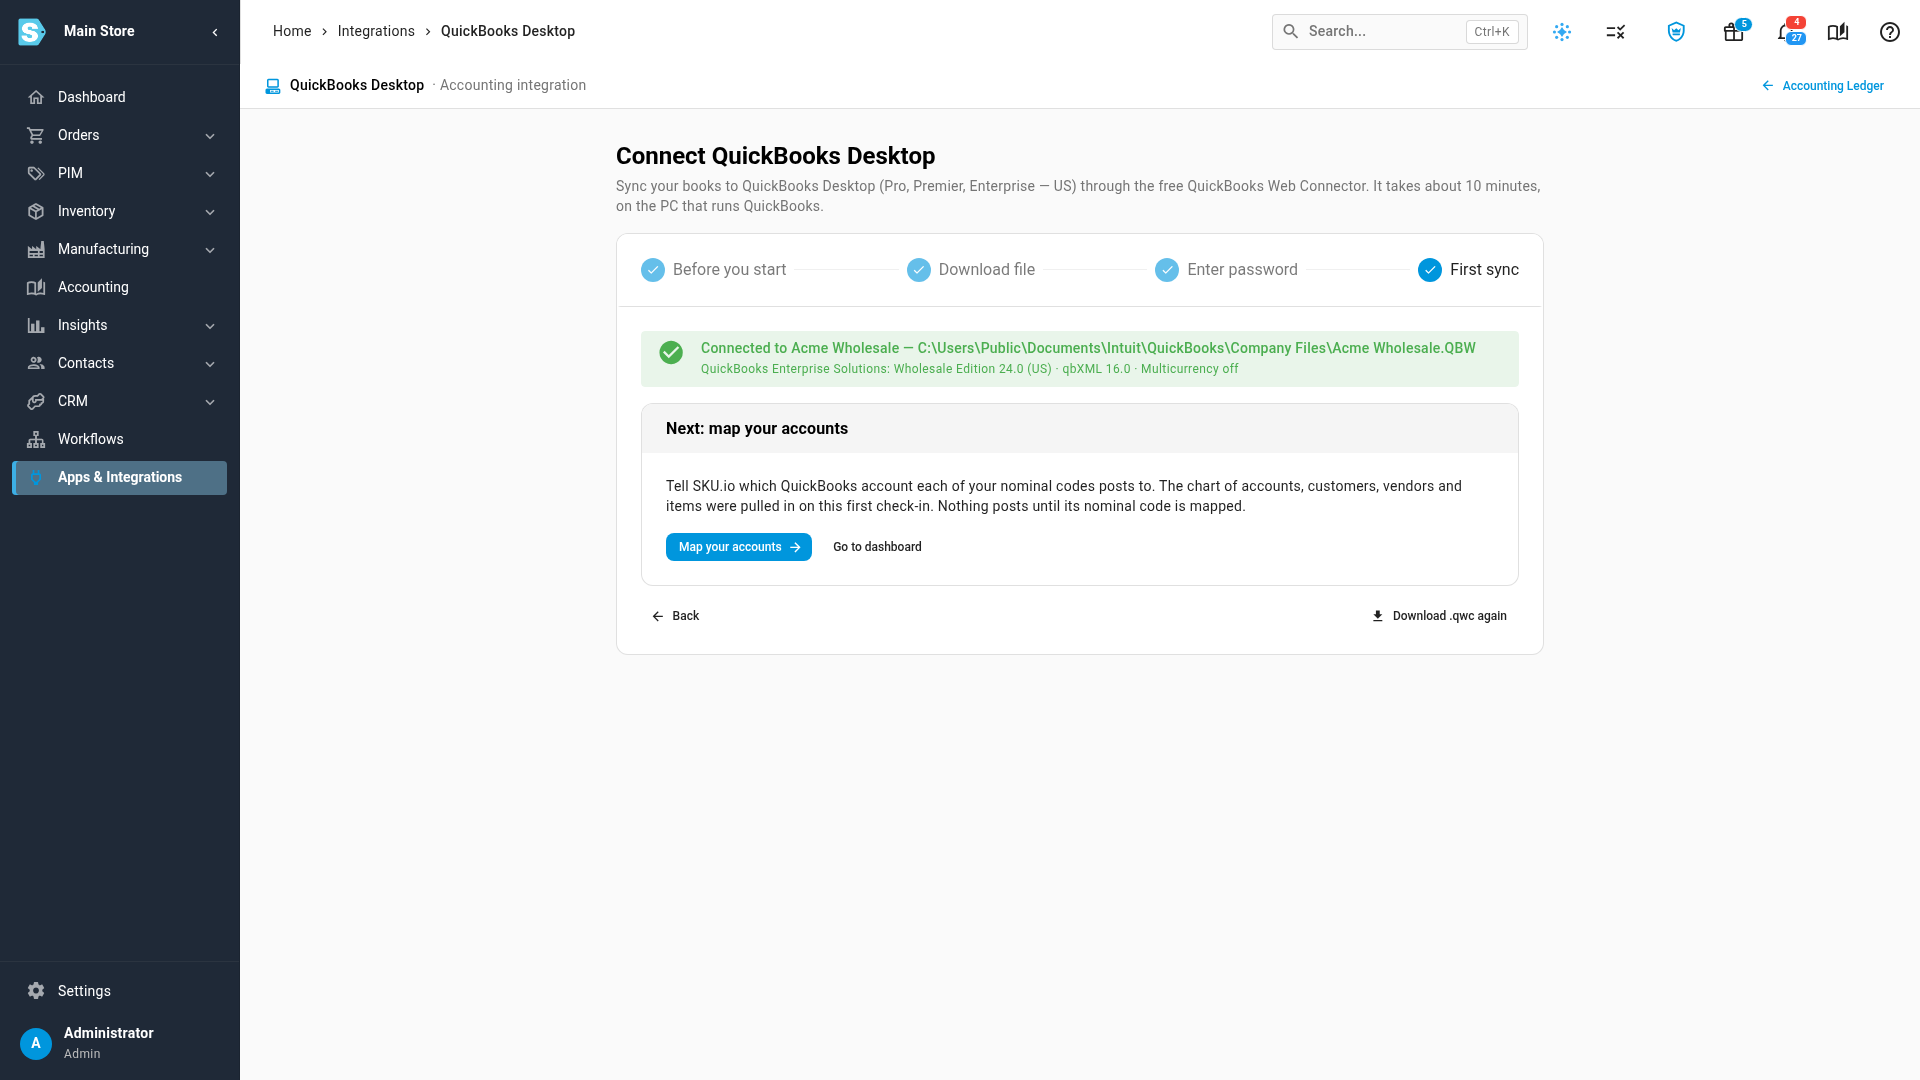
In the Web Connector, tick SKU.io and click Update Selected. The First sync step waits for the check-in and updates by itself. When QuickBooks checks in, it shows the company file the connection is now paired with, and the first check-in brings in your chart of accounts, customers, vendors and items.
-
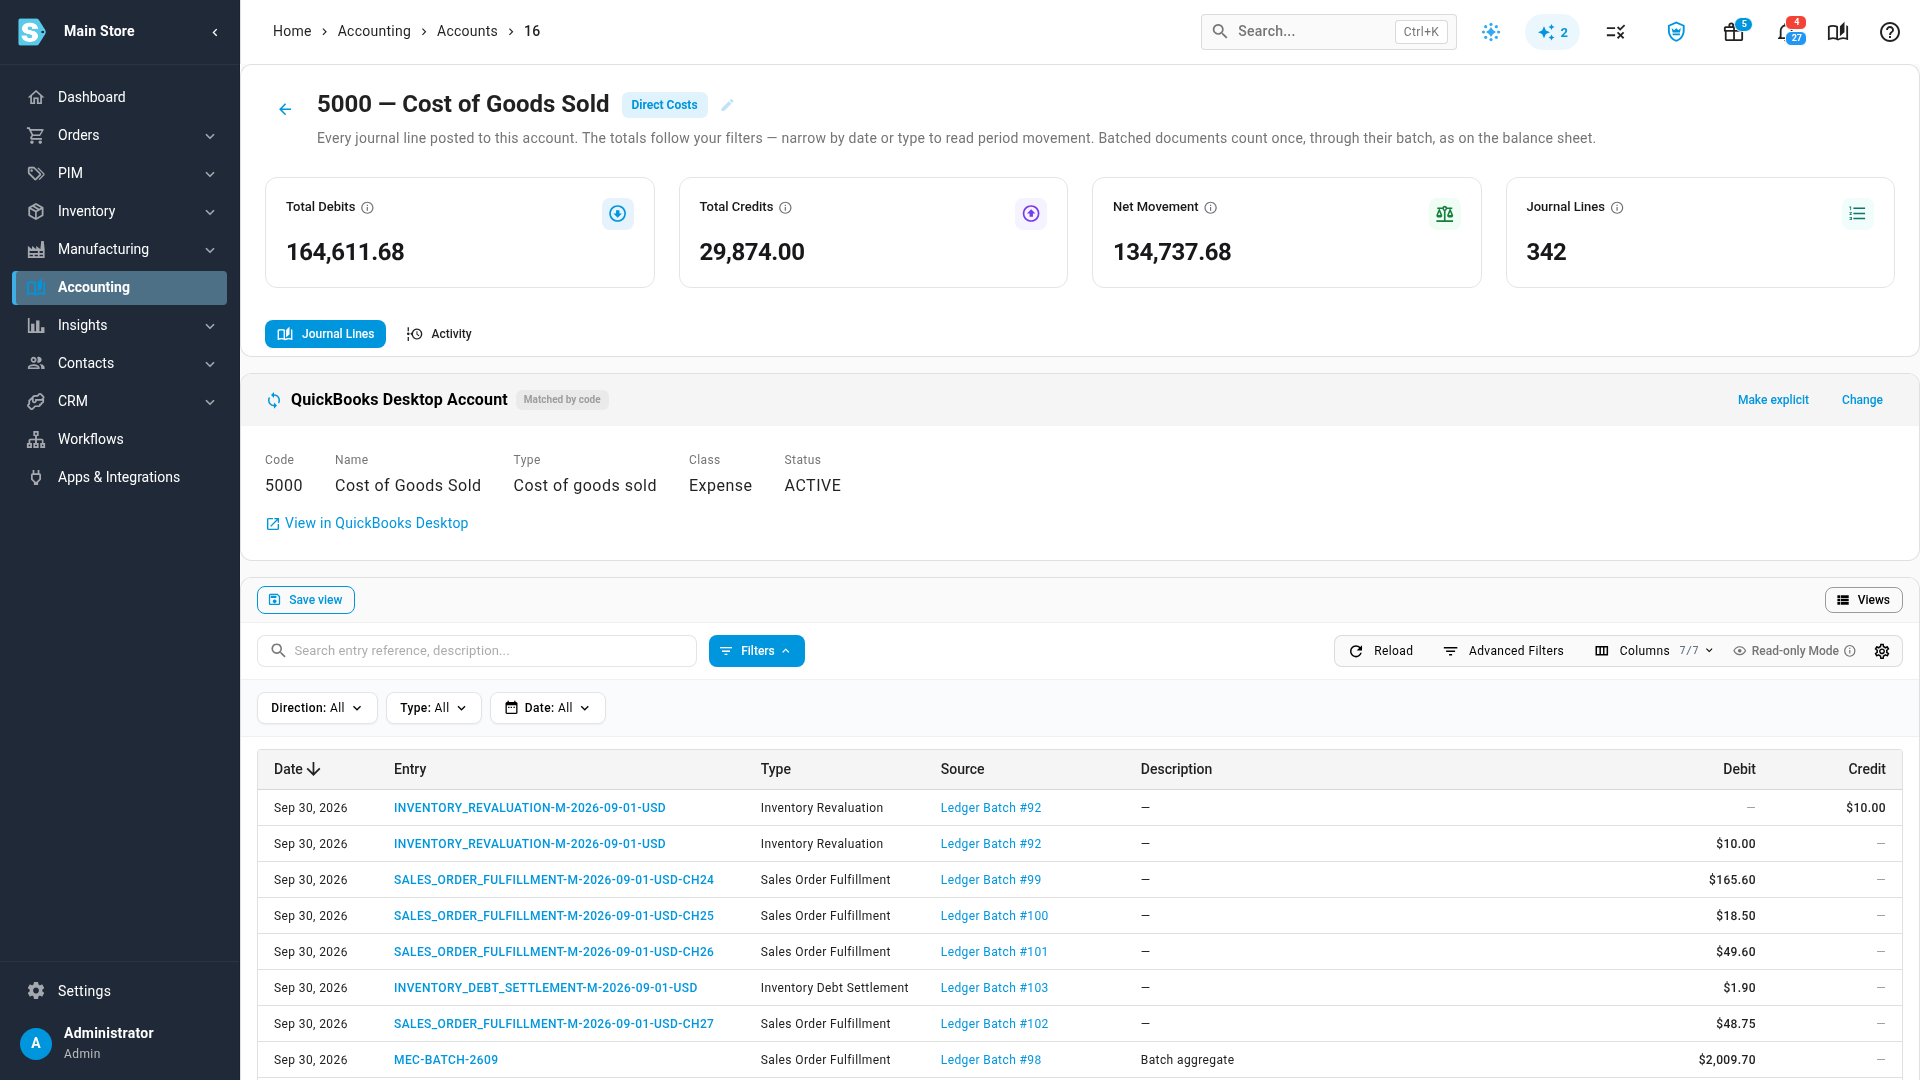
Click Map your accounts to check where each nominal code posts. A nominal code posts to the QuickBooks account with the same number or name. Open a code to see its QuickBooks Desktop Account: Matched by code means it was paired that way. To pair a different account, click Change.
From now on, SKU.io sends entries to QuickBooks Desktop the next time the Web Connector checks in, every 15 minutes by default. Until then, an entry shows Waiting for Web Connector. For what's sent, and what to do when a check-in fails, see How QuickBooks Desktop syncs.
Read the dashboard
Open the connection from Apps & Integrations → QuickBooks Desktop. It opens on Dashboard.
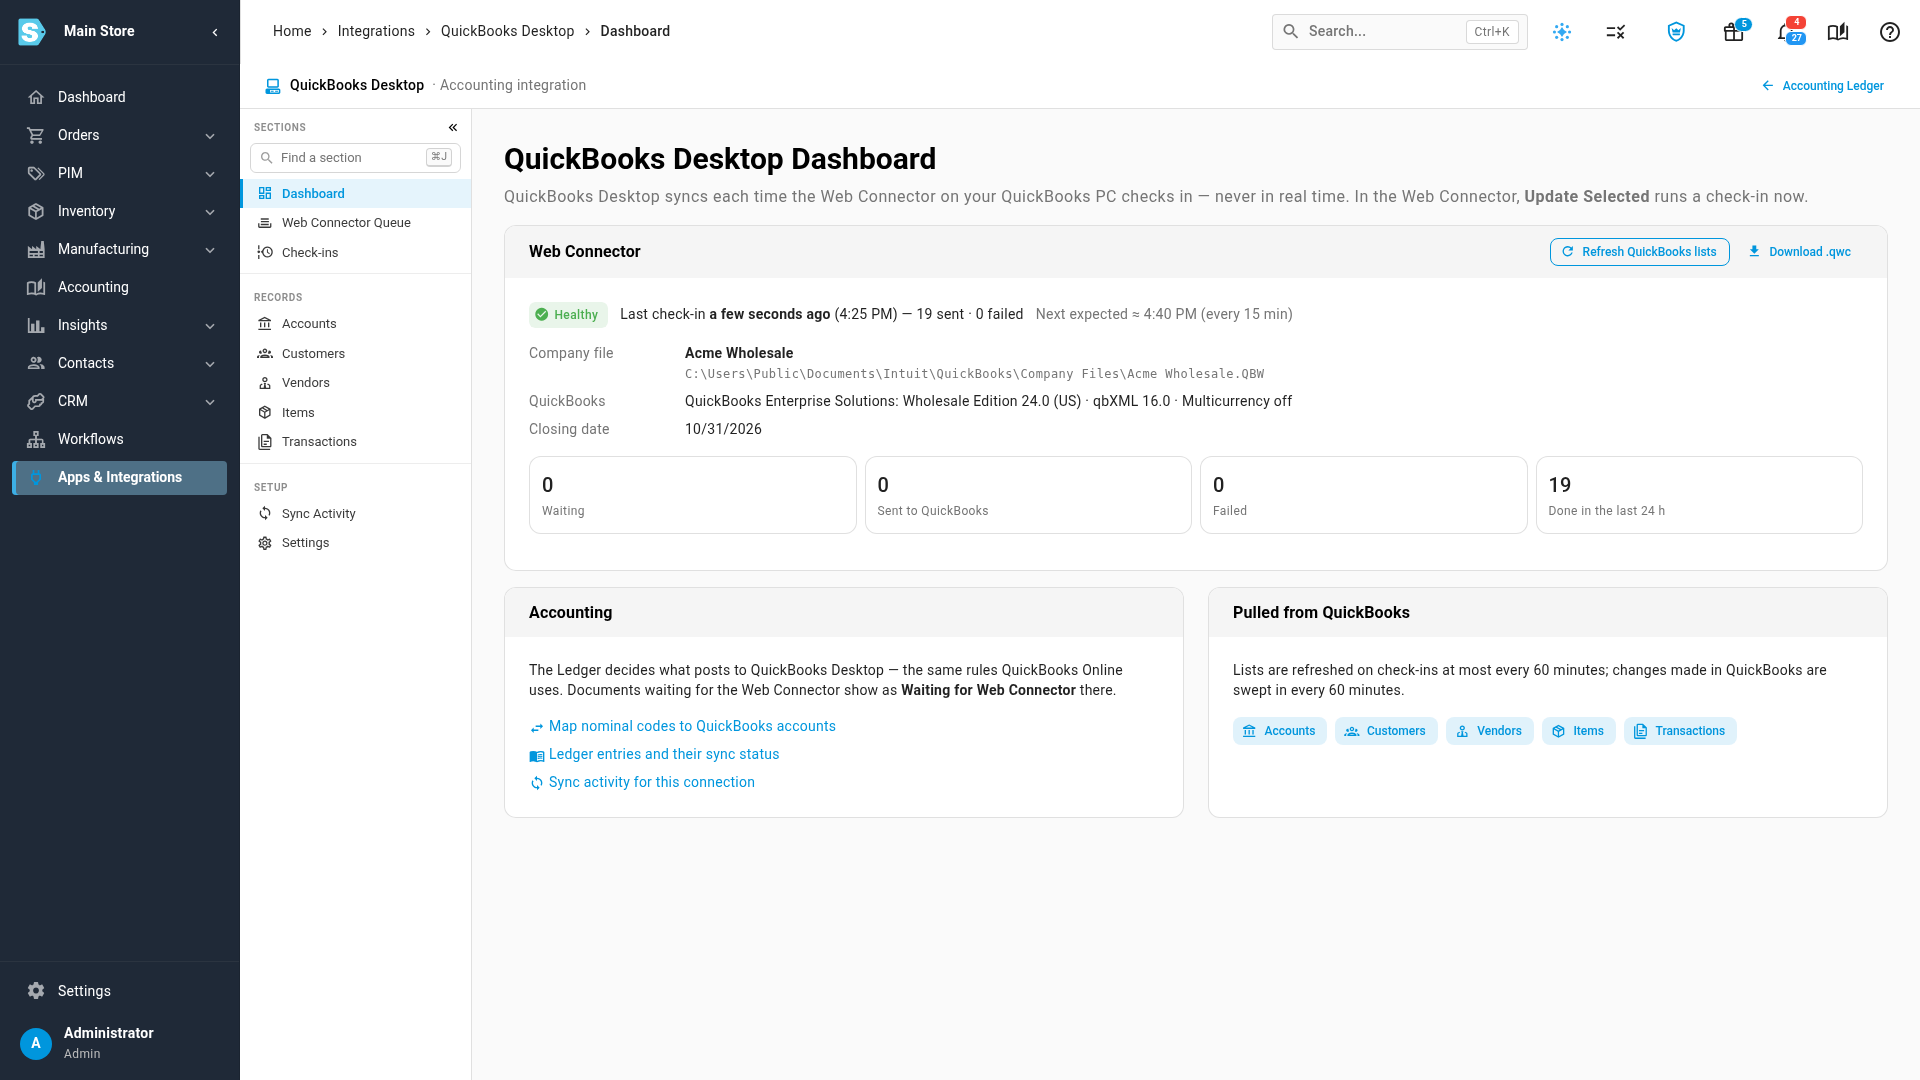
The Web Connector card tells you whether syncing is working:
| Part | What it tells you |
|---|---|
| Status | Healthy when the last check-in went well and nothing is waiting, Waiting while requests are queued, Error when the last check-in failed, and Overdue when the Web Connector has missed three check-ins in a row. |
| Last check-in | When the Web Connector last signed in, and how many requests it sent and how many failed. Next expected is when the next check-in is due. |
| Company file | The company file this connection is paired with. SKU.io only ever writes to this file. |
| QuickBooks | Your QuickBooks edition and version, and whether multiple currencies are on. |
| Closing date | QuickBooks' closing date. Nothing dated before it can be sent. |
| Waiting, Sent to QuickBooks, Failed, Done in the last 24 h | Counts from the Web Connector queue. |
Refresh QuickBooks lists pulls your accounts, customers, vendors and items again on the next check-in, which is useful after you add accounts in QuickBooks. Download .qwc downloads the connector file again.
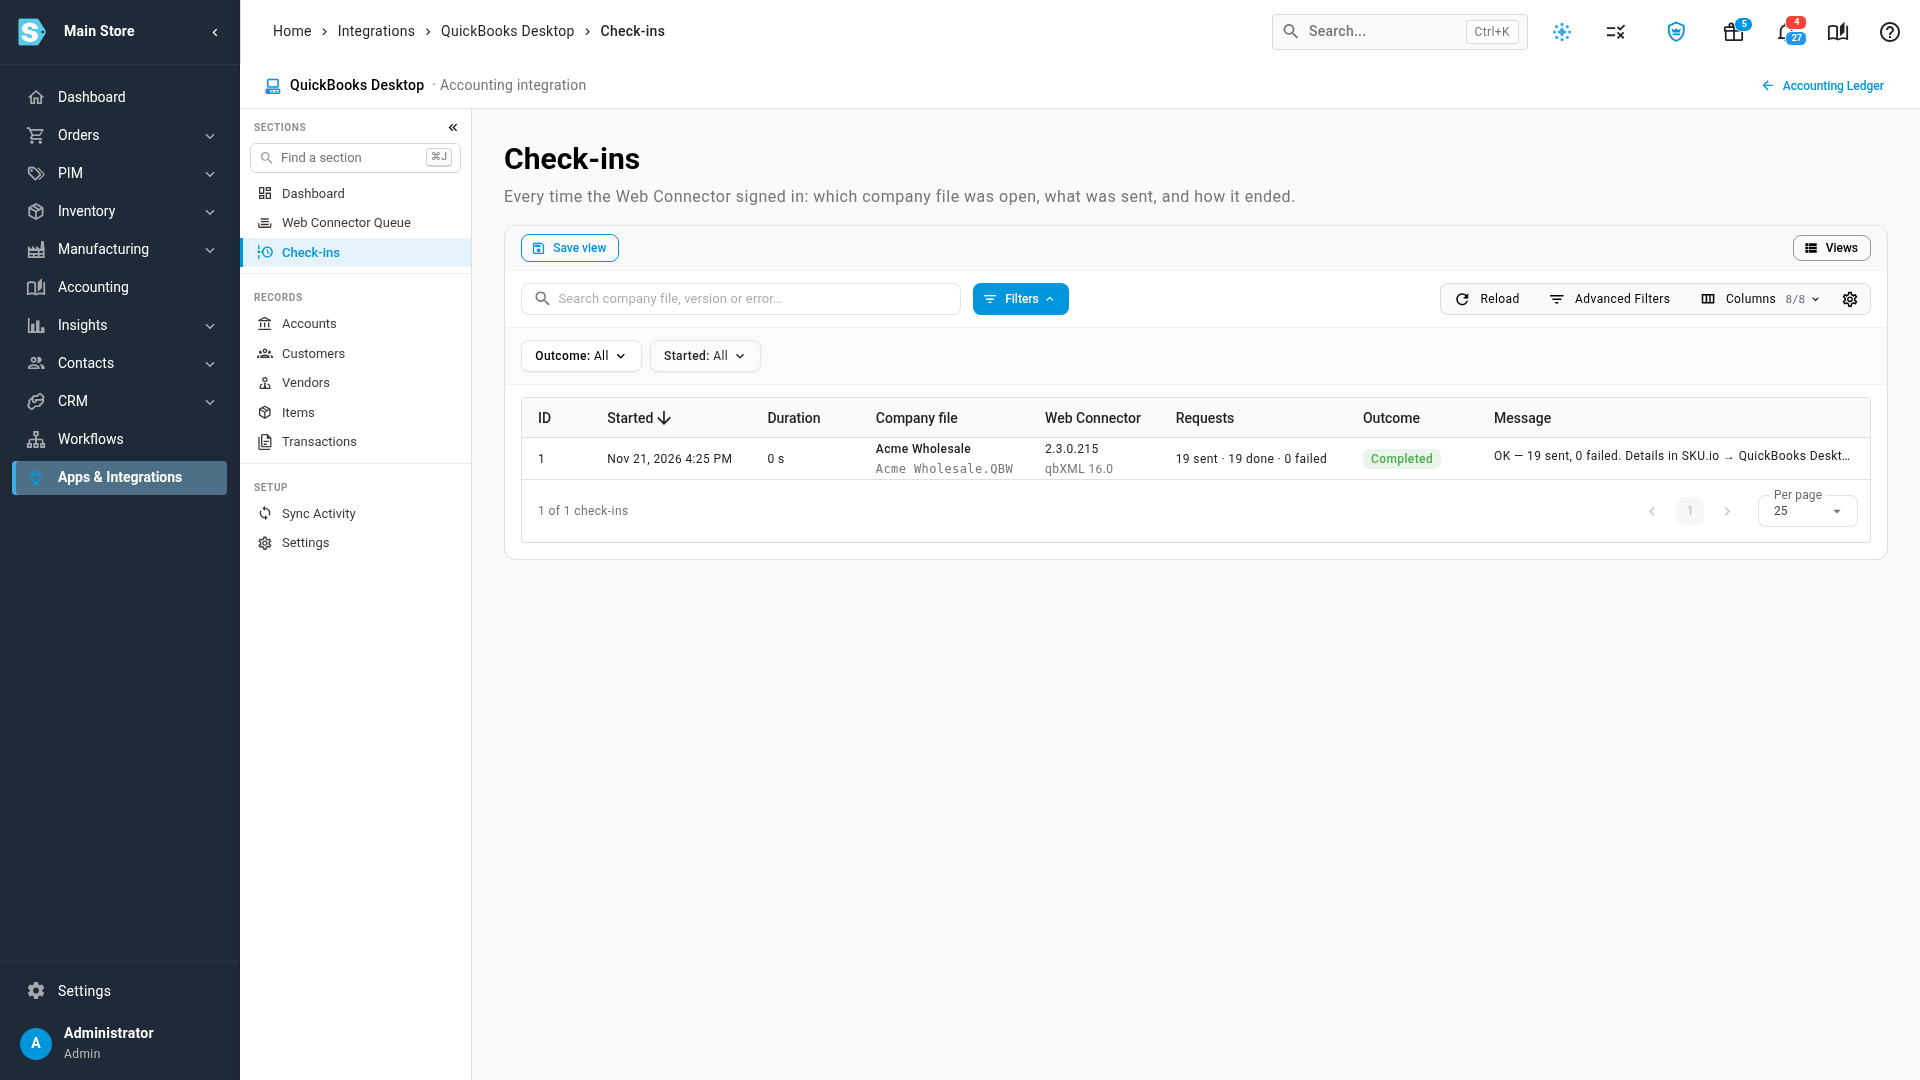
The Web Connector Queue and Check-ins pages, in the menu on the left, list every request SKU.io sends and every time the Web Connector signed in.
Choose what QuickBooks receives
-
Open Settings. It starts on General.
-
To also send purchase orders, switch on Send purchase orders to QuickBooks Desktop, then click Save Changes. It's off by default. Purchase orders don't post to the books, and QuickBooks can't receive stock against them, so turn it on only if your accountant wants to see open purchase orders in QuickBooks. SKU.io adds an order when it's submitted, and updates or closes it there afterwards.
-
Open Web Connector under Settings to see the connection's Username, generate a new password with Regenerate password, or download the connector file again.
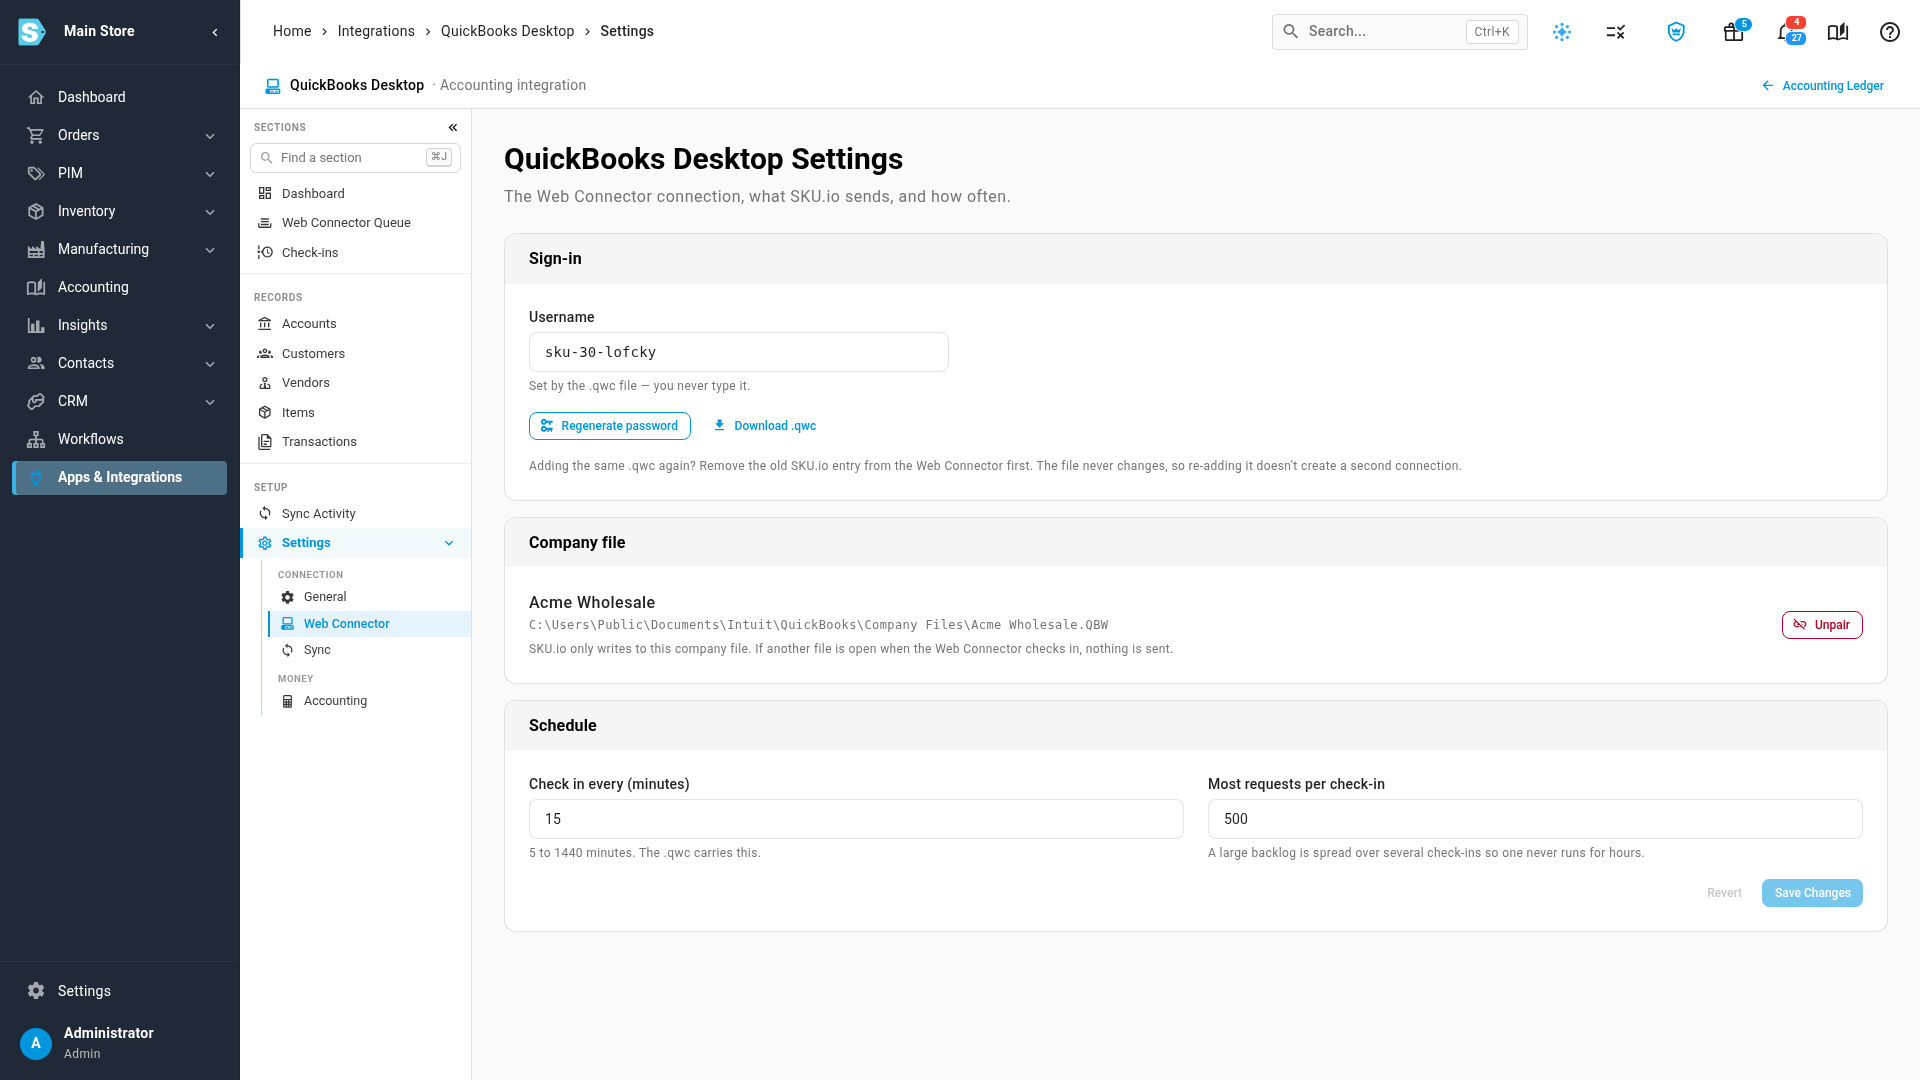
The Web Connector settings also hold:
- Company file, with Unpair. Unpair only if you've moved to a different company file: the next check-in pairs whichever file is open.
- Check in every (minutes), from 5 to 1440. The connector file carries this interval, so after you change it, add the file to the Web Connector again or change Auto-Run there.
- Most requests per check-in, 500 by default. A large backlog is spread over several check-ins, so no single one runs for hours.
Sync under Settings holds Automatic Sync by Transaction Type: switch on Auto-Sync for each kind of entry you want sent on its own. A kind that's off is only sent when you click Sync Now on an entry. Accounting links to the settings that live in Accounting → Settings: nominal codes, sales tax, and QuickBooks classes.
To stop syncing, open Settings → General, click Disconnect, and type DISCONNECT to confirm. Requests waiting in the queue are cancelled, and entries waiting for the Web Connector move to Needs Attention. Nothing is deleted in QuickBooks.
Next steps
- How QuickBooks Desktop syncs: what's sent, the queue, and how to fix a failed check-in.
- What syncs to your accounting provider: what each entry becomes in your books.
- Choose who calculates tax: sales tax settings.
Video transcript
To connect your desktop books, open Apps and Integrations from the menu on the left. Type QuickBooks into the search box, and choose the Desktop edition. Then click the blue Connect button, and the connection guide opens. The first step lists what the PC that runs QuickBooks needs. That's a US edition of QuickBooks Desktop, and the Admin sign-in. It also needs the free Web Connector from Intuit. And the PC has to stay on and signed in when syncs are due. When all of that's ready, click Create connection to set up the sign-in. Next, download the connector file, and double-click it on that PC. The Web Connector starts, and QuickBooks asks whether to allow access. Choose Yes, always, and select the admin user. When the file is added, come back to this page and click Next. This password is shown only once, so copy it now. In the Web Connector, paste it into the Password column for this connection. Then click Yes, and the Web Connector saves the password. When that's done, click I've entered it to move on to the first sync. Now tick this connection in the Web Connector, and click Update Selected. This page waits for that first check-in, and updates by itself. Once QuickBooks checks in, the page names the paired company file. The first check-in also brings in your accounts, customers, vendors and items. Next, click Map your accounts to see your nominal codes. Each one posts to the QuickBooks account with the same number or name. Open a code to check where it posts. Here, Cost of Goods Sold is matched by its number. To pair a different QuickBooks account, click Change. To return to the connection, click View in QuickBooks Desktop, then Dashboard. The Web Connector card shows whether syncing is healthy. It shows the last check-in, and when the next one is due. Below that are the paired company file, and your QuickBooks edition. These counts show what's waiting, sent, failed, and done today. Open Web Connector Queue, which lists every request in order. Each row shows its status, and what QuickBooks answered. Next, the Check-ins page lists every time the Web Connector signed in. Each one shows the company file, what was sent, and how the check-in ended. Finally, open Settings. Purchase orders aren't sent to QuickBooks unless you switch this setting on. Do that only if your accountant wants to see your purchase orders there. Then click Save Changes to keep it. The Web Connector tab holds the username, a new password, and the paired company file.