Show the sales rep and PO number on QuickBooks invoices
QuickBooks Online invoices can carry up to three custom fields. SKU.io can fill one with the sales order's sales rep, and write the customer's PO number either to another custom field or to the invoice's note to customer. The settings apply to invoices sent to QuickBooks from now on.
Before you begin
- Connect QuickBooks Online. See Connect QuickBooks Online.
- To use custom fields, turn them on in QuickBooks first, under Settings → Account and settings → Sales → Custom fields, and give each a name. The note to customer needs no setup.
- You need permission to manage integrations to save the mapping.
Load your QuickBooks custom fields
-
Go to your QuickBooks connection and open Mappings → Custom Field Mapping.
-
Click Fetch Custom Fields. SKU.io asks QuickBooks which custom fields you have.
-
Check Available QuickBooks Custom Fields. It lists each field's ID, Name and whether it's Enabled in QuickBooks.
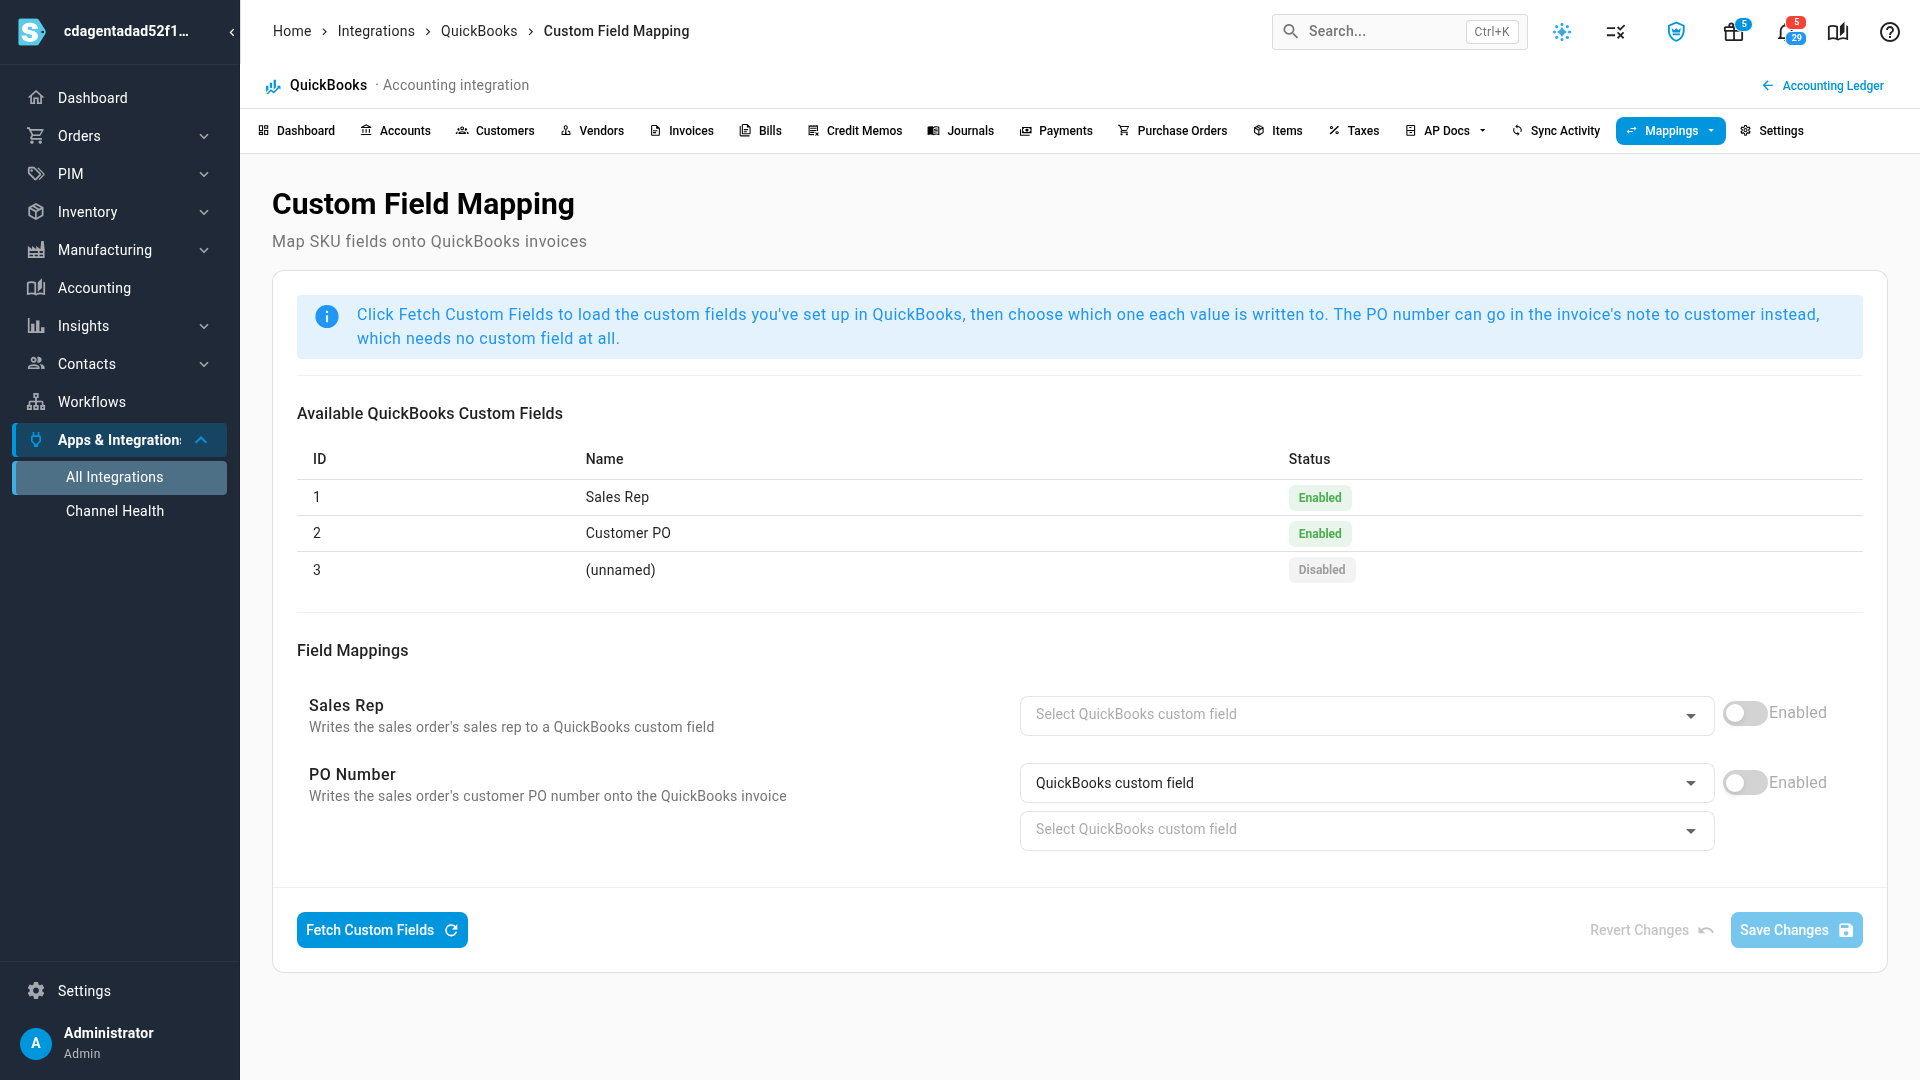
Fetch again whenever you add or rename a custom field in QuickBooks.
Map the sales rep
- Under Field Mappings, open the dropdown beside Sales Rep and pick the QuickBooks field to hold it. A field marked (turned off in QuickBooks) won't show on invoices until you turn it on there.
- Switch on Enabled. It stays greyed out until you pick a field.
Map the PO number
-
Beside PO Number, choose where it goes:
- QuickBooks custom field, then pick the field in the dropdown below.
- Note to customer (invoice memo), which prints on the invoice your customer receives and needs no custom field.
-
Switch on Enabled.
-
Click Save Changes. SKU.io confirms Custom field mappings saved successfully. Revert Changes puts back what was saved.
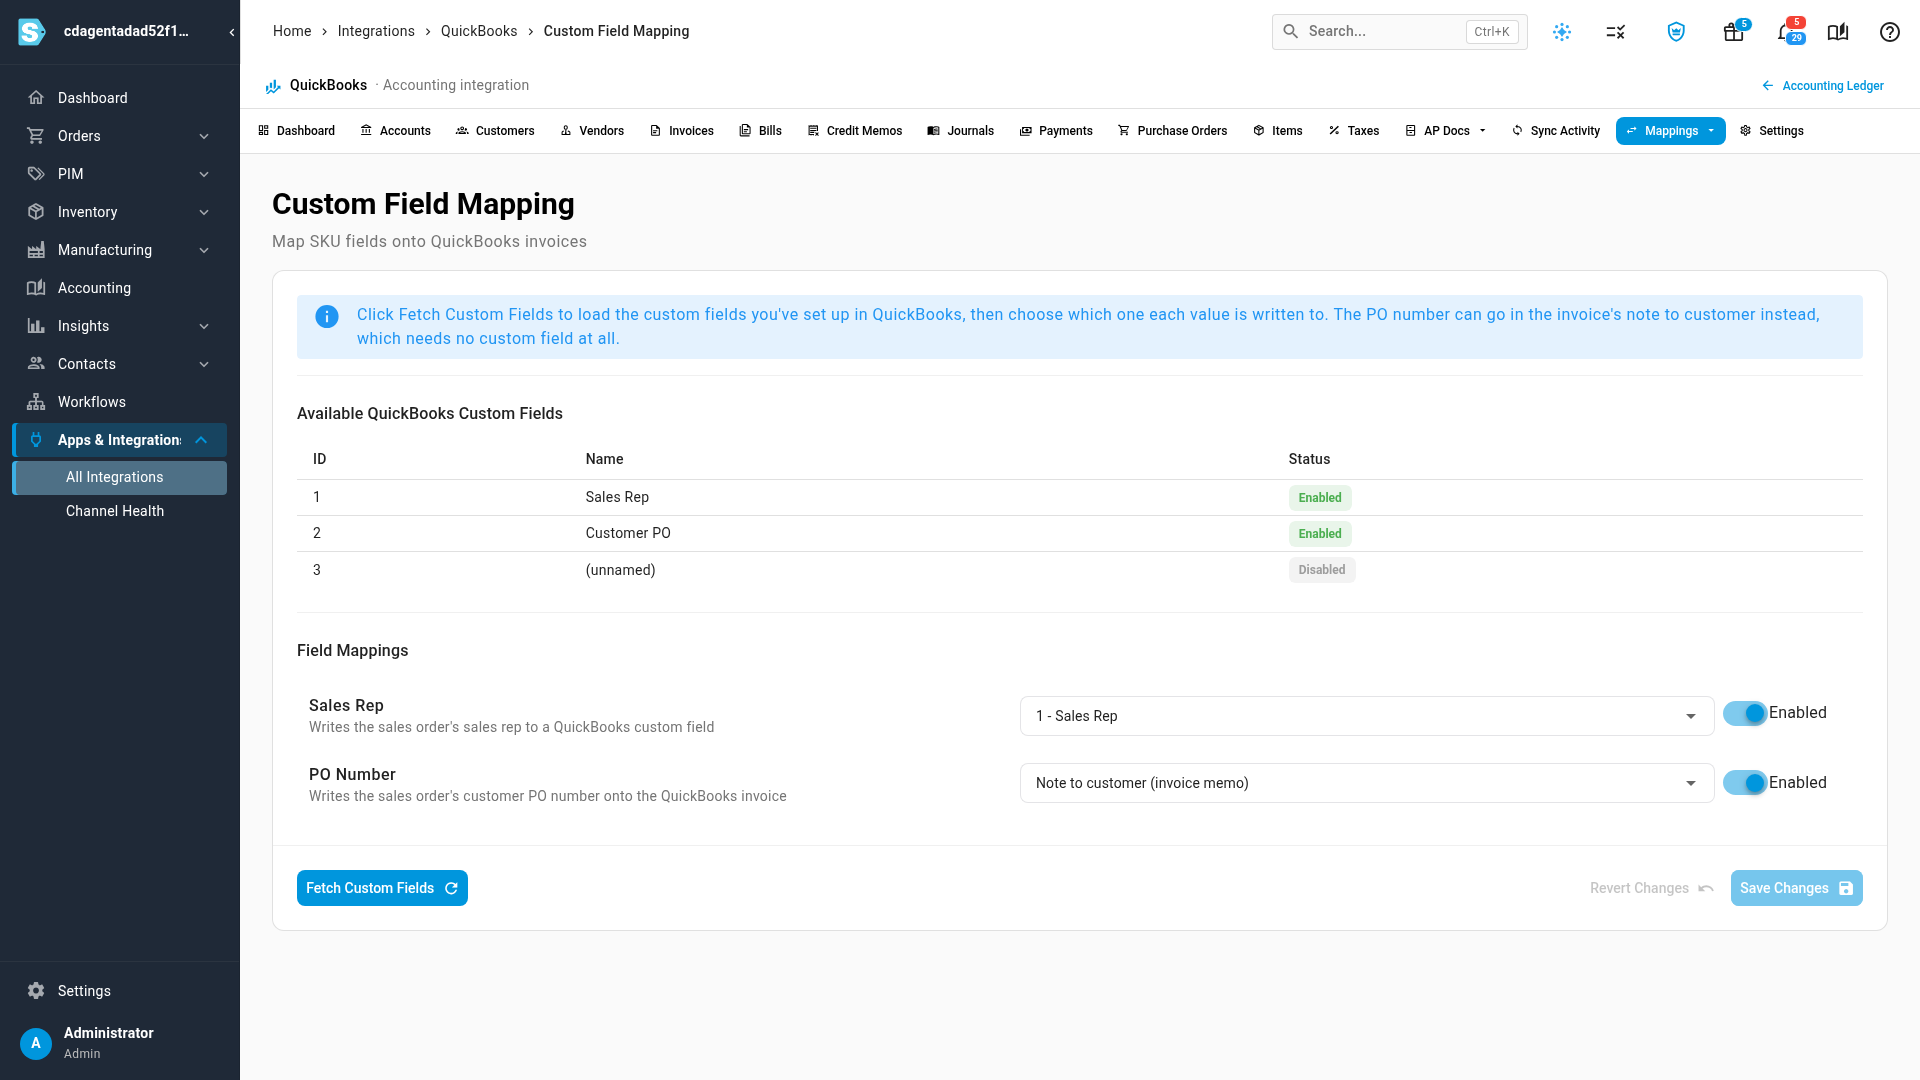
To stop sending a value, switch off its Enabled and save.
Next steps
- What syncs to your accounting provider: what each sales order invoice becomes in QuickBooks.
- Connect QuickBooks Online: choose which transaction types sync on their own.
Video transcript
On your QuickBooks connection, open Mappings, then Custom Field Mapping.
Click Fetch Custom Fields to load the custom fields you've set up in QuickBooks.
They're listed here, with whether each one is switched on.
For Sales Rep, pick the QuickBooks field that should hold the rep's name.
Then switch on Enabled, so that field is filled in on every invoice.
Next, for PO Number, pick where it goes from the dropdown.
A QuickBooks custom field, or the note to customer, which prints on the invoice and needs no custom field.
Switch on Enabled.
Then click Save Changes to keep both mappings.
A confirmation appears, and invoices sent from now on carry both values.