Connect QuickBooks Online
Connecting QuickBooks Online lets SKU.io post the entries it generates to your QuickBooks company as invoices, bills, credit memos, journals and payments. Connecting downloads your QuickBooks chart of accounts and tax codes, but nothing syncs on its own until you switch on the transaction types you want.
Before you begin
- You need a QuickBooks Online login that can approve app connections for the company you're connecting.
- You need permission to manage integrations in SKU.io.
- In QuickBooks, set up the bank and credit card accounts your payments land in. You map each payment method to one of them.
Connect your QuickBooks company
-
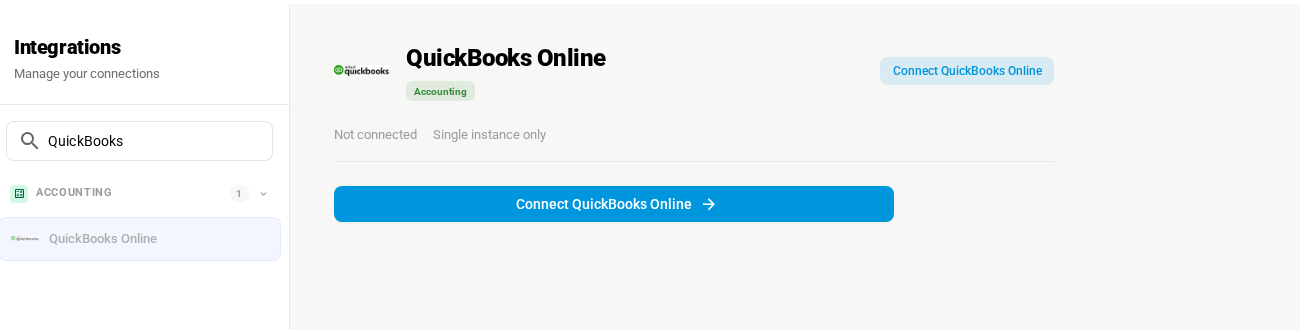
Go to Apps & Integrations, search for QuickBooks, and choose QuickBooks Online.
-
Click Connect QuickBooks Online. QuickBooks allows one connection per account, so once you're connected this button is replaced by your connection.
-
The QuickBooks page reads Connect QuickBooks Online. Click Create New Integration.
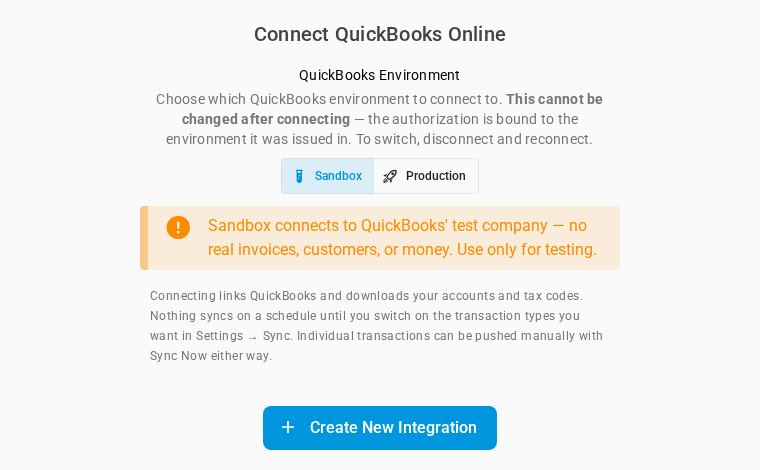
On SKU.io test servers the page also asks for a QuickBooks Environment, Sandbox or Production. Your live account always connects to QuickBooks production, so you don't see that choice there.
-
QuickBooks opens in a pop-up window. If nothing opens, allow pop-ups for SKU.io and try again.
-
Sign in to QuickBooks, choose the company to connect, and approve the connection.
-
The window closes and SKU.io shows QuickBooks connected — choose which transaction types to sync in Settings → Sync. SKU.io downloads your QuickBooks accounts and tax codes, and the QuickBooks Dashboard opens.
A connection is tied to the QuickBooks company you approve. To move to a different company, delete the connection and connect again.
Read the dashboard
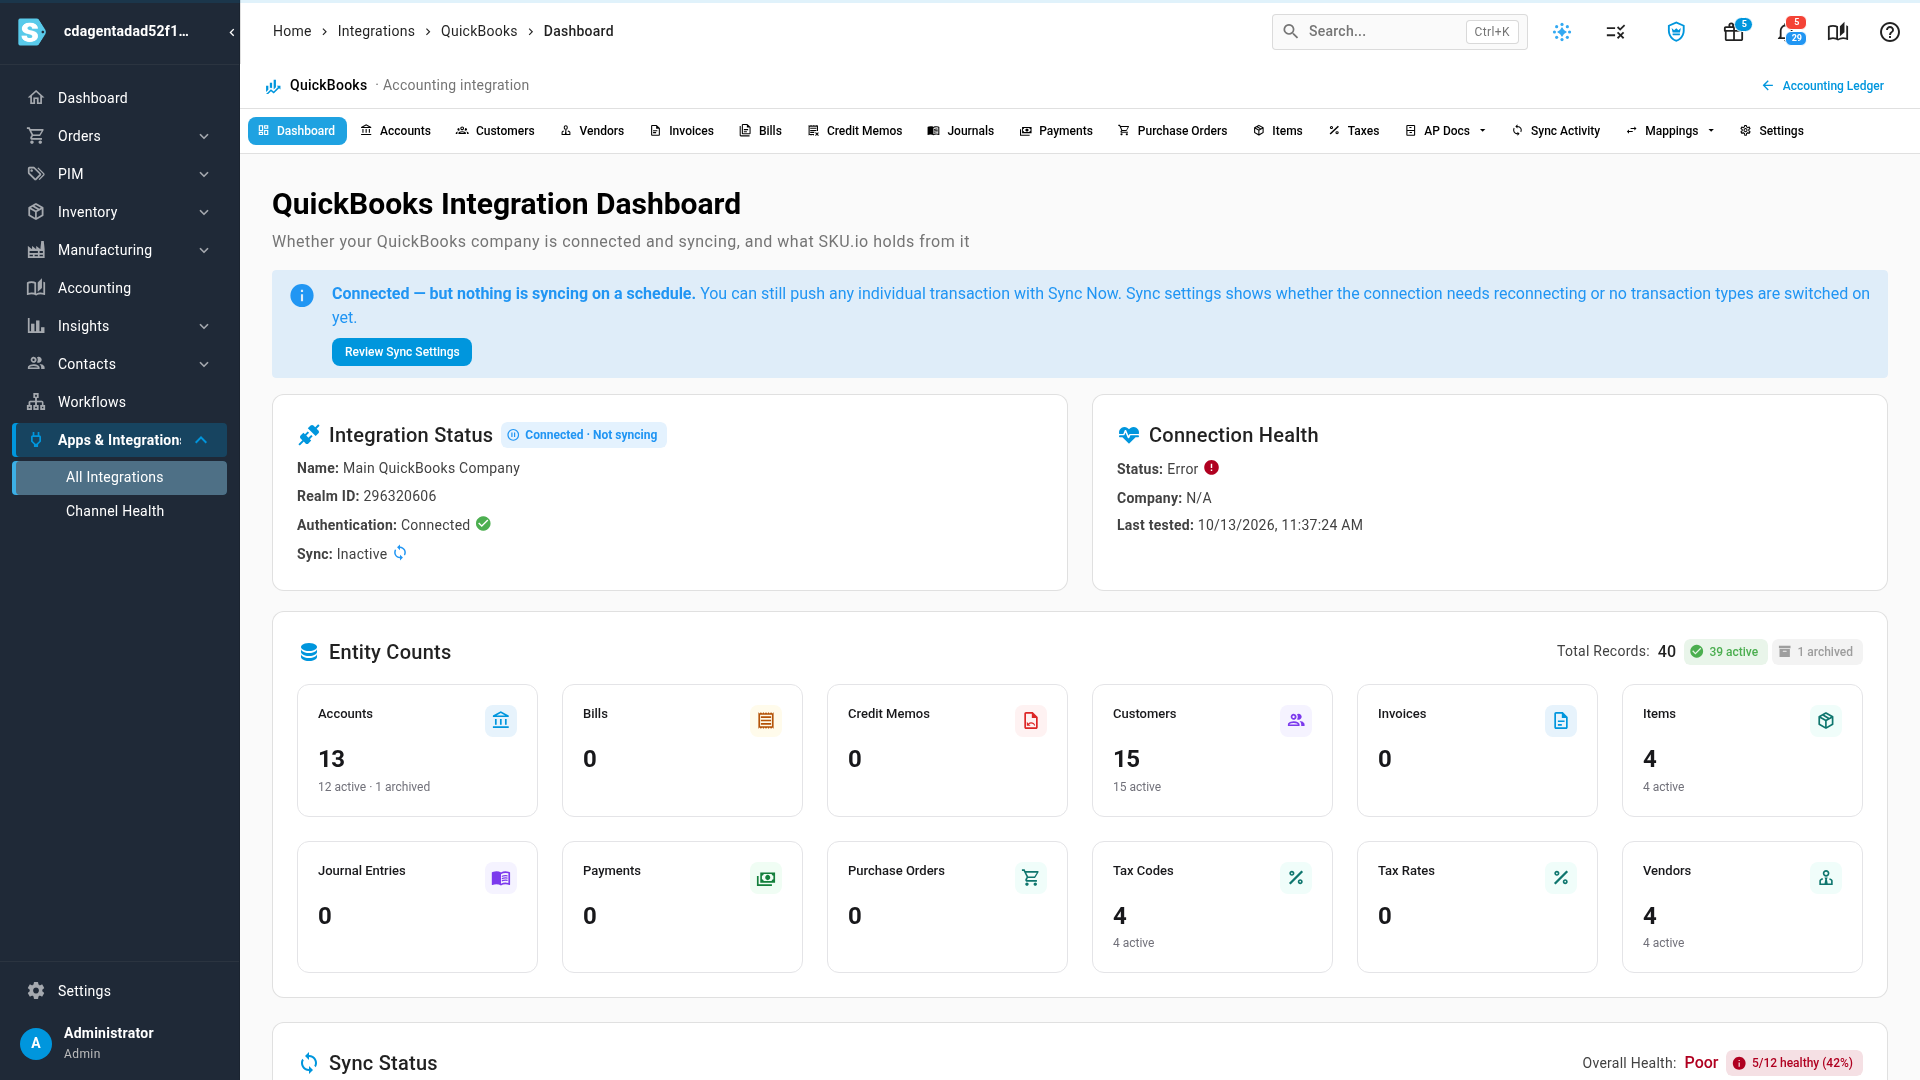
The Dashboard tab is where your QuickBooks connection opens.
| Card | What it tells you |
|---|---|
| Integration Status | The connection's Name, its QuickBooks Realm ID, whether it's signed in (Authentication), and whether anything syncs on a schedule (Sync). The chip reads Connected · Syncing, Connected · Not syncing or Not Connected. |
| Connection Health | Tests the link to QuickBooks each time the page opens, and shows the company name QuickBooks reports. A Status other than Connected means SKU.io couldn't reach your company. Re-authorize the connection. |
| Entity Counts | How many QuickBooks records SKU.io holds of each kind (accounts, customers, vendors, items, tax codes, invoices, bills and more), split into active and archived. |
| Sync Status | For each kind of record, how long ago the newest one changed. A warning icon marks a kind with no change in the last week, and a chip counts records updated today. Overall Health is the share of kinds without a warning. |
When the connection is signed in but no transaction type syncs on its own, a banner reads Connected — but nothing is syncing on a schedule. Click Review Sync Settings to fix it. You can still push any single transaction with Sync Now while the banner shows.
Sync Status also flags a kind of record that has nothing in it, such as purchase orders when you don't use them in QuickBooks. A low Overall Health on a new connection usually means that, not a problem with the connection.
Choose what syncs
-
Open the Settings tab, then Sync. (Review Sync Settings on the dashboard banner opens the same place.)
-
Under Automatic Sync by Transaction Type, switch on Auto-Sync for each type you want sent on its own, such as Sales Order Invoice or Bill, and give it an Auto-Sync Start Date if you need one.
-
Click Save.
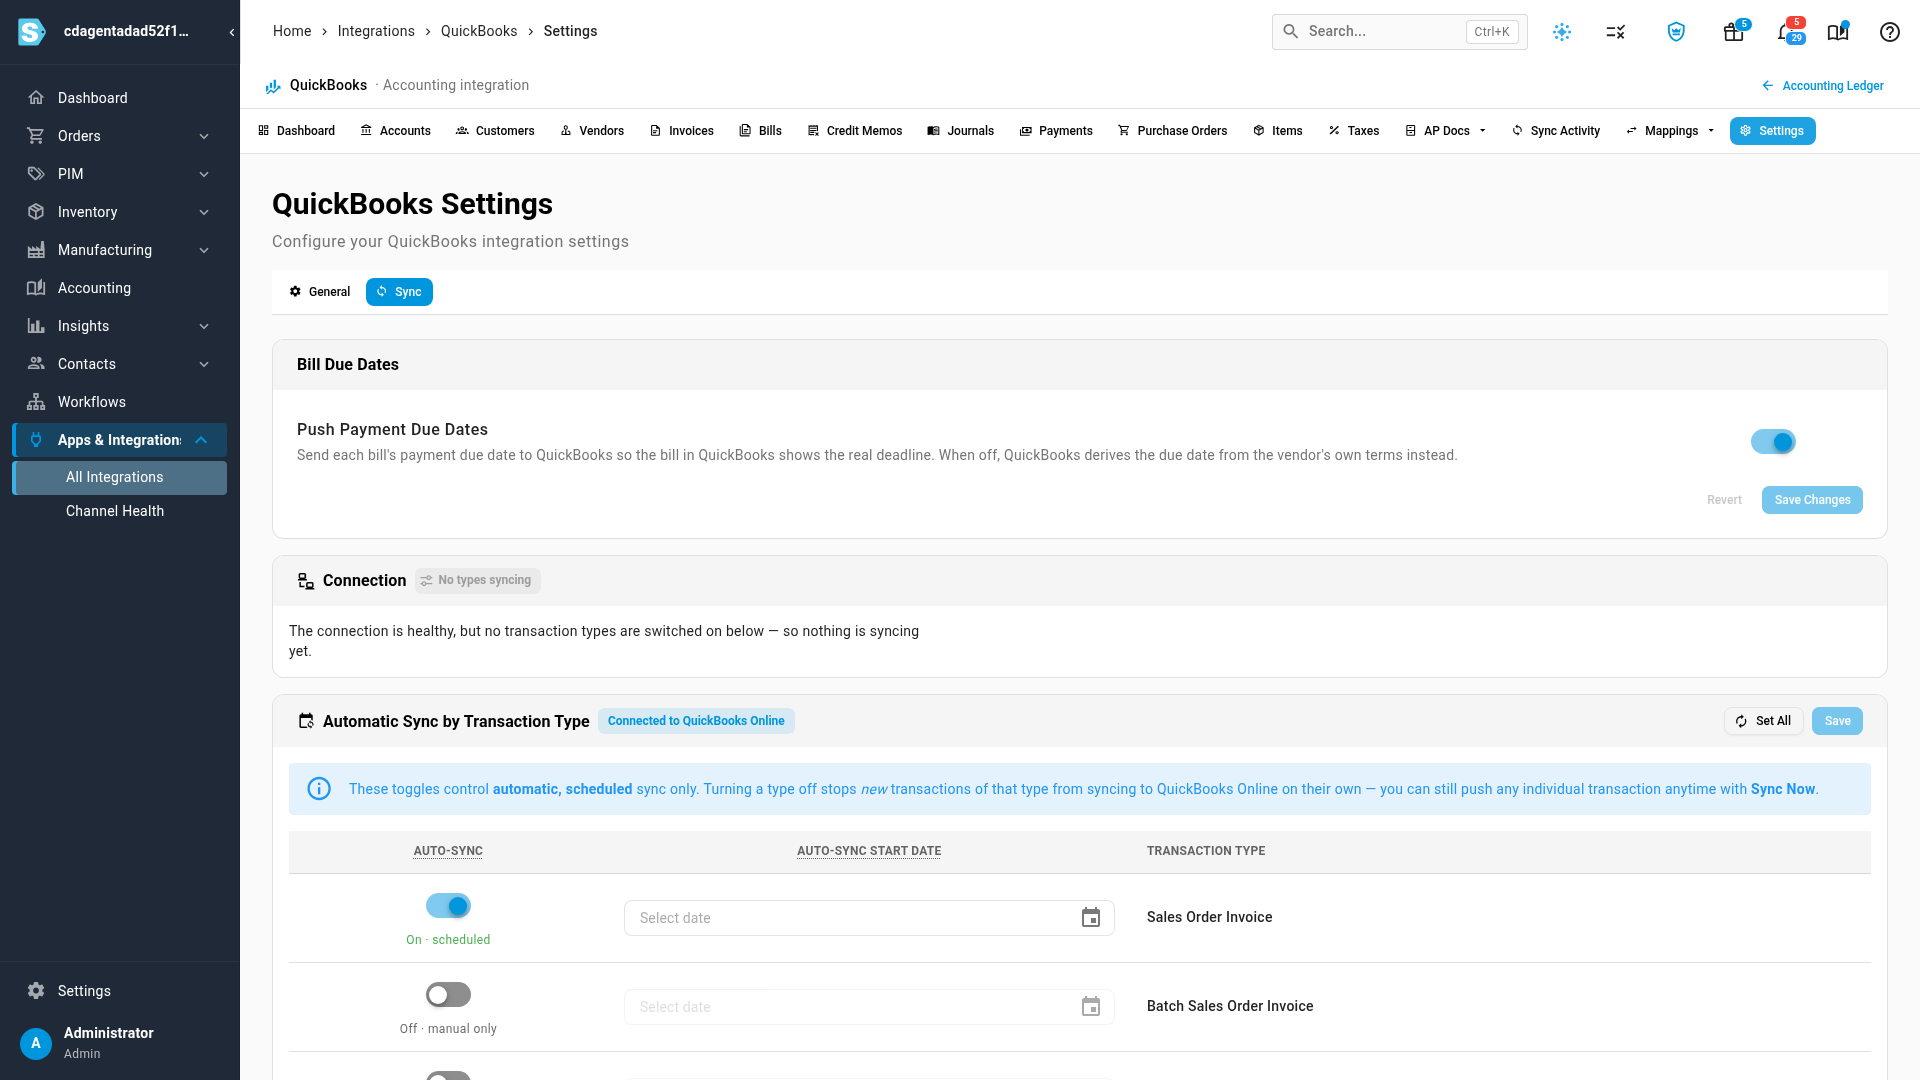
A type that's off reads Off · manual only. Its entries stay in SKU.io until you push one by hand with Sync Now. For what each type becomes in QuickBooks, see What syncs to your accounting provider.
The Bill Due Dates card above it holds Push Payment Due Dates. Leave it on to send each bill's payment due date to QuickBooks. Turn it off, and click Save Changes, to let QuickBooks work the due date out from the vendor's own terms.
Map payment methods
Each payment method posts to a QuickBooks bank or credit card account. A payment made with an unmapped method isn't sent to QuickBooks.
-
Open Mappings → Payment Methods.
-
For each payment method, pick the account under Select bank account. The list holds your active Bank and Credit Card accounts from QuickBooks.
-
Click Save Changes. Revert Changes puts back what was saved.
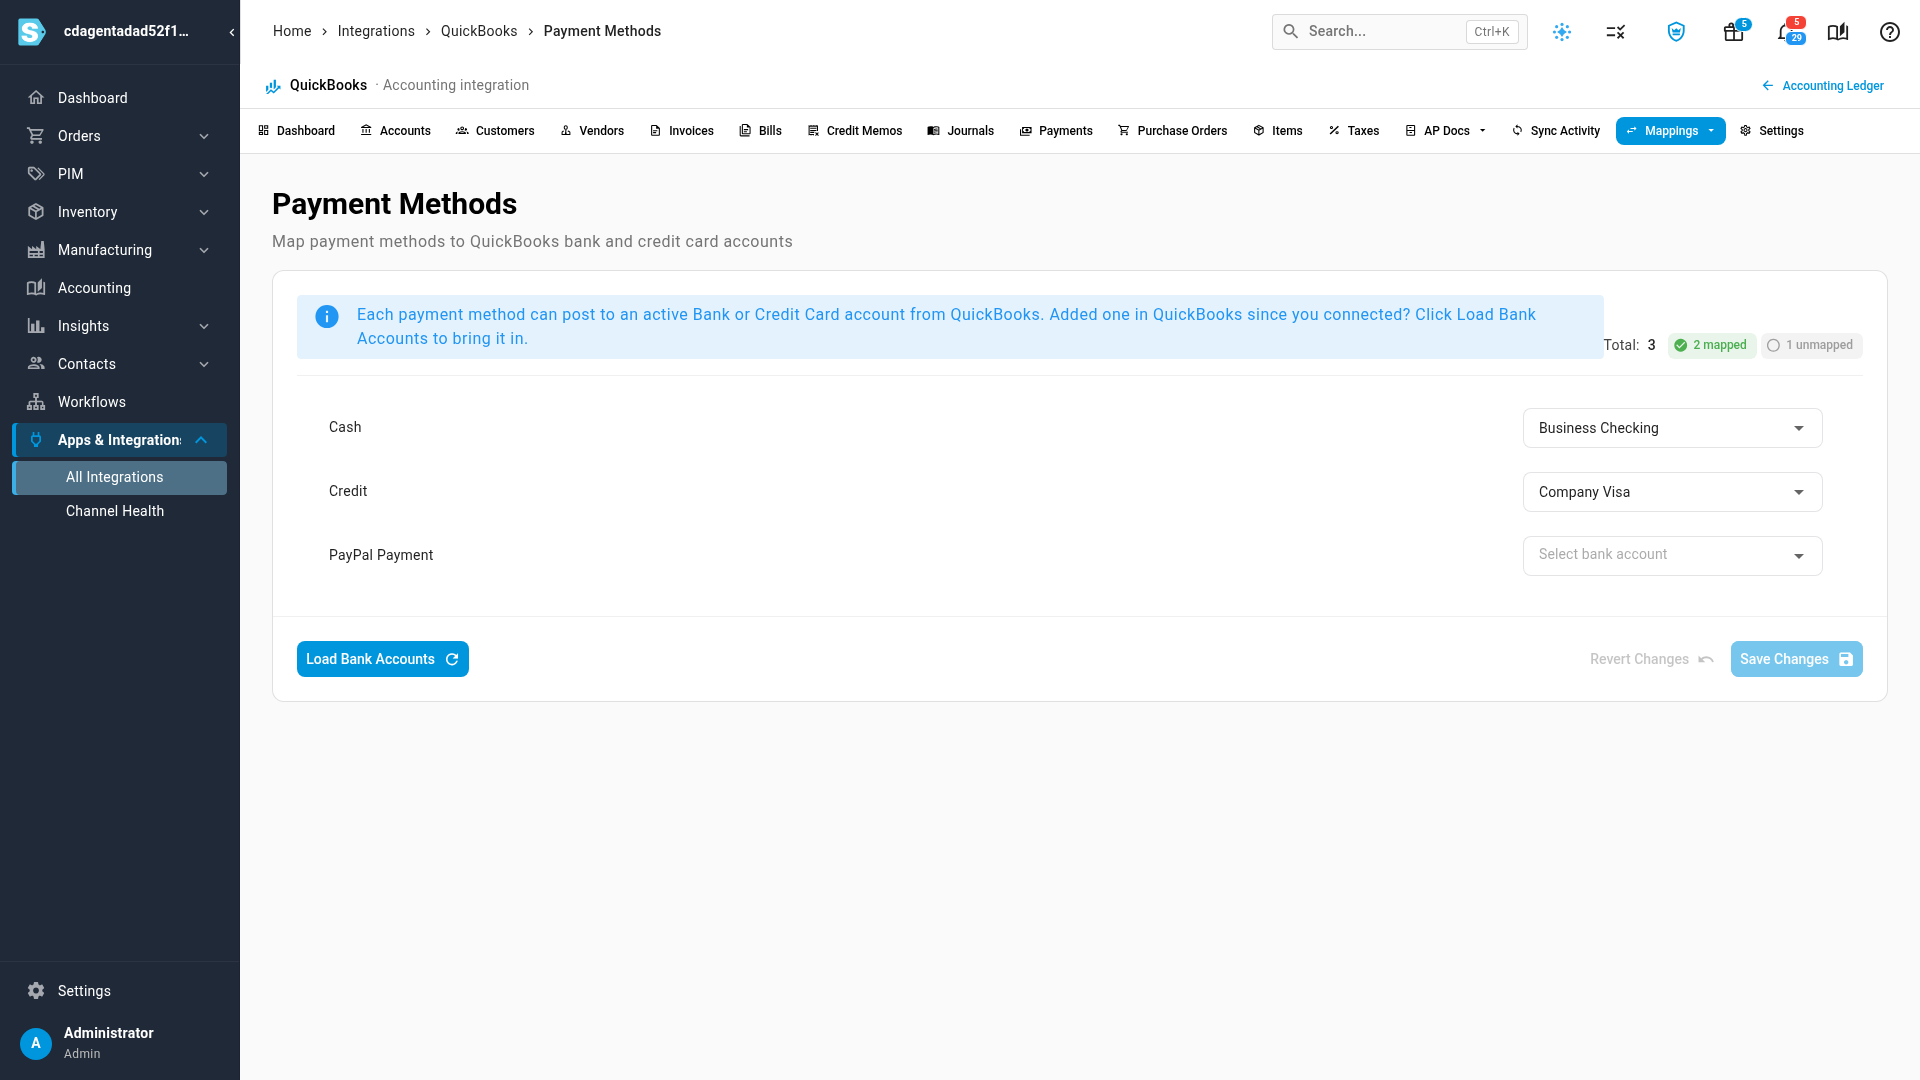
Added an account in QuickBooks since you connected? Click Load Bank Accounts to download it, then pick it.
Look after the connection
Settings → General holds the rest:
- Re-authorize signs in to QuickBooks again. Use it when Connection Health shows an error or QuickBooks asks you to reconnect.
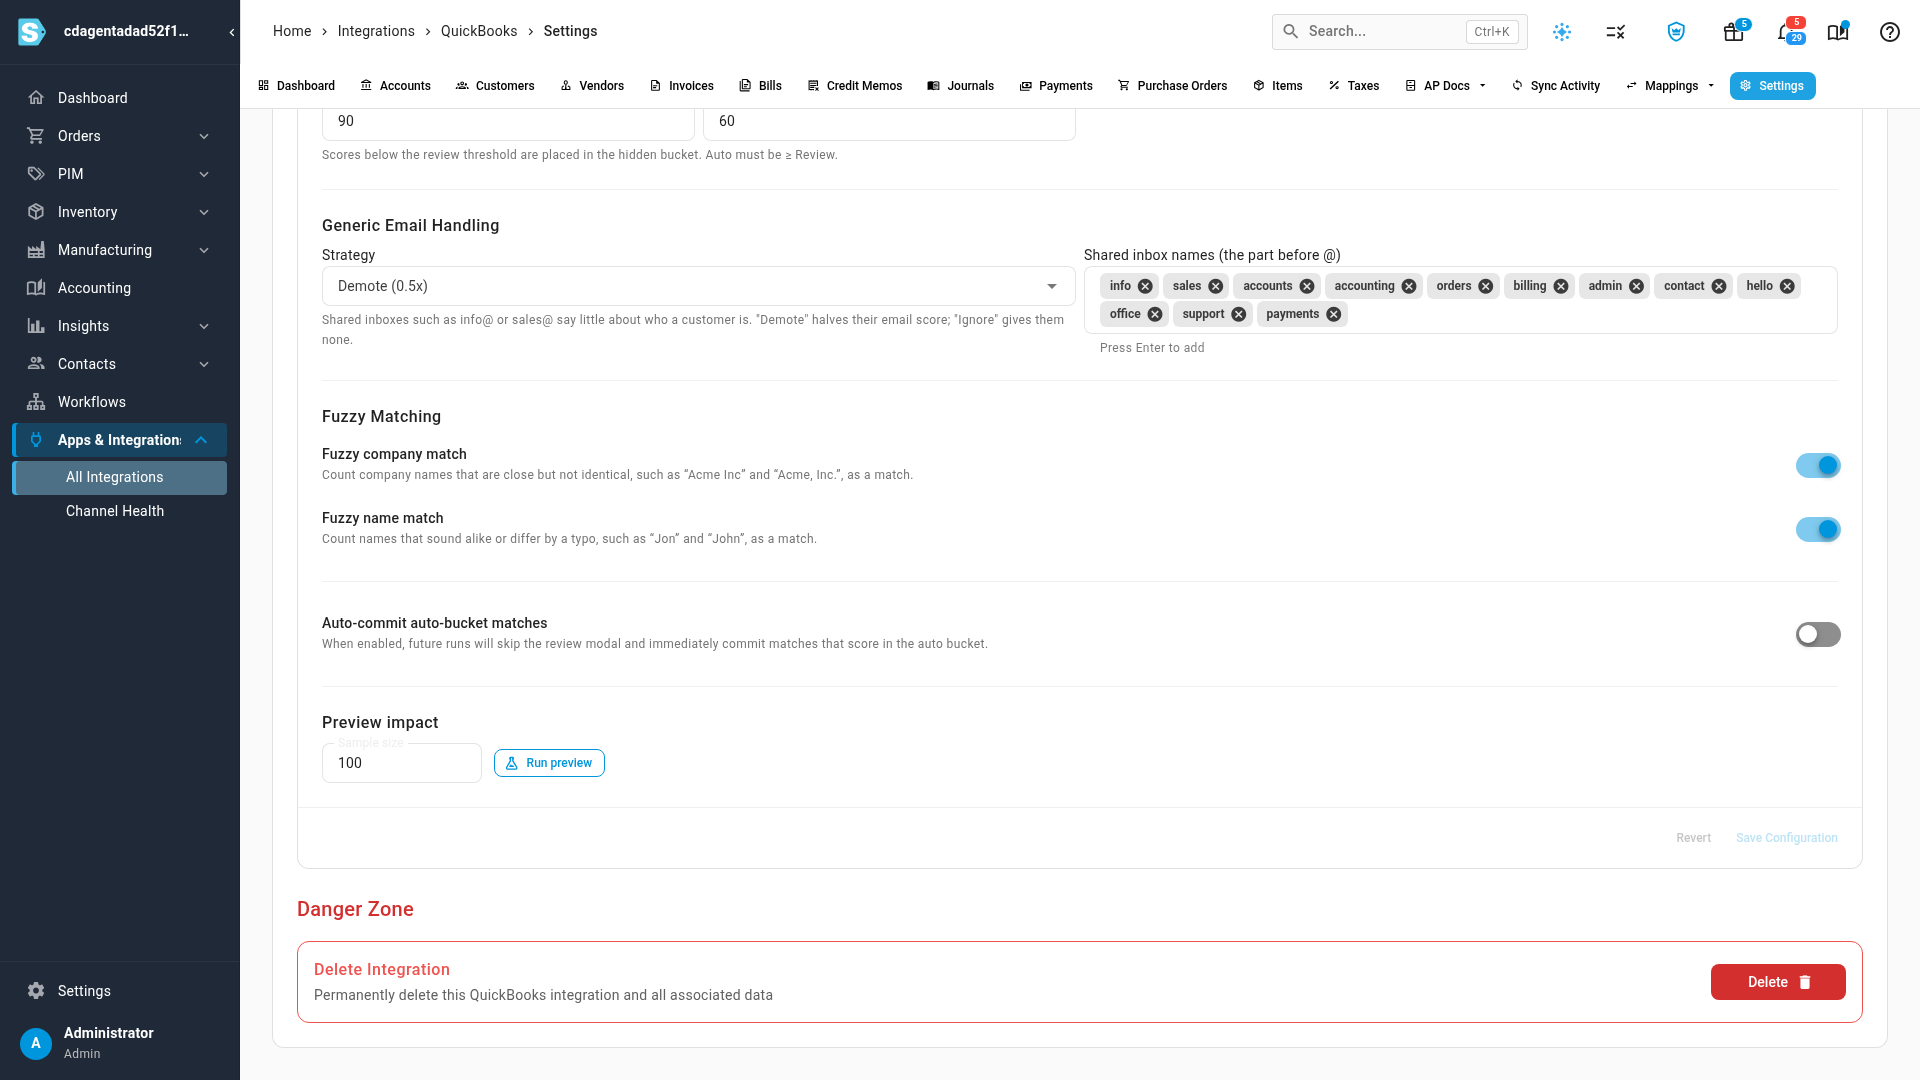
- Customer Matching Configuration tunes how SKU.io pairs QuickBooks customers with yours. See Match customers with QuickBooks.
- Delete, under Danger Zone, removes the connection and the QuickBooks records SKU.io has stored, in the background. It doesn't change anything in QuickBooks.
The other tabs on the QuickBooks page, such as Accounts, Customers, Vendors, Invoices, Bills and Payments, list the records SKU.io holds for your company. Mappings also holds Tax Mappings, the same tax rate mapping as Choose who calculates tax, and Custom Field Mapping.
Next steps
- Map your accounts to QuickBooks Online: choose which QuickBooks account each entry posts to.
- Match customers with QuickBooks: link QuickBooks customers to yours and clear out duplicates.
- Show the sales rep and PO number on QuickBooks invoices: fill QuickBooks custom fields from your sales orders.
- Choose who calculates tax: pick a tax treatment and map tax rates to QuickBooks tax codes.
Video transcript
Once QuickBooks is connected, open Apps and Integrations from the menu on the left.
Type QuickBooks into the search box, then choose QuickBooks Online from the results.
Your connection appears underneath, so click it to open the connection.
Its Dashboard opens first.
Integration Status confirms the connection is signed in to your company.
This banner means it's connected, but no transaction types sync on their own yet.
Connection Health tests the link to QuickBooks whenever the page opens.
An error there means it's time to re-authorize.
Entity Counts shows how many QuickBooks records SKU has of each kind.
To choose what syncs, click Review Sync Settings in the banner.
Under Automatic Sync by Transaction Type, switch on each type you want sent on its own.
Here, that's sales order invoices.
Then click Save to keep the change, and a confirmation appears.
The card above holds Push Payment Due Dates, which sends each bill's due date to QuickBooks.
Next, open the Mappings menu at the top, and choose Payment Methods from the list.
Each payment method needs a QuickBooks bank or credit card account.
For each one, open its dropdown and pick an account.
Here, credit card payments post to the Company Visa card.
Then click Save Changes, and the mapping is saved.
If you add an account in QuickBooks later, Load Bank Accounts downloads it.
Finally, open the Settings tab, which starts on General.
Re-authorize signs in to QuickBooks again when its access expires.
Customer Matching Configuration tunes how customers are paired.
Further down, Delete removes the connection from SKU, without changing anything in QuickBooks.