Set up two-factor authentication
Two-factor authentication puts a second step between your password and your account. Once it's on, signing in needs a short code as well as your password — and so do the actions that could hand someone else the keys, like creating an access token or revoking an app.
A password can be guessed, reused, phished, or turn up in someone else's data breach. A second factor means none of that is enough on its own.
Before you begin
- This is a personal setting. You turn it on for your login; it doesn't affect anyone else, and you don't need an administrator to do it.
- Have somewhere to put your recovery codes before you start — a password manager, or paper somewhere safe. You'll be shown them once.
- If you're going to use an authenticator app, install it on your phone first.
- The screenshots come from a demonstration account.
Where to find it
Go to Settings → Developer → Two-Factor Authentication.
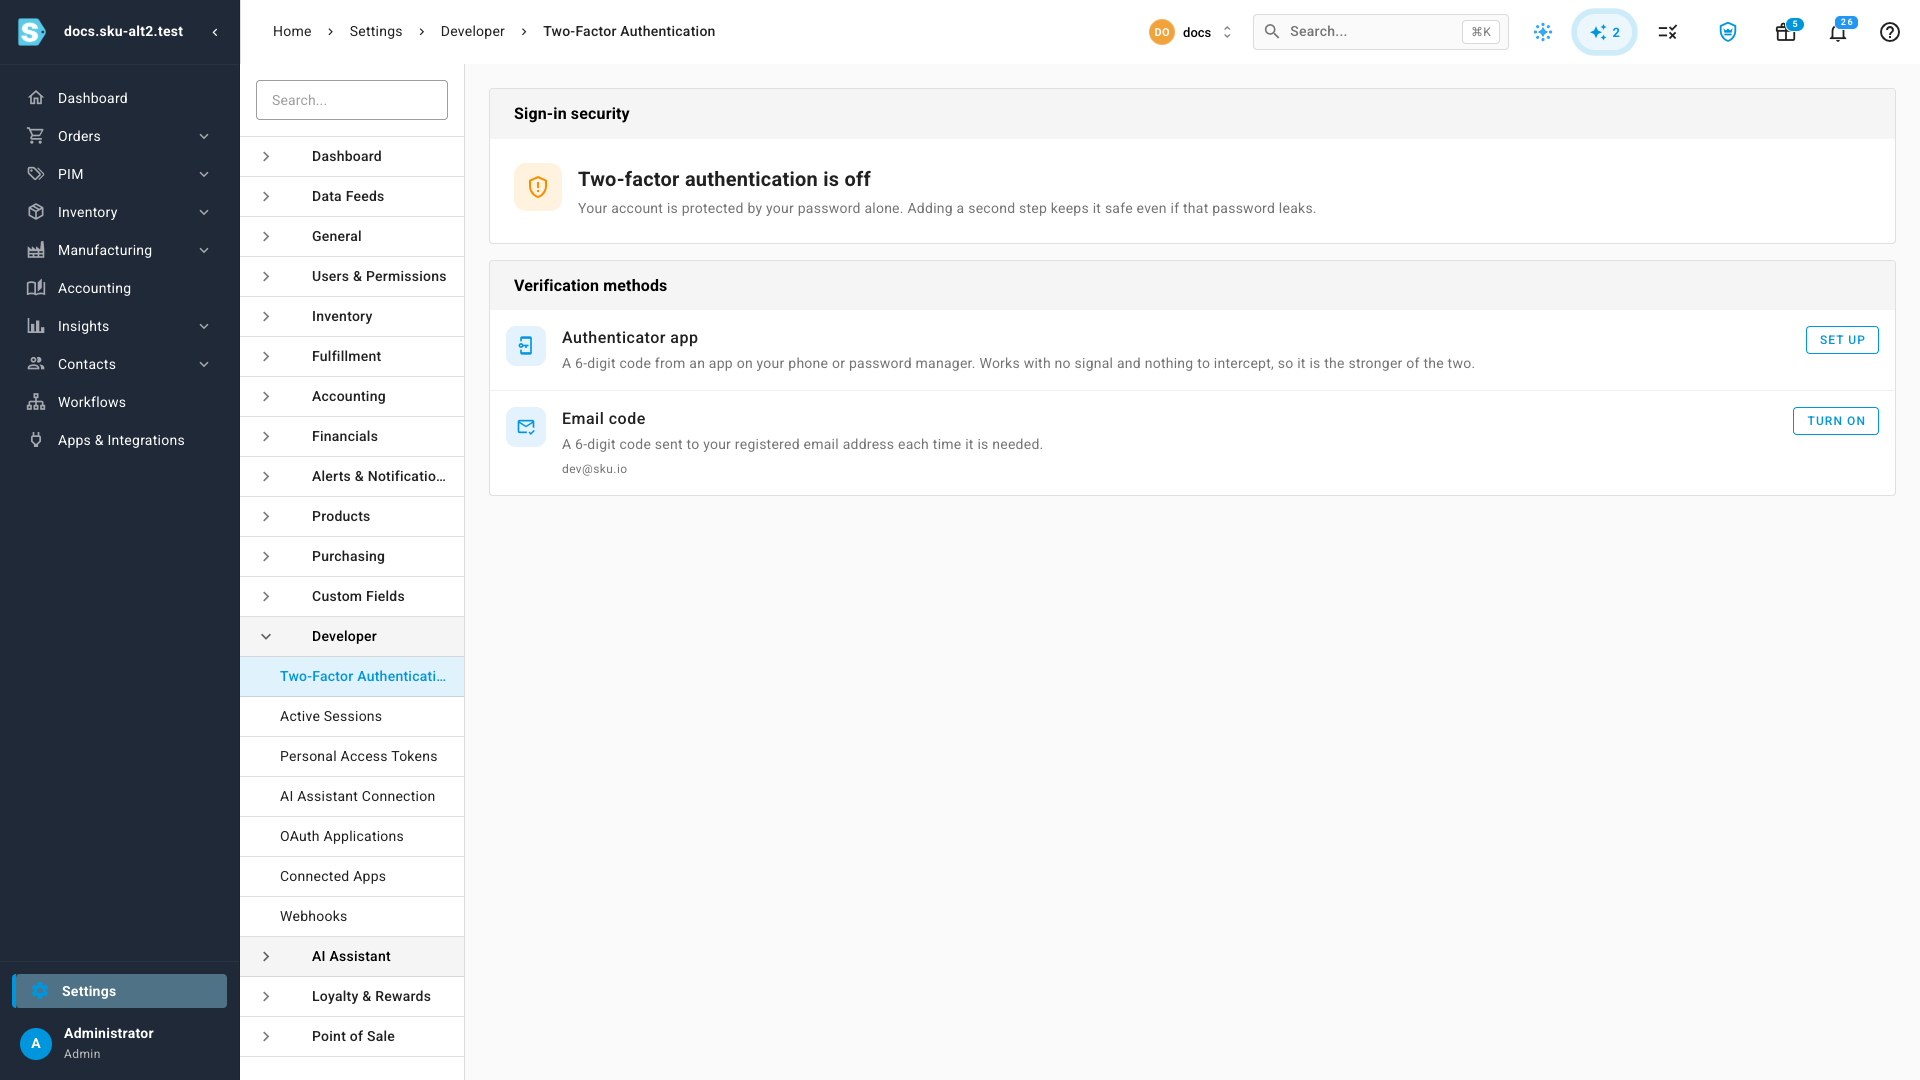
The Sign-in security card at the top always tells you where you stand. While it's off, it says so plainly: Your account is protected by your password alone.
Choose a method
Verification methods lists what you can verify with. You use one at a time.
| Method | How it works | Worth knowing |
|---|---|---|
| Authenticator app | A 6-digit code from an app on your phone or password manager | Works with no signal and nothing to intercept, so it's the stronger of the two |
| Email code | A 6-digit code sent to your registered email address each time it's needed | Nothing to install, but only as secure as your email account |
If you can use an authenticator app, use it. Emailed codes are a reasonable fallback when you can't.
Turn on the authenticator app
Any app that supports time-based codes works — 1Password, Authy, Google Authenticator, and others.
-
Click Set up on the Authenticator app row.
-
Scan the QR code with your authenticator app.
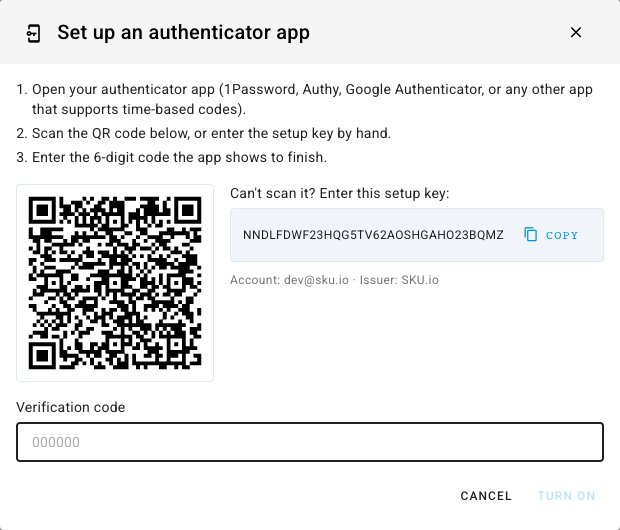
Can't scan it? Copy the setup key shown beside the code and type it into your app by hand. The account and issuer underneath are what the entry will be called in your app, so you can tell it apart from the others.
-
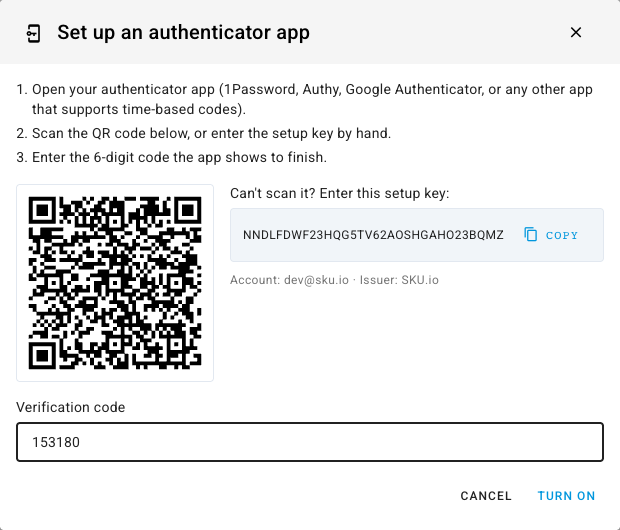
Your app starts showing a 6-digit code that changes every 30 seconds. Type the current one into Verification code.
-
Click Turn on.
Entering the code is what proves the enrolment worked — that your app really can read codes from the secret it was given. Nothing about how you sign in changes until it does. If the code is rejected, the setup stays open so you can try the next one your app shows.
-
Save the recovery codes you're given, tick I have saved these codes somewhere safe, and click Done. The next section explains what they're for.
The status card flips to Two-factor authentication is on, and the Authenticator app row is marked In use.
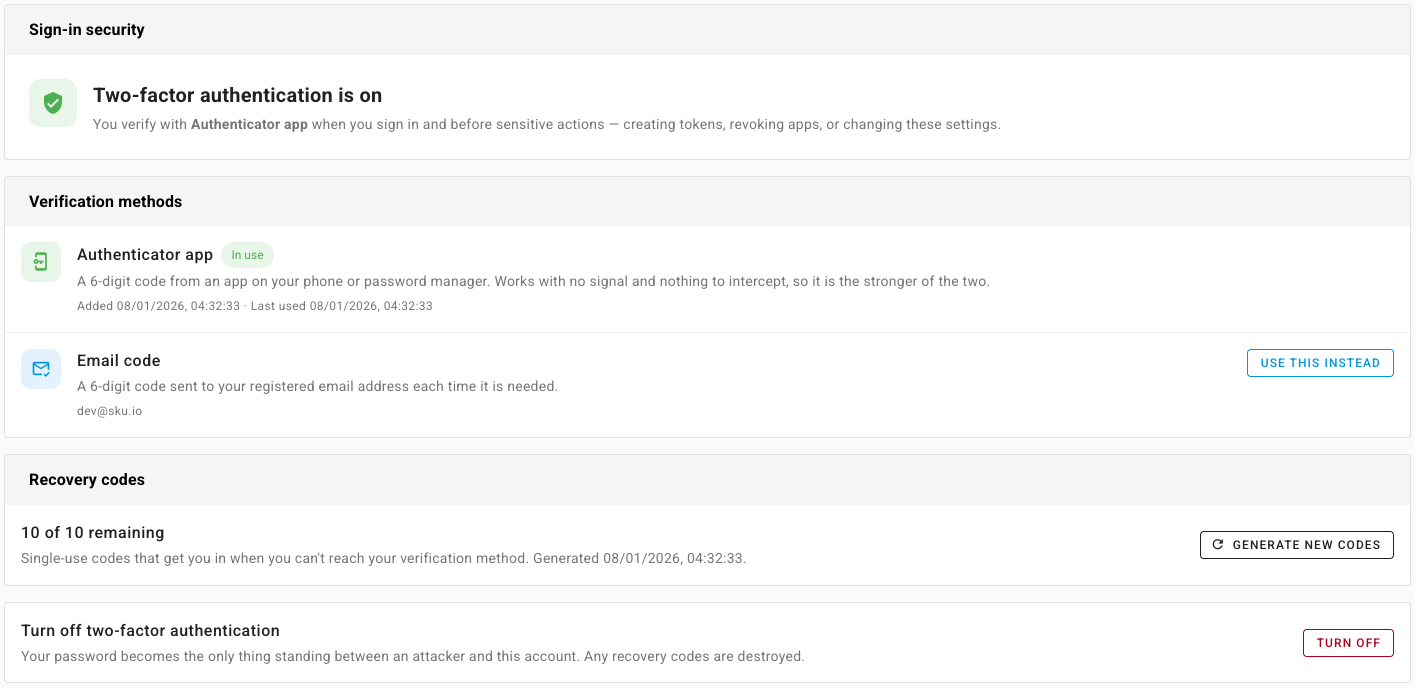
Two new cards appear with it: Recovery codes, and Turn off two-factor authentication.
Turn on email codes
If you'd rather have codes emailed, click Turn on on the Email code row. There's nothing to enrol, so it takes effect immediately — you'll go straight to the recovery codes. The address codes go to is the one shown on the row.
Save your recovery codes
Recovery codes are how you get back in when you can't reach your verification method — a lost phone, a wiped authenticator app, an email account you can't open.
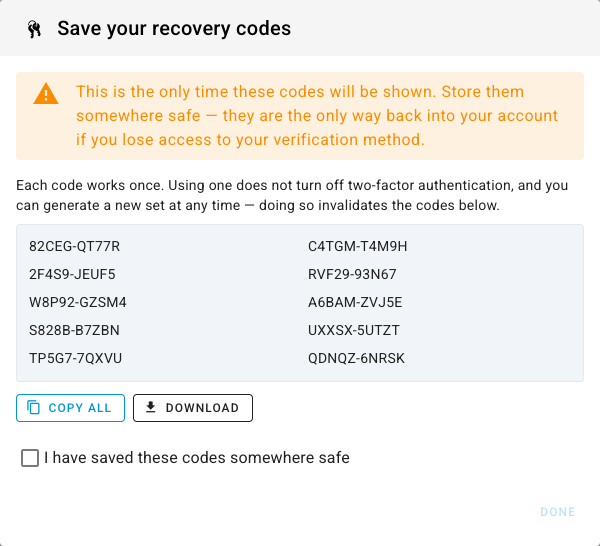
You get 10 codes, and they're shown once. Use Copy all to put them in a password manager, or Download for a text file you can print. The checkbox is there to make you stop and do it — Done stays disabled until you tick it, because there's no second showing.
Each code works once. Using one doesn't turn two-factor authentication off; it only spends that code.
The codes avoid characters that are easy to misread — no 0 against O, no 1
against I — because sooner or later someone reads one off a printout. They're
also not case-sensitive when you type one in.
Check how many you have left
The Recovery codes card tracks what's left and when the set was generated.

When you're down to 3 or fewer, a warning appears telling you to generate a new set before you get locked out.
Generate a new set
Do this if you've used several, if you think the list has been seen by someone else, or if you've lost it.
-
Click Generate new codes.
-
Confirm.
-
Save the new set the same way.
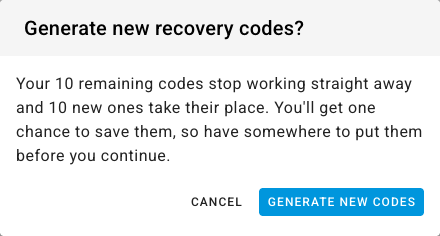
The old codes stop working the moment the new ones are issued — there's no overlap. Have somewhere to put them before you start.
Signing in from now on
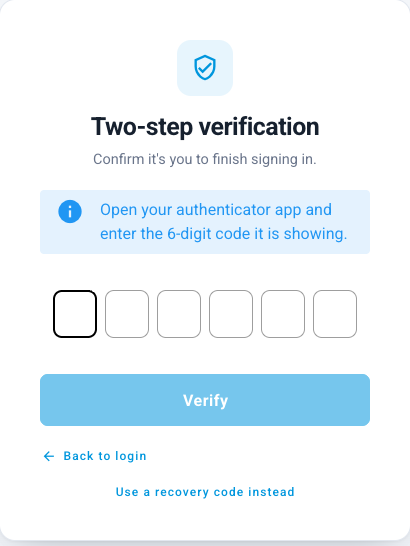
After your password, you'll see the Two-step verification step.
With an authenticator app, it asks for the code your app is showing:
With emailed codes, it tells you where the code was sent and offers Resend code if it doesn't arrive — you can send another after a 30-second wait. An emailed code stays valid for an hour.
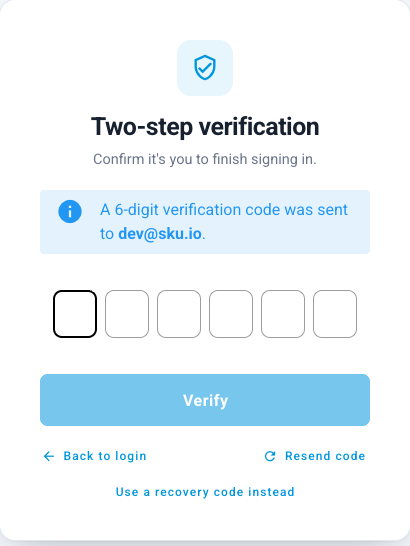
If you can't reach either, click Use a recovery code instead and enter one of the codes you saved.
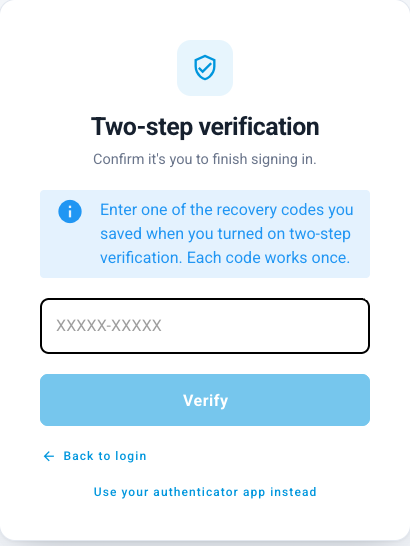
A recovery code works here whichever method you normally use — a fallback that only worked on the screen where you still had your phone wouldn't be much of a fallback. Back to login returns you to the password step.
Verifying before sensitive actions
Signing in isn't the only place a code is asked for. Once two-factor authentication is on, so are the actions that could be used to take the account over — creating access tokens, revoking connected apps, and changing these two-factor settings themselves.
Verifying covers you for 10 minutes, so a run of related changes doesn't mean a code each time. After that, the next sensitive action asks again. A recovery code is accepted here too.
This is why an attacker with a stolen session still can't quietly disable your second factor: turning it off is itself gated behind it.
Switch to the other method
-
Click Use this instead on the method you want.
-
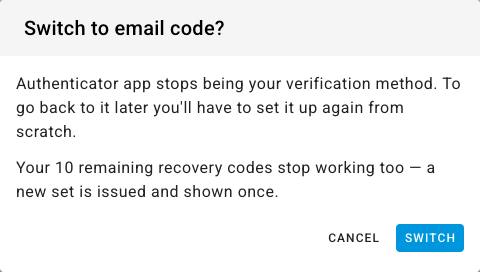
Read the confirmation and click Switch.
-
Save the new recovery codes you're issued.

Two things happen that are easy to miss. The method you switched away from is not kept on file — going back to an authenticator app later means scanning a fresh QR code, because the old secret is gone. And your existing recovery codes stop working; a new set is issued and shown once.
Turn it off
Turning two-factor authentication off leaves your password as the only thing protecting the account, and destroys your recovery codes. There's rarely a good reason for it.
-
Click Turn off on the Turn off two-factor authentication card.
-
Confirm.
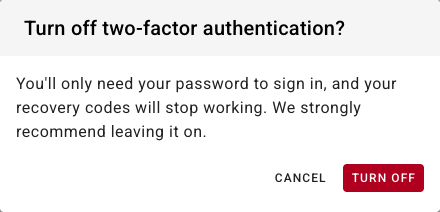
If you're turning it off because you've lost your phone, switch methods or generate new recovery codes instead — both leave the protection in place.
Troubleshooting
| What you see | What it means |
|---|---|
| That code did not match. during setup | The code expired while you typed it, or your phone's clock is out. Wait for the next code and try that one. If it keeps failing, turn on automatic time on your phone |
| The code your app shows is rejected at sign-in | Same causes. Codes last about 30 seconds, and a small clock difference is tolerated — a large one isn't |
| The same code won't work twice | Deliberate. Once a code has been accepted it can't be used again, so anyone who saw it over your shoulder can't reuse it |
| The emailed code hasn't arrived | Check spam, then use Resend code. If email is the problem, sign in with a recovery code and switch to an authenticator app |
| You're out of recovery codes | Sign in with your usual method and generate a new set straight away |
| No phone and no recovery codes | Nobody can re-display your codes — they're stored one-way. Contact your administrator to get two-factor authentication cleared from the account |
| You're asked for a code again a few minutes later | Verification lasts 10 minutes. A longer session of changes will ask a second time |
| You set up the authenticator app but the row says Set up again | The enrolment only completes when a code is accepted. Run through it again and finish with Turn on |
Next steps
- Manage active sessions — see where your account is signed in, and sign out anything you don't recognise.
- Create a personal access token — one of the actions that asks you to verify.
- Review connected apps — third-party access, and revoking it.