Create a personal access token
Video transcript
Settings, then Developer, is where your account's API access lives. Tokens for your own scripts, webhooks, connected apps, and two-factor sign-in. Open Personal Access Tokens. Each row is one credential, with its scopes, last use, and expiry. Click Create Token, and name it after the thing that will use it. A name like Nightly reporting export tells you what to revoke later. Ninety days is preselected. A shorter expiry limits the damage if a token leaks. Scopes are next. Read-only sets every group to read — fifteen permissions, nothing writable. This job also cancels orders, so move Sales Orders to Read and Write. The running total now says sixteen permissions. Check it before you continue. Because the token can write, SKU.io asks you to re-enter your password. Confirming opens a five minute window for further sensitive changes. Here is the token, once. Copy it now into your secret store. Nothing will show it again, so send it as a bearer token. Every token has its own page: requests over time, status breakdown, top endpoints. Rotate the secret if it leaks, or revoke it outright. Webhooks push events to you instead, so you don't have to keep polling for changes. Each subscription is one event to one HTTPS address, with its own delivery log to inspect. And two-factor sign-in protects the account all of these credentials belong to. Set up an authenticator app, or have a code emailed.
A personal access token is a long-lived API credential that acts as you. You choose exactly what it can do and how long it lasts, so a nightly export script never gets the ability to cancel orders. This guide creates one and captures its value — the only time SKU.io shows it.
Before you begin
- Any signed-in user can create tokens for their own account. A token can never grant more than you have: scopes narrow your access, they don't widen it.
- Decide what the token needs to do before you start. You pick scopes during creation, and you can change them later.
- Have somewhere safe to paste the value — a secrets manager, your CI secret store, or a password manager. You get one chance to copy it.
- You can hold 50 tokens at once. Expired tokens still occupy a slot, so revoke what you no longer use.
Steps
1. Open the tokens list
Go to Settings → Developer → Personal Access Tokens.
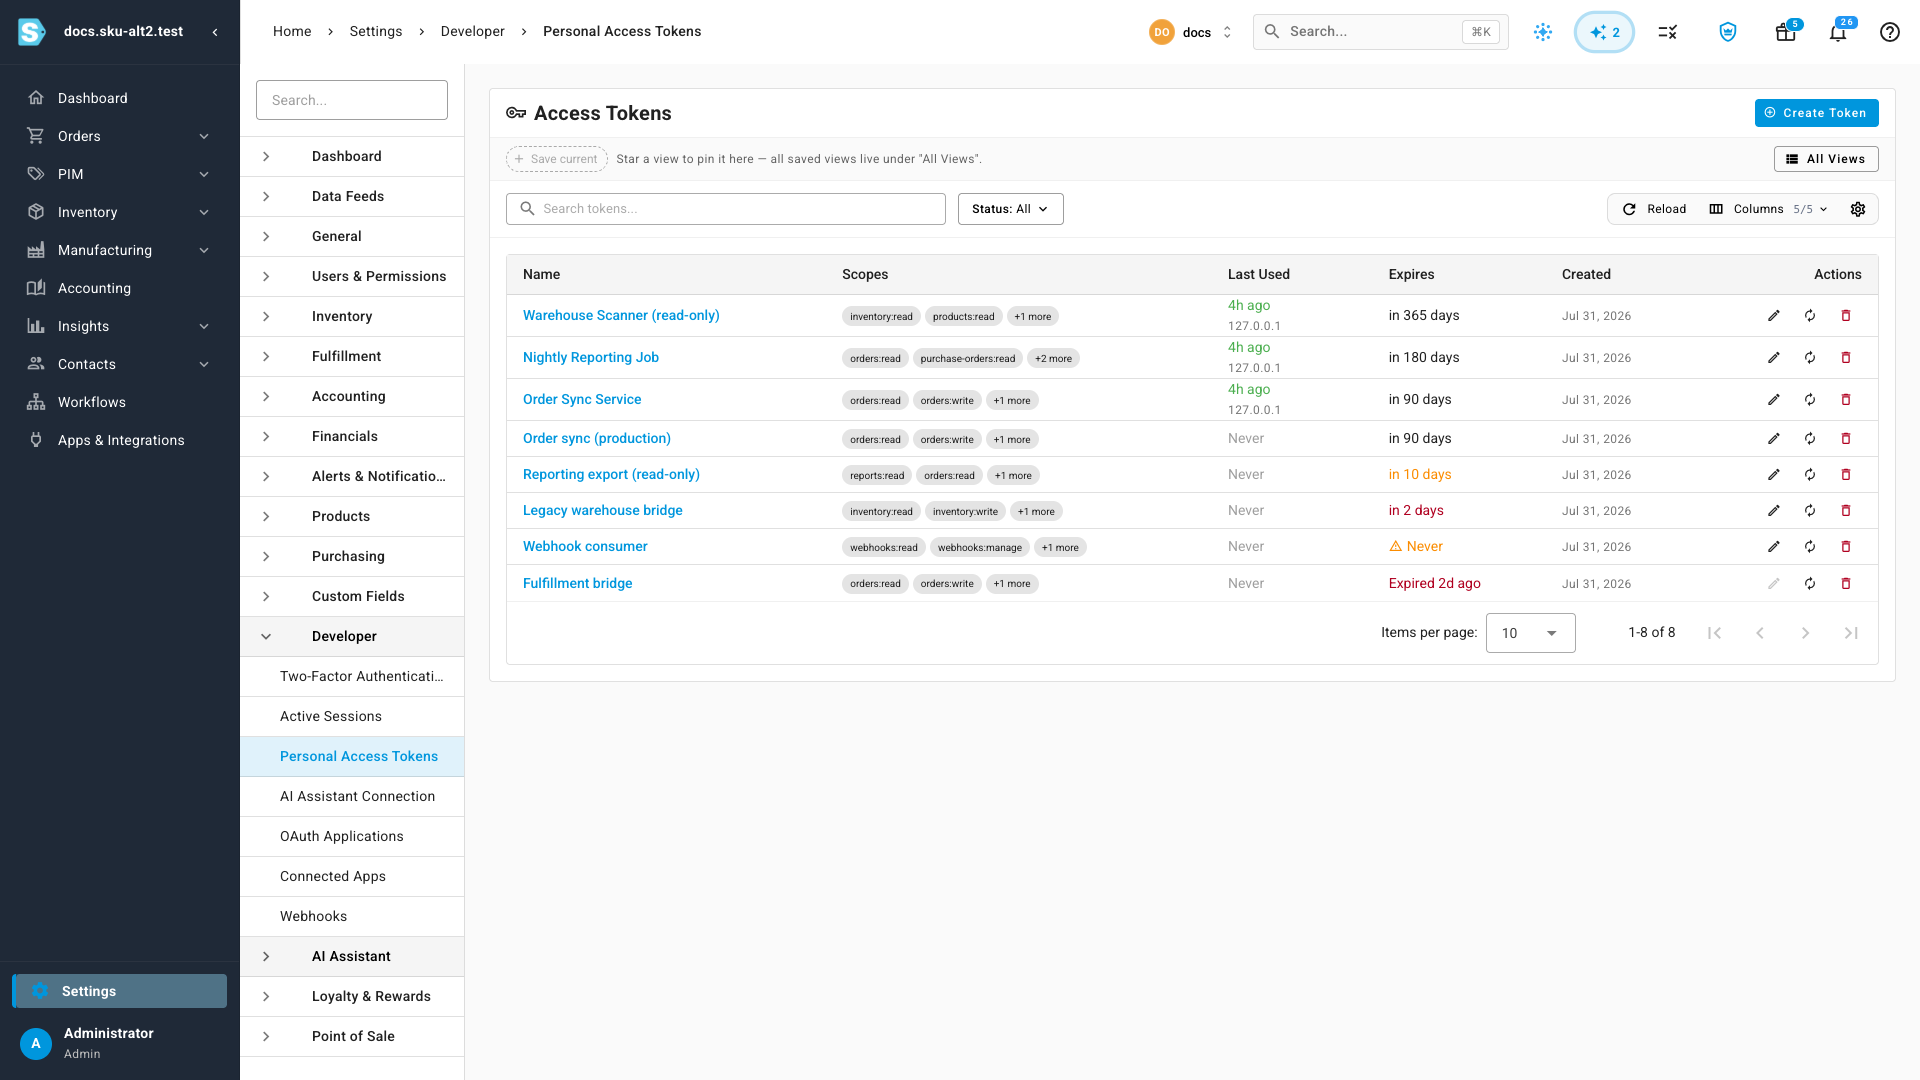
The list shows only personal access tokens — your browser sessions and integration credentials live elsewhere and never appear here.
2. Start a new token
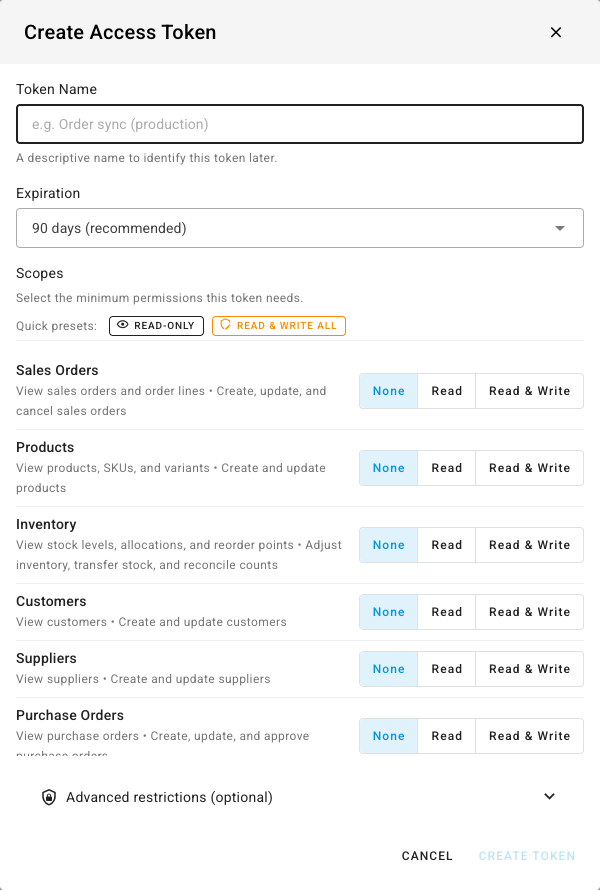
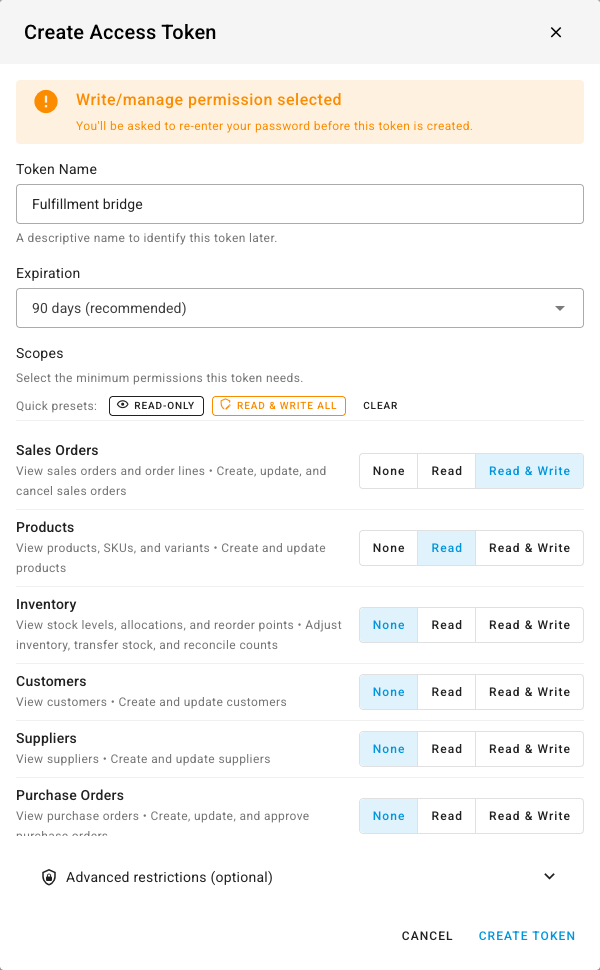
Click Create Token. The Create Access Token dialog opens with the name field focused.
3. Name it after the thing that will use it
Enter a Token Name of at least 3 characters — for example,
Nightly reporting export. The name is how you'll recognize this token months
later in the list, in usage logs, and in the email SKU.io sends you when it's
created, so name it after the script or service rather than the person.
4. Choose an expiration
Pick an Expiration. The dropdown offers 30 days, 60 days, 90 days (recommended), 180 days, 365 days, and No expiration (not recommended).
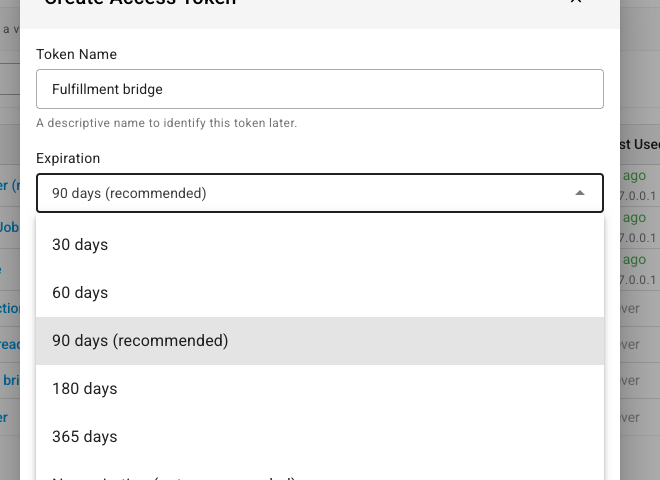
90 days is preselected. Short expiries limit the damage if a token leaks — choose No expiration only for something you actively monitor, because nothing will ever force a rotation.
5. Select the scopes it needs
Tick the permissions the token needs under Scopes. Scopes are grouped by
area, and each group offers read and write separately, so a reporting job can
take orders:read without ever getting orders:write.
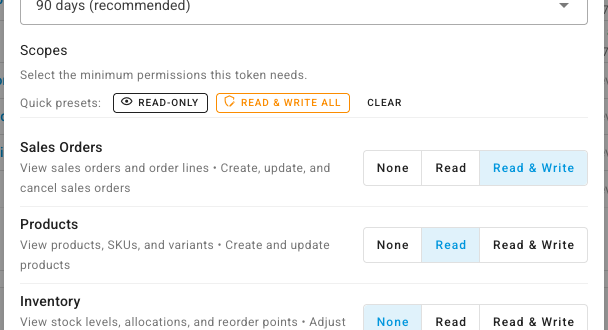
Grant the minimum that makes the job work. You can add a scope later without re-issuing the token.
A token can only do what you can do, so the picker checks each scope against your own role as you choose. If your role can't fully deliver one, a banner appears above the list and the affected groups are flagged with a warning icon — hover it to see exactly which permissions you're missing. A flag isn't a blocker: the scope still works for everything your role does cover, and it only refuses the specific actions behind the missing permissions. Groups with no icon are ones your role covers completely. See Fix a 403 from your API token for what happens when you skip the warning and call the endpoint anyway.
6. Add restrictions, if you want them
Expand Advanced restrictions (optional) to lock the token down further:
| Restriction | What it does |
|---|---|
| IP allowlist | Only accepts requests from the addresses or CIDR ranges you list — up to 50 entries. Use it when the caller has a fixed egress IP. |
| Rate limit | Caps the token at a number of requests per minute (1–10,000). Use it to stop a runaway script from exhausting your account's capacity. |
Leave both empty if you're not sure — you can set them later.
7. Create the token
Click Create Token. The button stays disabled until the name is at least 3 characters and at least one scope is ticked.
If the token includes write or manage permissions, SKU.io asks you to re-enter your password first.
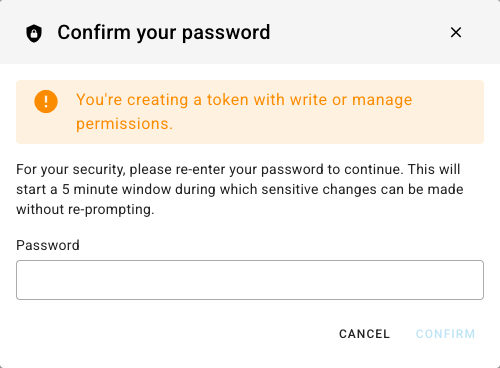
Confirming opens a 5-minute window in which further sensitive changes don't re-prompt.
8. Copy the value now
The Token Created — Copy it now dialog appears with the token in full.
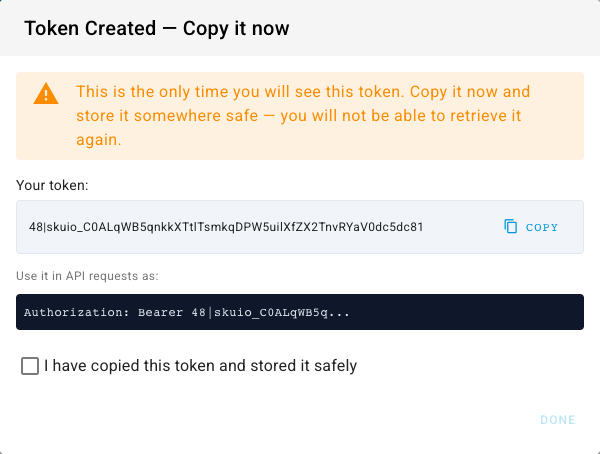
Click Copy and paste the value into wherever it will live. SKU.io stores only a hash of it — there is no page, email, or endpoint that will ever show it again, and editing the token does not re-issue one. If you lose it, use Rotate Secret on the token: it issues a fresh secret while keeping the token's name, scopes, restrictions, and usage history, so you don't have to create a second token and re-point everything at it.
Send it in API requests as a bearer token:
Authorization: Bearer <your-token>
Tick I have copied this token and stored it safely, then click Done. The new token appears in the list.
To make the first call with it, follow the API quickstart on developer.sku.io — that site documents the endpoints themselves, the request format, and the responses you'll get back.
Next steps
- Manage your personal access tokens — edit scopes, watch usage, and revoke.
- API scopes reference — what each scope grants.
- Set up two-factor authentication — required before some token actions.
- Developer settings overview — the other credentials available, and when a token isn't the right one.