Connect an AI assistant
SKU.io speaks the Model Context Protocol (MCP), so an AI assistant can read your orders, stock, and suppliers — and act on them — without you pasting data back and forth. You generate one connection token, paste a config into your assistant, and it talks to your account directly. This guide sets that up.
Before you begin
- You need Claude Desktop, Cursor, Claude Code, or another client that speaks MCP over streamable HTTP.
- The assistant acts as you. It can see and do exactly what your own permissions allow — no more, and no less.
- You get one connection token. Generating another replaces the first, so every assistant you configure shares the same token.
- The token is shown once, at creation. Have the client's config file open, or somewhere safe to paste it.
Steps
1. Open the connection page
Go to Settings → Developer → AI Assistant Connection.
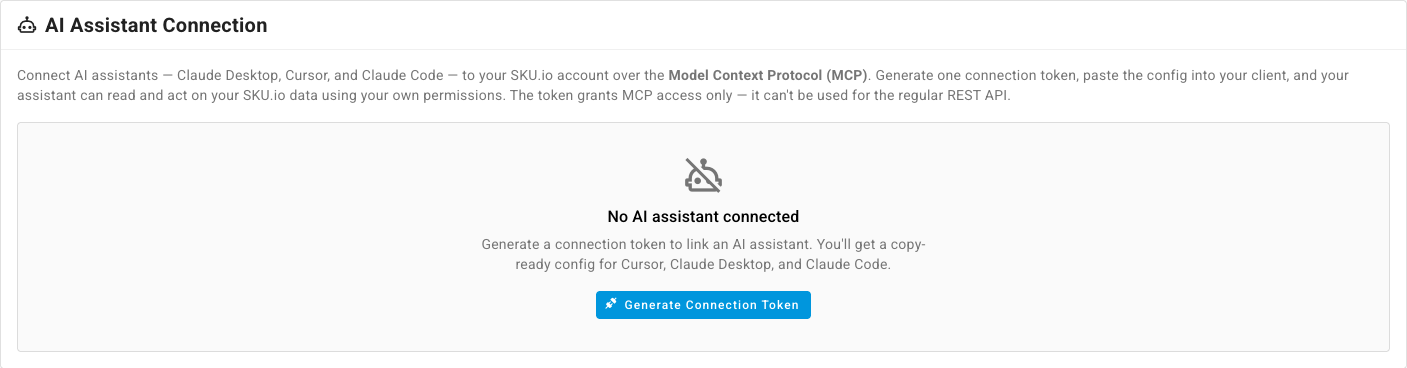
Until you generate a token the page shows No AI assistant connected.
2. Generate the connection token
Click Generate Connection Token.
SKU.io asks you to re-enter your password first. An assistant holding this token can write to your account, so minting one is treated as a sensitive action — the same as creating a token with write permissions. Confirming starts a five-minute window, so you won't be asked again straight away. If you also have two-factor authentication switched on, you verify that first.
SKU.io emails you whenever a token is created on your account, so an assistant you didn't set up is visible straight away.
3. Copy the config for your client
The Connection ready — copy your config now dialog opens with the token already embedded in a ready-to-paste config.
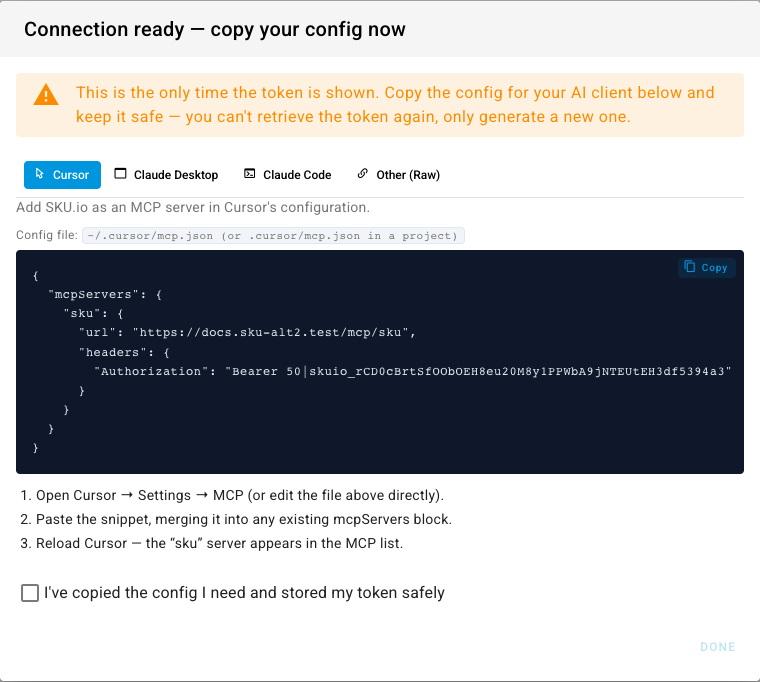
Pick your client from the tabs across the top.

Each tab gives you the config file to edit, the snippet to paste, and the steps to finish in that client. The endpoint in the snippet is your own account's MCP URL — the screenshots below show a local example.
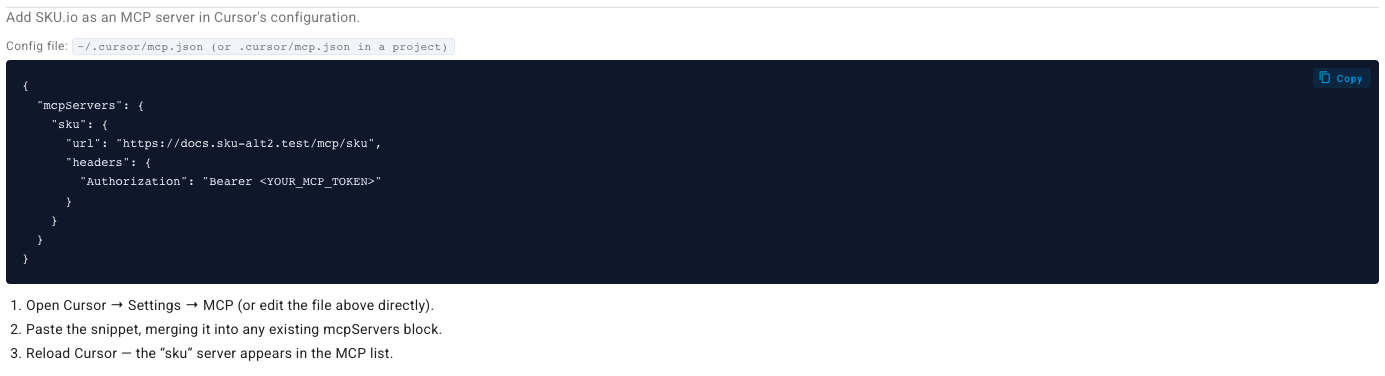
Cursor
Cursor talks to the endpoint over HTTP with a bearer header. Merge the snippet
into ~/.cursor/mcp.json, or .cursor/mcp.json inside a project.
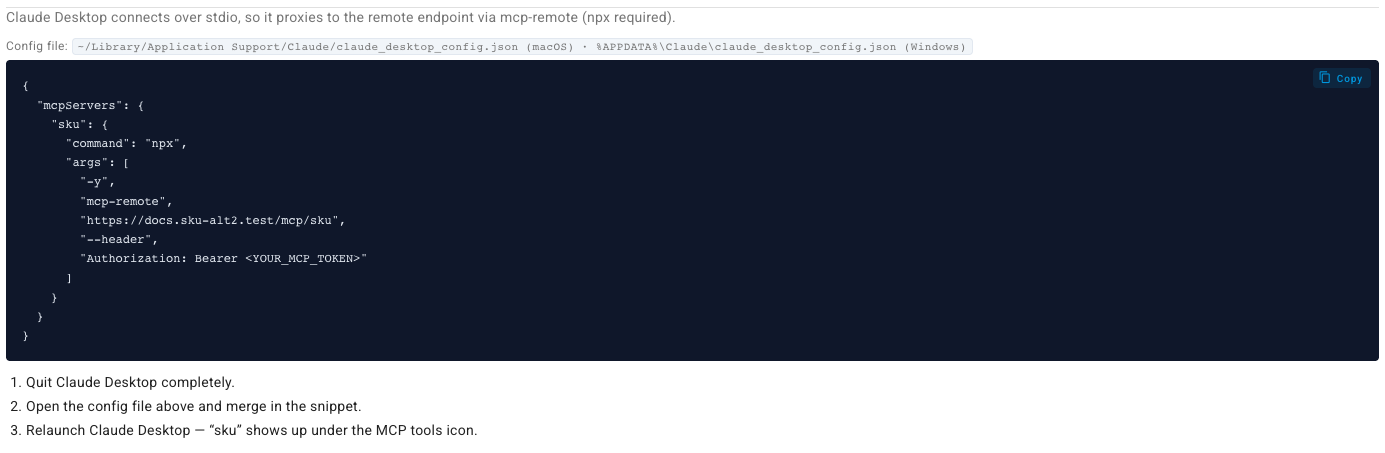
Claude Desktop
Claude Desktop only speaks stdio, so its config proxies to the remote endpoint
through mcp-remote — which needs npx on your machine. Merge the snippet into
claude_desktop_config.json, then quit and relaunch Claude Desktop.
Claude Code
Claude Code registers the server with a single command — run it in your
terminal, then confirm with claude mcp list.

Any other client
The Other (Raw) tab gives you the two things every MCP client needs: the
endpoint URL and the Authorization header.

Each snippet has a Copy button in its top-right corner.
4. Confirm and close
Tick I've copied the config I need and stored my token safely, then click Done. The button stays disabled until you tick the box.
The token isn't recoverable afterwards. If you lose it, generate a new one — there's no way to reveal the old one.
5. Check the connection
Back on the page, the card now shows Connected with the token's name, when it was created, when it was last used, and the MCP endpoint.
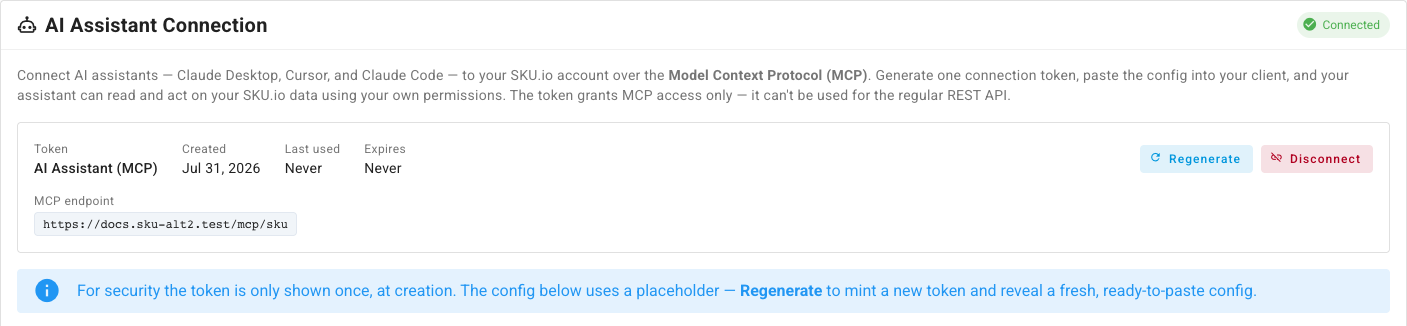
Last used is the quickest way to confirm your assistant actually reached SKU.io — ask it something about your data, reload the page, and the value moves.
The setup instructions stay on the page after you close the dialog, but with
<YOUR_MCP_TOKEN> in place of the real value. Use them to remind yourself of
the file paths; use Regenerate if you need a working config again.
What the connection can do
The token carries a single ability, mcp:access. That means:
- It reaches the MCP endpoint only. The same token sent to the regular REST API is refused, so an assistant config that leaks doesn't become a general API credential.
- It inherits your permissions. The assistant can read and change exactly what you can. It doesn't get its own role, and it can't be given scopes.
- It doesn't appear in your token list and doesn't use one of your 50 personal access token slots. It's managed only from this page.
- It doesn't expire. An AI connection that dies on a silent 90-day timer is worse than one you revoke deliberately, so there's no expiry — which makes Disconnect the control that matters.
For an API credential that reaches the REST API instead, see Create a personal access token.
Regenerate the token
Use Regenerate when you want a fresh secret — after someone leaves, after a config file ends up somewhere it shouldn't, or when you need a working config to paste into a new machine.
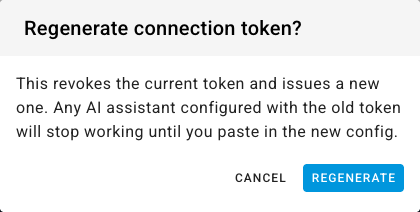
Regenerating revokes the current token and issues a new one, then reopens the copy-once dialog with the fresh config. Every assistant still holding the old token stops working until you paste the new config in.
Disconnect
Disconnect revokes the token and leaves nothing in its place.
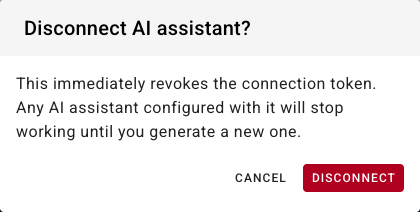
Every assistant configured with it stops working immediately. The page returns to No AI assistant connected, and you can generate a new token whenever you want one — it won't be the same value.
Next steps
- API scopes reference — why an MCP token can't carry REST scopes.
- Set up two-factor authentication — required to generate a connection token once enabled.
- Review connected apps — third-party apps authorized on your account.