Configure general repair settings
Settings → Repairs & Warranty → General is one page of grouped cards covering almost everything about how a repair behaves, from the number it's given to how its cost is booked. Every field starts with today's behaviour, so nothing changes until you deliberately change a setting. This guide walks through each card.
Before you begin
- You need the Manage repair settings permission to change anything on this page. Without it, every field is visible but greyed out.
- The whole page shares one Save Changes / Discard pair — there's no per-card save button. Save Changes is disabled until something on the page has actually changed, and it only sends the fields you touched.
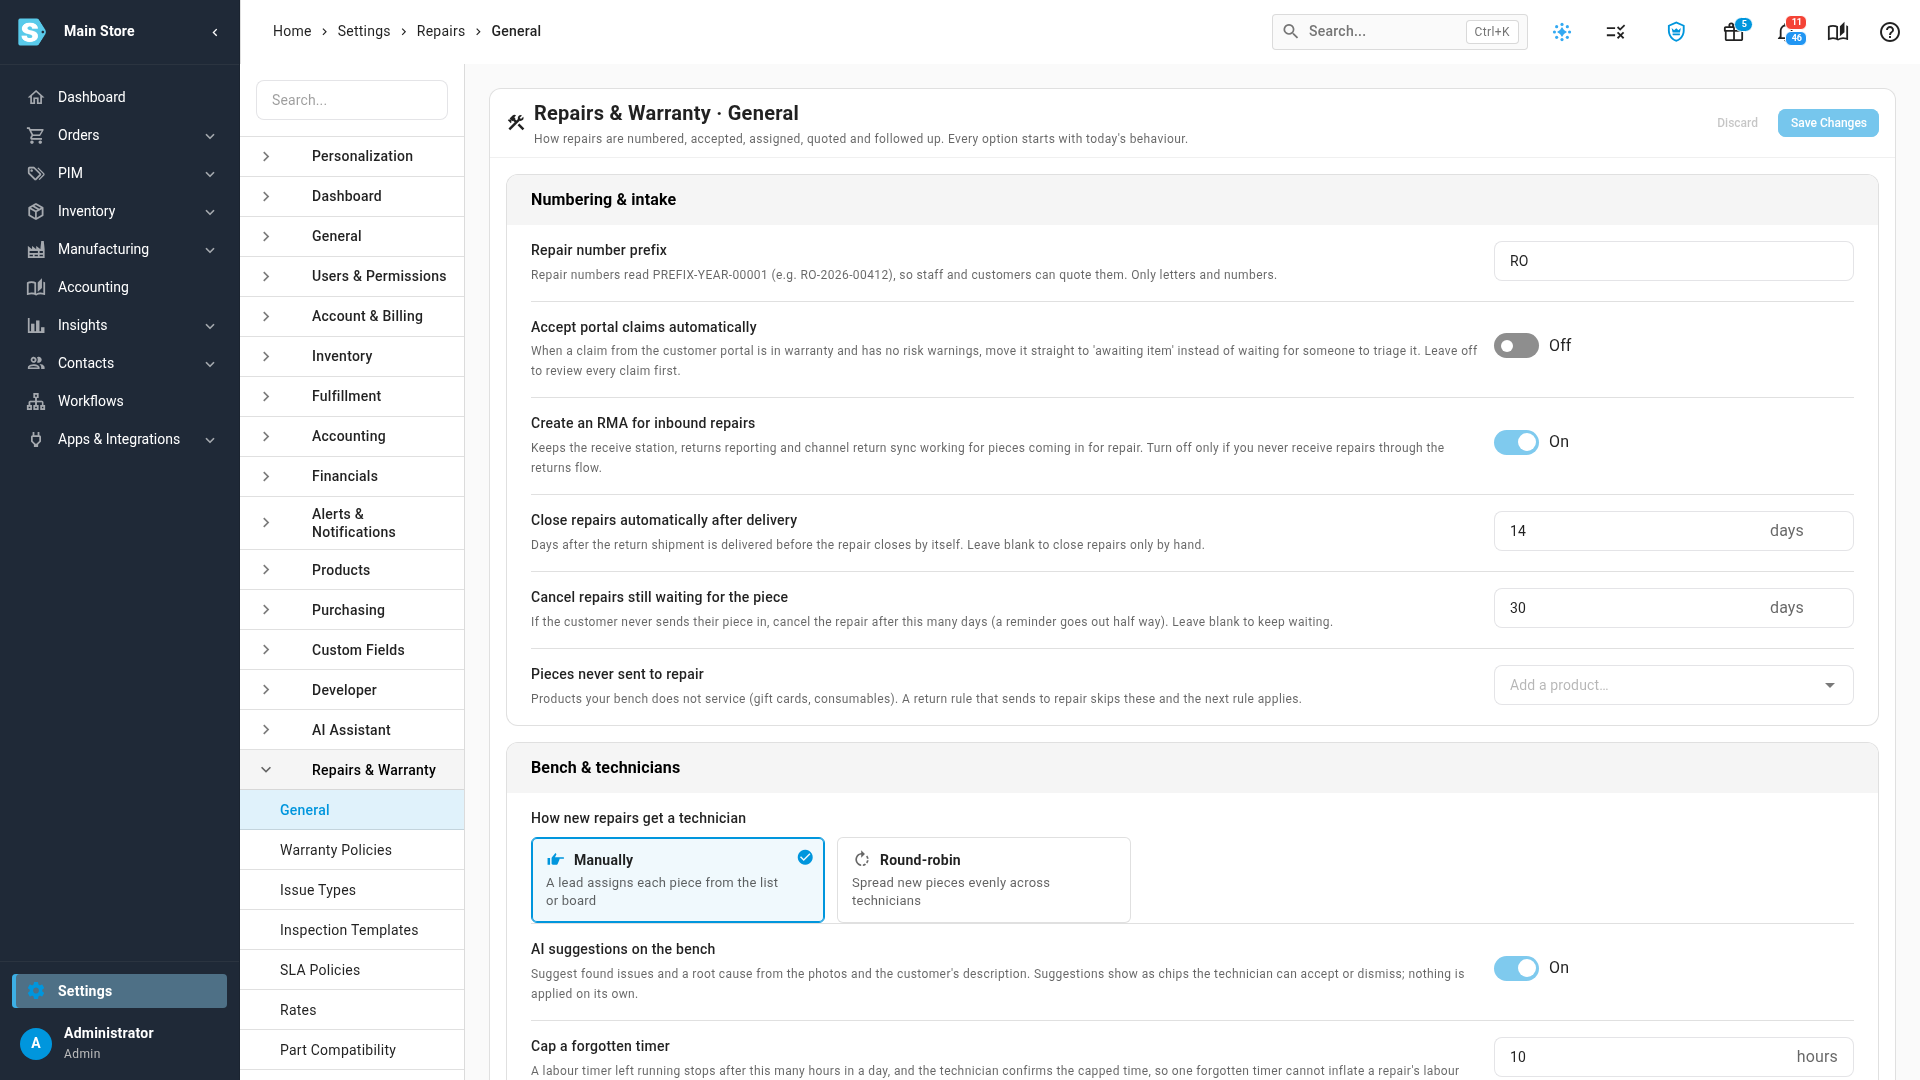
1. Set numbering and intake defaults
The Numbering & intake card controls how a new repair is named and accepted:
- Repair number prefix — every repair is numbered
PREFIX-YEAR-00001(for exampleRO-2026-00412); the default prefix is RO. Letters and numbers only, up to 10 characters — anything else shows "The repair number prefix can only use letters and numbers." - Accept portal claims automatically — off by default. Turn it on and a customer-portal claim that's in warranty with no risk warnings moves straight to Awaiting item instead of waiting for someone to triage it.
- Create an RMA for inbound repairs — on by default. Keeps the receive station, returns reporting, and channel return sync working for pieces coming in for repair. Turn it off only if you never receive repairs through the returns flow.
- Close repairs automatically after delivery — days after the return shipment is delivered before a finished repair closes itself. Default 14 days; clear the field to close repairs only by hand.
- Cancel repairs still waiting for the piece — if the customer never sends their piece in, the repair cancels itself after this many days (default 30), with a reminder email at the halfway point. Clear the field to keep waiting indefinitely.
- Pieces never sent to repair — a product picker for items your bench doesn't service, such as gift cards or consumables. Type two or more characters to search; each match shows the product's name, with its SKU under it. Added products show as removable chips. A return-disposition policy that would otherwise send one of these products to repair skips it and the next matching policy applies instead.
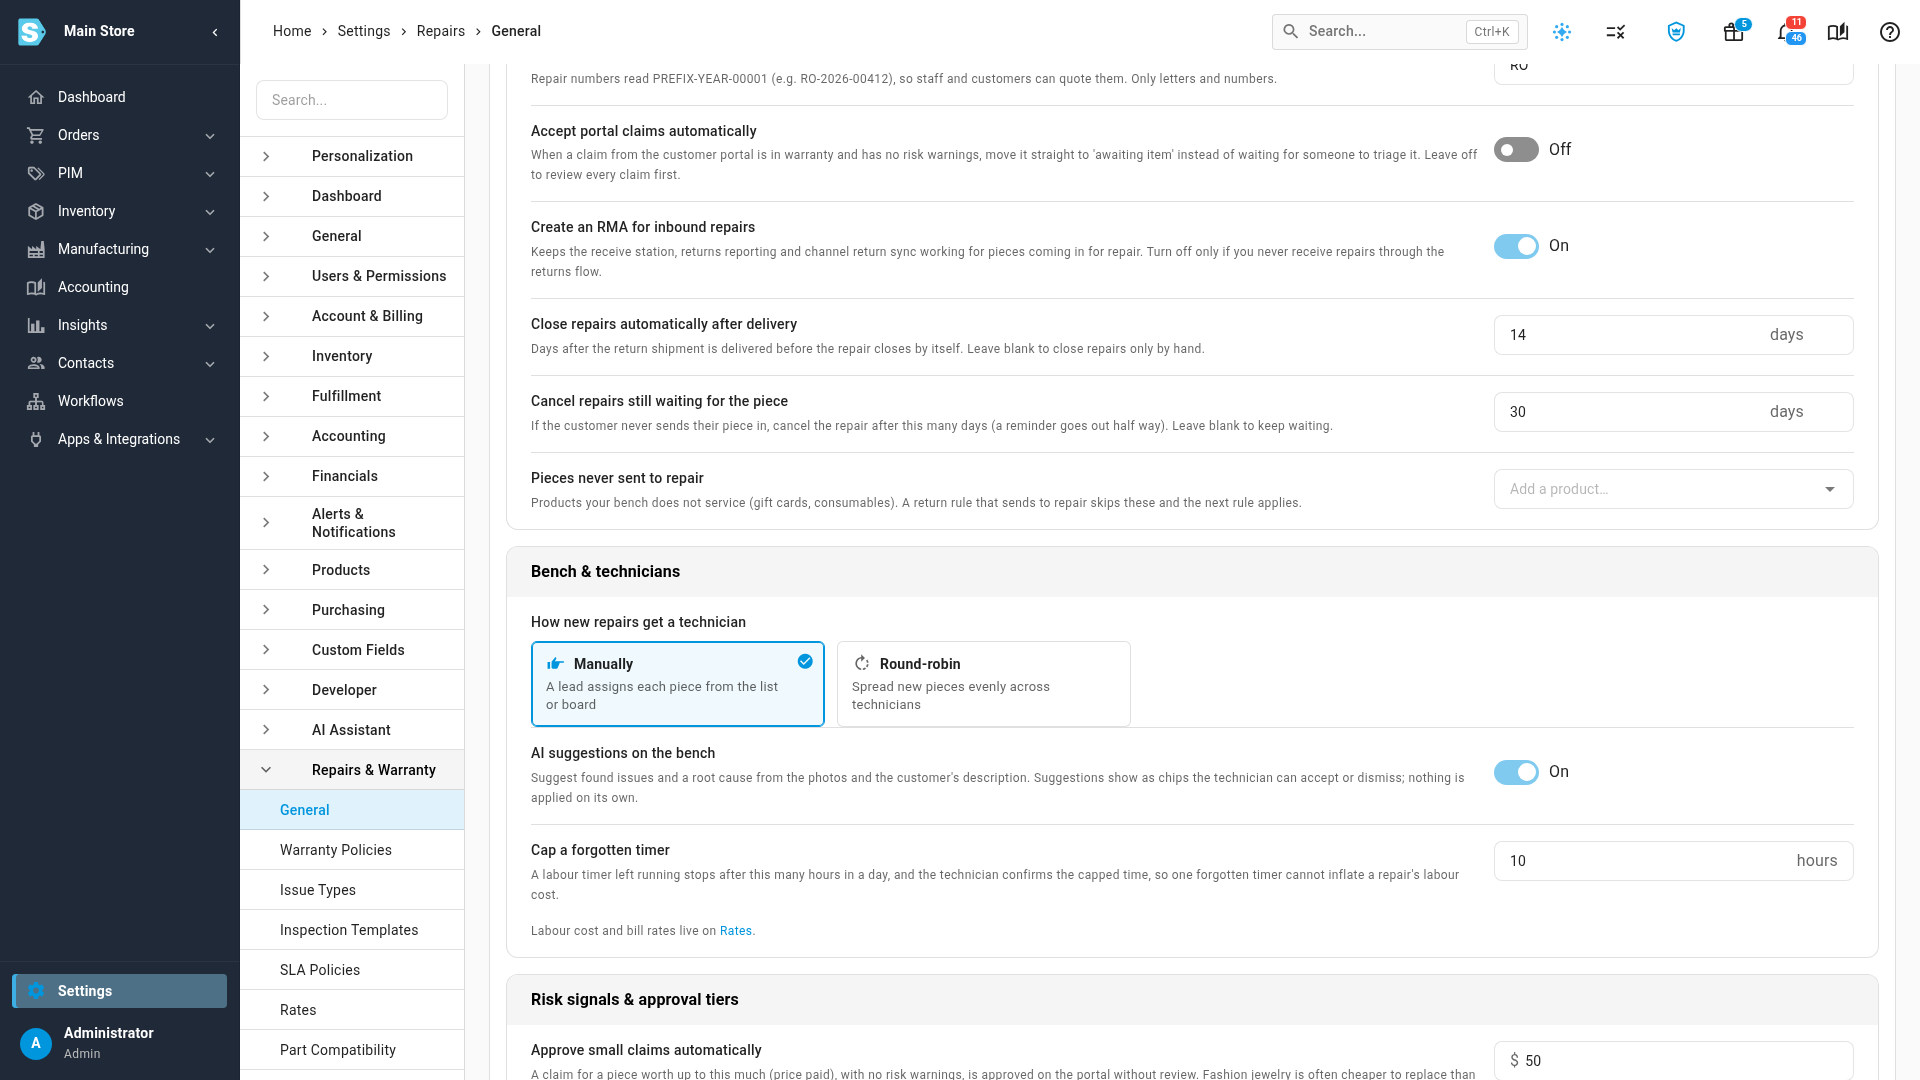
2. Assign technicians and tune the bench
The Bench & technicians card:
- How new repairs get a technician — choose Manually (a lead assigns each piece from the list or board) or Round-robin (spread evenly across technicians). Manually is the default.
- AI suggestions on the bench — on by default. Suggests found issue types and a root cause from photos and the customer's description, shown as dismissible chips a technician accepts or dismisses. Nothing is applied automatically.
- Cap a forgotten timer — a labour timer left running stops itself after this many hours in a day (default 10 hours); the technician has to confirm the capped entry, so one forgotten timer can't inflate a repair's labour cost.
Labour cost and bill rates are set on their own page — see Set SLA policies and labour/bill rates.
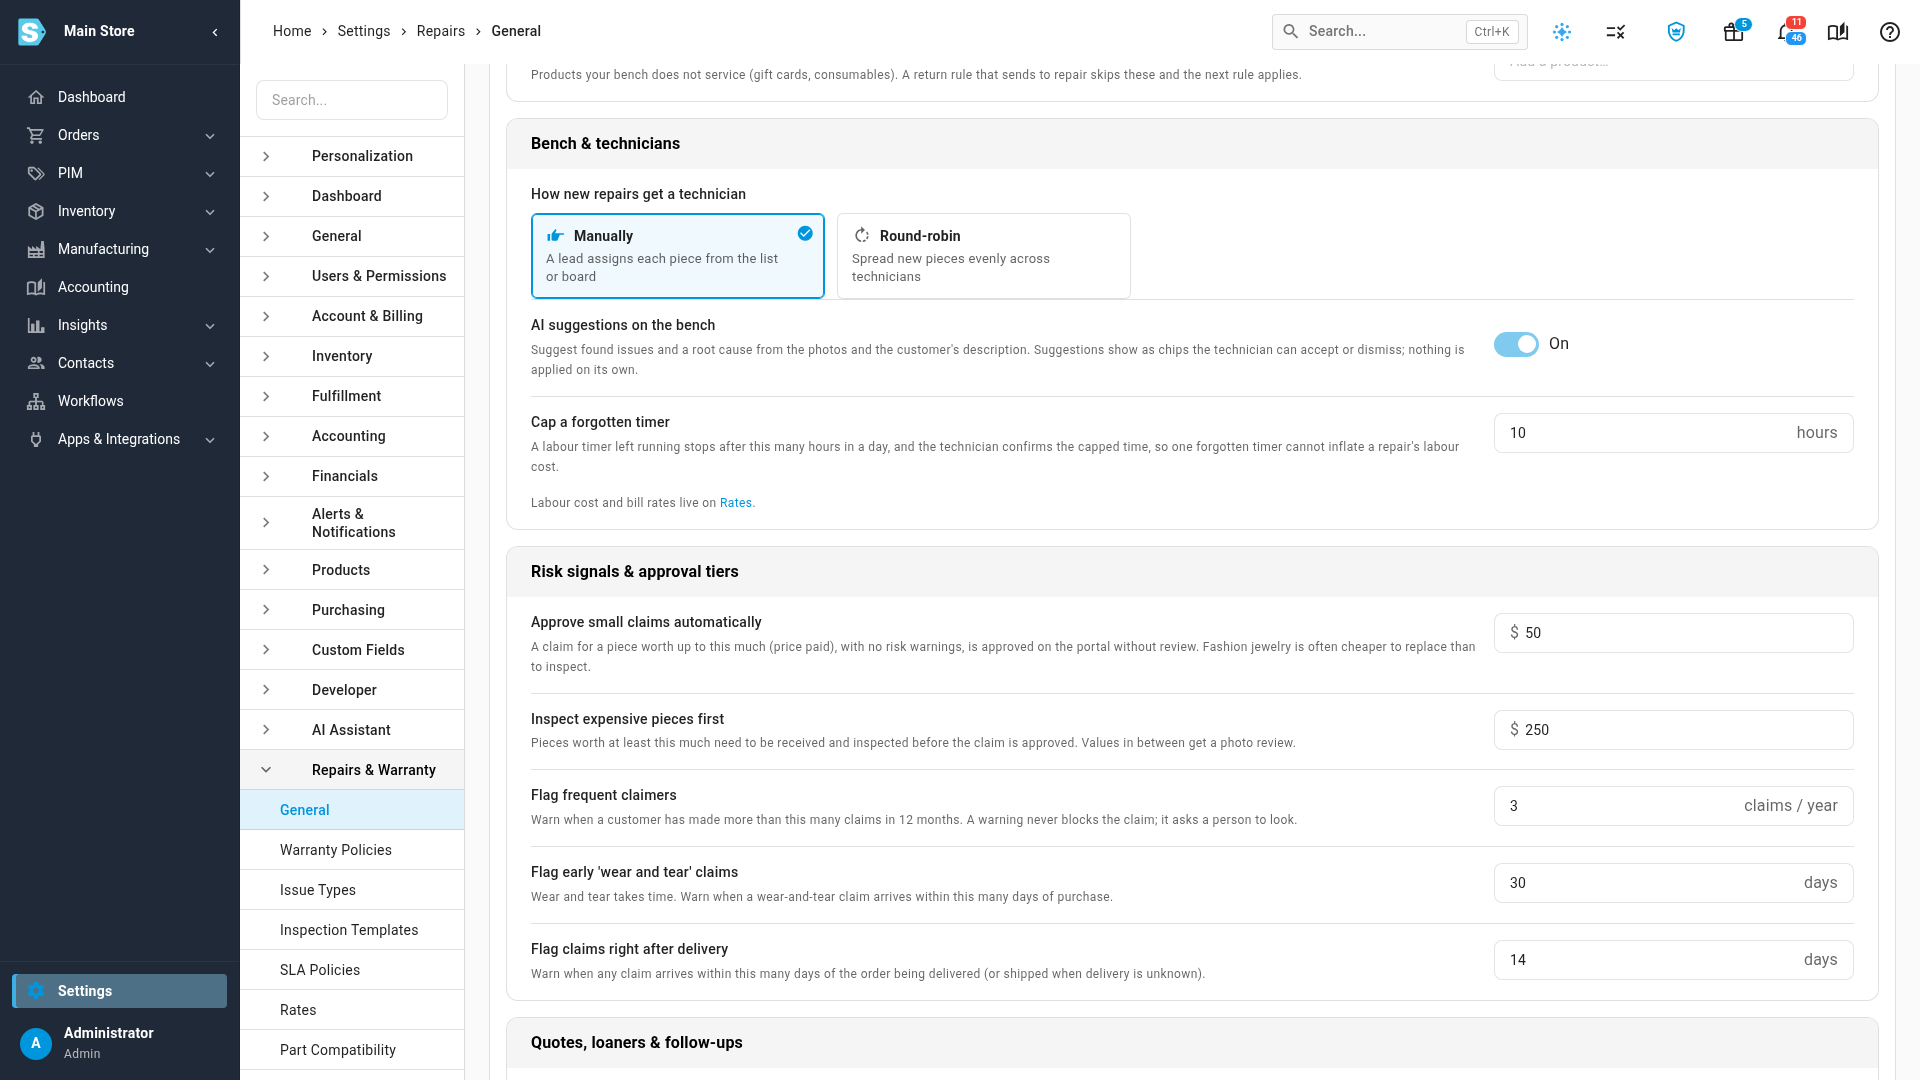
3. Set risk signals and approval tiers
The Risk signals & approval tiers card raises warnings on a claim — none of them block it, they just ask a person to look:
- Approve small claims automatically — a claim for a piece worth up to this amount (price paid), with no risk warnings, is approved on the portal without review.
- Inspect expensive pieces first — pieces worth at least this amount must be received and inspected before the claim is approved; values in between get a photo review instead. This threshold must be at or above the auto-approve limit — set it lower and you'll see "The inspection threshold must be at least the auto-approve limit."
- Flag frequent claimers — warns when a customer has made more claims than this in the last 12 months.
- Flag early "wear and tear" claims — warns when a wear-and-tear claim arrives within this many days of purchase.
- Flag claims right after delivery — warns when any claim arrives within this many days of the order's delivery (or shipment, if delivery is unknown).
4. Set quotes, loaners and follow-ups
The Quotes, loaners & follow-ups card:
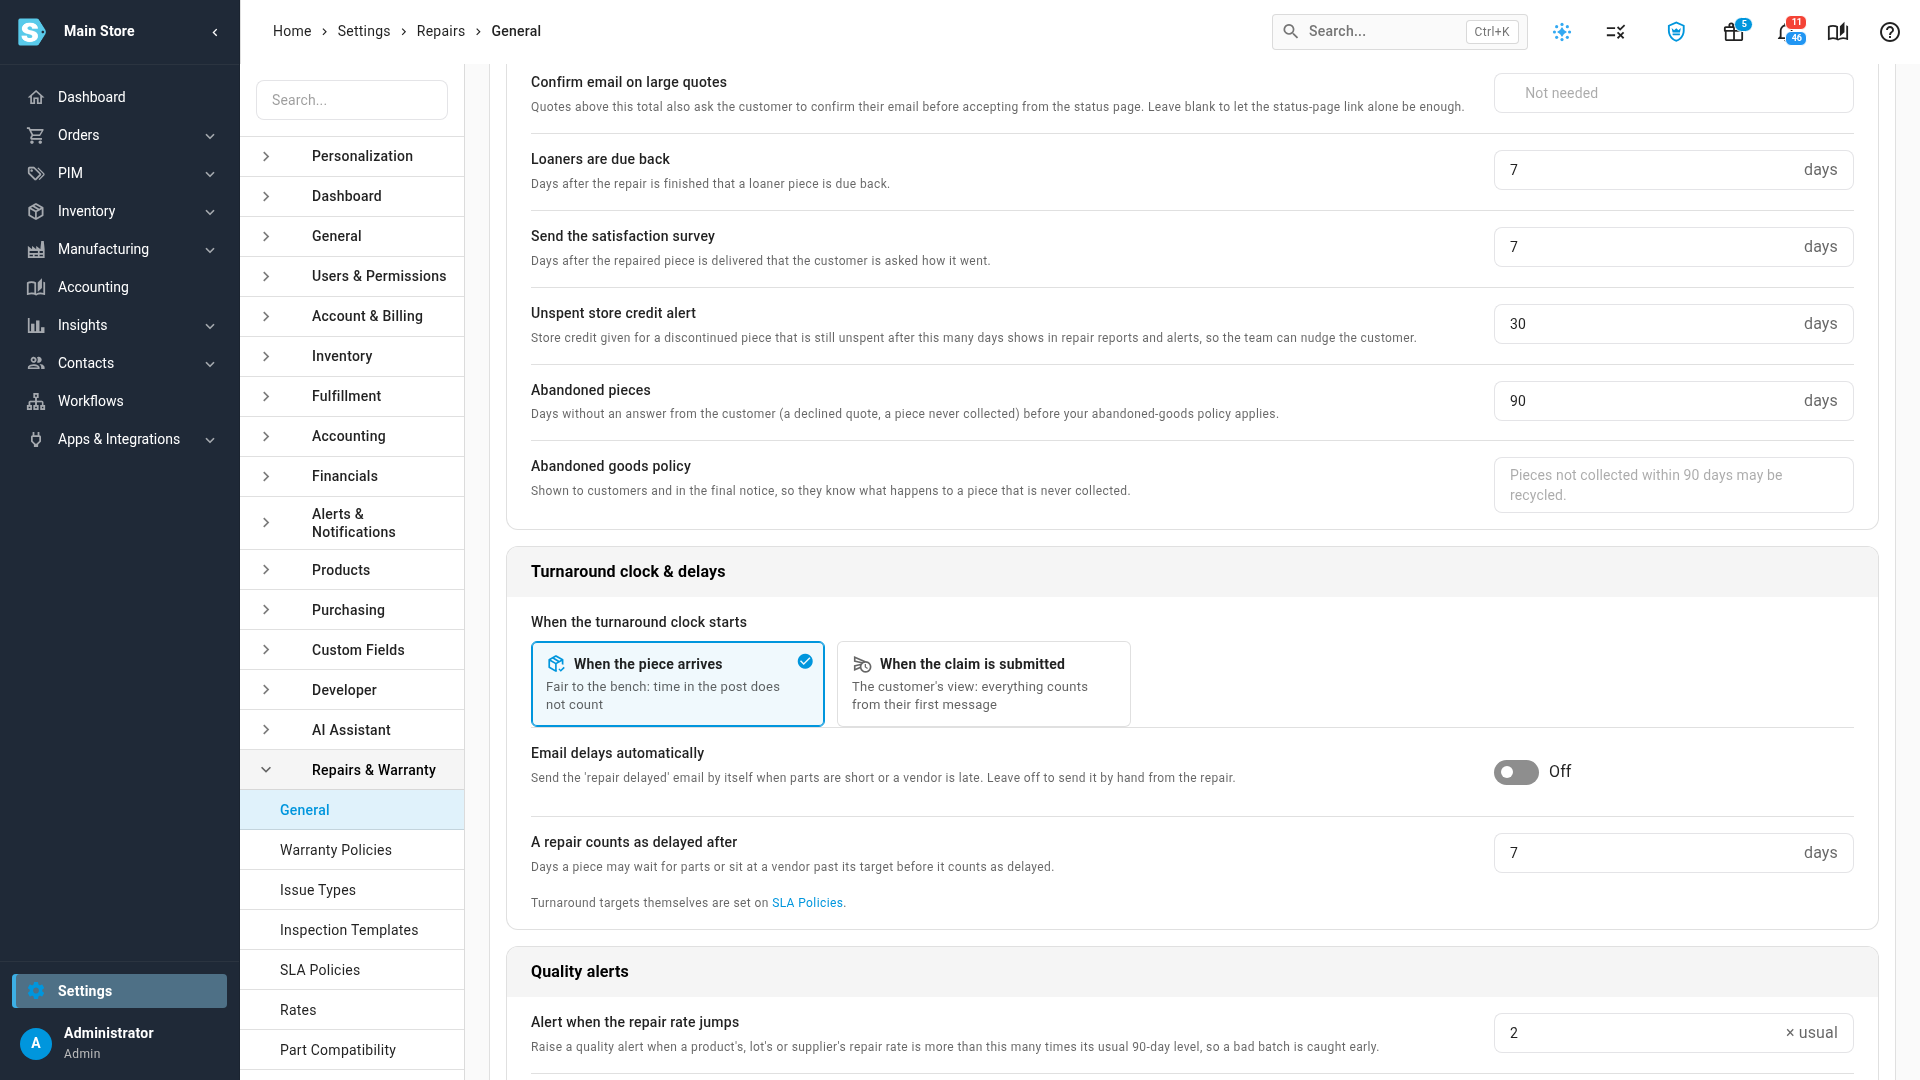
- Quotes expire after — how many days a paid-repair quote stays open for the customer to accept.
- Quote reminders — the days after sending a quote on which a reminder goes out; type a number and press Enter to add it.
- Confirm email on large quotes — quotes above this total also ask the customer to confirm their email before accepting from the status page. Leave blank to skip this extra check.
- Loaners are due back — days after a repair finishes that a loaner piece is due back. Only products marked for lending can be issued as loaners: open the product, and on Overview → Details, click Edit and tick Loaner eligible.
- Send the satisfaction survey — days after a repaired piece is delivered that the customer is asked how it went.
- Unspent store credit alert — flags store credit given for a discontinued piece that's still unspent after this many days, so the team can follow up.
- Abandoned pieces — days without an answer from the customer (a declined quote, a piece never collected) before your abandoned-goods policy applies.
- Abandoned goods policy — the wording shown to customers and in the final notice once a piece is considered abandoned. Up to 5,000 characters.
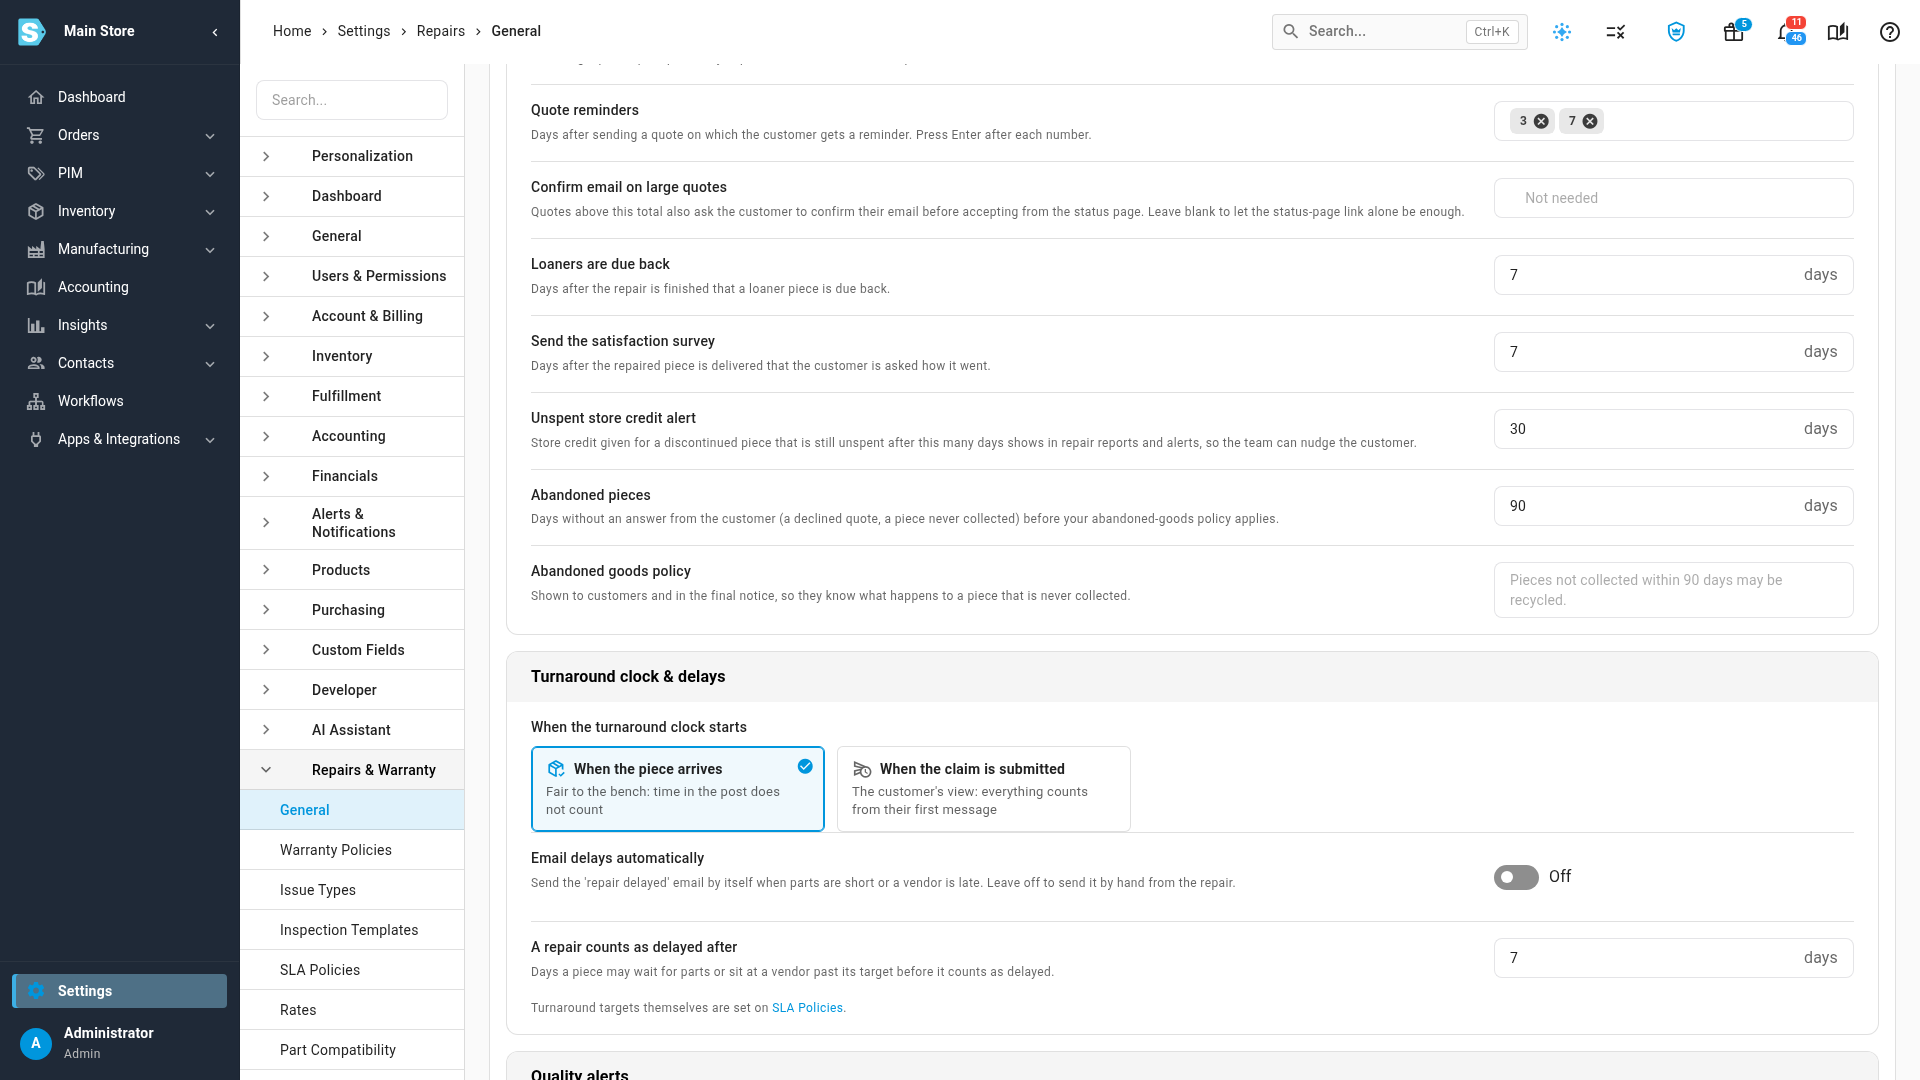
5. Choose when the turnaround clock starts
The Turnaround clock & delays card:
- When the turnaround clock starts — choose When the piece arrives (time in the post doesn't count against the bench) or When the claim is submitted (counts from the customer's first message).
- Email delays automatically — on sends the "repair delayed" email by itself when parts are short or a vendor is late; off leaves it to be sent by hand from the repair.
- A repair counts as delayed after — the number of days a piece may wait past its target before it's considered delayed.
The turnaround targets themselves are set on SLA Policies — see Set SLA policies and labour/bill rates.
6. Tune quality alerts
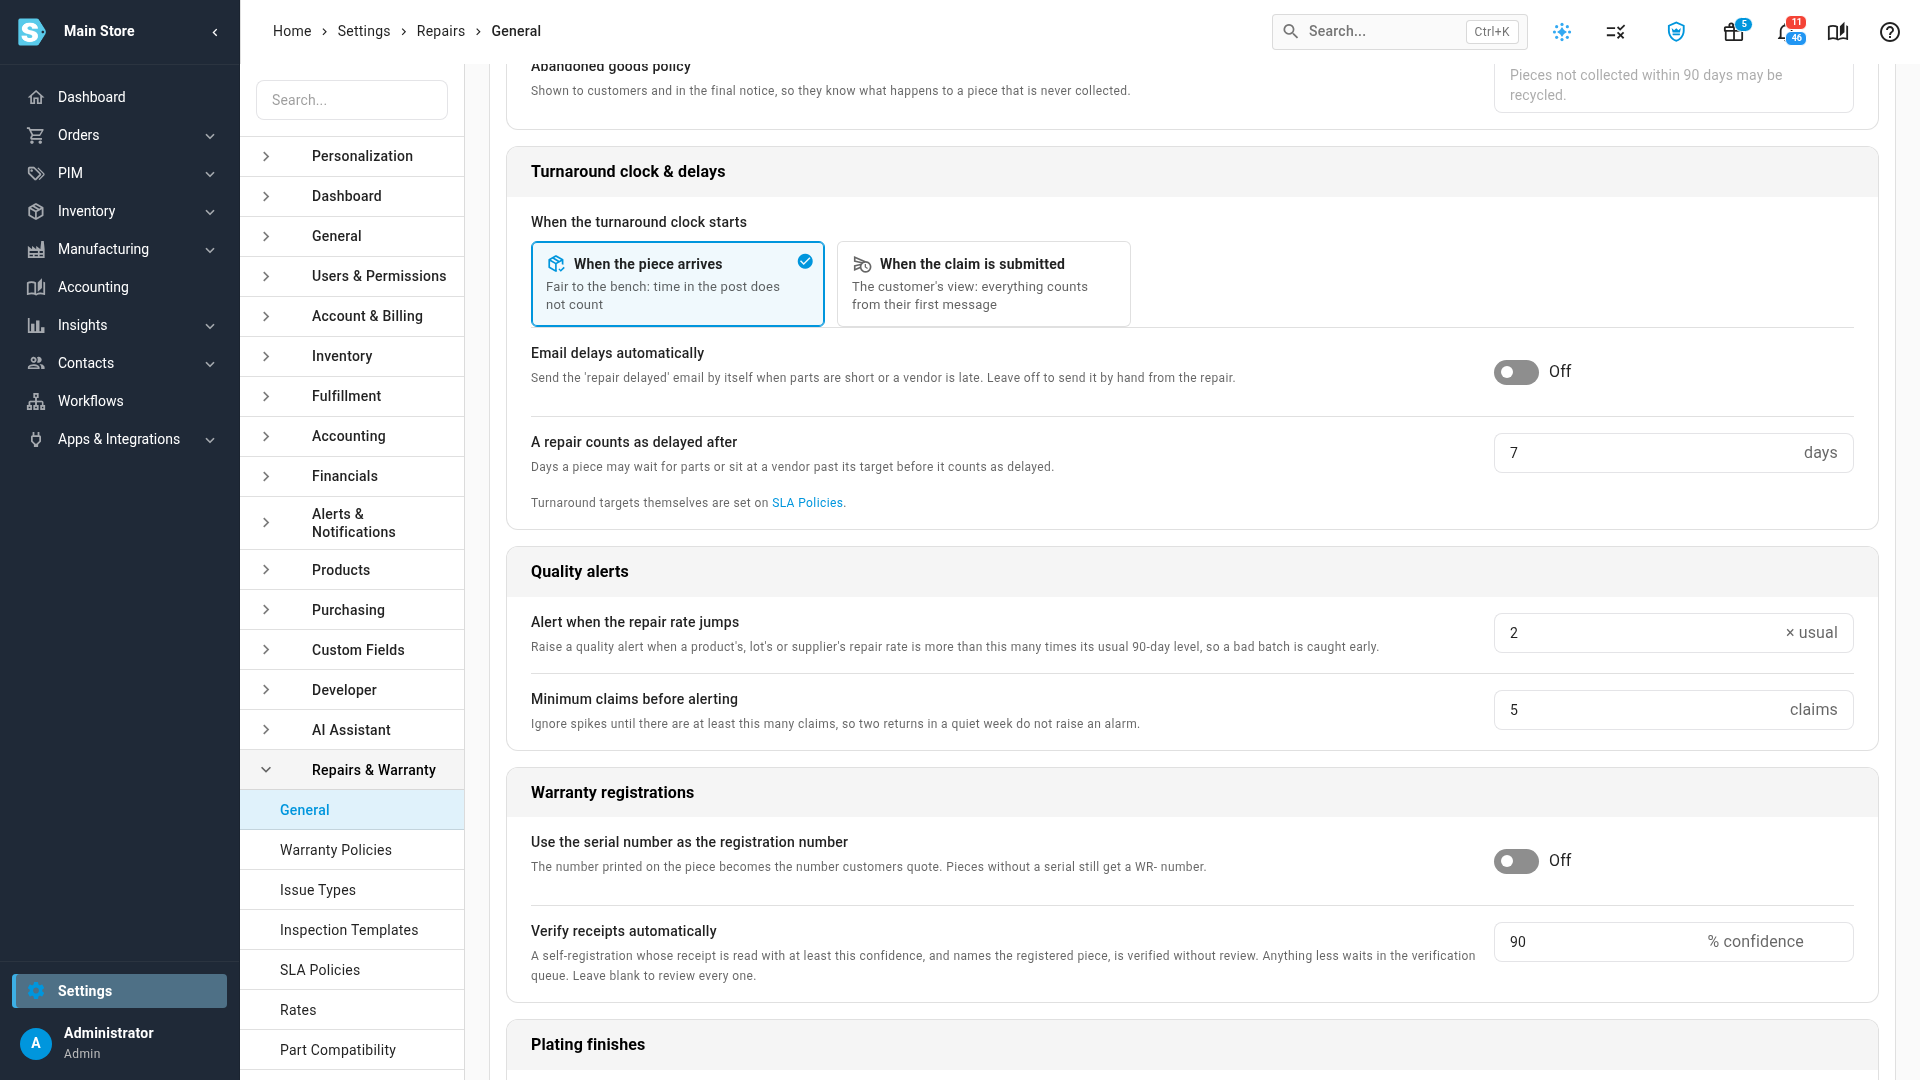
The Quality alerts card raises an alert when a product, lot, or supplier's repair rate spikes:
- Alert when the repair rate jumps — how many times its usual 90-day level a repair rate has to exceed before it's flagged.
- Minimum claims before alerting — ignores spikes until at least this many claims exist, so a couple of returns in a quiet week never raise an alarm.
7. Set warranty registration defaults
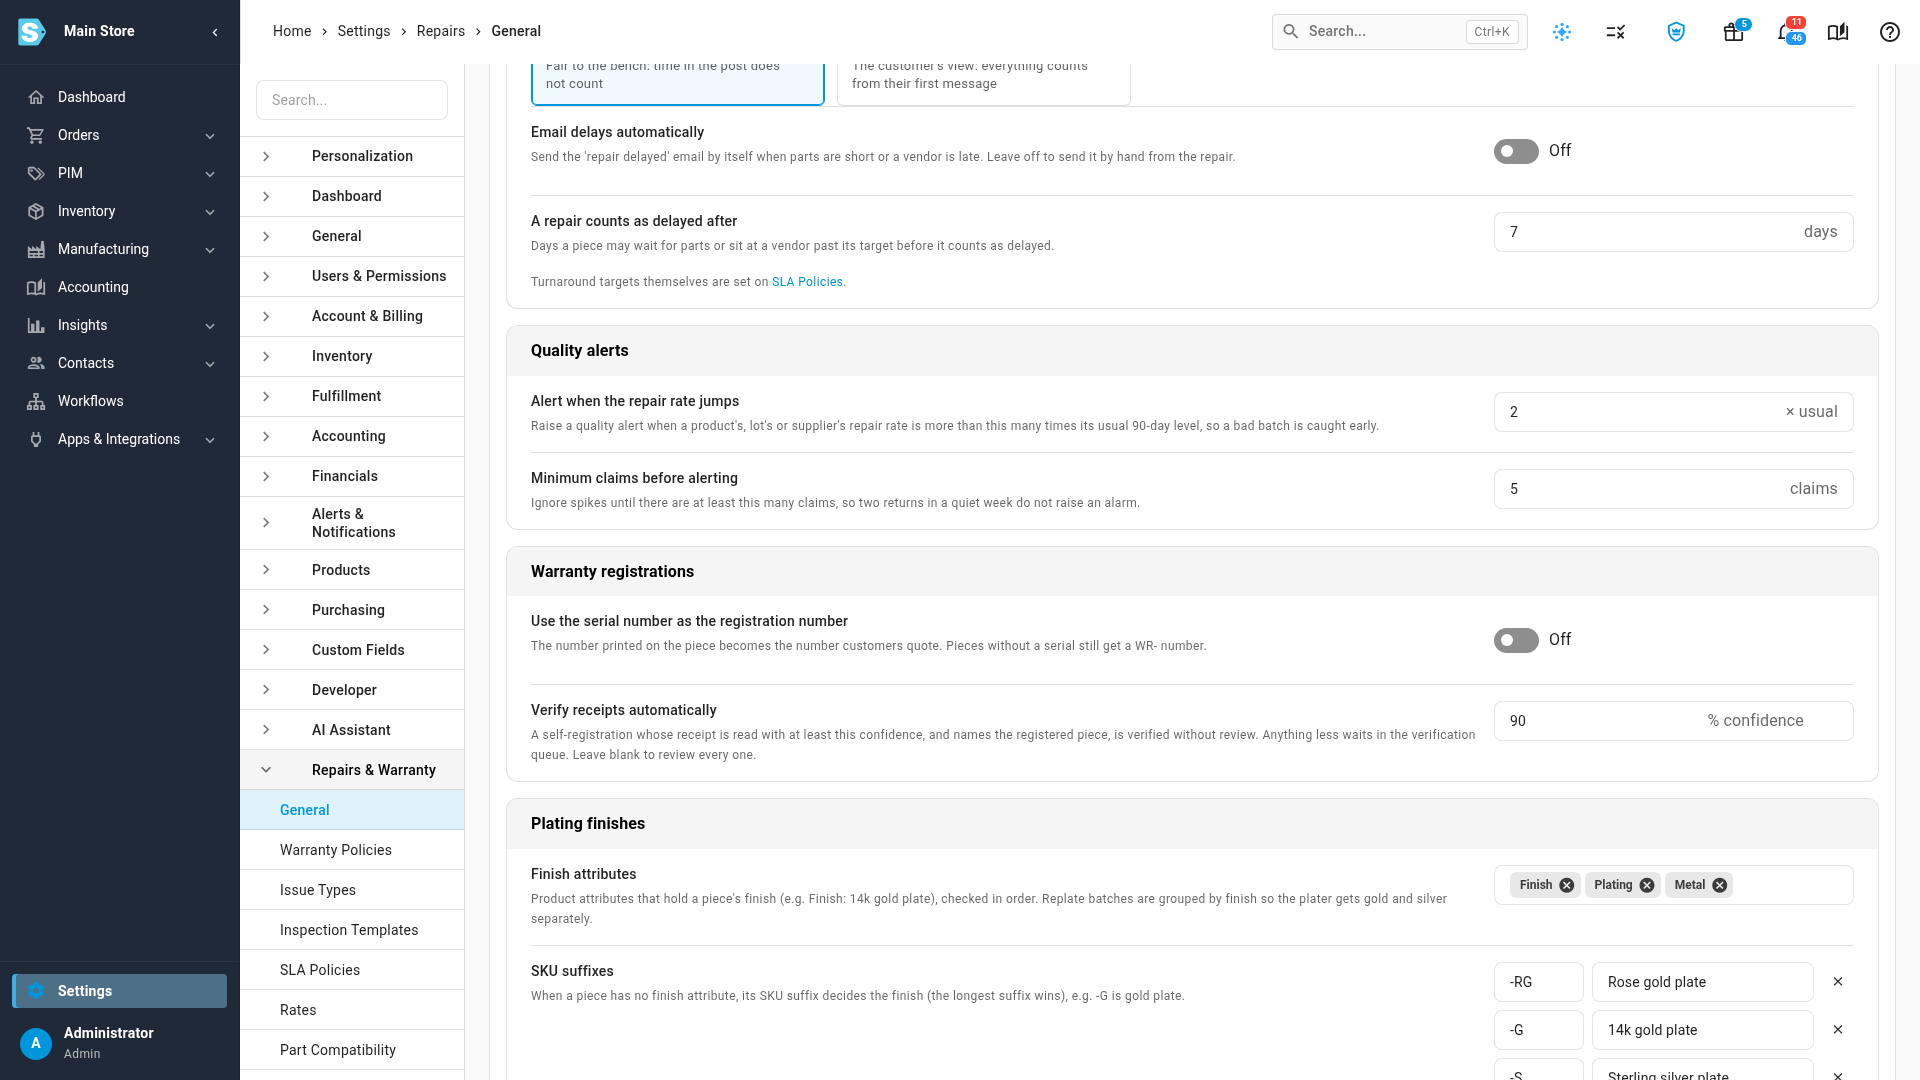
The Warranty registrations card:
- Use the serial number as the registration number — makes the piece's serial the number customers quote; pieces without a serial still get a
WR-number. - Verify receipts automatically — a confidence percentage. A self-registration whose receipt is read at or above this confidence, and that names the registered piece, is verified without review; anything lower waits in the verification queue. Leave blank to always review by hand. The field validates as a percentage between 0 and 100 — entering something else shows "The auto-verify confidence is a fraction between 0 and 1 (0.9 = 90%)."
8. Set plating finish rules
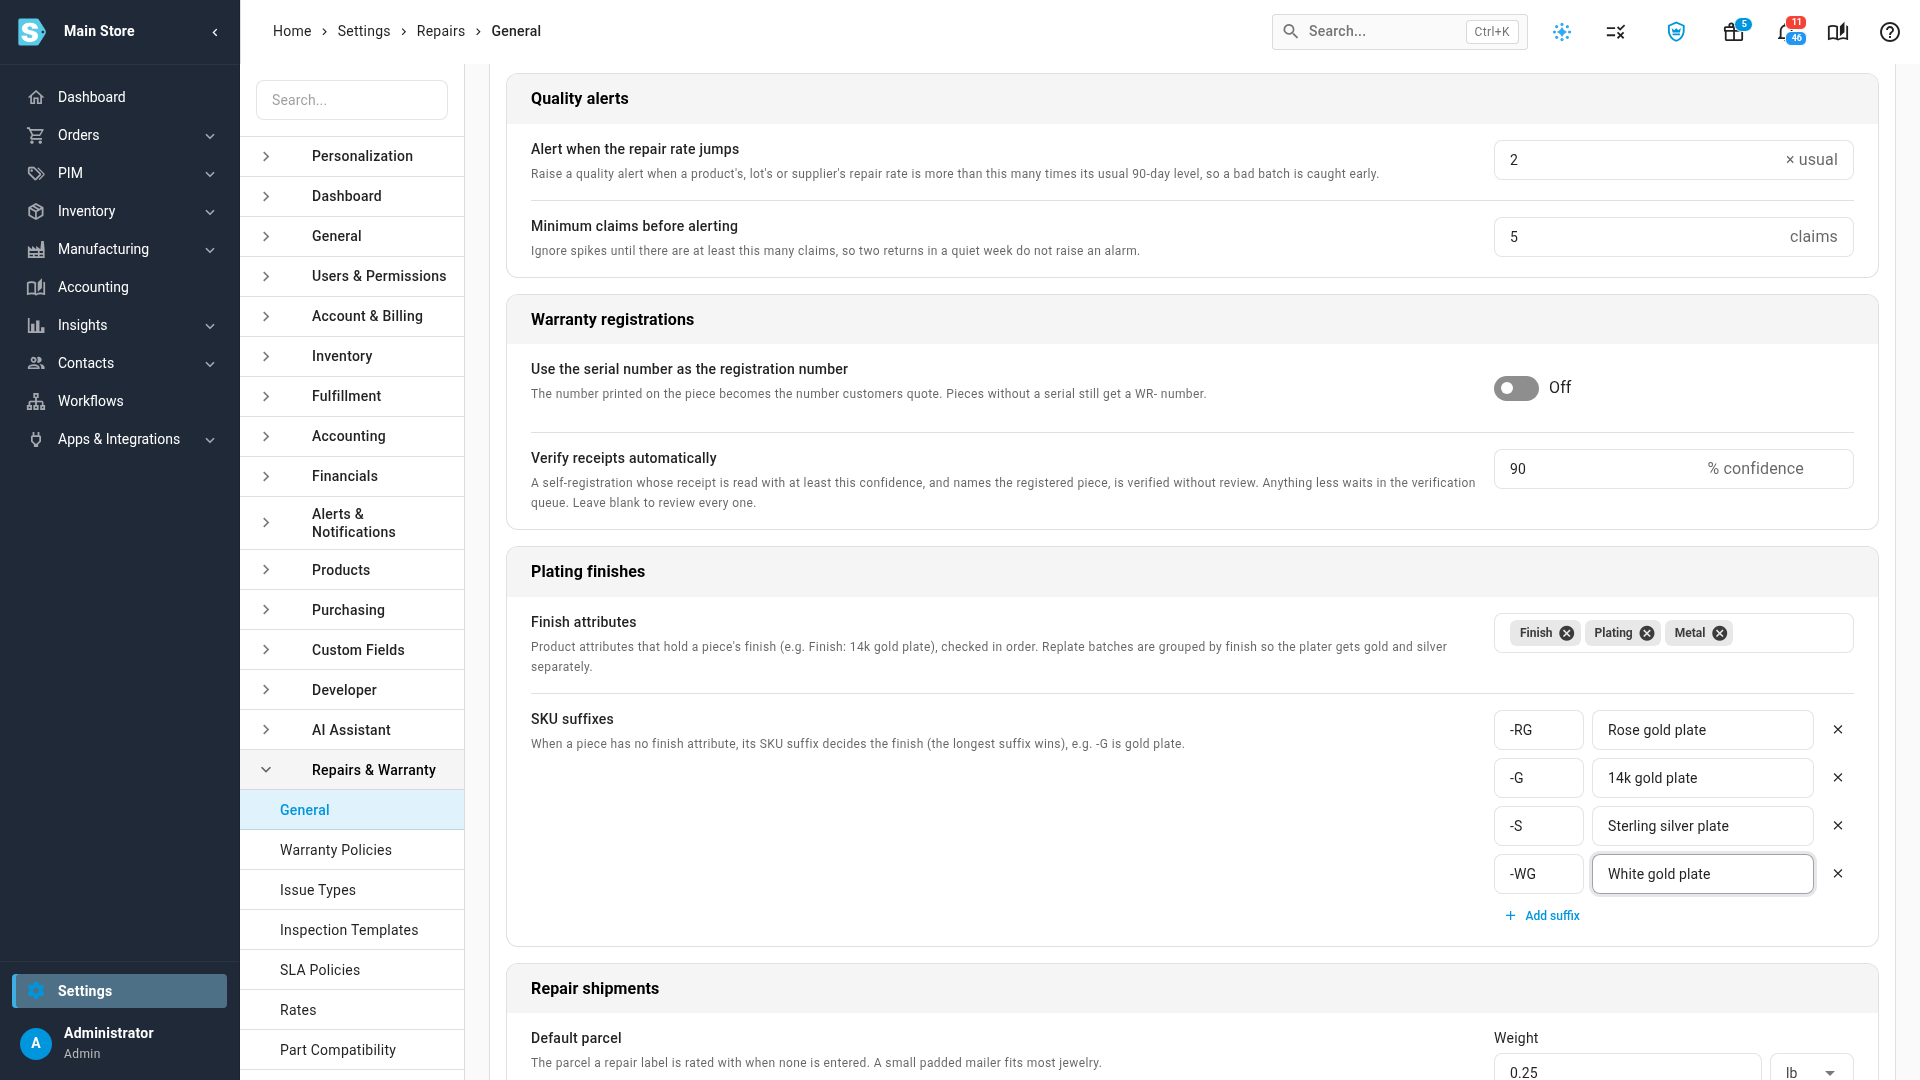
The Plating finishes card decides how a piece's finish is detected for replate batches:
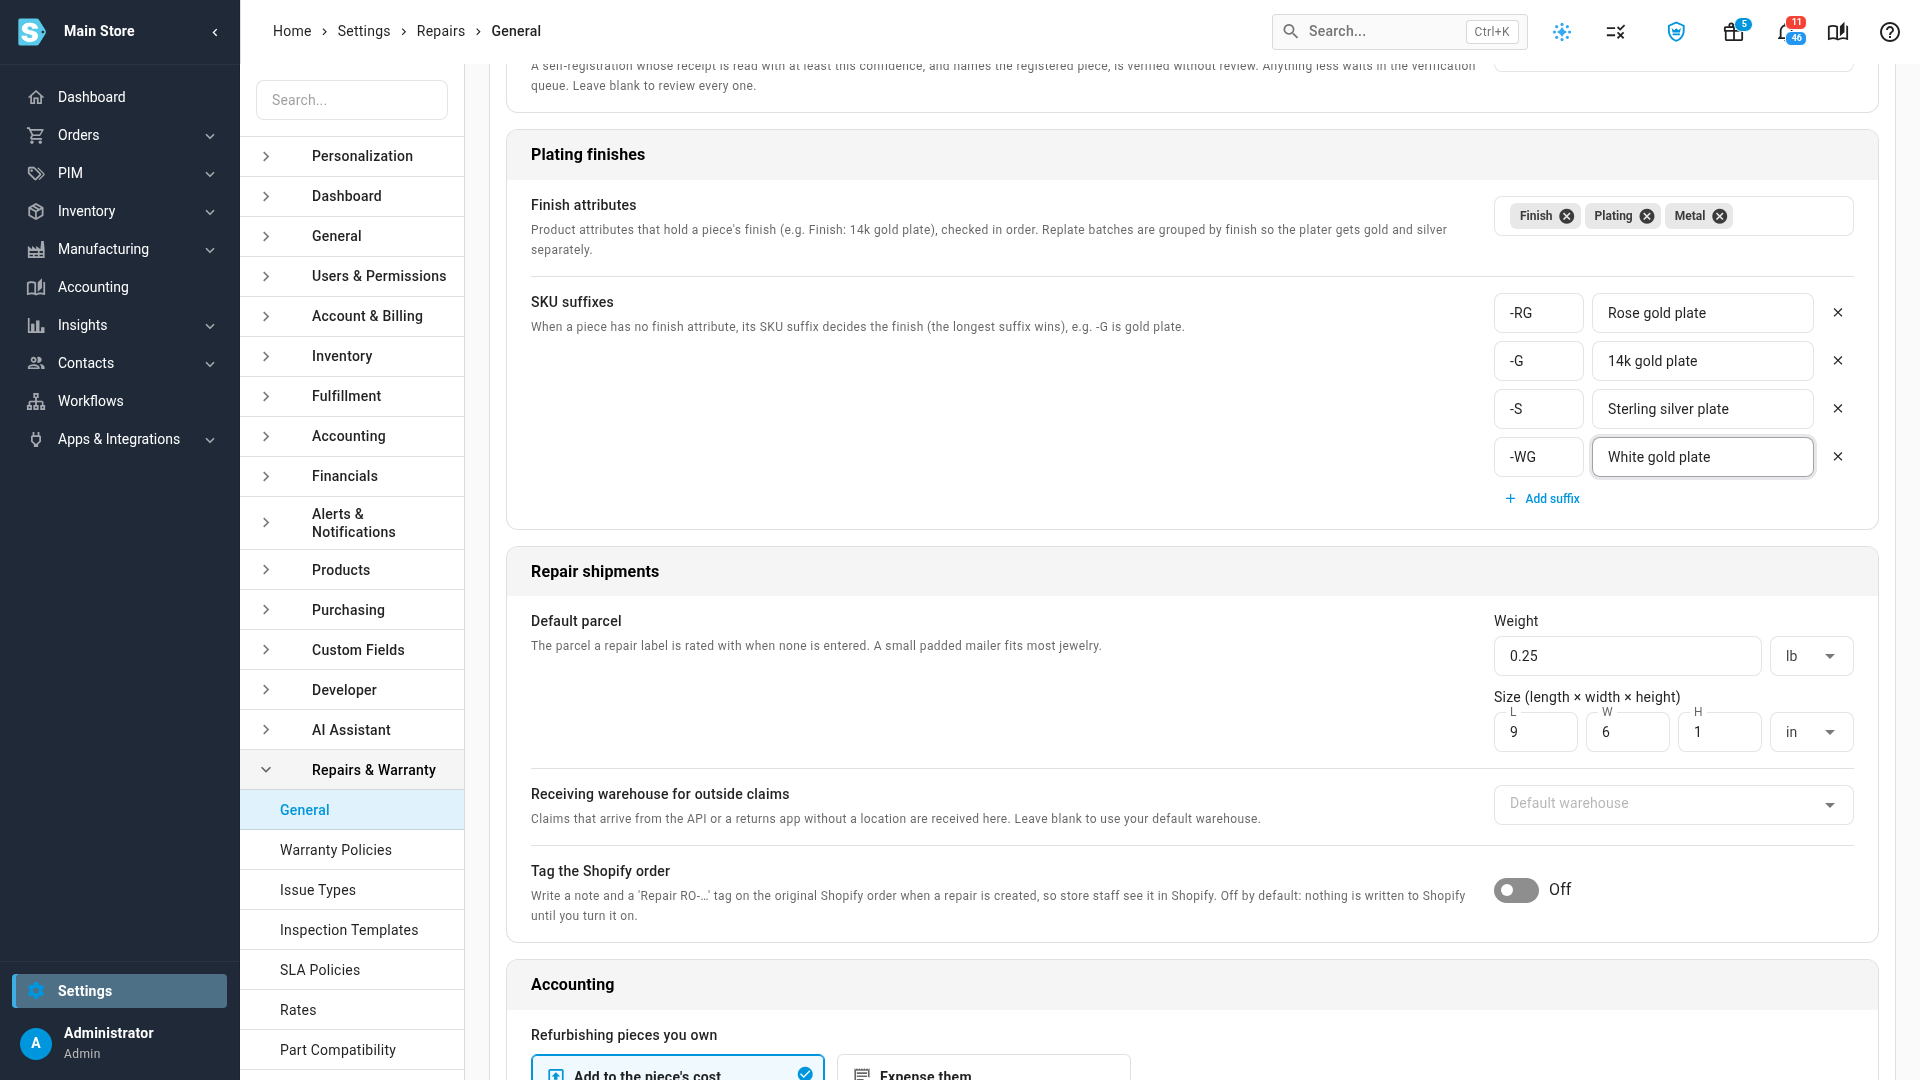
- Finish attributes — product attribute names, checked in order, that hold a piece's finish (for example a "Finish: 14k gold plate" attribute).
- SKU suffixes — a fallback table of SKU suffix → finish rows (the longest matching suffix wins) used when a piece has no finish attribute, for example
-G→ 14k gold plate. Click Add suffix for a new row, type the SKU ending in the first box, then the finish name beside it.
Replate batches group pieces by the finish resolved this way, so your plater receives gold and silver pieces separately.
9. Set repair shipment defaults
The Repair shipments card:
- Default parcel — the weight and dimensions used to rate a repair shipping label when none is entered, on two labelled lines: Weight (a value and its unit — lb, oz, kg or g), then Size (length × width × height) (three values and one unit — in or cm).
- Receiving warehouse for outside claims — where a claim that arrives through the API or a connected returns app with no warehouse on it is received. Leave blank to use your default warehouse. It's also the warehouse New repair starts on, marked Default for repairs in every repair warehouse list.
- Tag the Shopify order — off by default. Turn it on and SKU.io writes a note and a
Repair RO-…tag on the original Shopify order whenever a repair is created from it, so store staff can see it in Shopify.
10. Set the accounting options
The Accounting card has two either/or choices, plus a mapping status banner:
- Refurbishing pieces you own — Add to the piece's cost (capitalize: parts and labour raise the refurbished unit's inventory value — the default) or Expense them (the unit keeps its existing cost; parts and labour hit expenses immediately).
- Warranty cost accounting — Expense as incurred (costs post when a repair uses them — the default) or Accrue a reserve (book a monthly warranty provision and draw it down as repairs happen). Switching to Accrue a reserve only takes effect once a warranty policy also sets an accrual rate on its own Reserve fields.
Below both options, a banner lists the five repair accounts — Warranty expense, Warranty reserve, Goodwill repair expense, Repair revenue, and Repair cost of sales — as chips. A mapped account shows a green chip with a tick; an unmapped one shows an amber chip with a warning icon. While any account is unmapped, the banner is amber and reads "N of 5 repair accounts are not mapped yet"; once all five are mapped, it's blue, titled Repair accounts, and reads "Repair postings use these five accounts, and all of them are mapped." Until an account is mapped, its costs post to cost of goods sold and repair revenue posts to your regular sales account instead.
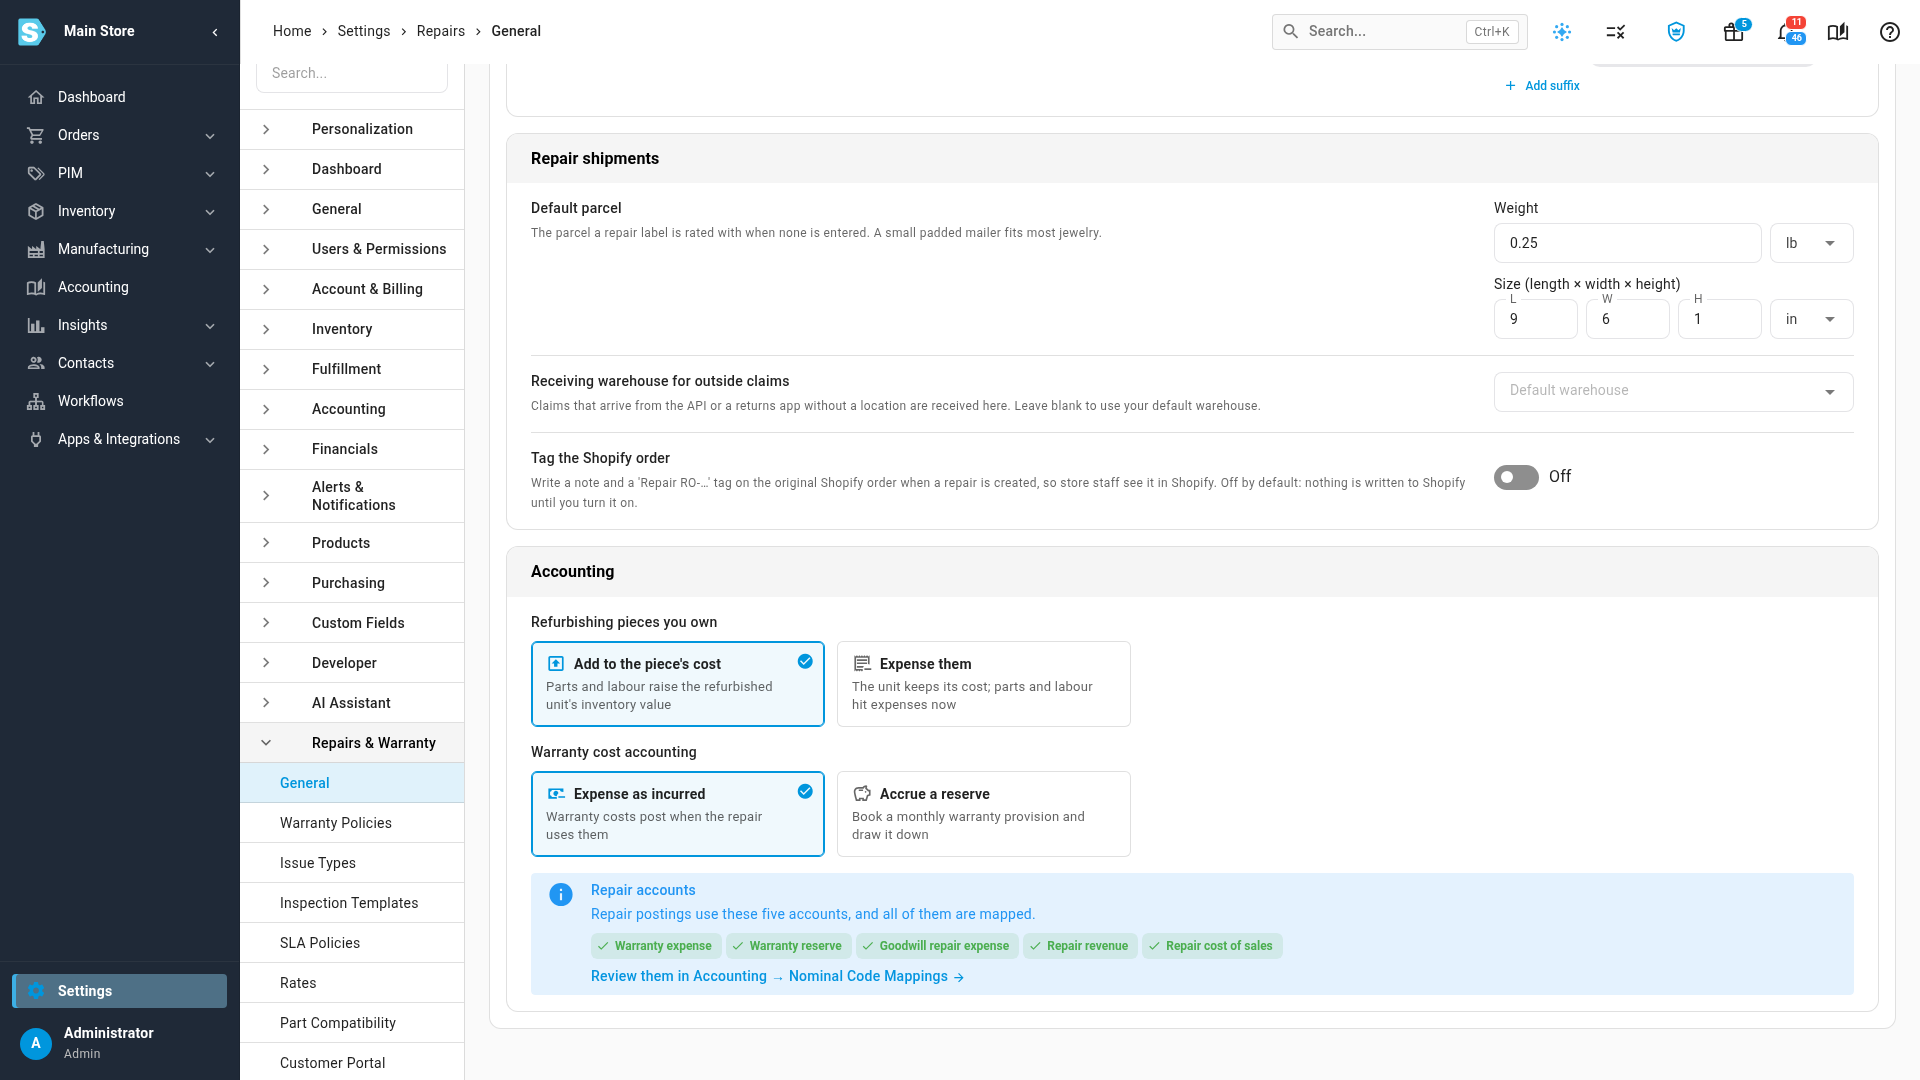
Click the banner's link to go straight to the mapping screen — Map them in Accounting → Nominal Code Mappings while an account is unmapped, or Review them in Accounting → Nominal Code Mappings once all five are. See Accounting settings at a glance for how Nominal Code Mappings works.
Save your changes
Click Save Changes at the top of the page once you're done — it only sends the fields you actually changed. Discard reverts every card to its last-saved values, not just the one you were editing.
Next steps
- Set SLA policies and labour/bill rates — turnaround targets, and labour cost versus bill rate.
- Build issue types and inspection checklists — the taxonomy quotes and standard times are built on.
- Accounting settings at a glance — Nominal Code Mappings and the rest of your books' settings.
- Roles & permissions reference — grant the Manage repair settings permission to someone else.
Video transcript
Every general repair option lives on one page of grouped cards. To begin, open Settings, the last entry at the bottom of the left sidebar. Click the Repairs & Warranty card to see its pages. Then click General, the first card in that group. The Numbering & intake card sits at the top. The Repair number prefix starts every new number. Leave Create an RMA for inbound repairs on to keep the receive station. Below, Cancel repairs still waiting for the piece sets a day limit. After that, the repair cancels, with a reminder at the halfway point. Scroll to the Bench & technicians card. How new repairs get a technician decides who picks up each new piece. Choose Manually, or spread the work with Round-robin. Cap a forgotten timer, so one missed stop never inflates the labour cost. Risk signals & approval tiers raise warnings but never block a claim. Use Approve small claims automatically to set a value limit. Inspect expensive pieces first holds claims above a second limit for review. Scroll to Quotes, loaners & follow-ups. Quotes expire after sets how long a customer can accept a paid repair. Further down, enter your Abandoned goods policy for unclaimed pieces. Scroll to Turnaround clock & delays. Under When the turnaround clock starts, pick one of two cards. Start the clock when the piece arrives, or when the claim is submitted. Turn on Email delays automatically to send each delay notice. Quality alerts flag a sudden spike in a product's repair rate. Under Alert when the repair rate jumps, set the multiple that raises an alert. Next, scroll down to the Warranty registrations card. Turn on Use the serial number as the registration number for serialized pieces. Verify receipts automatically sets the confidence needed to approve self-registrations. Plating finishes decide how a replate batch groups its pieces. Finish attributes list the product attributes that record plating. SKU suffixes link a SKU's last letters to a plating finish. Click Add suffix to start a new row. Click the first box of the new row, and type the new SKU ending. Then click the finish name box beside it, and type the matching plating name. From now on, pieces with that ending join the matching replate batch. Next, scroll down to the Repair shipments card. Set the default parcel used to rate labels with no dimensions. Turn on Tag the Shopify order to flag the original Shopify order. Next, scroll down to the Accounting card. Refurbishing pieces you own decides whether that work raises cost or counts as expense. Warranty cost accounting chooses between expensing costs as incurred and a monthly reserve. The Repair accounts banner shows each mapped account, with a link to Accounting. When you finish, scroll back to the top of the page. Click Save Changes to keep your edits. Then look for the Repair settings saved message.