Manage part compatibility
Part compatibility rows tell SKU.io which repair parts (findings) fit which pieces, so the bench sees the right parts suggested — with stock on hand — instead of searching the whole catalog. This guide adds and manages rows one at a time; for a bulk upload, see Import part compatibility.
Before you begin
- You need the Manage repair settings permission to add, edit, or remove compatibility rows.
- The part and anything it fits are products in your catalog — add the part itself as a product first if it doesn't exist yet.
Add a compatible part
-
Go to Settings → Repairs & Warranty → Part Compatibility.
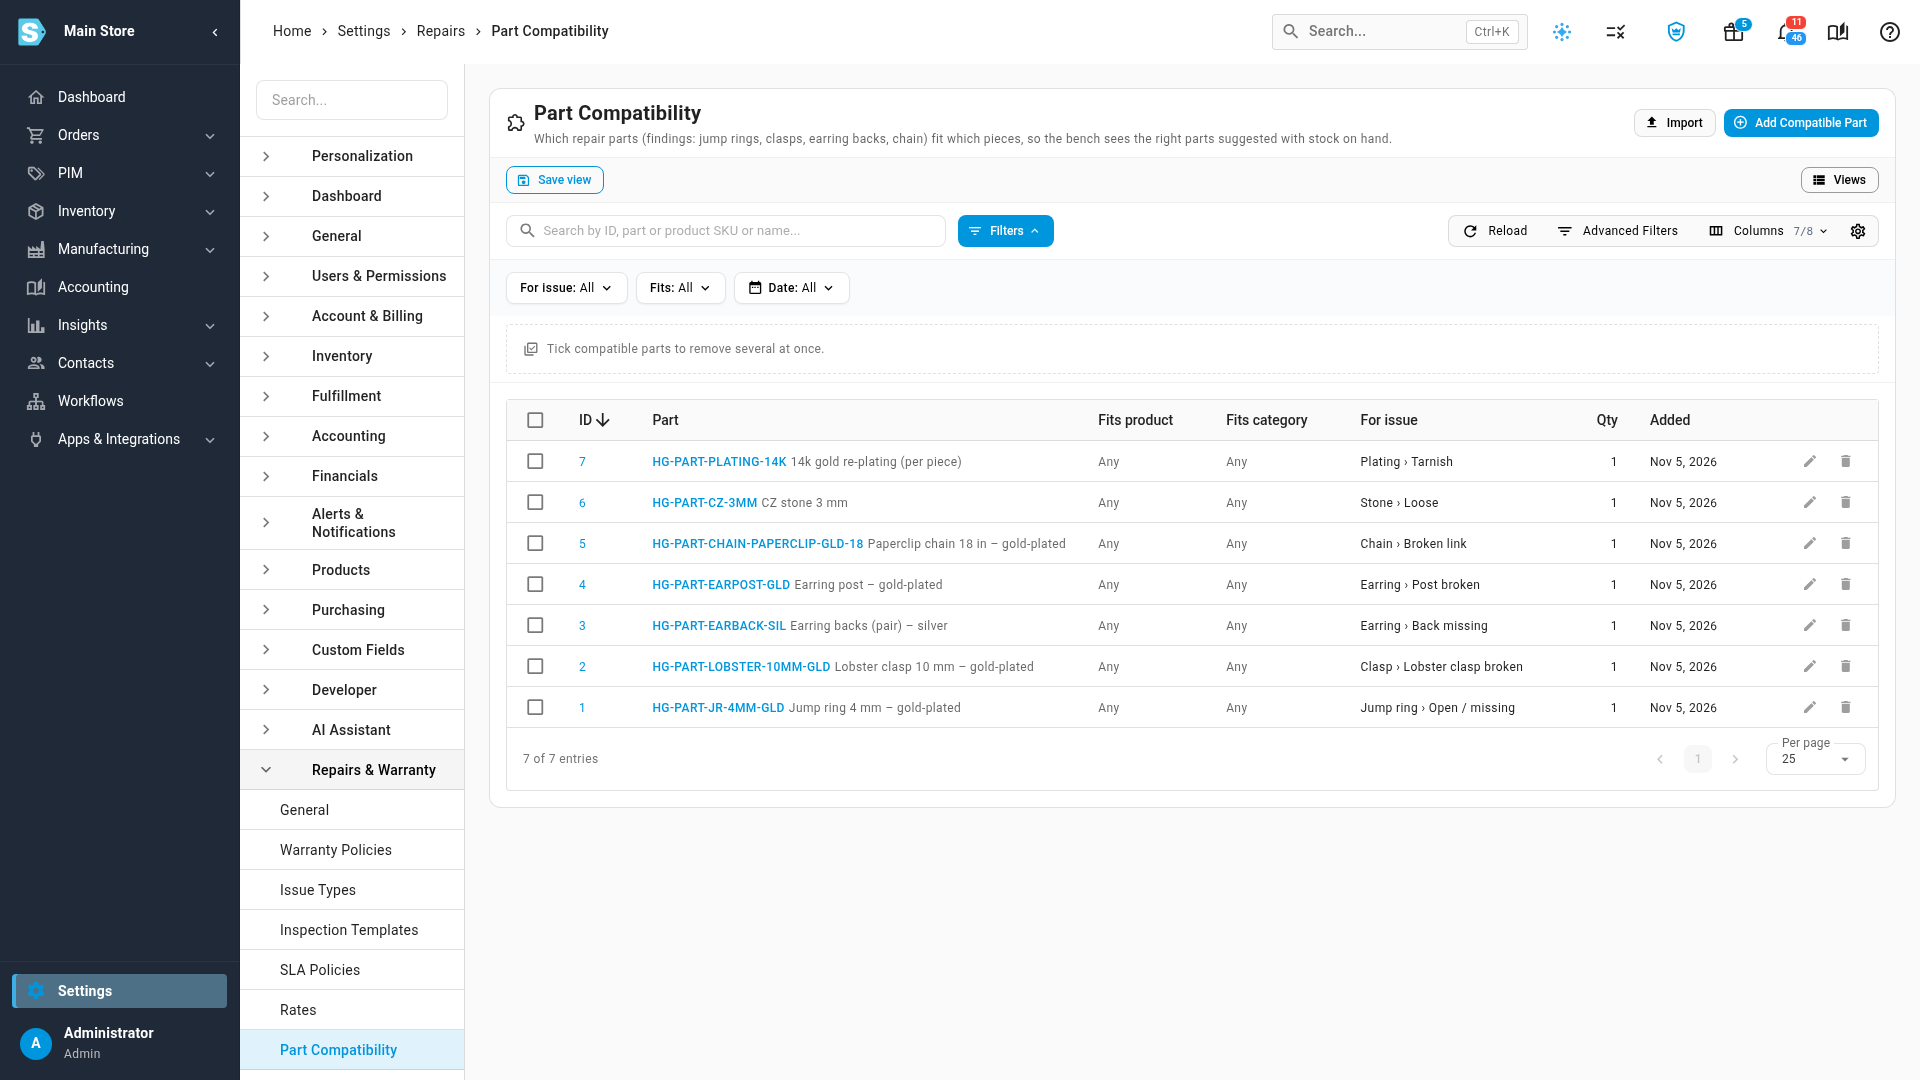
The Added column shows the date only, for example Nov 5, 2026; hover it for the time. Updated, hidden by default under Columns, works the same way.
-
Click Add Compatible Part.
-
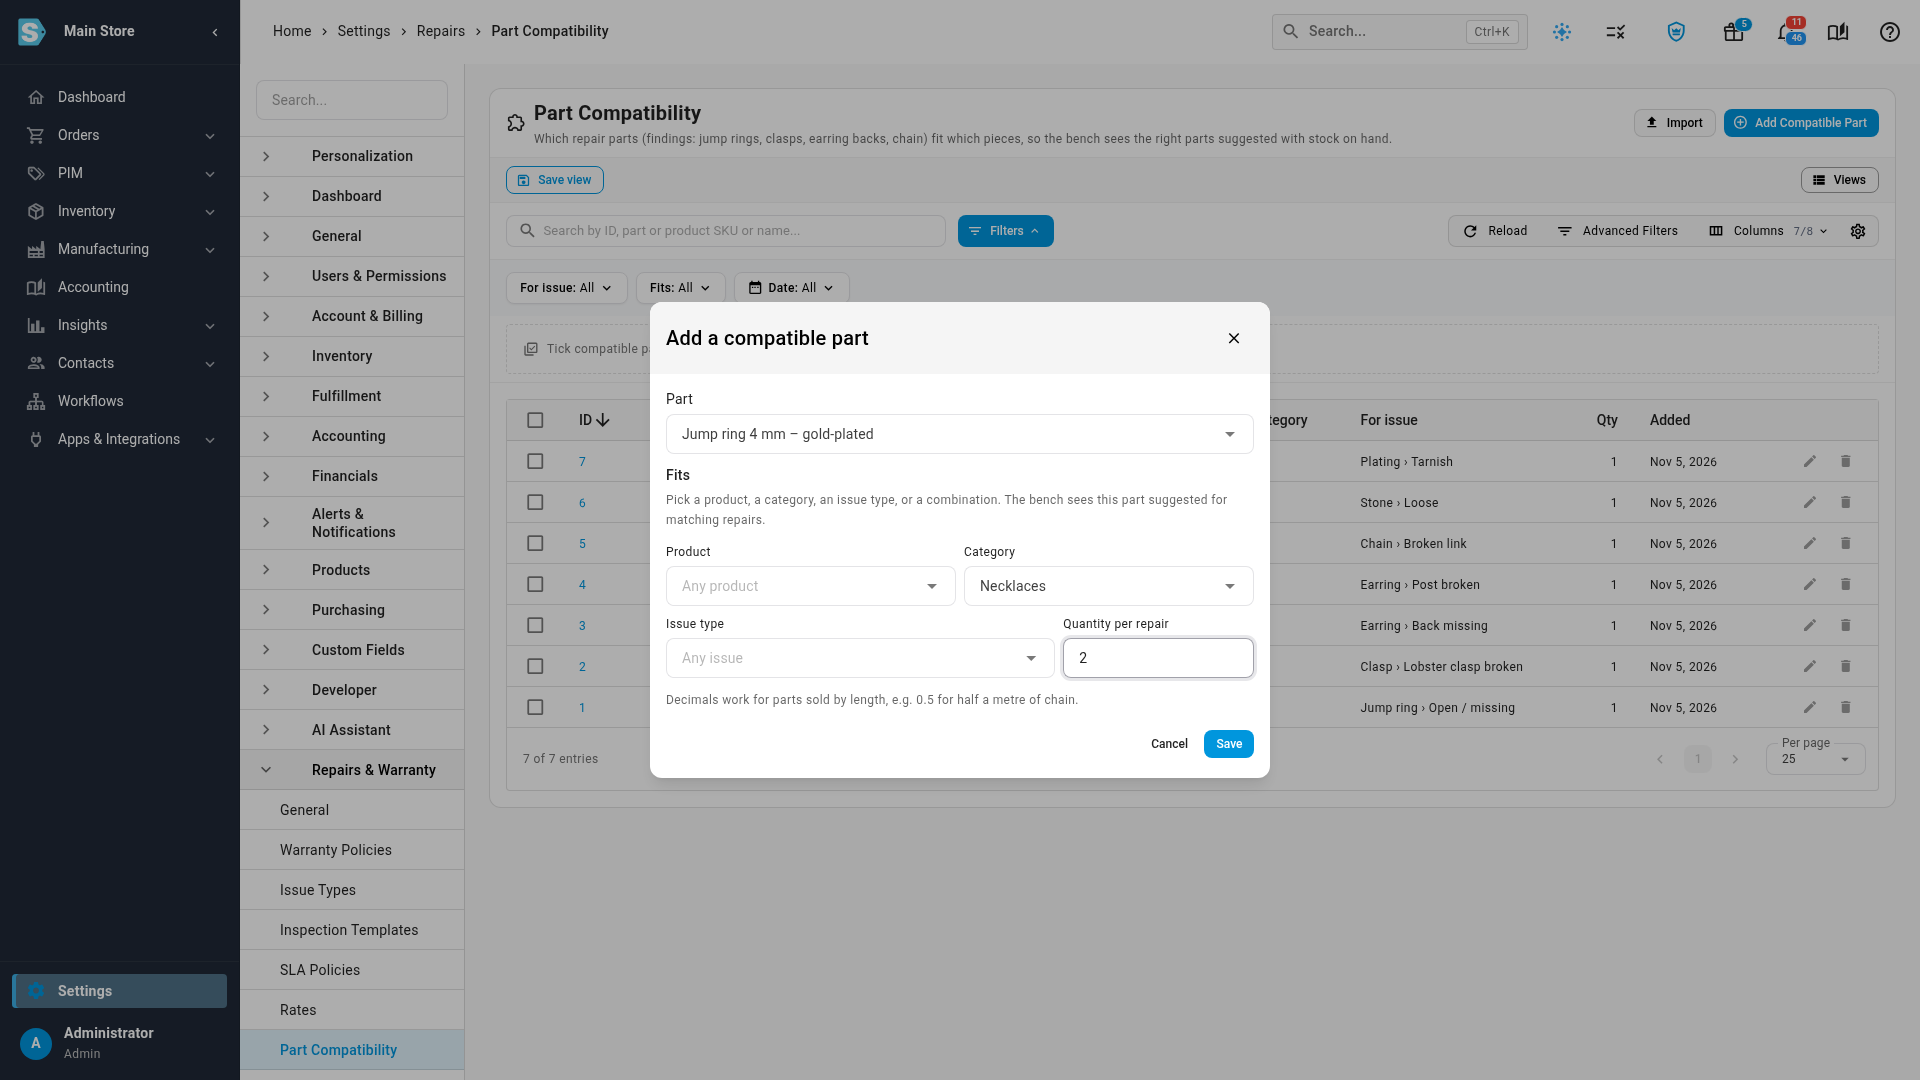
Choose the Part — a product picker; any product can be a part (findings are usually set up as their own products, such as "6mm jump ring, gold"). The empty picker reads Type to search by SKU or name; once you've typed two characters it reads Searching… until the matches appear. Each match shows the product's name, with its SKU under it, and the picked part shows by name — for example Jump ring 4 mm – gold-plated — with no further search once it's picked.
-
Under Fits, pick at least one of:
- Product — one specific piece, picked by name the same way.
- Category — every piece in a category.
- Issue type — suggest the part for this issue regardless of the piece, for example a row with only Clasp › Lobster clasp broken set.
You can combine all three for a narrower match — pick at least one, or SKU.io shows "Pick at least a product, a category or an issue type the part fits."
-
Set Quantity per repair — decimals work for parts sold by length, for example
0.5for half a metre of chain. -
Click Save. A confirmation names the part and what it fits — for example "The Part compatibility 'Jump ring 4 mm – gold-plated for Necklaces' created successfully" (after an edit, "… updated successfully").
Creating a row with the exact same part, product, category, and issue type as an existing one is blocked — "That part is already linked to this product, category and issue type." — edit the existing row instead.
Find and filter rows
Use Search (by row ID, part SKU/name, or product SKU/name), the For issue filter, and the Fits filter (One product, A category, or An issue type only). Right-click a row for shortcuts: Show every piece this part fits and Show every part for this product apply that row's part or product as a filter instantly.
Remove a compatibility row
Use a row's Remove action, or tick several rows and use the bulk bar. Until a row is ticked, a dashed hint above the table reads "Tick compatible parts to remove several at once."; the first tick turns it into the bulk bar in the same spot, so the rows don't move. Removing a row only drops the link between the part and what it fits — the part product itself is never deleted — and the confirmation names both by name and says so explicitly, for example "Stop suggesting Jump ring 4 mm – gold-plated for Necklaces? The part itself is not deleted." After you click Remove, the confirmation message names the row too, for example "Part compatibility 'Jump ring 4 mm – gold-plated for Necklaces' removed."
Next steps
- Import part compatibility — load many compatibility rows at once from a CSV.
- Build issue types and inspection checklists — the issue types a compatibility row can target.
Video transcript
Part compatibility tells the bench which repair parts fit which pieces. Start from Settings, at the bottom of the left-hand menu. Choose the Repairs and Warranty card, home to every setting for the bench. From the list that opens, choose Part Compatibility. Every link you have set up appears here, in one table. Click Add Compatible Part to open a blank compatibility row. In the Part box, search for the part by its SKU or its name. Matching parts drop down as you type, so pick the right one from the list. The Fits section links the part to products, categories, or issue types. Pick a category here, so the part fits every piece in that group. Then set Quantity per repair, the amount the bench uses each time. Decimals work for parts sold by length, such as chain. Click Save to add the compatibility row. A confirmation names both the part and its category. The new row now sits at the top of the list, ready for the bench. Use the For issue and Fits filters to narrow a long list. Click the Fits filter to show its options, then choose the one called A category. Only the rows tied to a category stay in the table. To remove a row, click the trash icon at the end of the row. The confirmation names the part, and promises it stays in your catalog. Click Remove to delete only this compatibility link. Then click Show all compatible parts to clear the filter. After a moment, every row is back in the table.