Set SLA policies and labour/bill rates
Two settings pages, one job each: SLA Policies sets how long a repair should take, and Rates sets what that time is worth — to you, and to a paying customer.
Before you begin
- You need the Manage repair settings permission to add, edit, or delete SLA policies or change rates.
- To give a technician their own rate, they first need the Bench permission (Settings → Users & Permissions → a role's Permissions tab). Without at least one technician holding it, the Rates page has no one to set a rate for.
Create an SLA policy
SLA Policies is what colours a repair on the board, list, and alerts by how close it is to its due date.
-
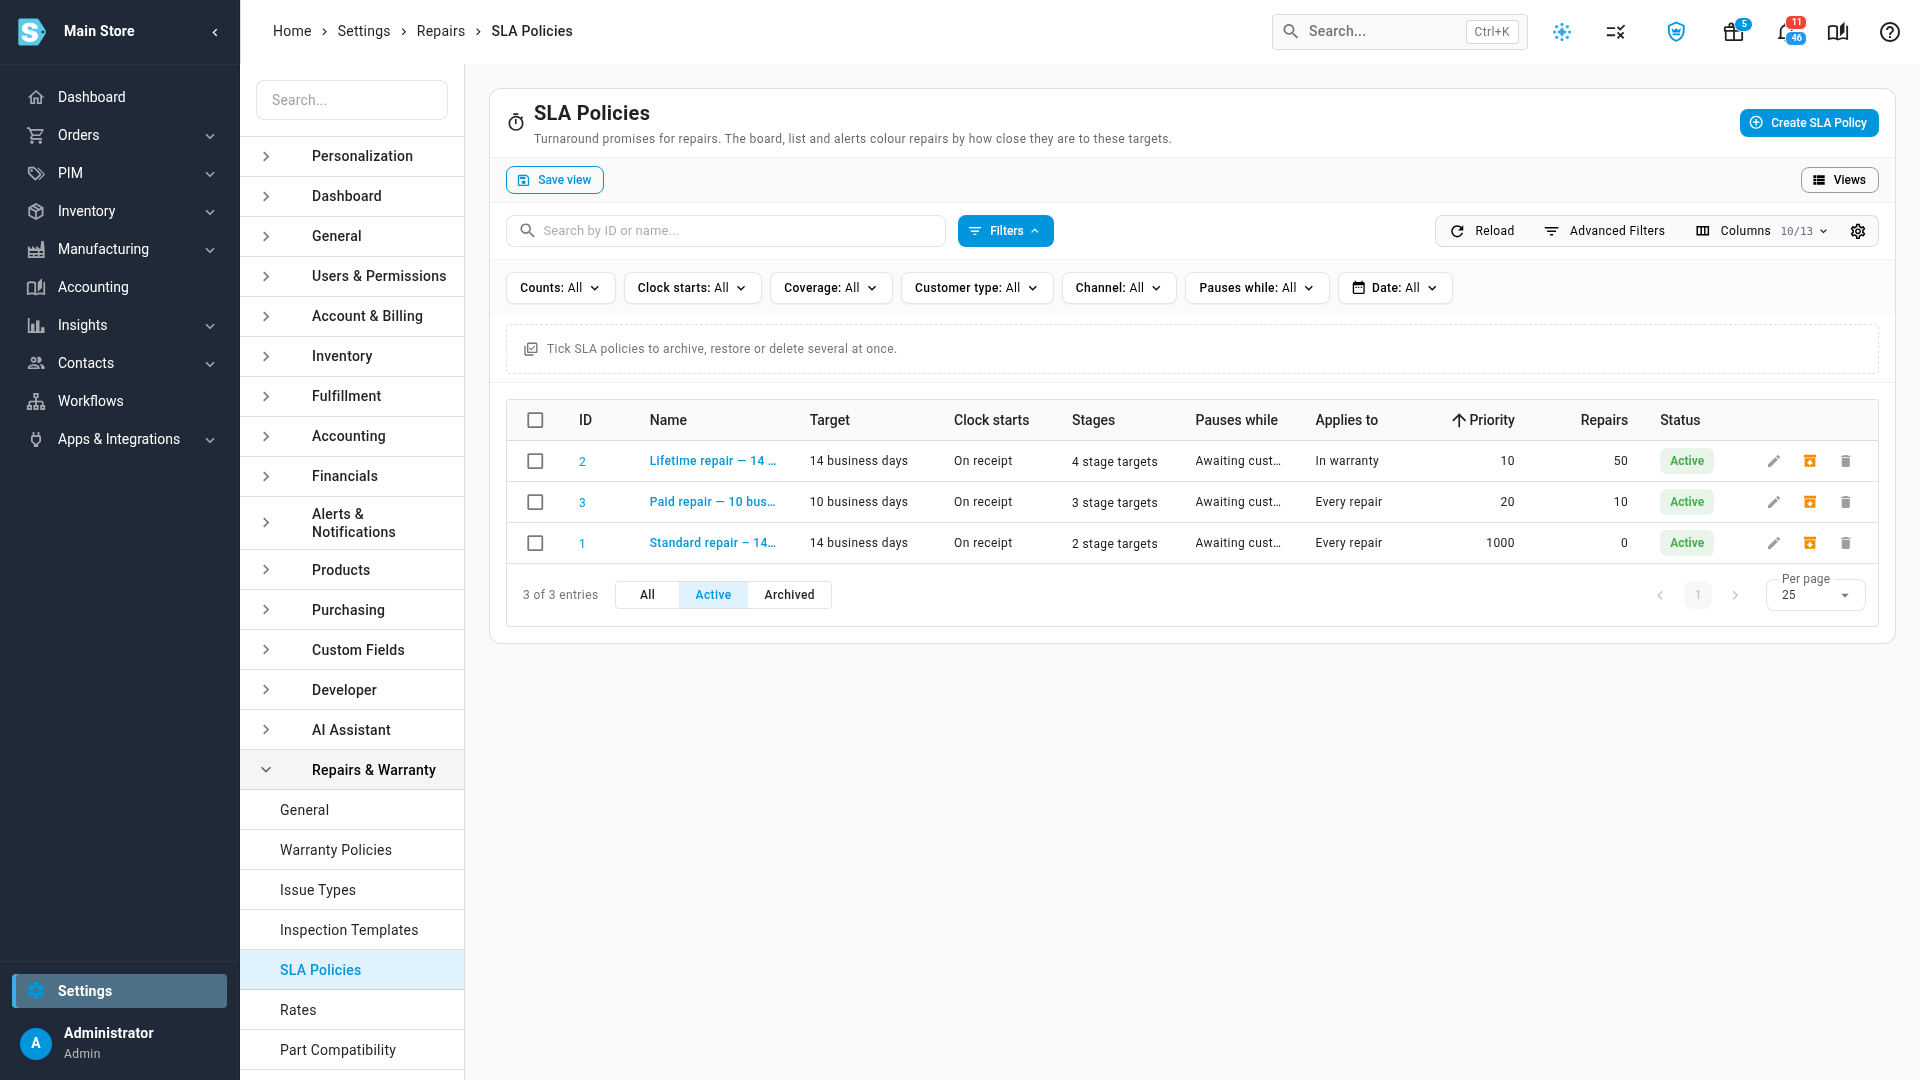
Go to Settings → Repairs & Warranty → SLA Policies.
-
Click Create SLA Policy.
-
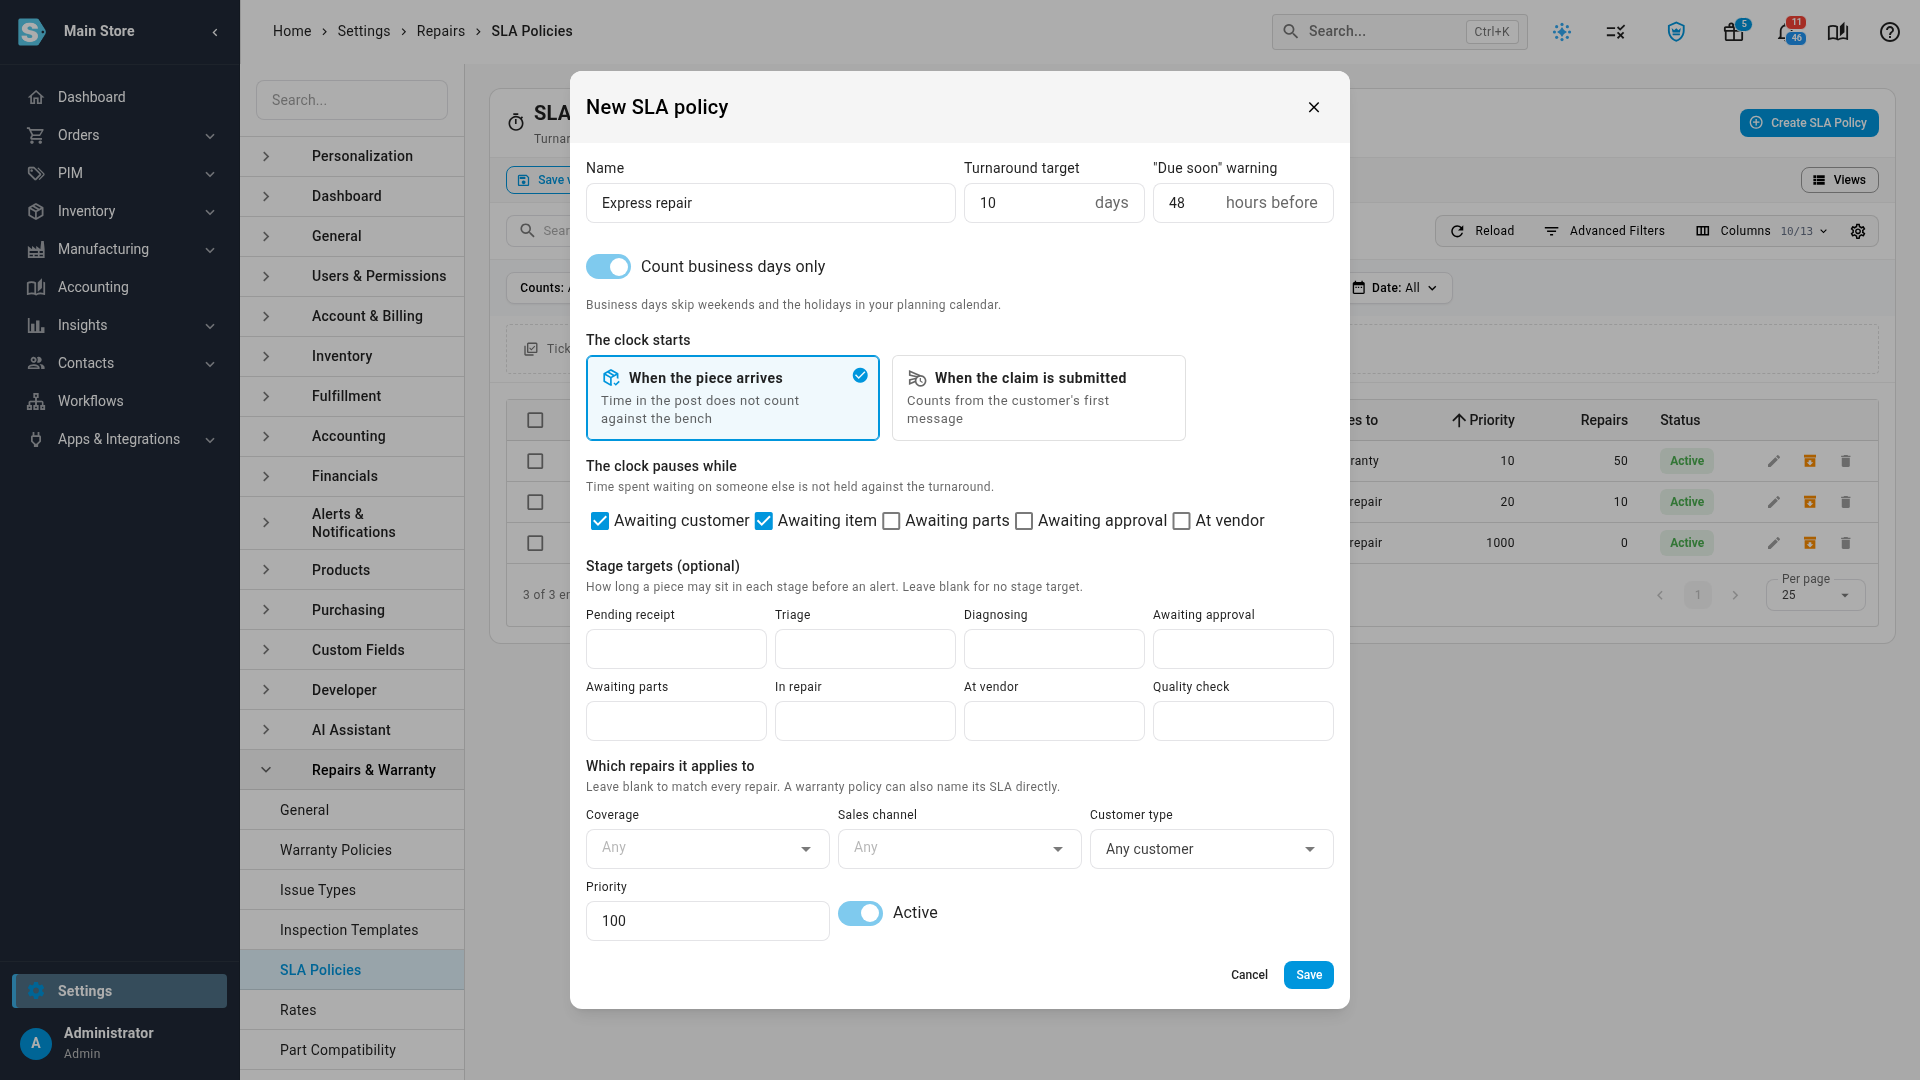
Fill in the policy:
- Name — for example "Standard repair – 14 business days".
- Turnaround target — the number of days.
- "Due soon" warning — how many hours before the target a repair turns amber on the board.
- A switch for Count business days only versus every calendar day. Business days skip weekends and, if your tenant has a default planning calendar, its holidays too; without one, only Saturdays and Sundays are skipped.
- The clock starts — pick When the piece arrives (time in the post doesn't count) or When the claim is submitted (counts from the customer's first message).
- The clock pauses while — tick the statuses that shouldn't count against the turnaround; Awaiting customer and Awaiting item are ticked by default.
- Stage targets (optional) — a day target per stage (triage, diagnosis, vendor, and so on), if you want to alert on a single stage running long, not just the overall total.
- Which repairs it applies to — optionally narrow the policy to a Coverage, Sales channel, or Customer type. Leave all three blank to match every repair. Priority breaks ties when more than one policy matches — the lowest number wins. An Active switch takes the policy out of matching without deleting it.
-
Click Save. A confirmation names the policy — for example "The SLA policy 'Express repair' created successfully" for a new one, or "The SLA policy 'Standard repair' updated successfully" after an edit — and the policy shows in the list straight away.
The list fits its card without scrolling sideways: a long Name, Pauses while or Applies to value is cut to one line ending in …, and you can hover the cell to read it in full. Updated and Created are hidden by default; turn them on under Columns. They show the date only, for example Nov 5, 2026, with the time on hover.
Archive, restore, or delete a policy
Use the row actions, or tick several and use the bulk bar. Until a row is ticked, a dashed hint above the table reads "Tick SLA policies to archive, restore or delete several at once."; the first tick turns it into the bulk bar in the same spot, so the rows stay put. Archiving stops a policy matching new repairs — open repairs using it switch to the next matching policy on their next refresh — without losing its history. Deleting a policy does the same thing, permanently; archive instead if you might want it again. The All / Active / Archived toggle at the bottom of the list filters by status.
Set labour cost, bill rates, and per-issue prices
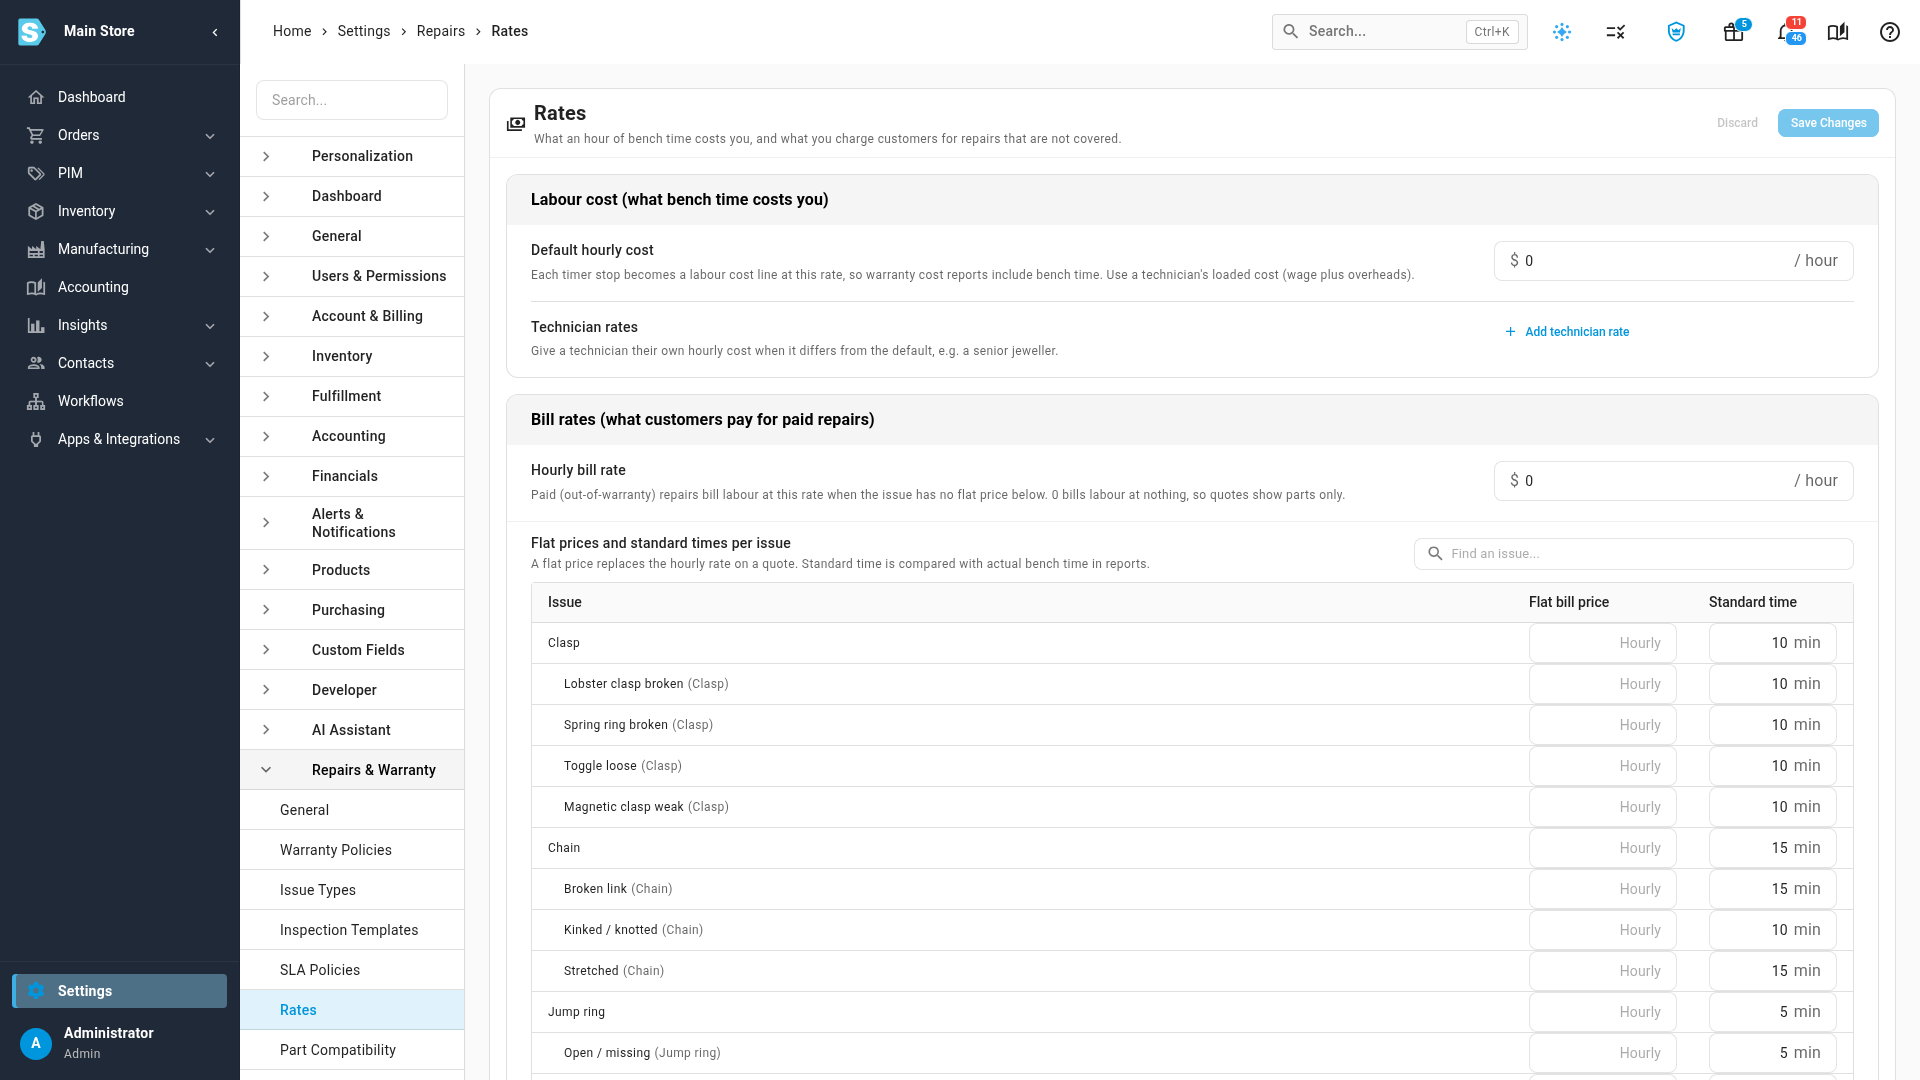
Rates has two halves: what bench time costs you, and what you charge a customer for a repair that isn't covered by warranty.
-
Go to Settings → Repairs & Warranty → Rates.
-
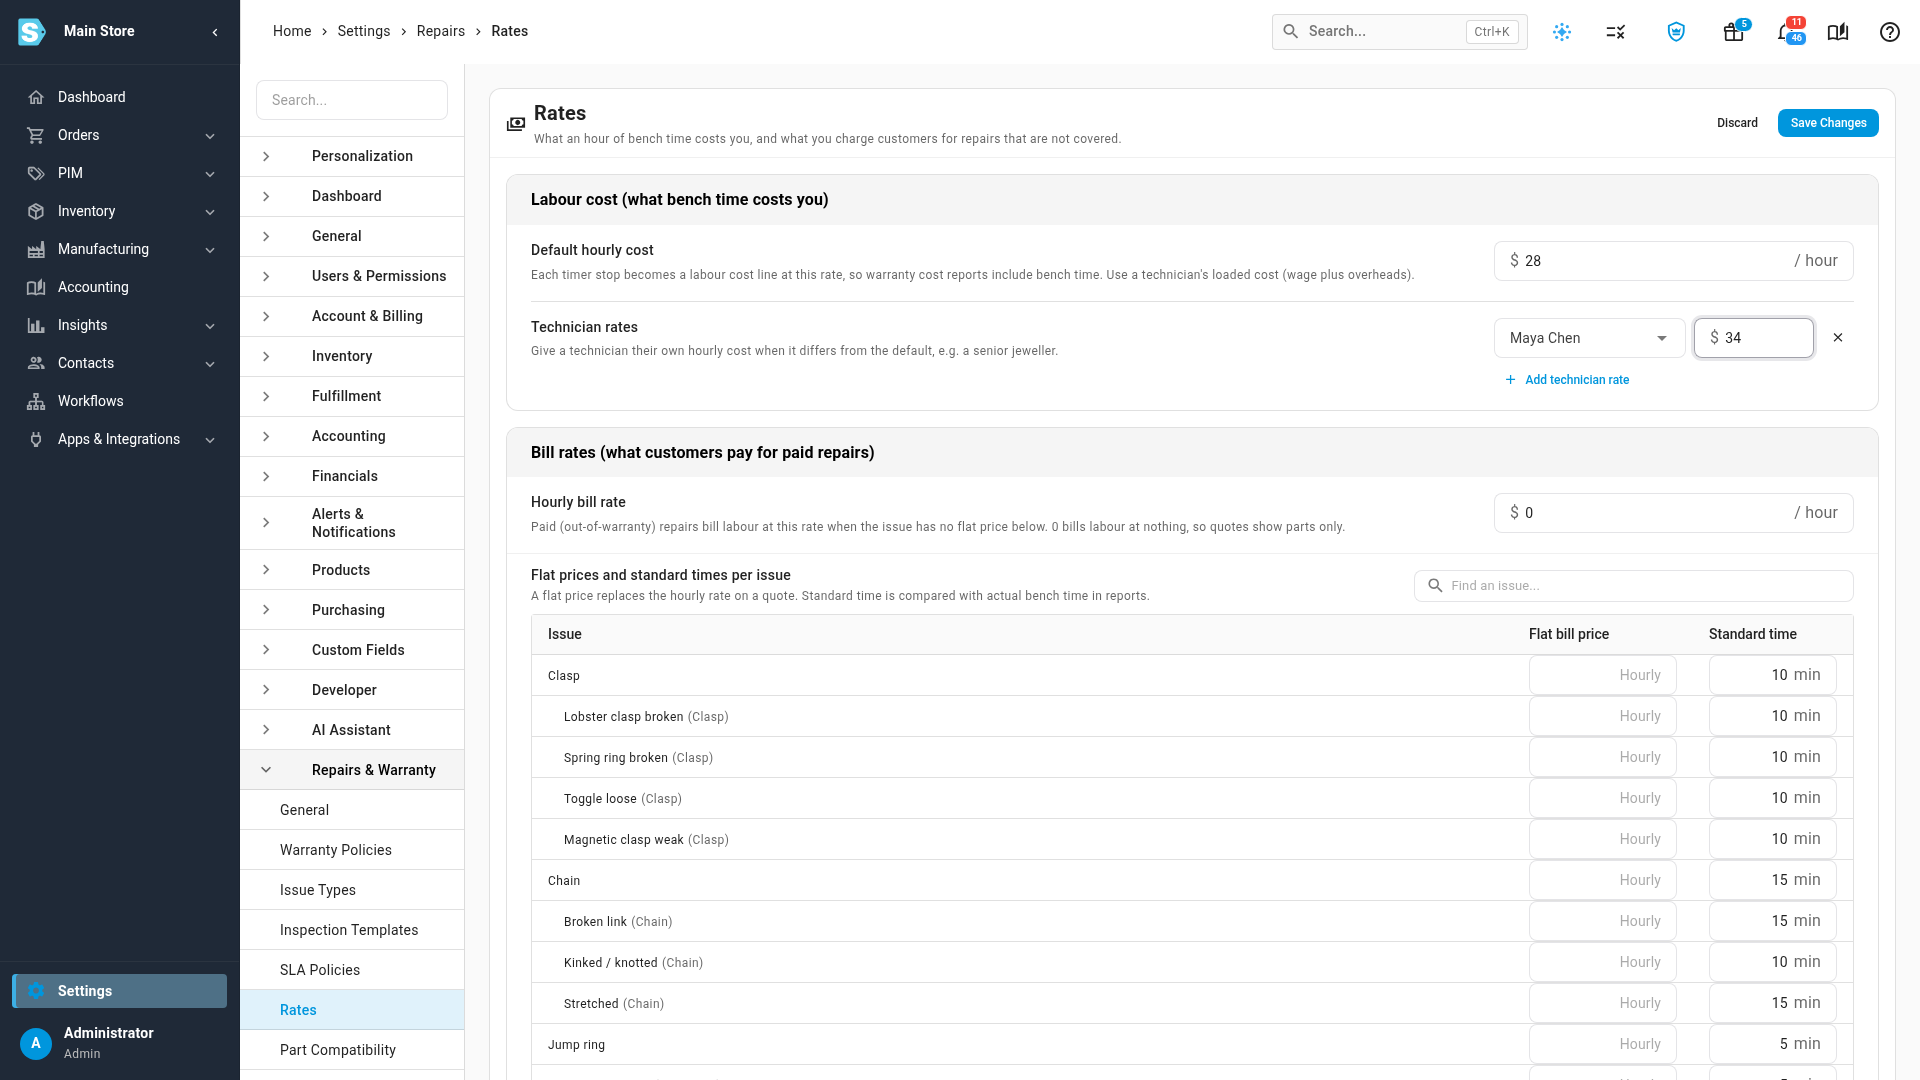
In Labour cost (what bench time costs you), set the Default hourly cost every timer stop uses to build a labour cost line — use a technician's loaded cost, wage plus overheads, not just their pay rate.
-
To give one technician their own rate (for example a senior jeweller), click Add technician rate and pick them from the list, then set their rate. Each technician can have only one rate row, so anyone who already has one isn't offered again. Until every row has both a technician and a rate, Save Changes stays greyed out, and hovering it explains why: "Pick a technician and enter a rate for every technician rate row, or remove the row." The same message shows in red under the rows only if you click away from a row you haven't finished. If nobody holds the Bench permission yet, SKU.io shows an inline note instead of a technician list: "No one holds the Bench permission yet, so there's nobody to set a technician rate for." with a Grant it from Roles link straight to Settings → Roles — grant the permission there, then come back to add the rate.
-
In Bill rates (what customers pay for paid repairs), set the Hourly bill rate — what an out-of-warranty repair bills for labour when its issue has no flat price. Set it to 0 to bill parts only.
-
Below it, search the table of issue types and set a Flat bill price (overrides the hourly rate on a quote) and Standard time in minutes, shown as for example 10 min (compared against actual bench time in reports) for any issue you want priced individually. Only the rows you actually change are sent when you save.
-
Click Save Changes, or Discard to back out of every change on the page.
If no issue types exist yet, the table's empty state links straight to Build issue types and inspection checklists so you can add some first.
Next steps
- Build issue types and inspection checklists — the issue types the per-issue bill prices apply to.
- Configure general repair settings — where the turnaround clock's start event and delay alerts are set.
- Roles & permissions reference — the full Repairs & Warranty permission list, including Bench.
Video transcript
SLA policies promise a turnaround and flag each repair nearing its due date. Start from Settings, at the bottom of the left-hand menu. Next, open the Repairs and Warranty card. Then choose SLA Policies to see every policy in a list. Click Create SLA Policy to open a blank form. Enter a clear name for your team. Set the turnaround target as a number of days. Under The clock starts, choose the event that begins each repair's countdown. Pick the arrival of the piece, or the submission of the customer's claim. Below that, choose what pauses the clock. Check any status that shouldn't count against the turnaround. Click Save, and the new policy appears straight away in the SLA policies list. Next, put a price on time spent at the bench. In the left-hand list of settings, click Rates to open the rates page. First, set the Default hourly cost, applied to every timer at the bench. Use a technician's wage plus overheads for this figure. To give one technician a different rate, click Add technician rate. Save Changes stays greyed out until both fields hold a value. Pick a name from the list, which shows only the people with bench access. Then enter that person's own hourly rate, in dollars per hour. Under Bill rates, set the Hourly bill rate for out-of-warranty repairs. To charge one issue differently, search for that issue. Then enter a flat price, which replaces the hourly rate on a quote. Click Save Changes to keep every rate on the page. The new rates apply to the next quote and the next labour cost line.