Set your timezone and date format
Two account-wide settings decide how SKU.io reads the calendar. Your timezone decides which day every order, payment and accounting entry falls on. Your date format decides how dates are written on screen. Set both when you first set up your account.
Before you begin
- You need permission to change settings.
- Decide your business timezone: the one your books and your team work in, usually where the business is based. It doesn't have to match where each person sits.
Accounting months start and end at midnight in your timezone. Changing it after you've closed a month moves entries near midnight into a different month, and closed months can then report drift when you verify them. See Month boundaries and timezones.
Set your timezone and date format
-
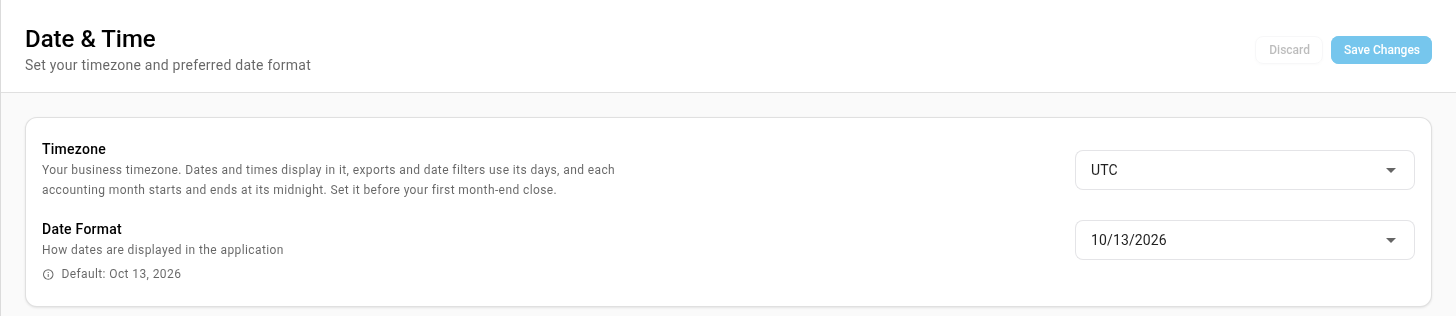
Go to Settings → General → Date & Time.
-
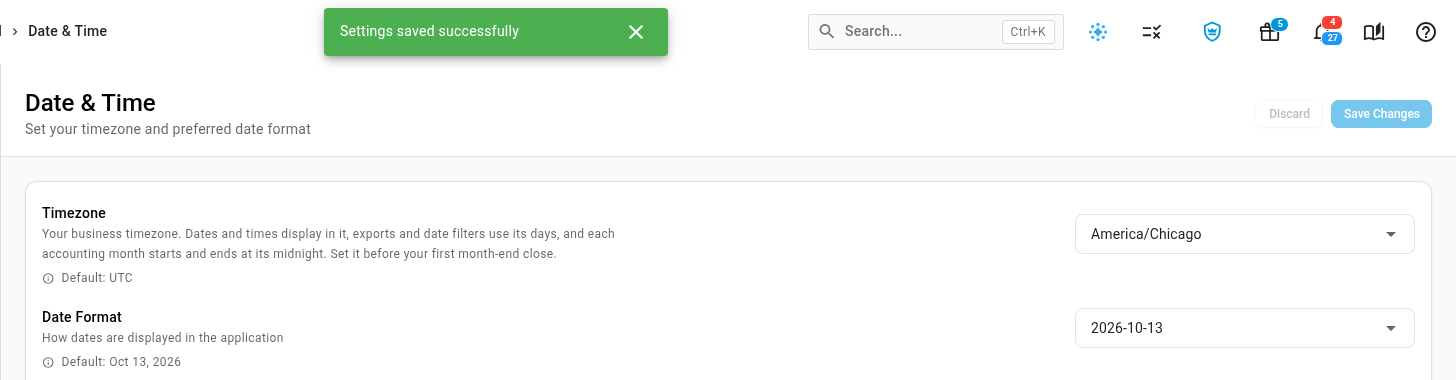
Under Timezone, type part of a city's name, such as
Chicago, and pick your timezone from the list. -
Under Date Format, pick how dates are written. Each option shows today's date in that format.
-
Click Save Changes, or Discard to undo.
What each setting changes
| Setting | What it changes |
|---|---|
| Timezone | Dates and times everywhere in the app display in it. A date you pick in a filter or report covers that whole day in your timezone. Exports show times in it. Each accounting month, and the month-end close, starts and ends at its midnight. |
| Date Format | How dates are written on screen, for example Oct 13, 2026 or 13/10/2026. It changes the display only, never the dates themselves. |
Changing the timezone doesn't change any stored timestamp. An order placed at 11 PM in New York is still placed at that moment; it just displays, filters and counts as a different day if your timezone puts that moment past midnight.
Next steps
- Month boundaries and timezones: which date decides an entry's month, and what a mid-year timezone change does to closed months.
- Set up your stores
Video transcript
Your timezone decides the date of every order, payment and accounting entry. Set it early, ideally before you close your first accounting month. Open Settings, at the very bottom of the left sidebar. Click the General card at the top of the page to expand its list. Scroll down to Date and Time, near the bottom of the list, and choose that entry to open its settings. Click the Timezone box, type part of your city's name, like Chicago, and pick your timezone from the list that appears. Dates and times across the app display in it, and exports and date filters use its days. Each accounting month starts and ends at its midnight. Under Date Format, pick how dates are written, with today's date shown as an example. It changes how dates display, not the dates themselves. Once both look right, click Save Changes to apply them to everyone on your account.