Customize email templates
Every email SKU.io sends for you starts from a template: the purchase order you send a supplier, the confirmation a customer gets, the shipping notice to a warehouse. Edit a template once and every email built from it changes. Each template can pull in details from the record it's about, such as the order number, the supplier's name, or a table of the items, and attach the record's documents automatically.
Before you begin
- You need permission to manage email templates. Administrators have it.
- The attached PDFs, such as the purchase order PDF, are designed separately in PDF templates.
Find a template
Go to Settings → General → Email Templates.
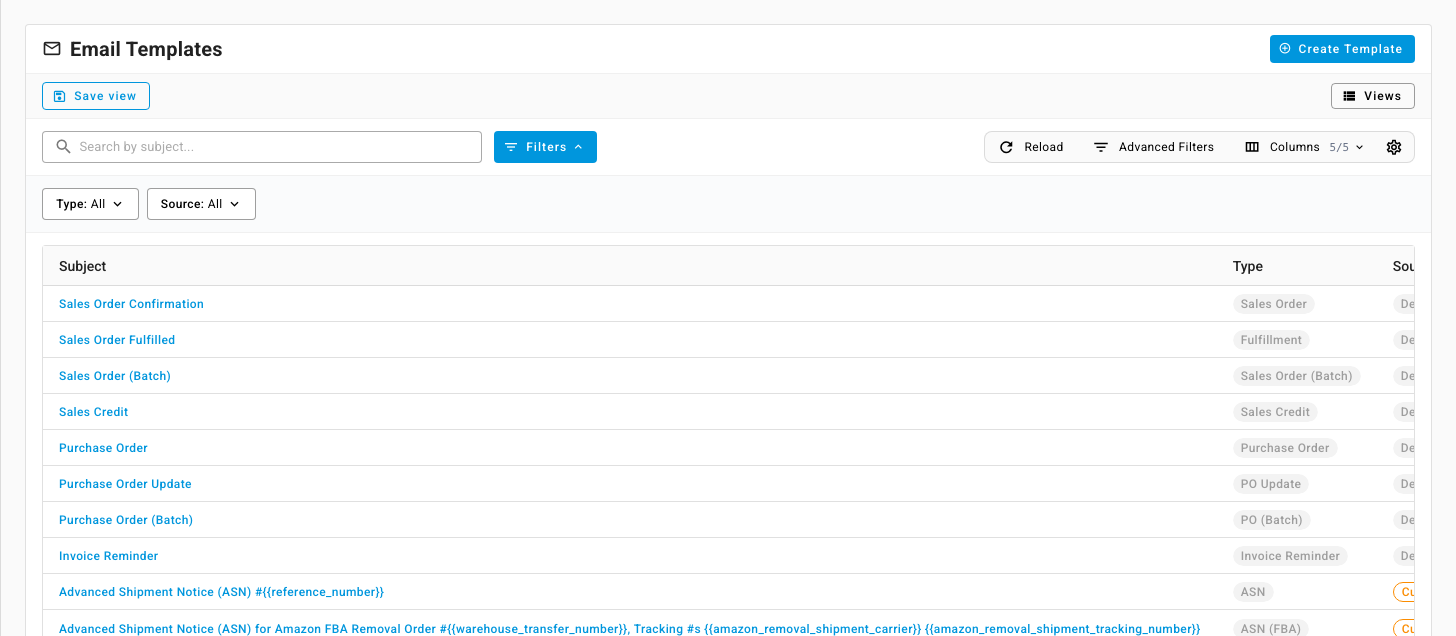
Each template shows its Subject, Type (the kind of record it's for), and Source:
- Default — a built-in template, such as Sales Order Confirmation, Purchase Order, or Invoice Reminder. You can edit these, but not delete them.
- Custom — a template you or your team added.
Use the Type and Source filters, or search by subject, to find one.
Edit a template
-
Click the template's subject. The editor opens.
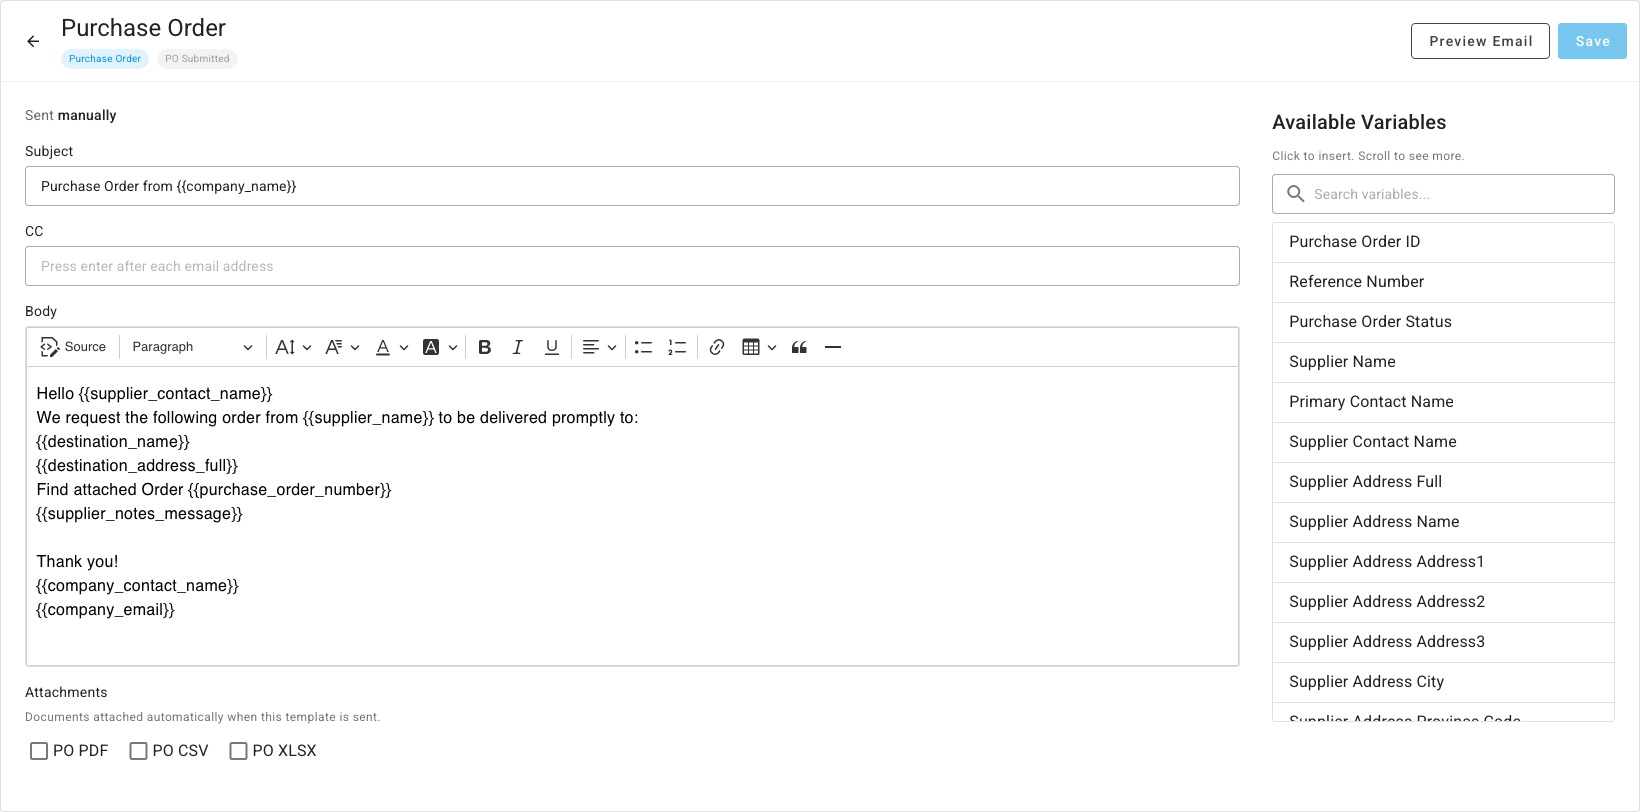
The chips under the name show what the template is for and when it's used. The line above Subject says whether it's Sent manually — when someone chooses it — or automatically when saved, if enabled.
-
Change the Subject.
-
In CC, type any address that should get a copy of every email from this template, and press Enter after each one.
-
Edit the Body. Use the toolbar for headings, bold, lists, links, and tables, or click Source to edit the raw layout.
-
To fill in details from the record, click where you want them in the subject or body, then click a variable under Available Variables, such as Supplier Name or Order Item List. It's inserted in double braces, such as
{{supplier_name}}, and replaced with the real value when the email is sent. Search the list to find a variable quickly. -
Under Attachments, tick the documents to attach every time, such as PO PDF, PO CSV, or PO XLSX.
-
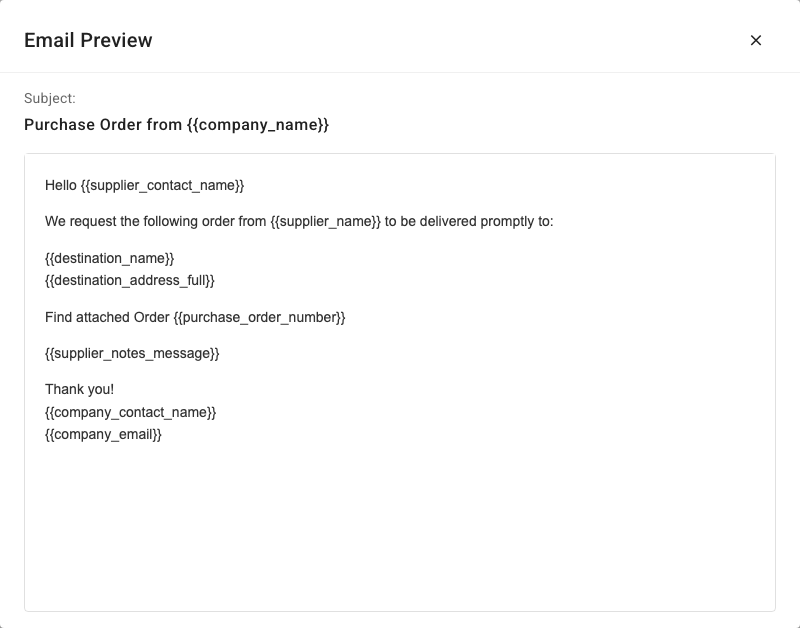
Click Preview Email to check the layout.
-
Click Save.
Add a template
Add a template when you need a second version of an email, such as a different purchase order email for overseas suppliers, or an email for a moment no built-in template covers.
-
Click Create Template.
-
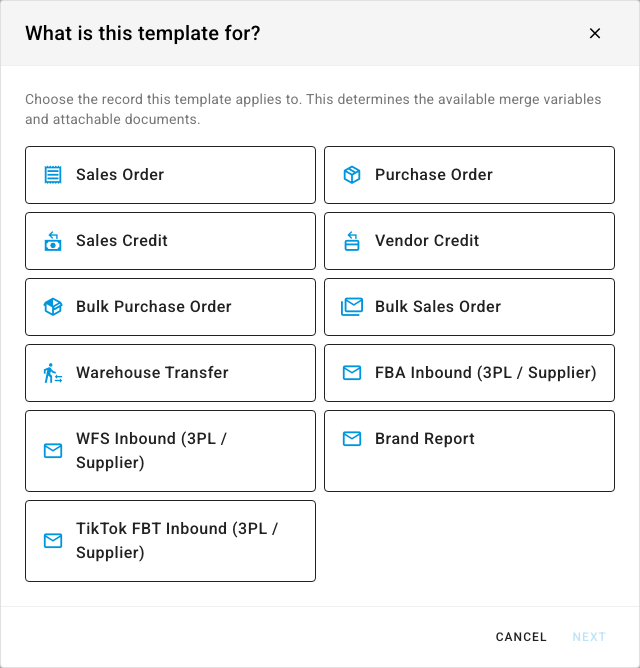
Under What is this template for?, choose the kind of record, such as Purchase Order, Sales Order, Warehouse Transfer, or FBA Inbound (3PL / Supplier). This decides which variables and attachments you can use. Click Next.
-
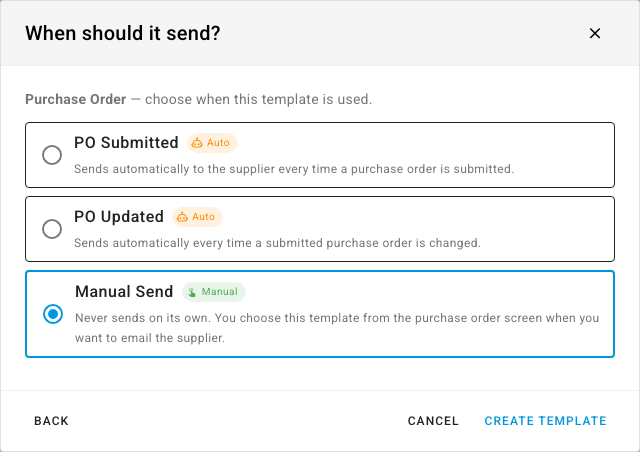
Under When should it send?, choose the moment it's used. Each option is marked Auto or Manual:
- Auto — SKU.io sends it on its own every time that event happens, such as PO Submitted. You won't review each send.
- Manual — it never sends on its own. You pick it on the record when you want to email someone. Manual Send is this kind of option.
-
Click Create Template. The editor opens on your new template.
-
Give it a Template Name your team will recognize, such as "Standard supplier PO email".
-
Write the subject and body as in Edit a template.
-
For an automatic template, set Enabled to Yes when it's ready to send. Only one automatic template can be enabled for the same moment, so enabling yours switches off the one it replaces.
-
Click Save.
To delete a custom template, click the delete button on its row in the list.
See a store's sending details
Each store has an Email & Sending tab, under Settings → General → Stores, that gathers what its emails go out as:
- From email and PO email — the addresses the store's emails and purchase orders come from.
- Domain verification — whether that address's domain is verified to send through SKU.io. See Send email from your own domain.
- Default sender — whether this is the store whose details are used for emails that don't belong to any one store. Click Set as default to change it.
- Email Templates — the templates in use.

Next steps
- Send email from your own domain
- Print and share documents — how attachments and email templates come together when you send a document.