Send email from your own domain
Out of the box, SKU.io sends your emails from noreply@sku.io under your
business name, and replies go to your team. That always delivers, but
suppliers and customers see SKU.io's address. To send from your own address,
such as orders@yourcompany.com, you add two kinds of DNS records to your
domain that authorize SKU.io to send for you, an SPF record and DKIM
records, and then switch your emails over. Until your domain is verified,
emails keep sending from noreply@sku.io, so nothing breaks while you set it up.
Before you begin
- You need permission to change account settings. Administrators have it.
- You need access to your domain's DNS, where you bought the domain or where your DNS is hosted, or someone who can make DNS changes for you.
- Set the From email and PO email on each store to an address at the domain you'll verify. They're on the store's Email & Sending tab under Settings → General → Stores.
Add your domain
-
Go to Settings → General → Sender Domains.
-
Under Quick add, SKU.io suggests the domains it found in your stores' and team's email addresses. Click Add beside the domain you send business email from.
If yours isn't listed, type it under Or add a domain manually and click Add Domain. Enter the domain only, such as
yourcompany.com, withouthttps://,www., or@.
The domain appears under Your domains with the status Not verified.
Publish the DNS records
- Click the domain to open it. It lists the records to add, each with its
Type, Host, Value, and Status:
- one TXT record for SPF, on the domain itself;
- two CNAME records for DKIM, on
s1._domainkeyands2._domainkeyof your domain.
- Use the copy buttons beside each Host and Value to copy them into your DNS provider exactly as shown.
- If a DKIM value reads Provided by SKU.io support, contact SKU.io support. They add your domain to SKU.io's sending account and give you the exact values to publish.
A domain can have only one SPF record. If you already have one, for Google
Workspace or Microsoft 365 for example, don't add a second. Add SKU.io's
include: to the record you have instead. The domain's panel shows the exact
before and after for your record, for example changing
v=spf1 include:_spf.google.com ~all to a record that includes both.
Verify the domain
DNS changes can take from a few minutes to a few hours to take effect.
- Open the domain on Sender Domains.
- Click Recheck.
Each record's Status changes from Not found yet to Found as SKU.io sees it. When all of them are found, the domain shows Verified.
If a verified domain's records are later removed, the domain changes to
Failed and emails fall back to noreply@sku.io until you fix the records
and click Recheck again.
Send from your domain
Verifying the domain makes it available. To switch your emails over:
-
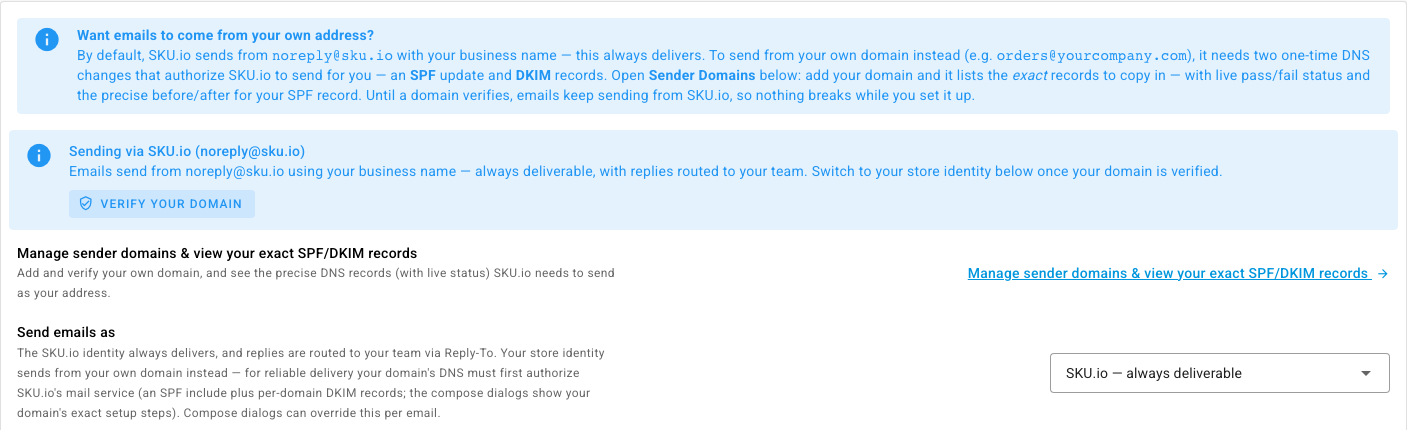
Go to Settings → General → Outbound Email.
-
Under Send emails as, choose Your store's domain (needs setup).
-
Click Save Changes.
From then on, emails come from each store's own address. Anyone composing an email in SKU.io can still choose a different sender for that one email.
Keep a copy of what SKU.io sends
Also on Outbound Email:
- Always copy on every outgoing email — every purchase order, order
confirmation, quote, receipt, shipping notice, and 3PL request SKU.io sends
for you is copied to these addresses, such as a
purchasing@or archive inbox. Separate multiple addresses with commas. - Send that copy as — BCC (hidden — recommended) keeps the copy address out of sight of the supplier or customer. CC (visible to recipient) shows it on the email.
- Always CC on 3PL / supplier inbound invites — copies every Walmart WFS and Amazon FBA inbound invite you email to a 3PL or supplier to these addresses.
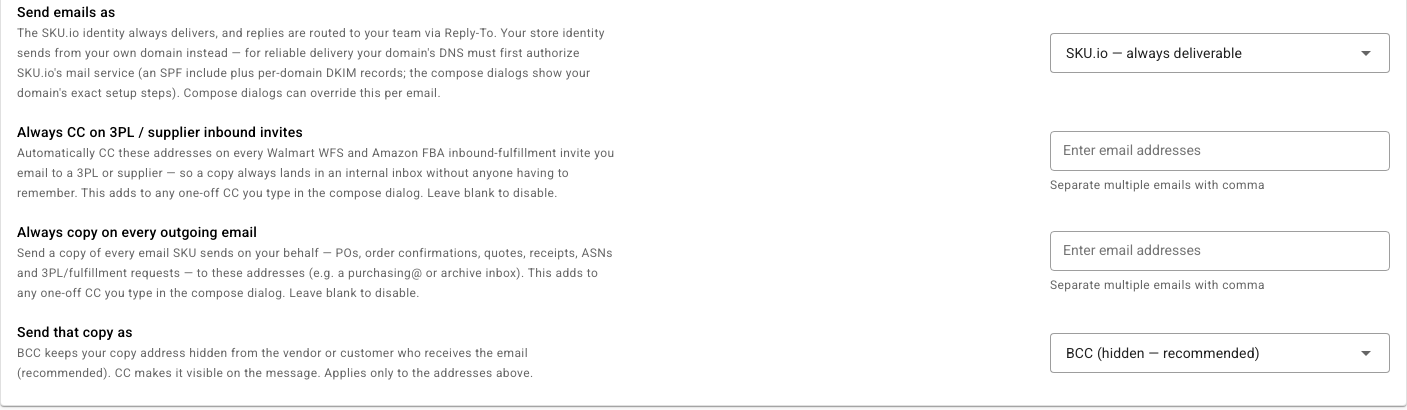
Click Save Changes after changing them. To see what was sent, open Settings → General → Outgoing Email Log.
Use a domain before it verifies
If you must send from your domain before its records verify, open the domain on
Sender Domains and click Use anyway. This isn't recommended: until the
records verify, receiving mail servers can't confirm SKU.io may send for your
domain, so emails may be rejected or land in spam. The domain shows In use ·
unverified until it verifies. Click Stop using to go back to
noreply@sku.io.
Remove a domain
Open the domain on Sender Domains and click Remove. Emails from that
domain go back to sending from noreply@sku.io.