Pick, pack and ship from your own warehouse
When you ship orders yourself, every order takes the same four steps: find the stock in its bin, pick it, pack it with a packing slip, and put a label on the box. This page walks one order through all four in SKU.io, and links to the full guide for each step.
In the video: 0:00 Check your bins · 0:38 Build a pick list · 0:56 Pick each bin · 1:25 Complete the pick list · 1:38 Pack the order · 2:03 Buy the label · 2:45 Print the label and ship
Picking, packing and printing the slip don't mark anything shipped. The order ships when you record the shipment, and buying a Shippo label in SKU.io does that for you, with the tracking number and label cost.
Before you begin
- Bins are set up for the warehouse, so a pick list can send pickers to a shelf. See Manage warehouse locations. Without bins, pick lists still work, and each pick says No bin — pick from stock.
- Shippo is connected, and the warehouse has a Shippo sender address on the Shippo Warehouses tab. See Connect Shippo. Shippo labels in SKU.io ship to US addresses only. For other ways to ship, see If you don't buy labels in SKU.io.
- The order is approved, with stock allocated at the warehouse, so it has an open fulfillment order. See Approve, reserve, and allocate stock.
- Fulfill from pick lists is off, under Settings → Fulfillment → Warehouse Locations. Buying the label records the shipment. If someone fulfills the order from the pick list first, it ships with no label or tracking, and Buy Label is no longer offered. See Turn off fulfilling from pick lists.
- Your role has the Fulfillment Orders → Ship permission, to buy the label. See Control who can act on fulfillment orders.
- To scan, use a barcode scanner that types what it reads and then presses Enter. On a computer without one, use Type code on the pick screen.
Steps
Check your bins
-
Go to Inventory → Warehouse Locations.
-
Search for the warehouse you ship from, and click its name.
-
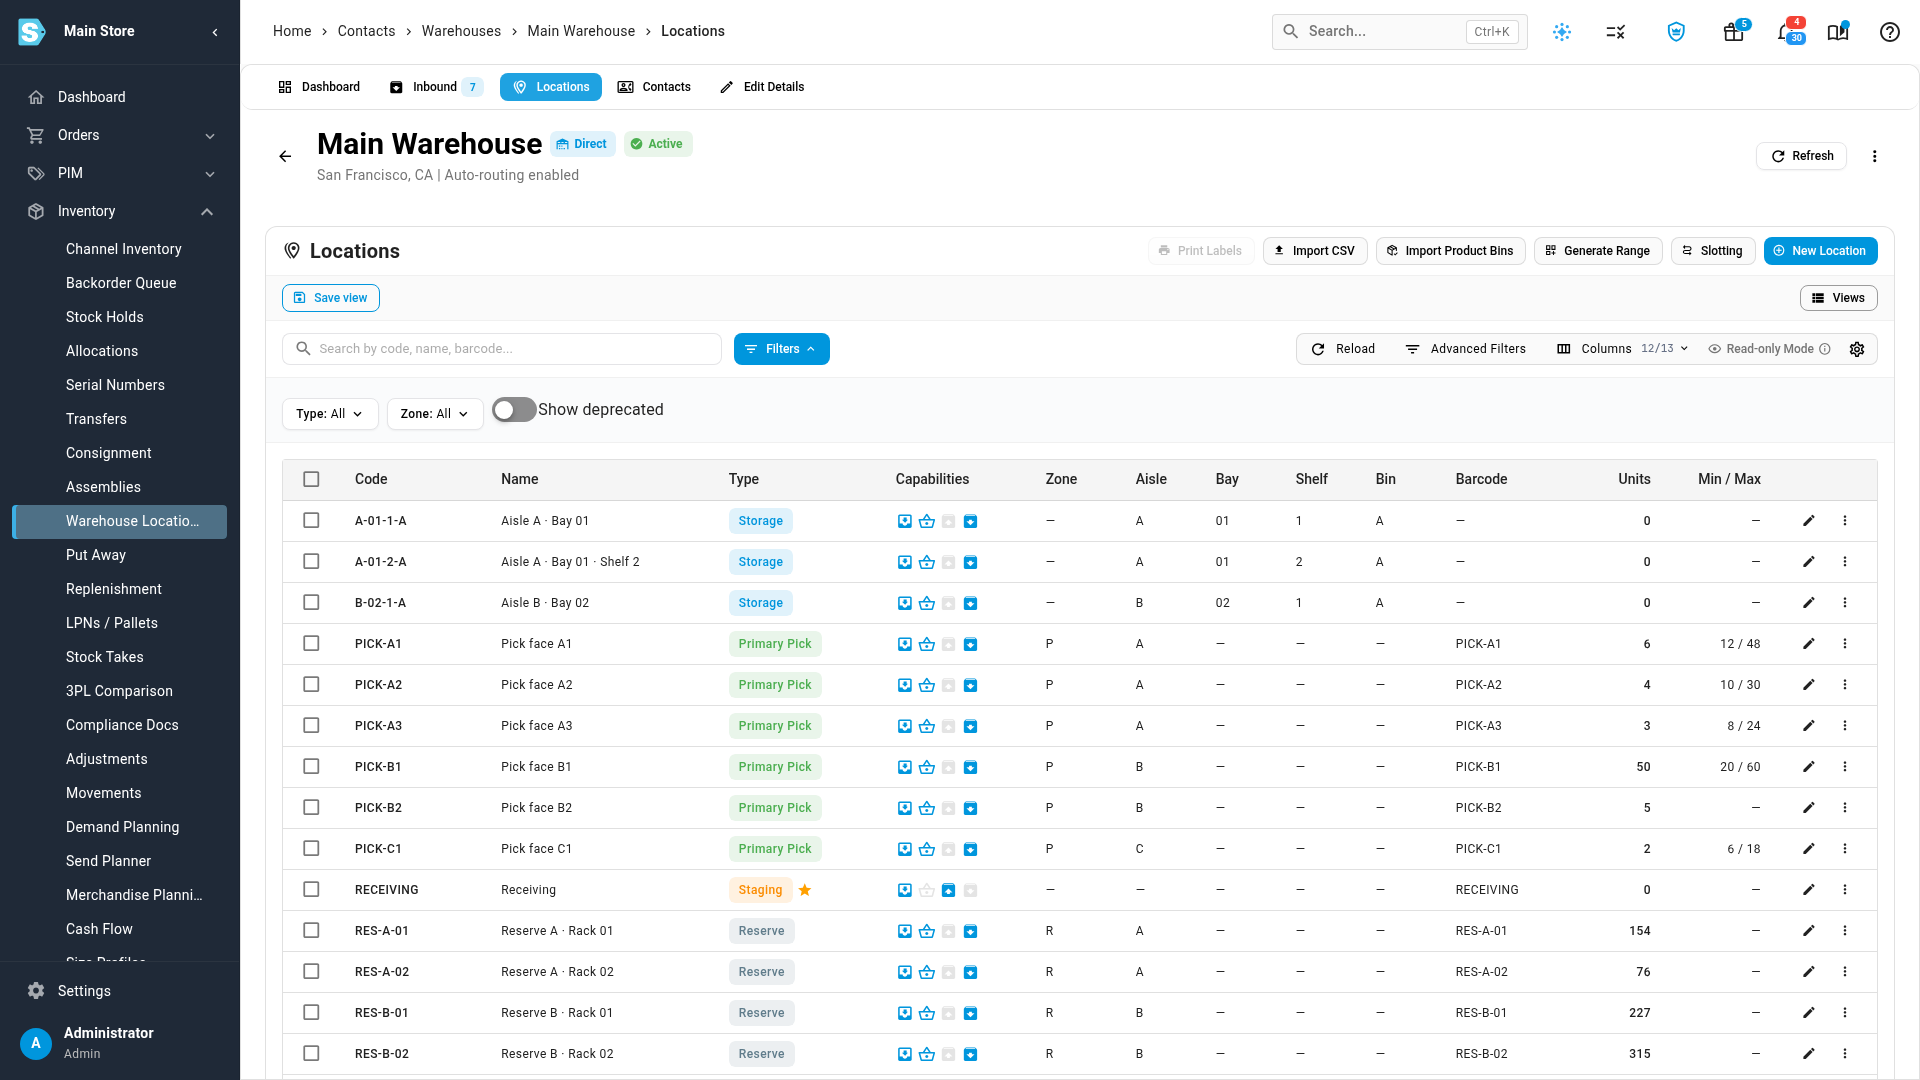
Choose the Locations tab. Each bin has a code, a barcode, and the units it holds now. Pick faces, of type Primary Pick, are the bins your team picks from. To set bins up, see Manage warehouse locations.
Pick the order
-
Go to Orders → Fulfillments. Every open order waiting to ship is listed.
-
Tick the orders you want to pick together. Picking several orders on one list makes a wave.
-
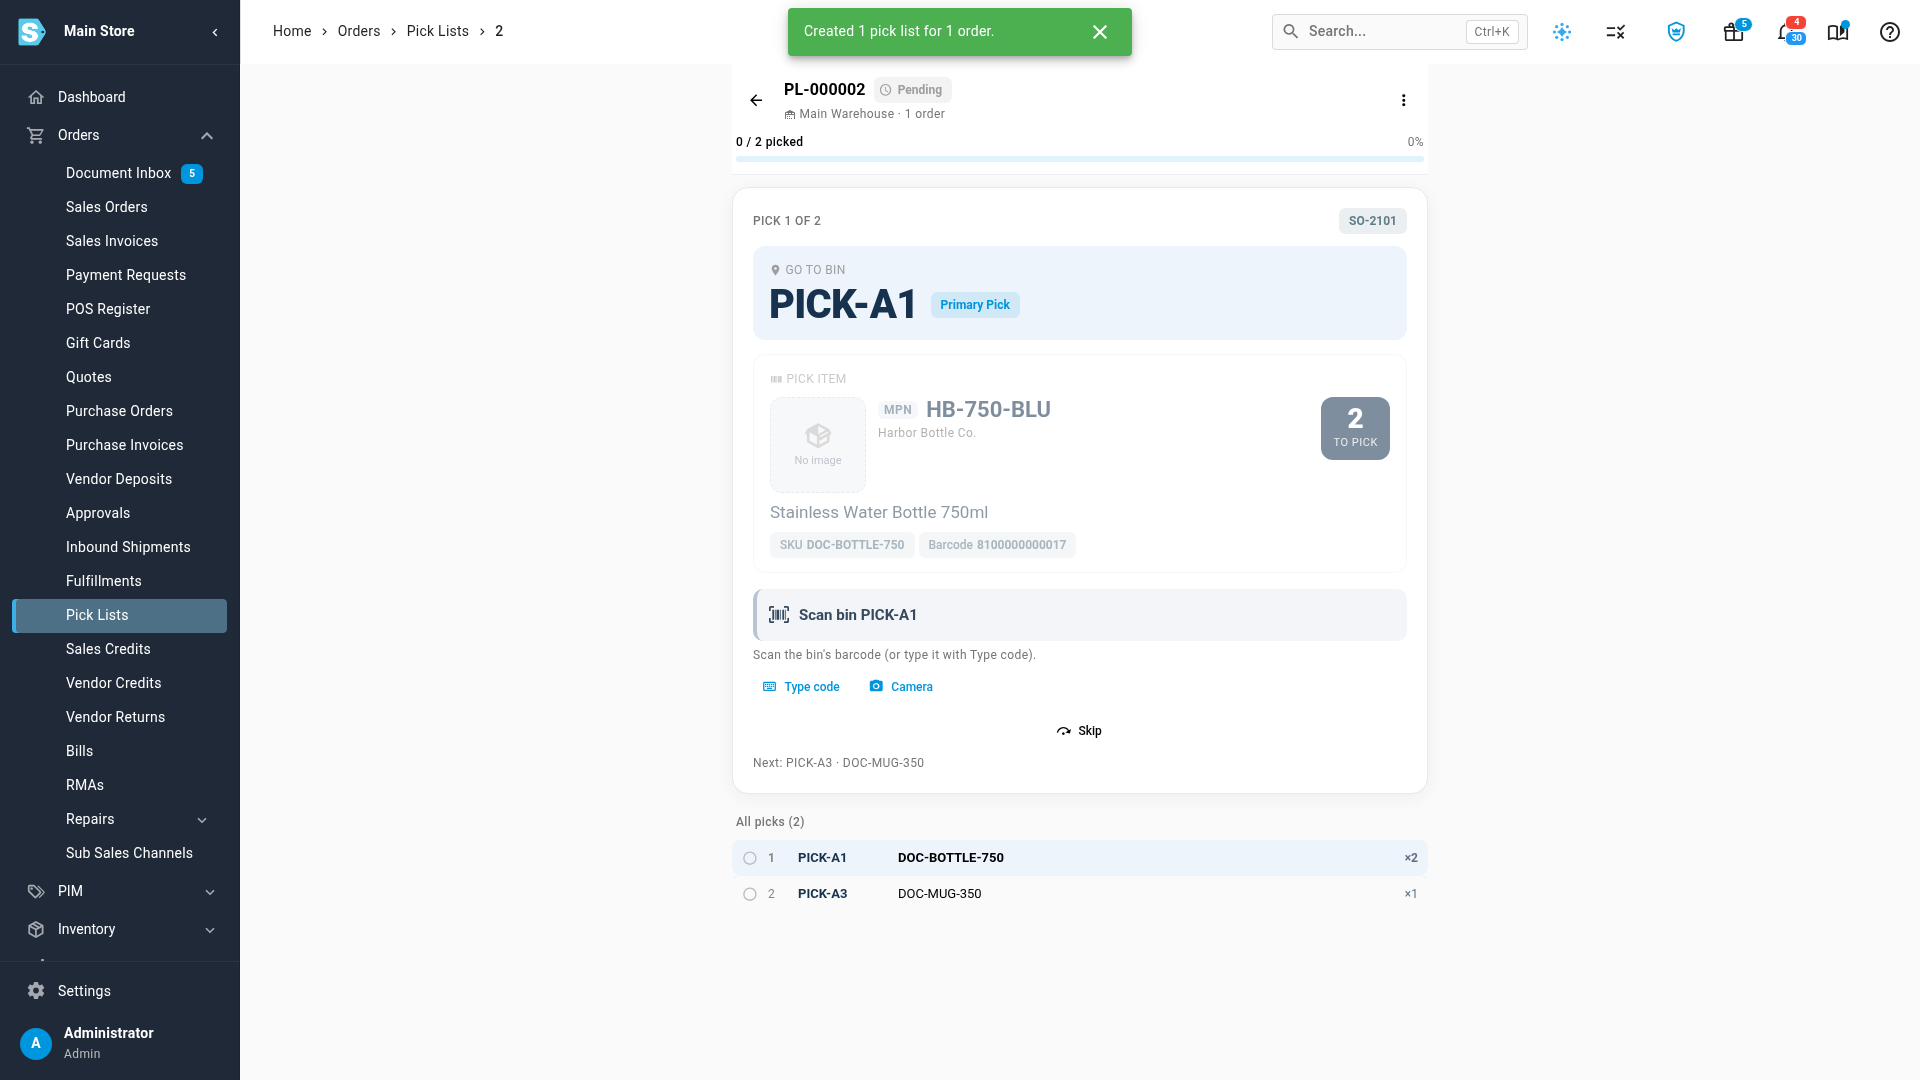
Click Create Pick List. SKU.io makes one list for each warehouse in your selection, up to 500 orders, and opens it on its first pick.
-
Walk to the bin shown under Go to bin, and scan its barcode. The bin turns green.
-
Scan the item once for each unit shown under To pick. The last scan confirms the pick, and the next bin comes up. If you can't pick something, click Skip and choose why.
-
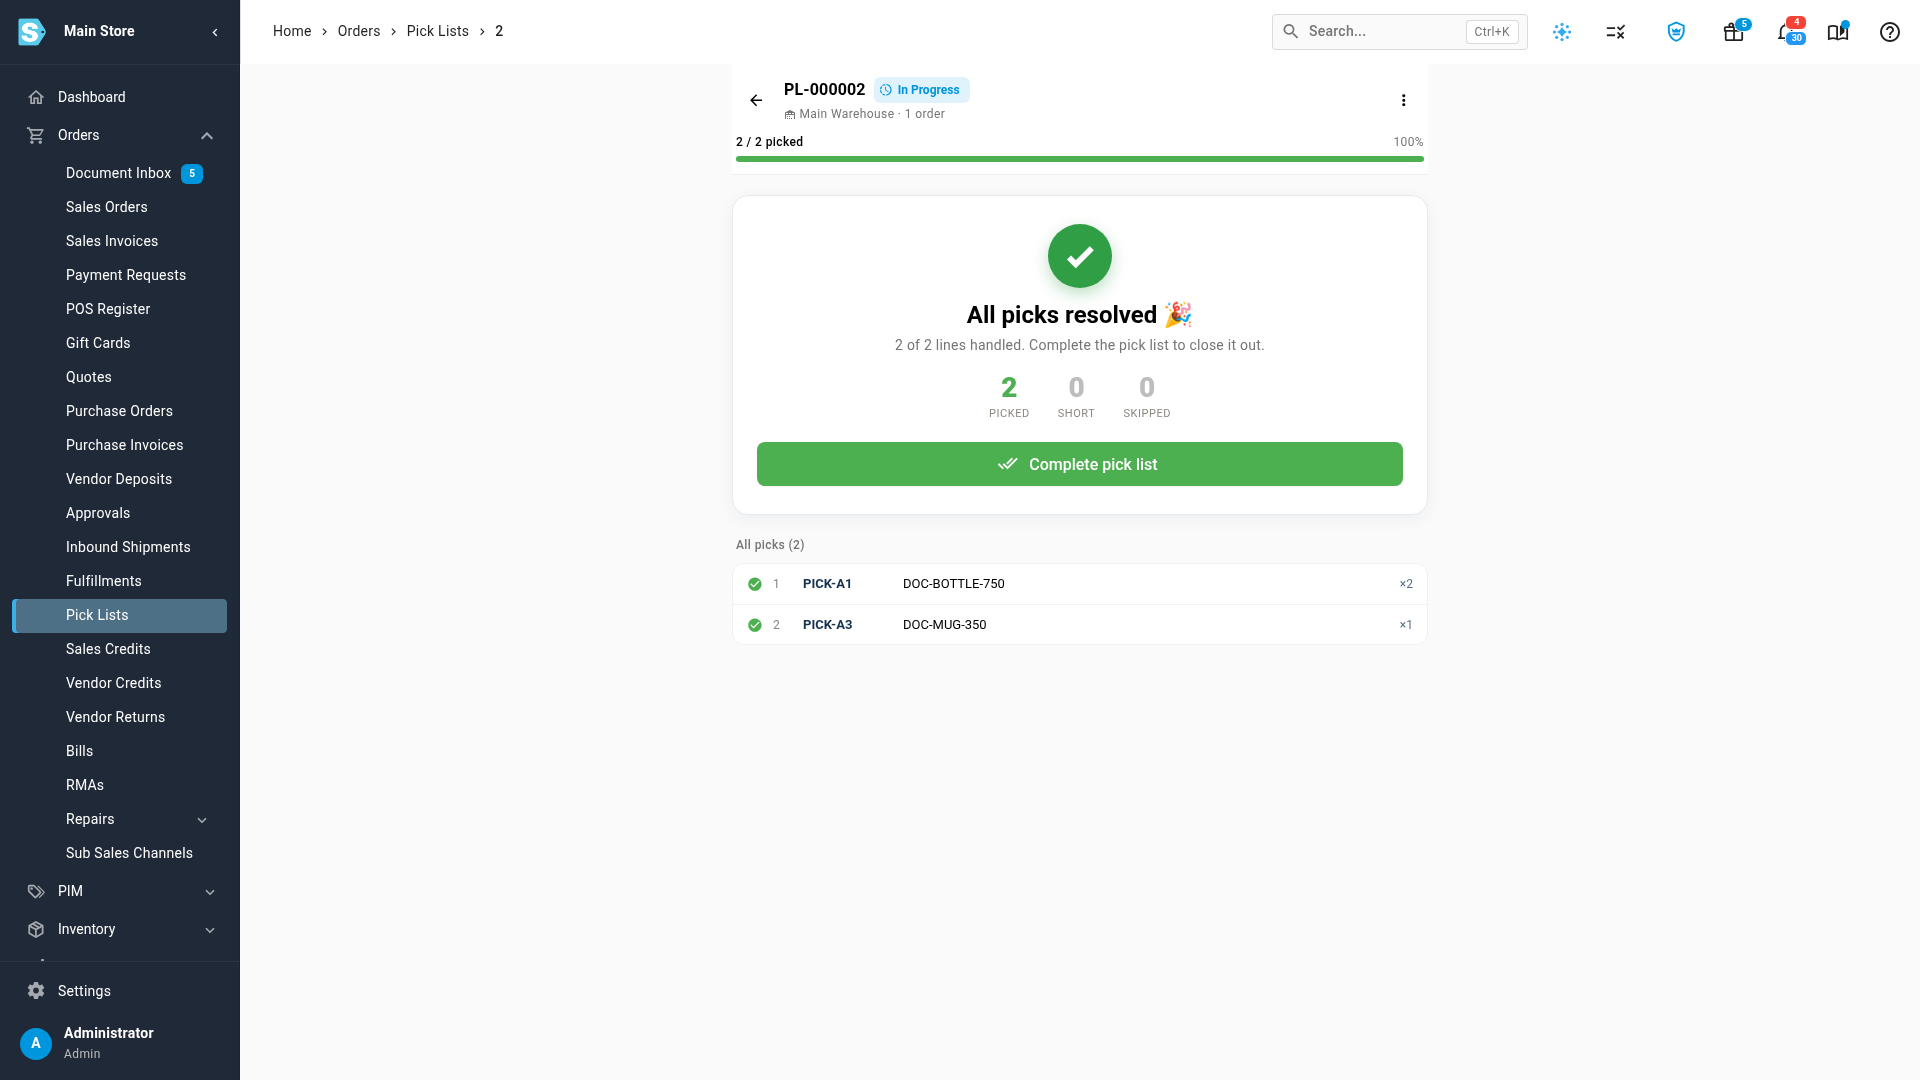
When every pick is done, the card shows All picks resolved. Click Complete pick list.
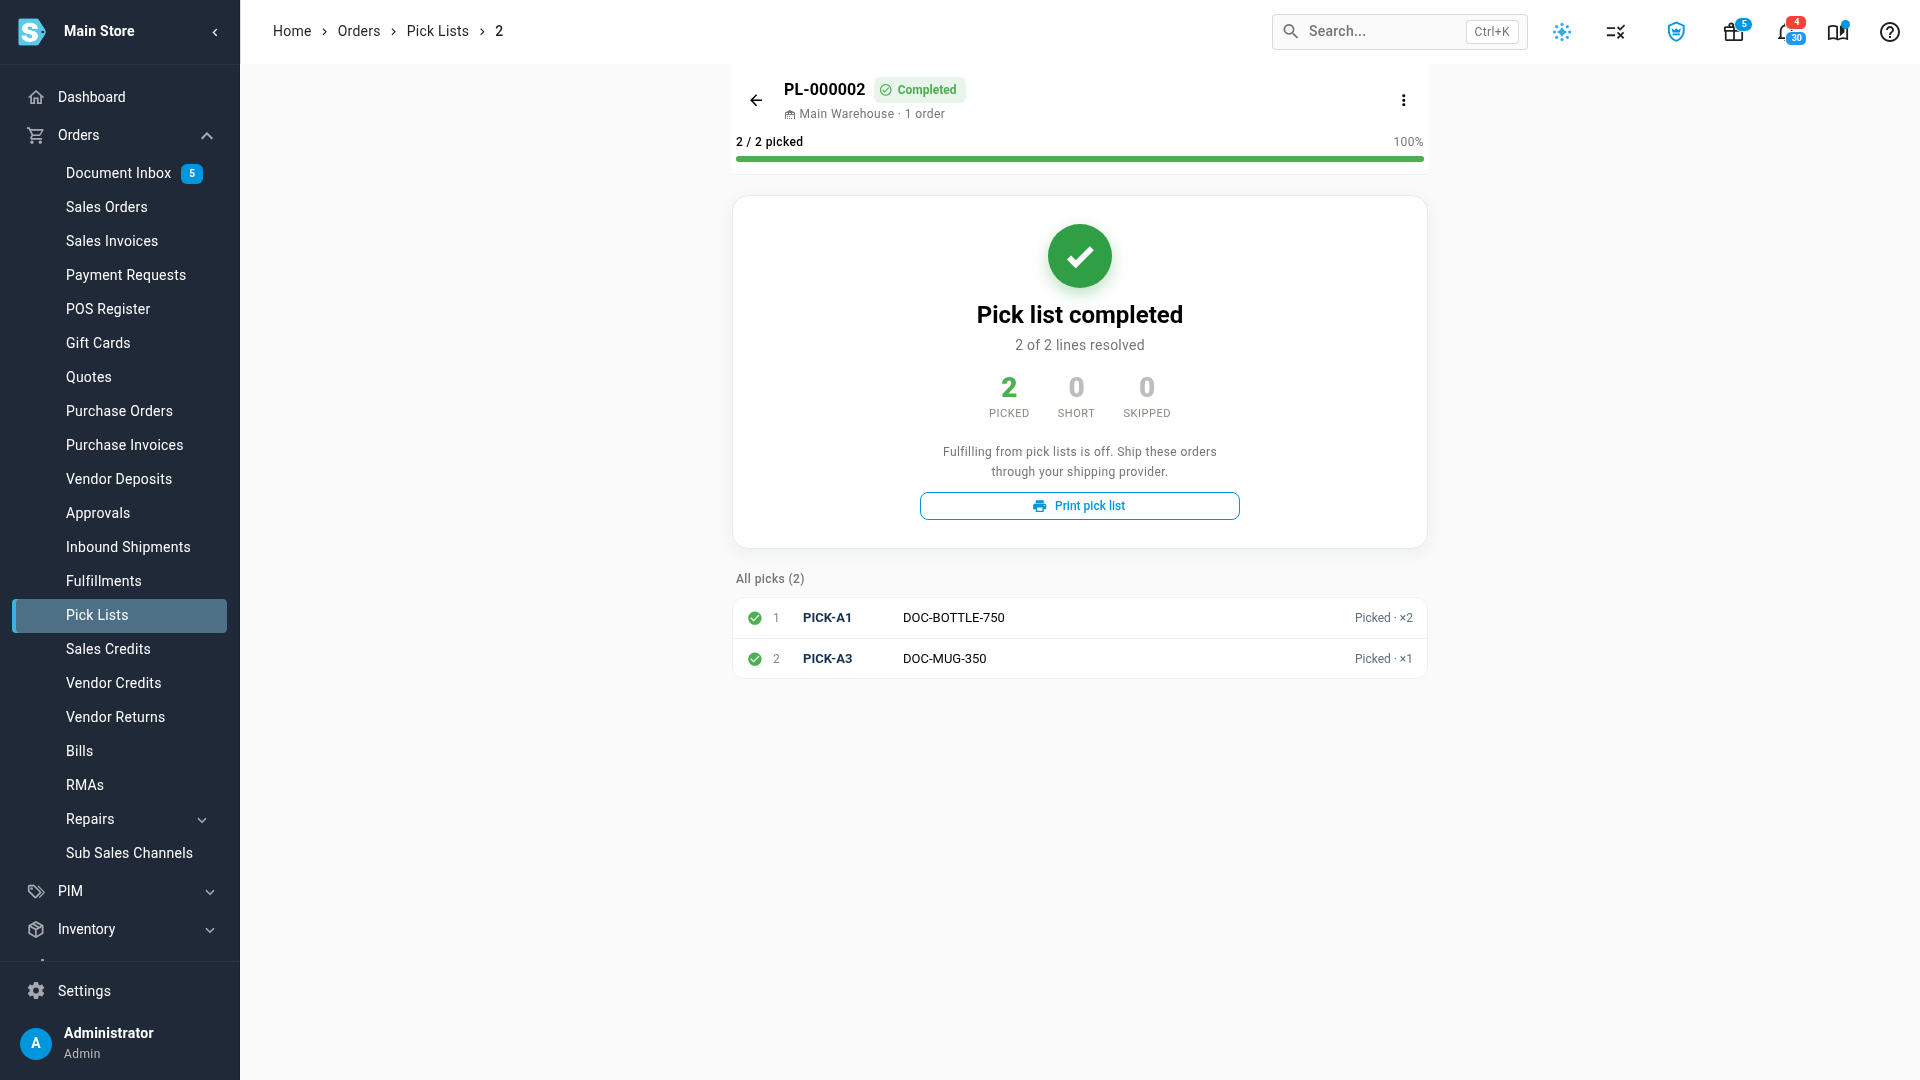
With Fulfill from pick lists off, the list says "Fulfilling from pick lists is off. Ship these orders through your shipping provider." The order is picked, and still waiting to ship.
For saved views, handhelds and the pick screen settings, see Create & work a pick list.
Pack the order
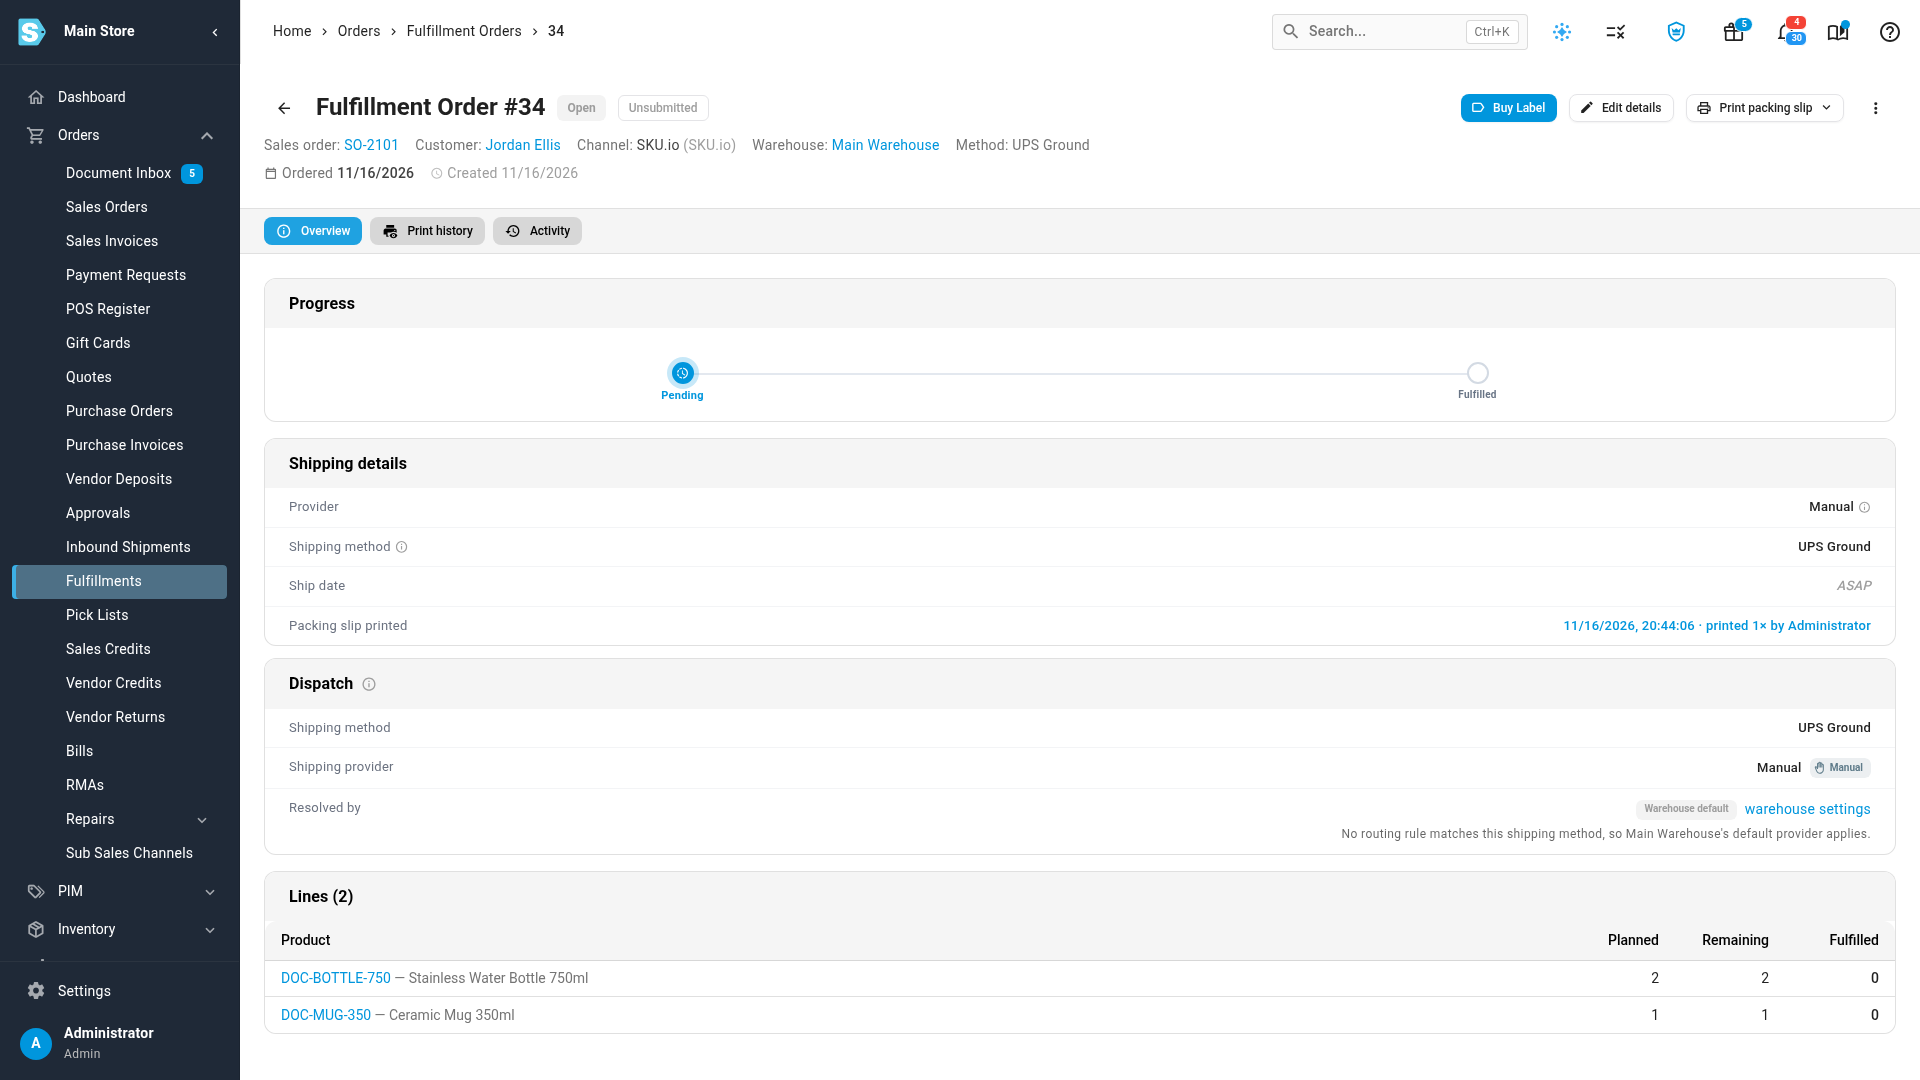
- Go back to Orders → Fulfillments, and click the order's fulfillment order number, such as FO-34.
- Click Print packing slip, then choose Print Packing Slip.
- Put the slip in the box with the items. Packing slip printed shows when the slip was printed, how many times, and by whom.
To print slips for many orders at once, tick them on Orders → Fulfillments and click Print Packing Slips. To change what the slip shows, see Common customizations by document type.
Buy the label and ship
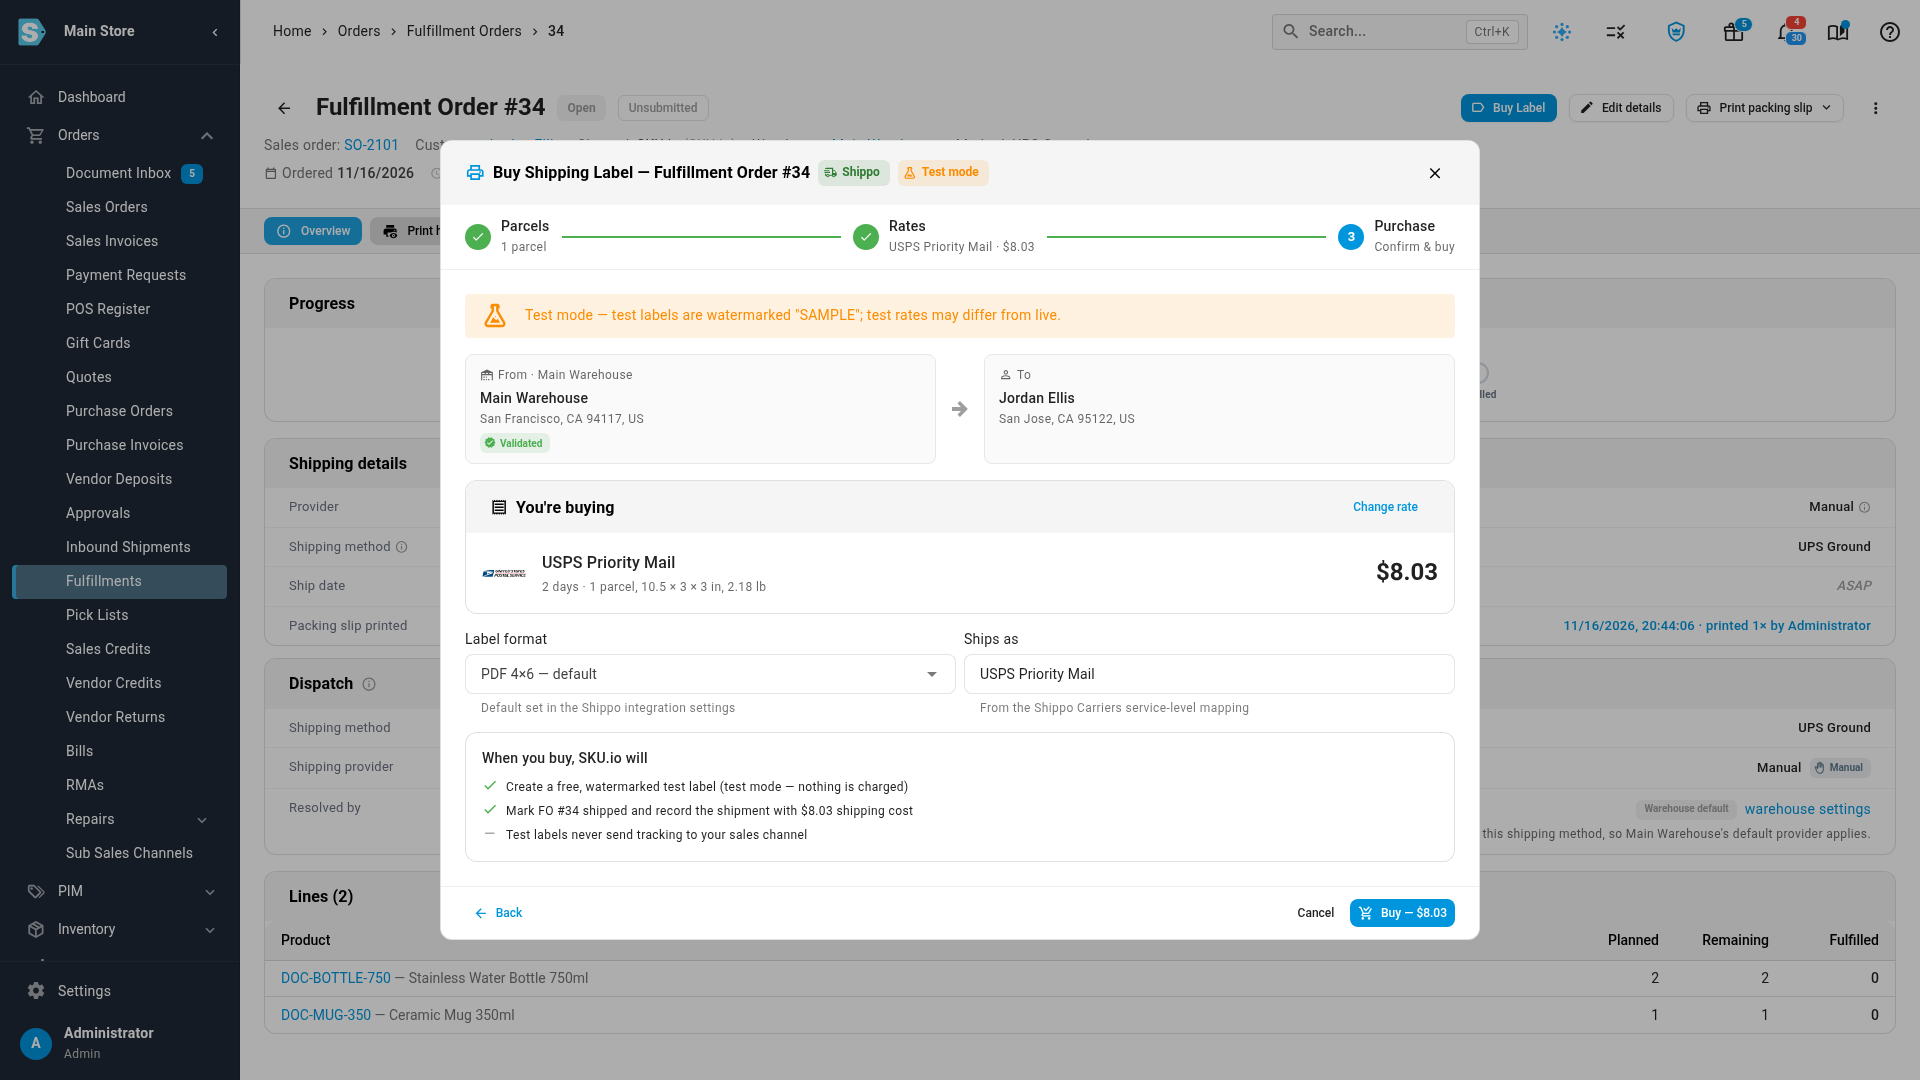
- Click Buy Label.
- Check the parcel's size and weight against your box. SKU.io fills them in from the products' weights and dimensions.
- Click Get rates. Each rate shows its price and transit time.
- Click the rate you want, then click Continue.
- Check Label format and Ships as, then click Buy. Label purchased shows the fulfillment order as Shipped, with the tracking number and label cost.
- Click Print Label, and put the label on the box.
- Click Done.
For several parcels, rates that don't come back, and voiding a label, see Buy a shipping label with Shippo.
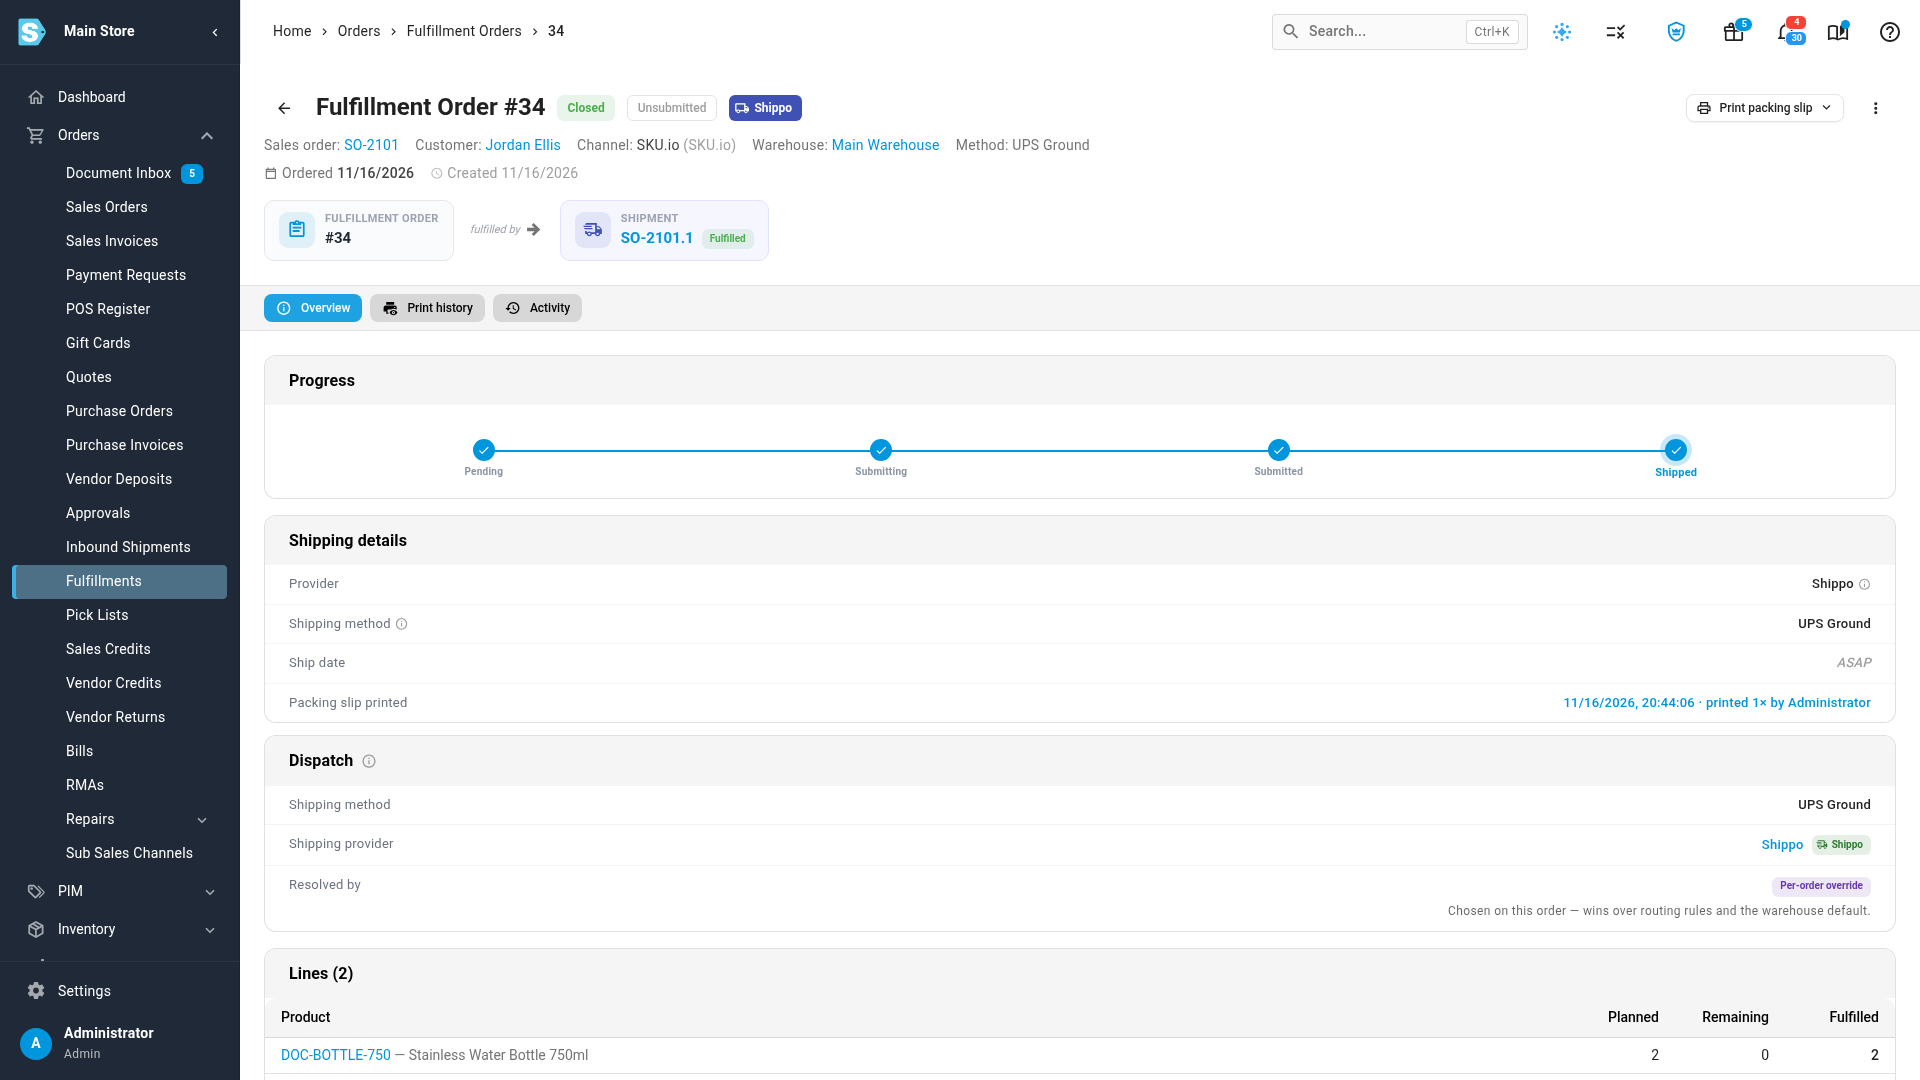
What you'll see: the fulfillment order is Closed, and its shipment is Fulfilled. The stock comes out of the bins it was picked from. With a live (not test) label, the tracking number goes to your sales channel, and the sales order closes when every line has shipped. Shipping the parcel needs nothing more in SKU.io: the carrier scans the label, and you can follow it in Track shipments.
If you don't buy labels in SKU.io
| You print labels… | Then… |
|---|---|
| in ShipStation or another shipping app connected to SKU.io | Send the fulfillment order to the app instead of buying a label. The app prints the label, and the shipment and tracking come back to SKU.io. See Dispatch to a fulfillment provider. |
| somewhere SKU.io isn't connected to (a carrier's own site, for example) | Record the shipment on the sales order with its tracking number. See Fulfill a sales order. |
| for orders that don't need tracking | Leave Fulfill from pick lists on, and use Fulfill picked items on the completed pick list. It records the orders as fulfilled from the bins you picked, but sends no tracking to your sales channel. See Fulfill the picked items. |
Next steps
- Create & work a pick list: scanning, skips, handhelds, and the pick screen settings.
- Buy a shipping label with Shippo: several parcels, rates that don't come back, and voiding a label.
- Top up pick faces from reserve bins: keep the bins you pick from stocked.
- Work the fulfillment board: see what's ready to pick and ship today.
Video transcript
This guide follows one order from the shelf to the carrier, in your own warehouse. It starts with your bins, the shelves where your stock lives. In the sidebar, open Inventory, and then choose Warehouse Locations from its list of pages. Search for the warehouse you ship from by typing its name in the search box. When it shows up in the list, click the warehouse's name to open its page. Then open its Locations tab, in the row of tabs at the top of the page. Each bin has a code, a barcode, and the units it holds right now. Your team picks orders from the pick faces, marked Primary Pick. Next, go back to the sidebar, open Orders, and then choose the Fulfillments page. Every open order that's waiting to ship is listed here, with its warehouse and status. Tick the box next to each order you want to pick in this walk. Then click Create Pick List, in the bar that appears above the list. The pick list opens on its first pick, with your progress at the top. It shows the bin to walk to, the item, and how many to pick. Scan the bin's barcode with your scanner, and the bin turns green. Then scan the item once for each unit, so this pick takes two scans. The last scan confirms the pick, and the next bin comes up on its own. Pick the second bin the same way, scanning the bin first and then the item. When it's done, the card shows that every pick is resolved. When every pick is done, click Complete pick list at the bottom of the card. Fulfill from pick lists is off here, because the label records the shipment. So the order is picked, and it's still waiting to ship. Now pack the order. Go back to Fulfillments in the sidebar, under Orders, where the order is still listed. Find the order, and click its fulfillment order number to open the fulfillment order page. Click Print packing slip at the top, and then choose Print Packing Slip from its menu. While it prints, put the slip in the box, along with the items you picked. The page then shows the print time, and the person who printed the slip. To ship the order, click Buy Label at the top of the page. The parcel's size and weight come from the products, so check them against your box. Then click Get rates, and Shippo asks every carrier on your account for a price. The rates take a few seconds to come back, because Shippo waits for each carrier to answer. Each rate shows its price and how many days it takes to arrive. Click the row of the rate you want to use, and it's selected. Then click Continue, at the bottom of the dialog, to review the purchase. Check the label format, and the shipping method this rate ships as. When it all looks right, click the Buy button in the corner. Shippo creates the label and sends back its tracking number, which takes a few seconds. The fulfillment order is now shipped, with the label's tracking number and cost. With a live label, the tracking number also goes to your sales channel. Click Print Label, and stick the label on the box. Then click Done to close the dialog and go back to the order. The fulfillment order is closed, and its shipment is marked as fulfilled.