Set up made-to-order decoration
If you embroider, print or engrave blank products to order, Made to Order lets each sales order line carry its own decoration: the method, the placement, the artwork and the colors. Decorations are built on manufacturing orders, so the blank and the thread or ink are consumed and the decorated item is costed like any other build.
This page covers the set-up: turning the feature on, the methods and placements your team picks from, and the cost rules that price a decoration the moment it's entered.
Before you begin
- You need permission to change settings.
Turn on Made to Order
- Go to Settings → General → Made to Order.
- Turn on Enable Made to Order and click Save Changes.

Turning it on adds:
- Decoration controls on sales order lines.
- A Decorator Warehouse switch on each warehouse's Settings tab, for an in-house or subcontracted decoration shop. Decoration builds are routed to a decorator warehouse.
- A Decoration consumable checkbox on products, for thread, ink and other materials a decoration uses up. See Create a product.
- Decoration Cost Rules, Decoration Methods and Decoration Placements under Settings → Financials.
Turning it off hides all of these again.
Keep your methods and placements
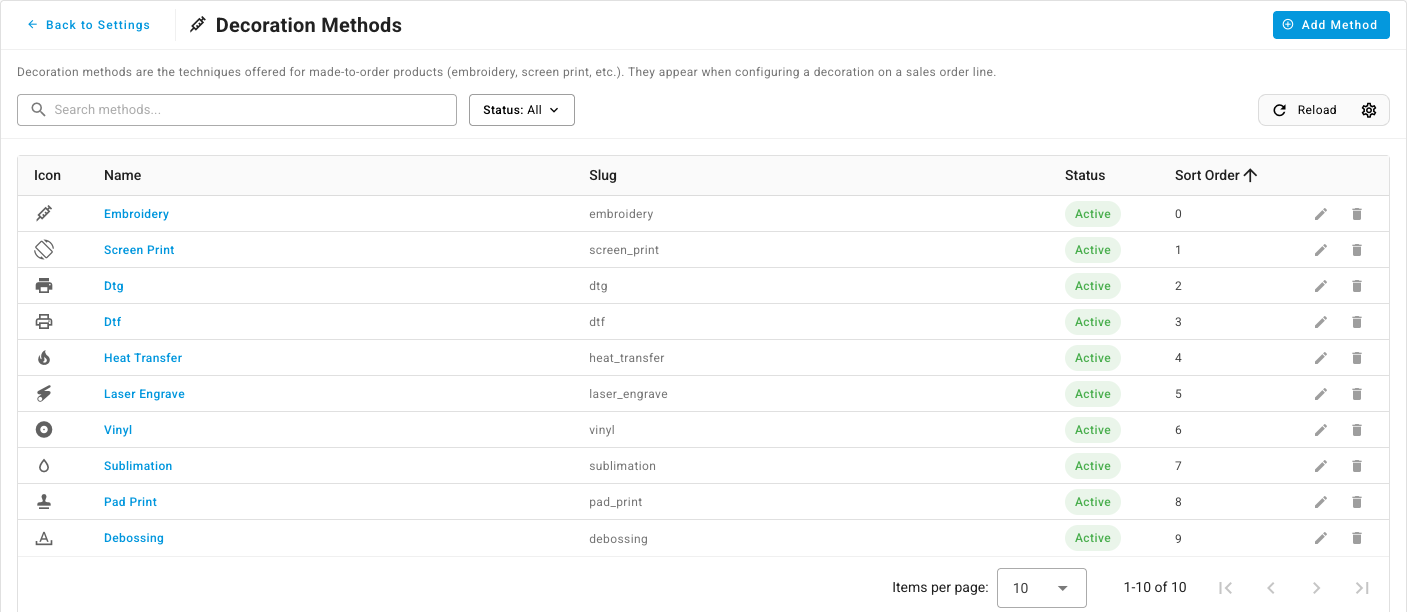
Decoration Methods lists the techniques you offer. Ten come built in, including Embroidery, Screen Print, DTG, DTF, Heat Transfer, Laser Engrave, Vinyl and Sublimation.
Decoration Placements lists where a decoration can go: Front Left Chest, Full Front, Full Back, Left Sleeve, Right Sleeve, Nape, Cap Front and Custom.
To add one, click Add Method or Add Placement, enter a Name, set the Sort Order that decides where it appears in pickers, and leave Active ticked. A method can also have an icon. Untick Active to stop offering one without deleting it.
Write cost rules
A cost rule adds to a decoration's estimated cost when the decoration matches its conditions. Rules run in Priority order, lowest number first, and every matching rule applies. The estimate is advisory: it helps you quote and check margin on the order, and never replaces the cost recorded when the decoration is built.
-
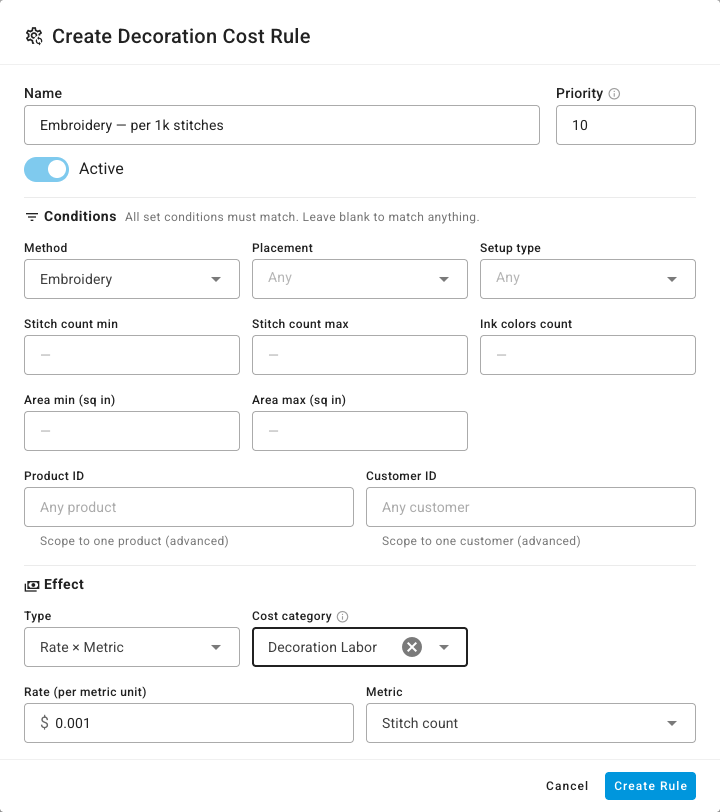
Go to Settings → Financials → Decoration Cost Rules and click Create Rule.
-
Enter a Name and a Priority.
-
Under Conditions, set only what the rule should depend on. Anything you leave blank matches everything.
- Method, Placement and Setup type (New Setup or Repeat).
- Stitch count min and Stitch count max, for embroidery.
- Ink colors count, for screen print.
- Area min (sq in) and Area max (sq in).
- Product ID or Customer ID, to limit the rule to one product or customer.
-
Under Effect, choose the Type and fill in its amount:
Type Adds Fixed (flat, once) The Amount once per decoration Per Unit The amount × the number of units decorated Rate × Metric The Rate (per metric unit) × the chosen Metric (stitch count, ink colors count or area) × the units decorated Minimum (floor) Nothing by itself. If the other rules add up to less than the Minimum total, a top-up line makes up the difference Flag Loss (warning) A $0 line that flags the decoration as a structural loss -
Optionally pick a Cost category for the amount, such as Decoration Labor or Decoration Setup. Left empty, amounts go to Decoration Consumables, and minimum top-ups go to Decoration Setup.
-
Leave Active on and click Create Rule.
Example
These two rules price embroidery at $1 per thousand stitches, with a $25 minimum:
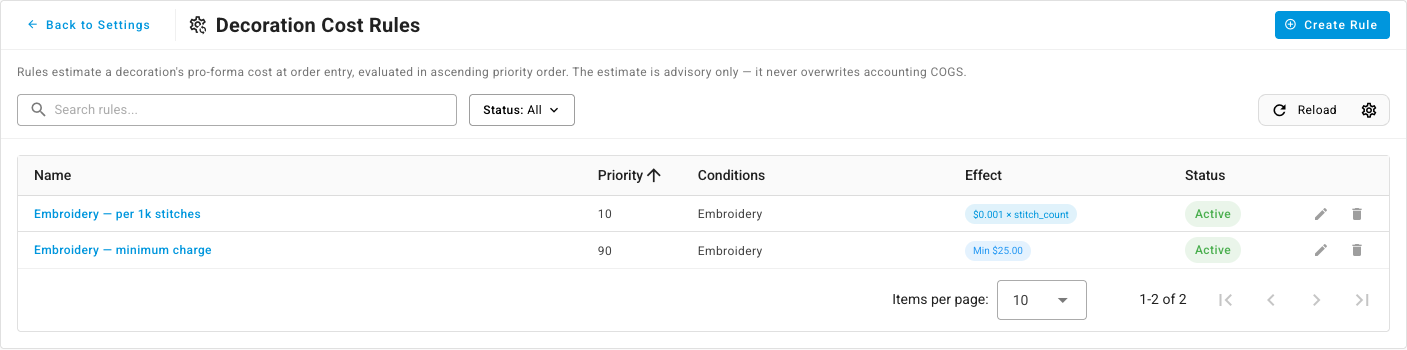
- Embroidery — per 1k stitches, priority 10: method Embroidery, type Rate × Metric, rate $0.001, metric Stitch count.
- Embroidery — minimum charge, priority 90: method Embroidery, type Minimum (floor), minimum total $25.
A left-chest logo of 8,000 stitches on 12 shirts estimates at 0.001 × 8,000 × 12 = $96. The same logo on 2 shirts comes to $16, so the minimum tops it up to $25.
To change or remove a rule, use the pencil or bin at the end of its row. Untick Active in the rule to pause it.
Next steps
- Add operations to a recipe: the labor steps a decoration build can carry.
- Build with a manufacturing order: how a build consumes the blank and records cost.