Choose which alerts your team gets
Alert Preferences is the company-wide switchboard for alerts. For each kind of alert you decide whether it's on, how urgent it is, which people receive it, and whether it also goes to shared email addresses or a Slack channel. Each person can then fine-tune how they receive their own alerts in My Notifications.
Before you begin
- You need permission to change alert preferences. Administrators have it.
- To post alerts to Slack, connect a channel first. See Send alerts to Slack.
Open Alert Preferences
Go to Settings → Alerts & Notifications → Alert Preferences. You can also click the settings icon on the Alerts page or under the bell.
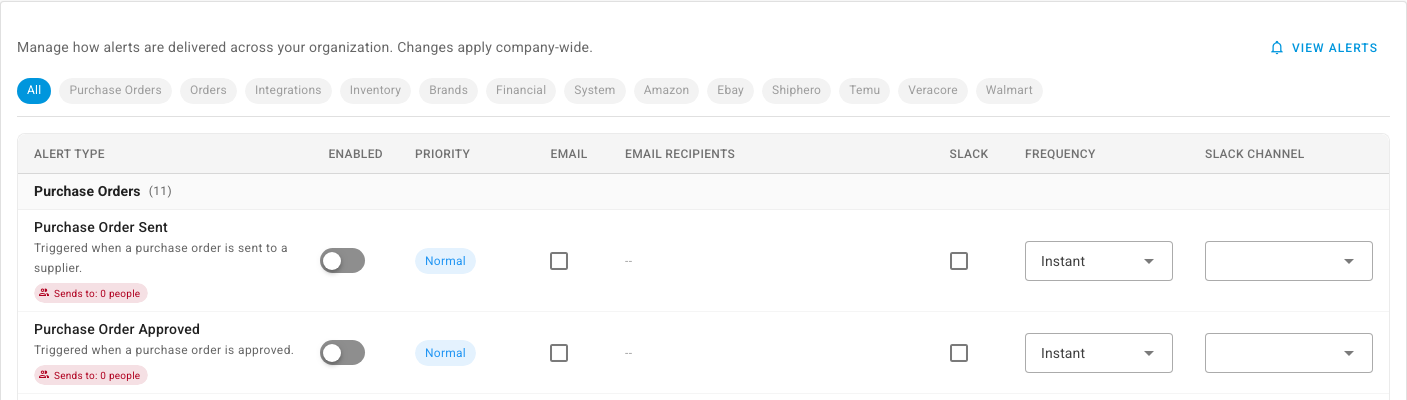
Alerts are grouped by area: Purchase Orders, Orders, Integrations, Inventory, Brands, Financial, System, and one group for each connected app that raises its own alerts, such as Amazon or Walmart. Click a chip at the top to show one group. Under each alert's name is a sentence saying exactly what triggers it.
Turn an alert on or off
- Find the alert.
- Switch Enabled on or off.
- Click Save Changes at the top of the page.
An alert that's off isn't raised for anyone. In each person's My Notifications it shows as Disabled company-wide.
Set its priority
Click the alert's Priority chip to switch it between Normal and High, then click Save Changes. High-priority alerts are counted in red on the bell, and people can filter their inbox to see only them.
Choose who receives it
The chip under each alert's description, such as Sends to: 4 people, counts the people who receive it. It turns red when nobody does.
- Click Sends to: on the alert. The Who receives dialog opens.
- Read Default audience to see who gets this alert unless you change it, for example all administrators, or everyone with the permission to approve purchase orders.
- Check the list of people. The chip beside each name shows why they're on it: Admin, Permission, Subscribed (added by hand), or Everyone.
- To add someone, pick them under Add person.
- To take someone off, click Remove beside their name.
- Click Save.
Critical alerts always need at least one recipient, so you can't remove the last person. The dialog says so with Critical alert — the audience cannot be emptied.
Send it to a shared inbox
Use this for an address that isn't a person in SKU.io, such as
purchasing@yourcompany.com.
- Tick the alert's Email box.
- Type each address into Email Recipients and press Enter after each one.
- Choose a Frequency:
- Instant — one email per alert, as it happens.
- Daily Digest — one summary email a day.
- Weekly Digest — one summary email a week, on Mondays.
- Click Save Changes.
The frequency here applies to these shared addresses and to Slack. People in the audience choose their own frequency in My Notifications.
Send it to Slack
- Tick the alert's Slack box.
- Pick the channel under Slack Channel.
- Click Save Changes.
Slack follows the same Frequency as the shared email addresses, so a daily digest posts once a day to the channel.
Demand-planning alerts are delivered from each forecast schedule instead. Their row says Email and Slack are configured per schedule in Demand Planning, and the email and Slack controls are turned off.