Allocate a cost across products
An overhead only shows up in a product's margin once you say which products it belongs to. Allocating a cost entry does that. You can split it across products, brands, suppliers or sales channels directly, or let SKU.io spread it across the lines of a document, such as a purchase order, in proportion to their revenue, cost, quantity, weight or volume.
Allocations are for reporting only. They change what the Profitability and Contribution Margin reports show, but no accounting entry is created.
Before you begin
- Record the cost entry. It needs an Unallocated amount.
- Decide which basis is fair. A shared warehouse cost might follow quantity or volume. A sales channel's subscription belongs to that channel alone.
Allocate a cost
-
Go to Insights → Cost Entries and open the entry.
-
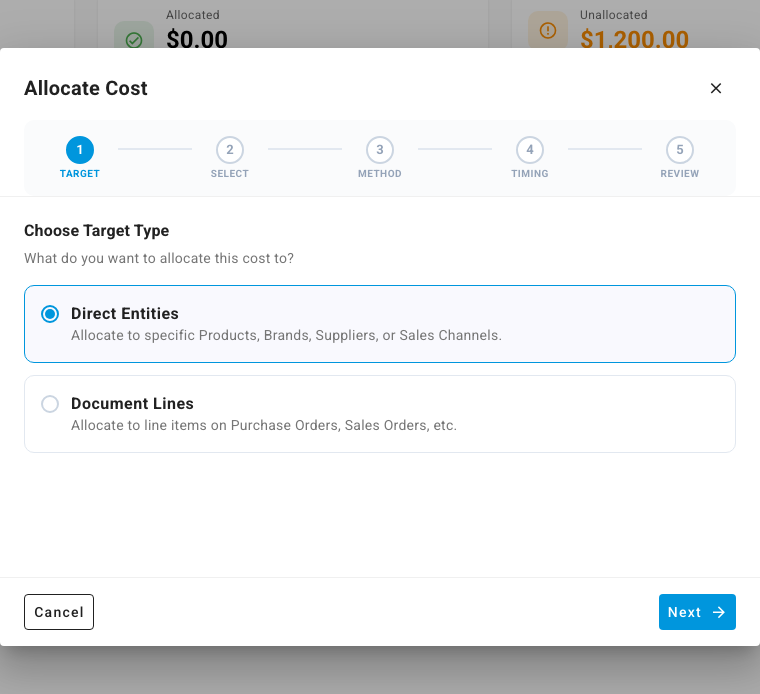
Click Allocate. The Allocate Cost wizard opens on Target.
-
Choose what to allocate to:
- Direct Entities to allocate to specific products, brands, suppliers or sales channels.
- Document Lines to allocate across the line items on purchase orders, sales orders, transfers, stock takes or assemblies.
-
Click Next.
-
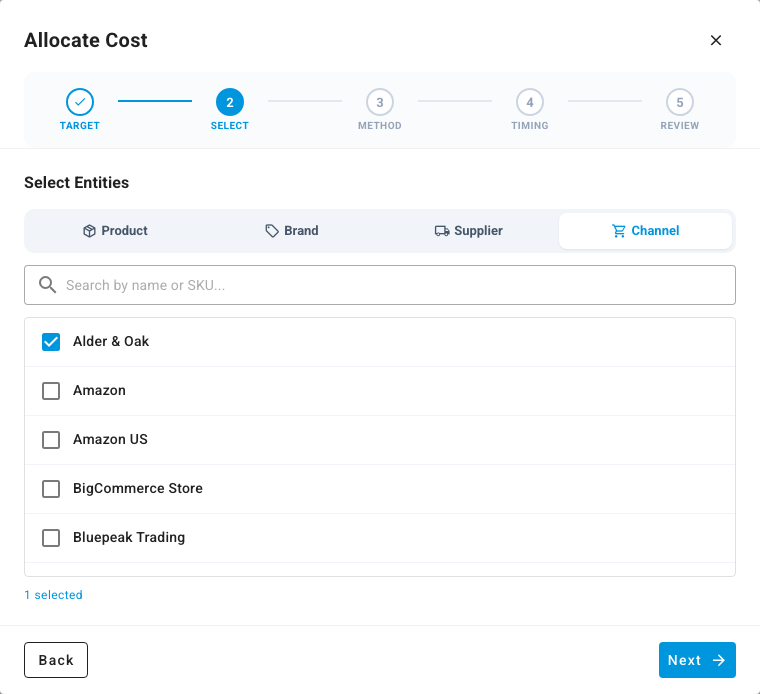
Pick a tab, Product, Brand, Supplier or Channel, and tick each target. For document lines, the tabs are Purchase Order, Sales Order, Transfer, Stock Take and Assembly, and you can narrow them with Document date from and Document date to.
-
Click Next.
-
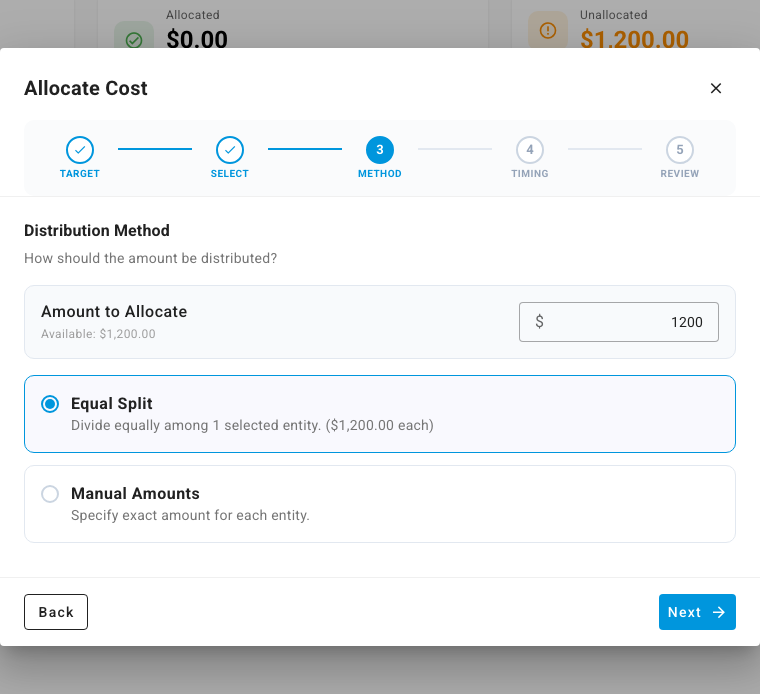
Under Amount to Allocate, keep the full amount or enter part of it. Available shows what's left to allocate.
-
Choose how to split it:
- For direct entities, Equal Split divides the amount evenly, and Manual Amounts lets you type each target's share. Remaining Available shows what's left.
- For document lines, pick a Proration Strategy: Revenue Based, Cost Based, Quantity Based, Weight Based or Volume Based. Each line gets its share of that measure. With several documents selected, the amount is split equally between the documents first, then across each one's lines.
-
Click Next.
-
Under Allocation Timing, choose One-time and set the Allocation Date, the day the cost is recognized in your reports. To spread it over several months instead, choose Amortize. See Amortize a prepaid cost.
-
Click Next, check the Review Allocation summary, and click Confirm Allocation.
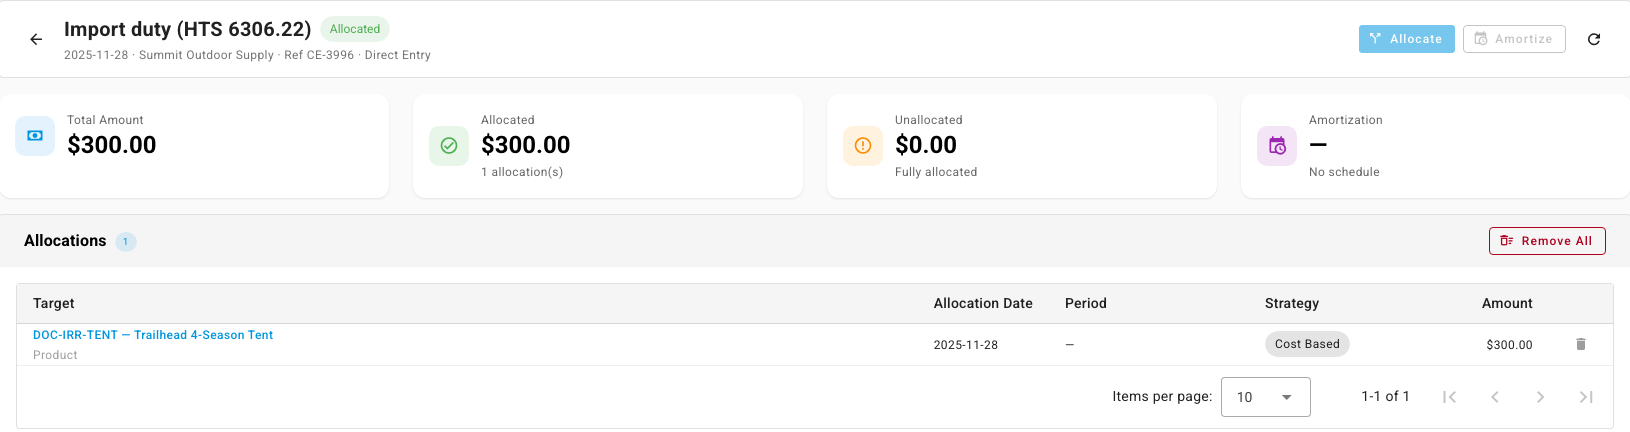
The entry's Allocated and Unallocated totals update, and each target appears under Allocations with its Allocation Date, Strategy and Amount. A document-line allocation lands on the products on those lines.
Allocate what's left
You can allocate an entry in several passes, for example half to one channel now and the rest later. Each pass works on the Unallocated amount. The entry shows Partially Allocated until nothing is left.
Remove an allocation
- To remove one allocation, click the delete icon on its row.
- To start over, click Remove All.
The amount returns to Unallocated. Allocations created by an amortization schedule can't be removed one at a time. Delete the schedule instead.
Next steps
- Amortize a prepaid cost
- Read the Contribution Margin report: see where allocated costs went, By Indirect Cost Type and By Target Type.
- Analyze profitability