Share a custom report and email it on a schedule
Once a custom report answers a question, other people usually need the answer too. You can share the report so colleagues open it in SKU.io, or schedule it so the latest numbers arrive by email as a file, with no one needing to log in.
Before you begin
- Save the report first. Sharing and scheduling are available only on a saved report, and only the person who created it can change who it's shared with or when it's sent.
- Colleagues you share with need their own SKU.io login and access to Custom Reports. Scheduled emails can go to any email address.
Share the report with everyone on your account
- Open the report from Insights → Reports → Custom Reports.
- On the Config tab, set Visibility to Shared.
- Click Save Changes.
The report now appears on the Shared tab of the Custom Reports list for everyone on your account. They can open and run it, and click Duplicate to make a copy of their own to change. Set Visibility back to Private (only me) to stop sharing it.
Share the report with named colleagues
-
Open the report, press ⌘K (or click Commands), and choose Share report.
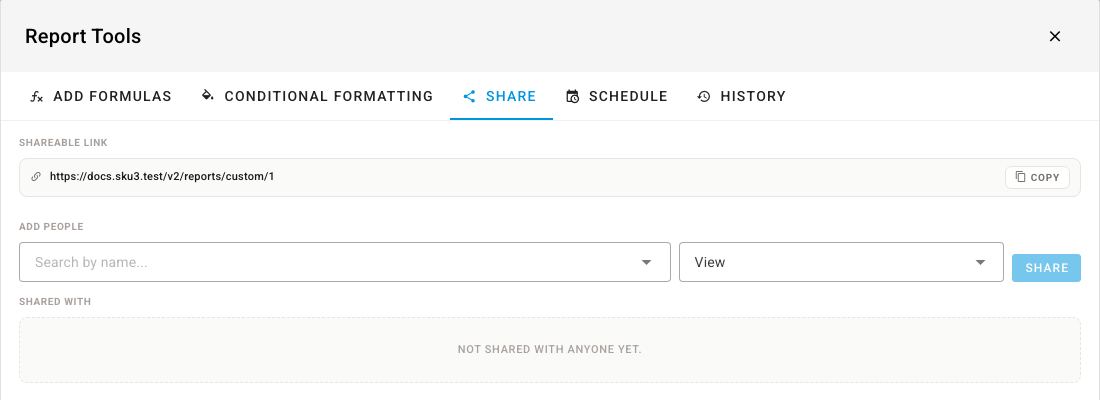
Report Tools opens on the Share tab.
-
Under Add People, search for a colleague by name.
-
Choose View to let them open and run the report, or Edit to also let them change and save it.
-
Click Share.
They appear under Shared With. Click the × beside a name to stop sharing with that person.
To send someone straight to the report, click Copy beside Shareable link and paste the link into a message. The link opens the report only for people it's shared with, by name or through Shared visibility.
Email the report on a schedule
-
Open the report and click the Sched tab on the right.
-
Click Add schedule.
Report Tools opens on the Schedule tab.
-
Click Add schedule in the dialog.
-
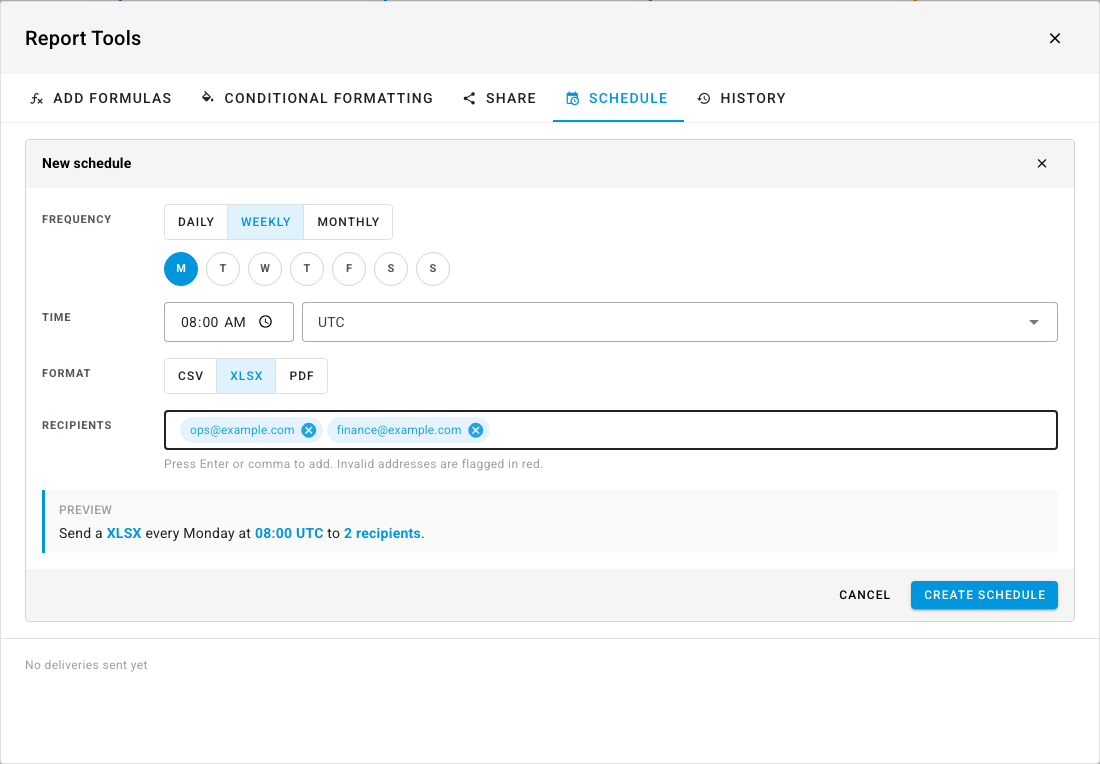
Under Frequency, choose Daily, Weekly, or Monthly.
- For Weekly, click the day to send it.
- For Monthly, pick the Day of month, from 1 to 28.
-
Set the Time and the time zone.
-
Under Format, choose CSV, XLSX, or PDF.
-
Under Recipients, type an email address and press Enter. Add as many as you need. An address that isn't valid turns red.
The Preview line reads back the schedule, for example "Send a XLSX every Monday at 08:00 UTC to 2 recipients".
-
Click Create schedule.
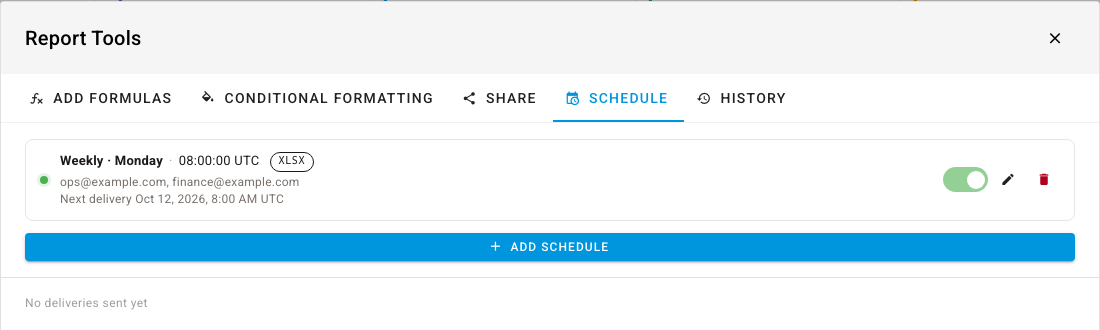
The schedule shows its cadence, format, recipients, and next delivery date.
At each scheduled time, SKU.io runs the report against your latest data and emails each recipient a message titled Scheduled Report: followed by the report name, with the results attached in the format you chose. The report runs with the fields, filters, and sort you saved, so save any change you want the next email to include.
Change, pause, or stop a schedule
On the Schedule tab of Report Tools:
- Turn the switch off to pause a schedule, and on again to resume it.
- Click the pencil to change the frequency, time, format, or recipients.
- Click the bin to delete the schedule.
The Sched tab on the right of the report shows each schedule at a glance, with its cadence, time, format, and recipients.
Next steps
- Build a custom report: change the report your schedule sends.
- Get your SKU.io data into a spreadsheet or BI tool: other ways to take your data out of SKU.io.