Replenish stock on a schedule
A forecast you build by hand answers "what should I order today?". A schedule asks that question for you, on the days and at the time you pick, so a supplier's reorder never waits for someone to remember it. Each schedule runs one saved forecast configuration, can create the purchase orders straight away, and tells your team what it found by email or Slack.
You can run one schedule per supplier, or one that covers a whole group of suppliers. Each schedule runs a single saved configuration, so make one configuration for each forecast you want to automate.
Before you begin
- Build a forecast you're happy with on Inventory → Demand Planning first. See Forecast demand and replenish stock.
- The products need what a manual forecast needs: sales history (or target stock levels) and supplier lead times.
Save the forecast as a configuration
A schedule doesn't store its own settings. It runs a saved configuration, so any change you later make to that configuration flows into every scheduled run.
- On Inventory → Demand Planning, set up the forecast: suppliers, destination warehouse, forecast type, history window, and options.
- Click Save Config.
- Enter a Configuration Name, for example "Summit Outdoor weekly reorder", and an optional Description. The Configuration Summary shows what's being saved.
- Click Save Configuration.
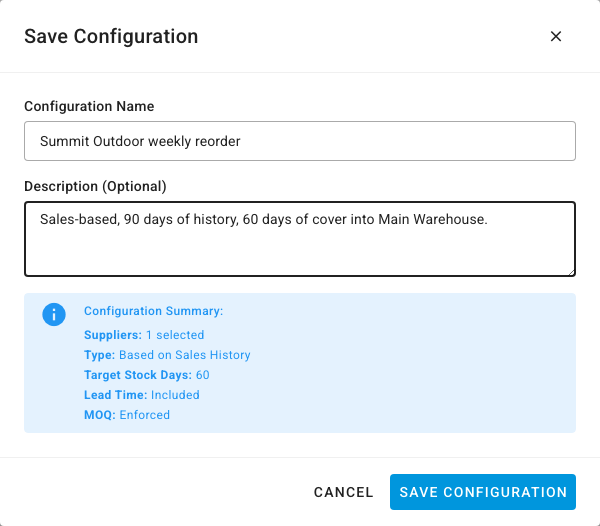
To change a saved configuration later, load it from the Saved Configurations menu, adjust the settings, then open Save Config and choose to update it. Choose Save as New Config instead to keep the original.
Create the schedule
- Open the Auto-Replenishment tab. The page lists your schedules, the next run, and the runs coming up today.
- Click New Schedule.
- Enter a Schedule Name.
- Set the Time the forecast should run, and pick the Days to Run. Use Weekdays or All to select several days at once. The time is in the Timezone shown beside it.
- Under Forecast Configuration, choose the configuration you saved. Its suppliers, forecast type, and target stock days appear underneath so you can check you picked the right one.
- Under Purchase Order Settings, decide what happens to the result:
- Leave Auto-create Purchase Orders off to have each run produce a forecast only. You review it and create the orders yourself.
- Turn it on to create purchase orders automatically, and choose the PO Status: Draft, Approved, or Approved & Sent to Supplier.
- Under Alerts, choose Email, Slack, or both, and add the Email Recipients or the Slack Webhook URL.
- Leave Status on Enabled, then save the schedule.
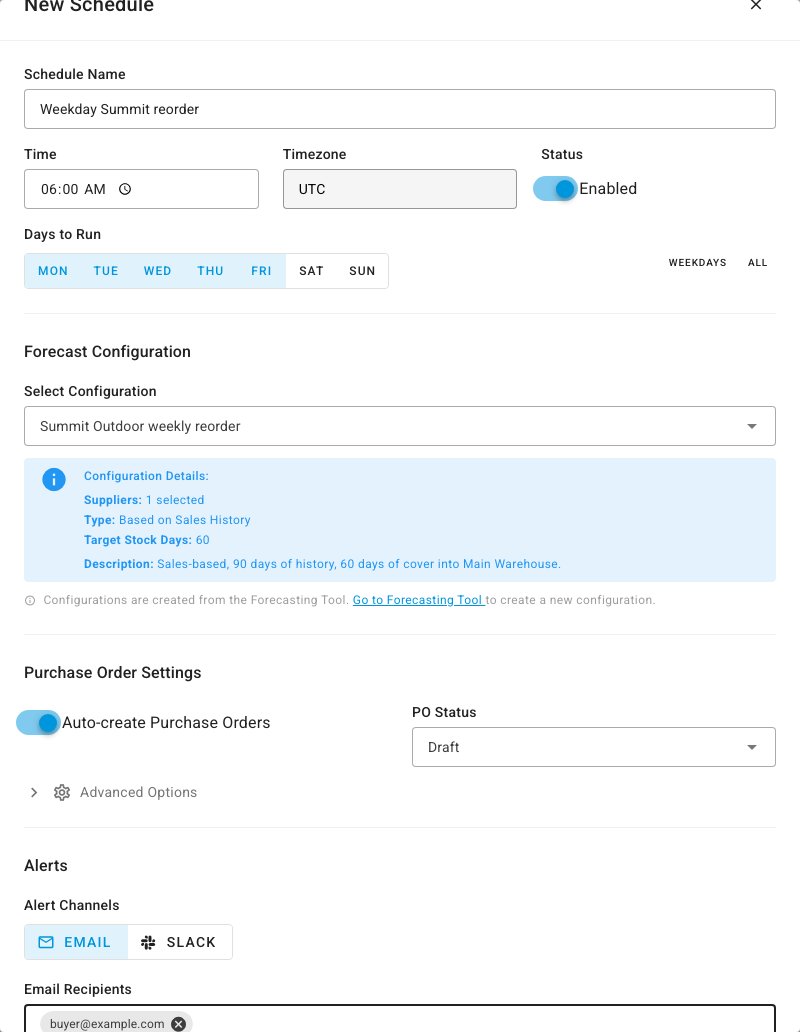
Run a new schedule with PO Status set to Draft for a week or two. You review every order it creates before anything reaches a supplier, and you can move to Approved & Sent to Supplier once you trust its numbers.
Advanced options
Expand Advanced Options for these settings:
- Separate PO by Brand creates one purchase order per brand within a supplier, instead of one per supplier.
- Auto-receive PO marks each purchase order as received as soon as it's created. It needs a PO Status of Approved or Approved & Sent to Supplier. Use it only when stock really is on hand the moment you order it, because receiving adds the units to your inventory.
- Missed Schedule Handling decides what happens when a run can't start on time, for example during maintenance:
- Run Within Deadline (Recommended) runs the missed forecast if it's no later than the Deadline Window (minutes), 60 by default, and otherwise waits for the next scheduled time.
- Run Once (Catch Up) runs the missed forecast once, as soon as it can.
- Skip Missed always waits for the next scheduled time.
Watch the schedule run
The Auto-Replenishment tab shows how your schedules are doing: active schedules, runs and purchase orders created today, and the success rate this week. Next Scheduled Run counts down to the next run, and Upcoming Runs lists today's slots.
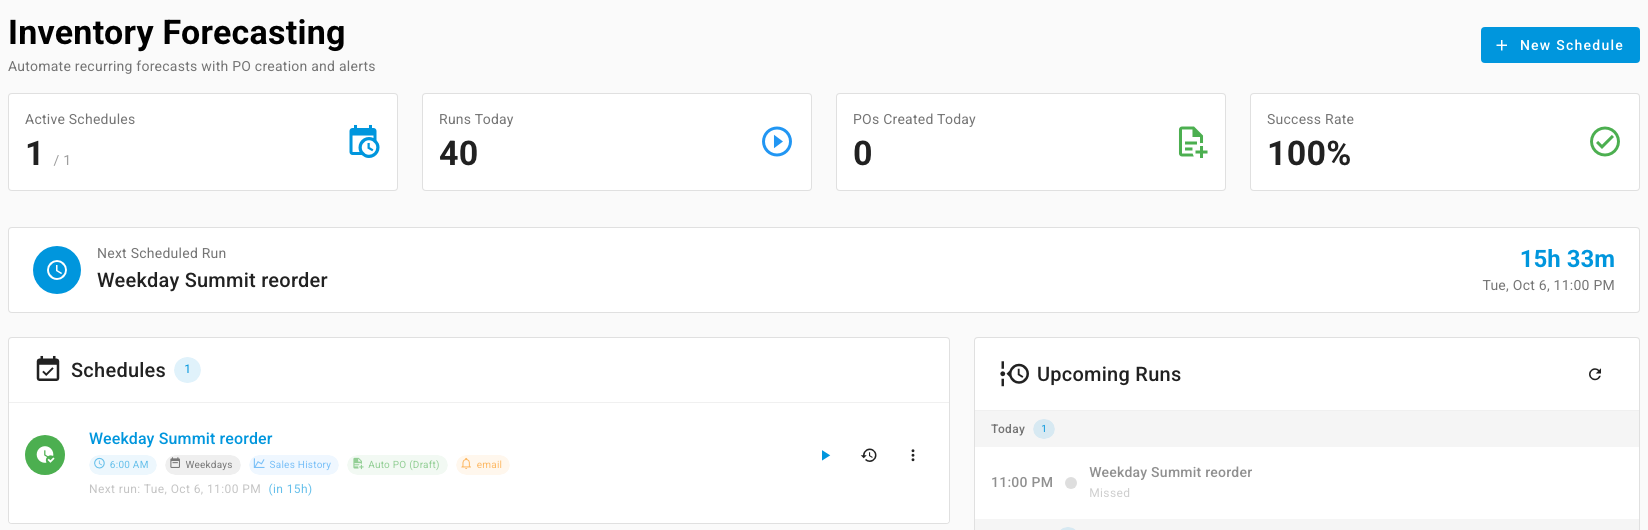
On each schedule in the list:
- Click Run now (the play button) to run it immediately, for example to test a new schedule.
- Click View history to see every run with the SKUs analyzed, the units to order, and their value. Click a run to see its full results.
- Open the menu to Edit or Delete the schedule.
Alerts go out only when a run finds something to order or creates purchase orders, so a quiet week doesn't fill your inbox. Admin users also get the alert as an in-app notification.
Find past runs
The History tab lists every forecast run, whether you built it by hand or a schedule ran it. Filter by Type, Status, or Date, and click the eye icon on a row to reopen its results.
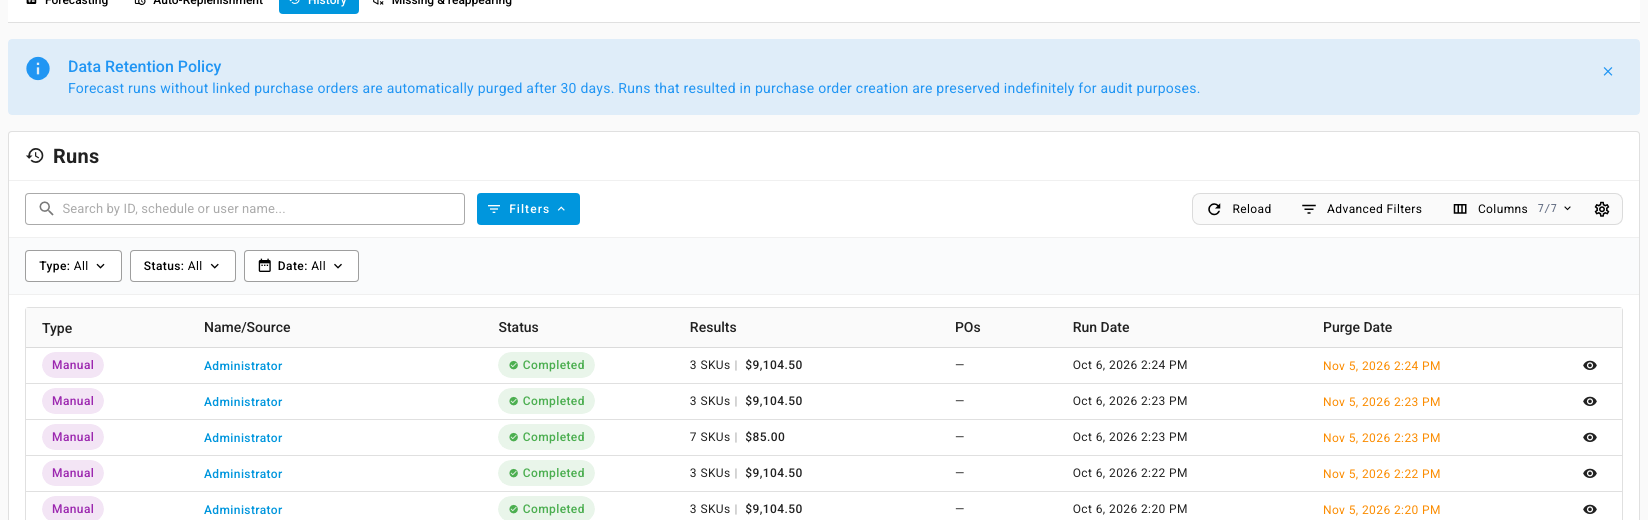
Runs that didn't create a purchase order are removed after 30 days; the Purge Date column shows when. Runs that created purchase orders are kept indefinitely so you can always trace an order back to the forecast behind it.
Next steps
- Forecast with trend-aware baselines to make the saved configuration follow growth.
- Check how far to trust a forecast before you let a schedule approve orders on its own.
- Create a purchase order to see where the scheduled orders continue.