Convert imported products into bundles or kits
Every product you import or create starts as Standard. Gift sets, multi-packs and kits from your sheet arrive that way too, so before they can sell as sets you convert them and tell SKU.io what each one contains. The Bundle & Kit Workshop does that for several products at once: you queue each product with the type it should become, give it its components, and convert the whole queue in one step.
To convert one product from its own page, or to have SKU.io suggest candidates from product names, see Convert & auto-detect product types.
Before you begin
-
You need the Products Edit permission to convert products.
-
Decide which type each product should be:
- Bundle: sold as one item and stocked as its parts. Each sale takes the components from stock, and the bundle has no stock of its own.
- Kit: assembled ahead of time and stocked as a finished item. You build kits from the components, and each sale takes a built kit.
Kits vs bundles explains the difference in full.
Open the conversion queue
- Go to PIM → Products and click Bundle & Kit Workshop.
- If nothing is a bundle or kit yet, the list says No bundles or kits yet. Click Convert products to bundles or kits. Otherwise, click the Convert products tab.
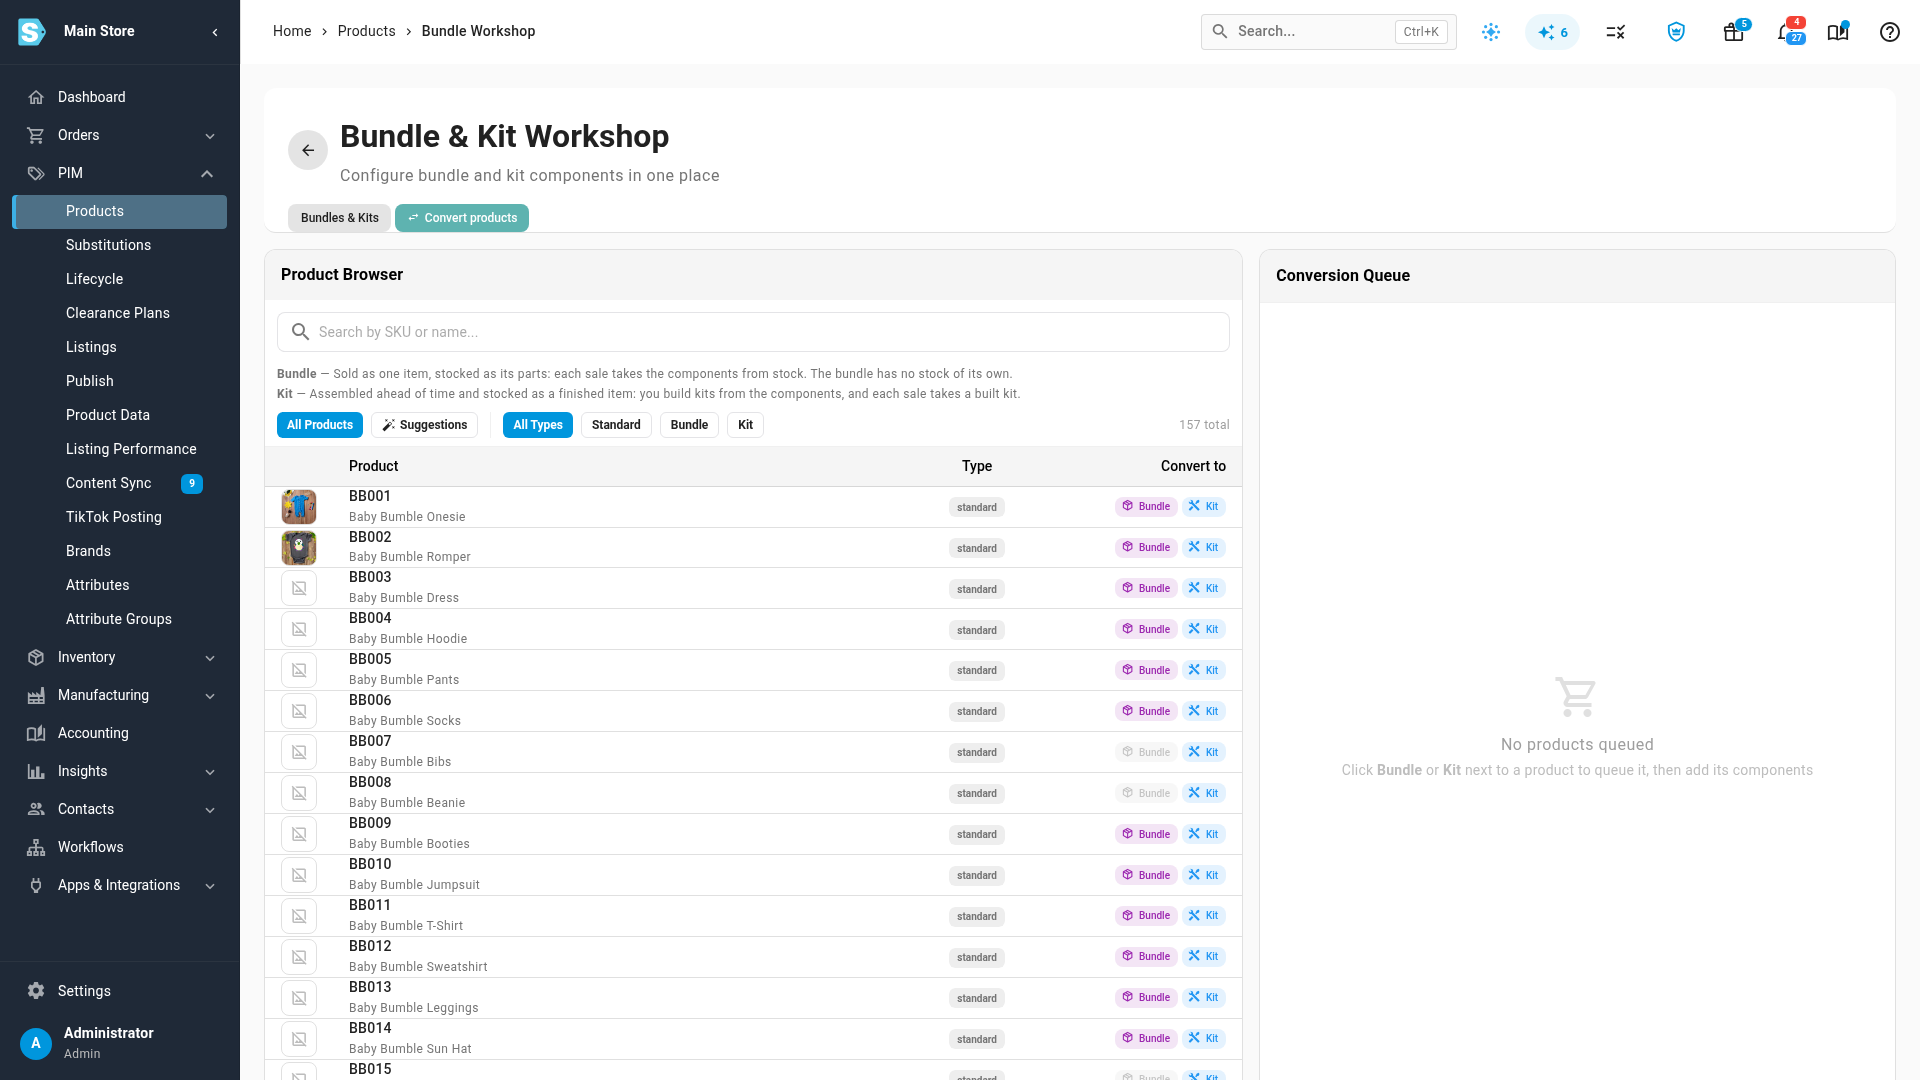
The tab has two panels: the Product Browser on the left and the Conversion Queue on the right. The one-line Bundle and Kit explanations sit above the browser, where you choose.
Queue the products to convert
- In the Product Browser, search for the product by SKU or name.
- In the product's Convert to column, click Bundle or Kit. The product moves into the Conversion Queue and its row shows In queue.
- Repeat for every product you want to convert.
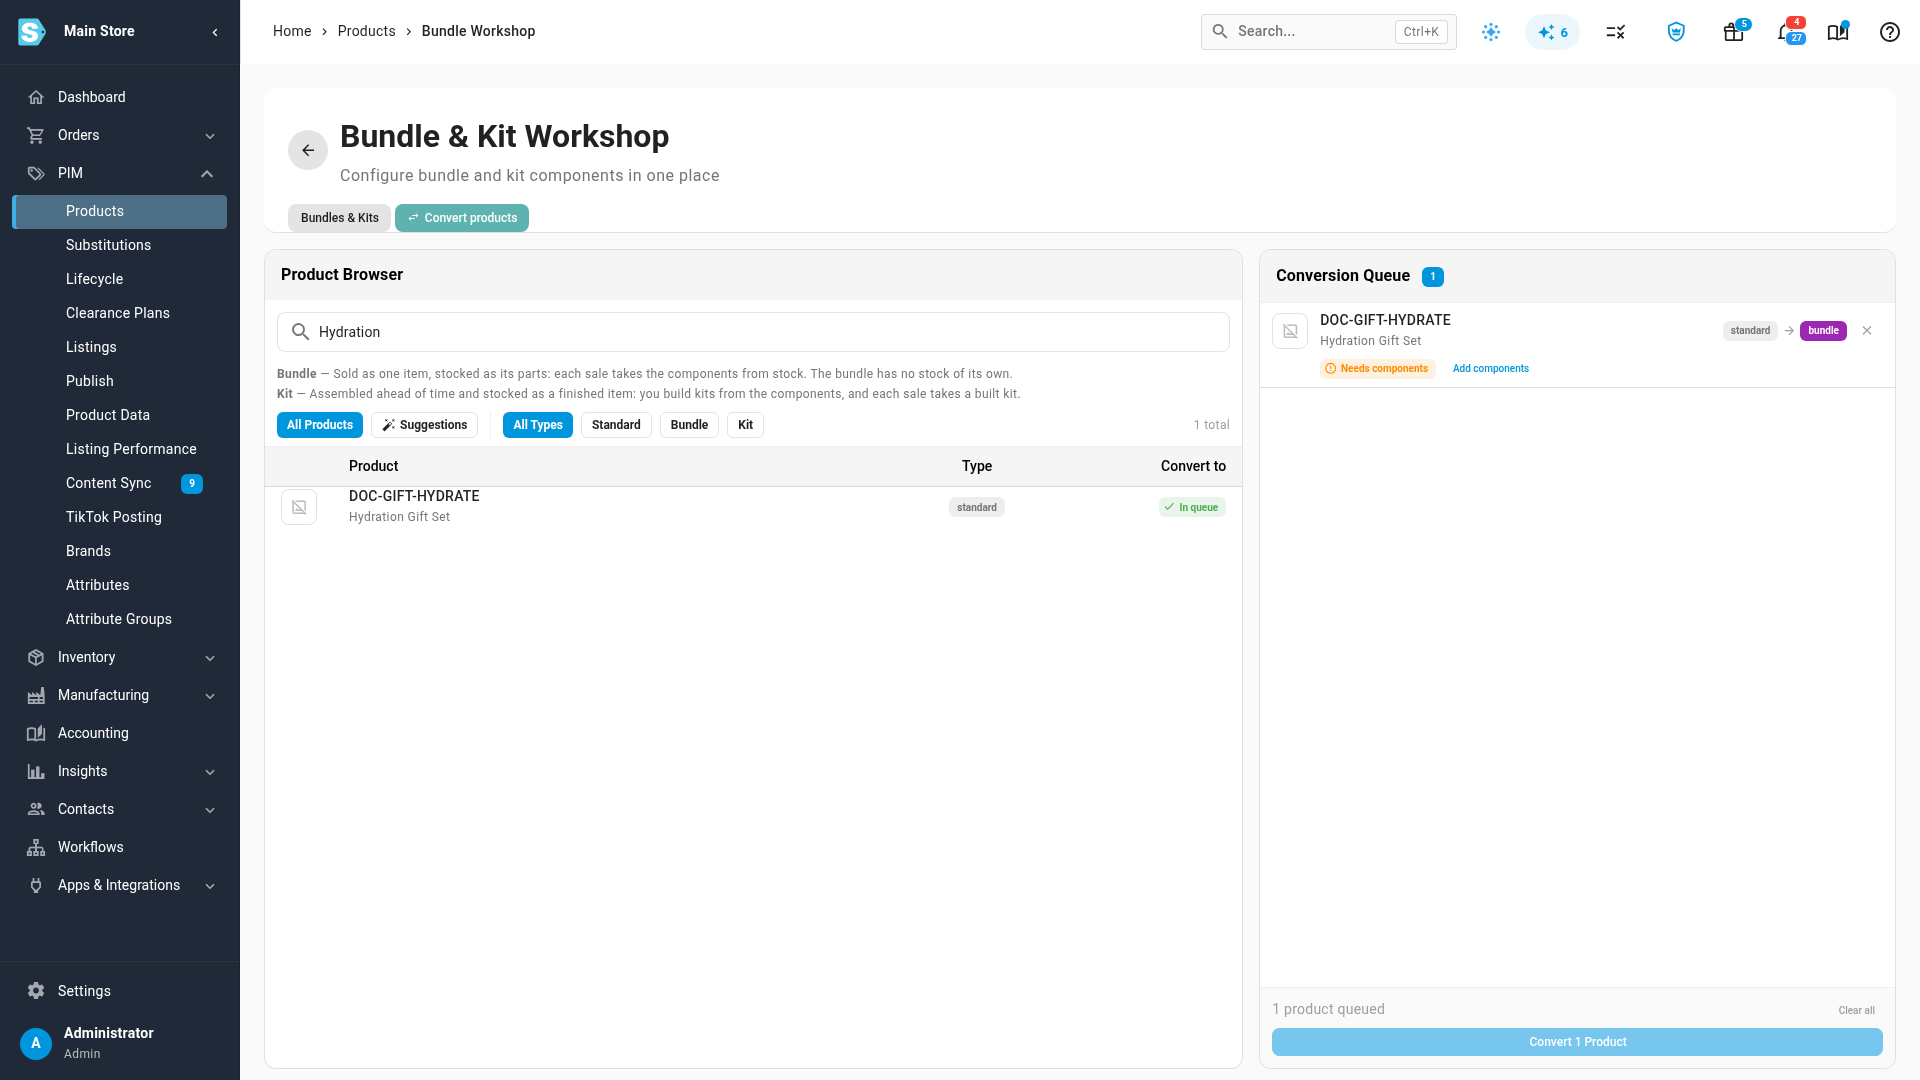
Bundle is greyed out on a product that already has sales or assembly history. Hover over it to see why, and convert that product to a kit instead.
Add each product's components
A bundle or kit must have at least one component, so every queued product shows Needs components until you give it some.
-
Click Add components on the queued product.
-
Add the components in either of these ways:
- Search: type at least two characters in Search products to add as component and pick the product.
- Paste: click Paste SKUs to add several components, paste one SKU, quantity per line (a comma or a tab, so two spreadsheet columns paste as they are), and click Add components. Leave the quantity out for 1.
-
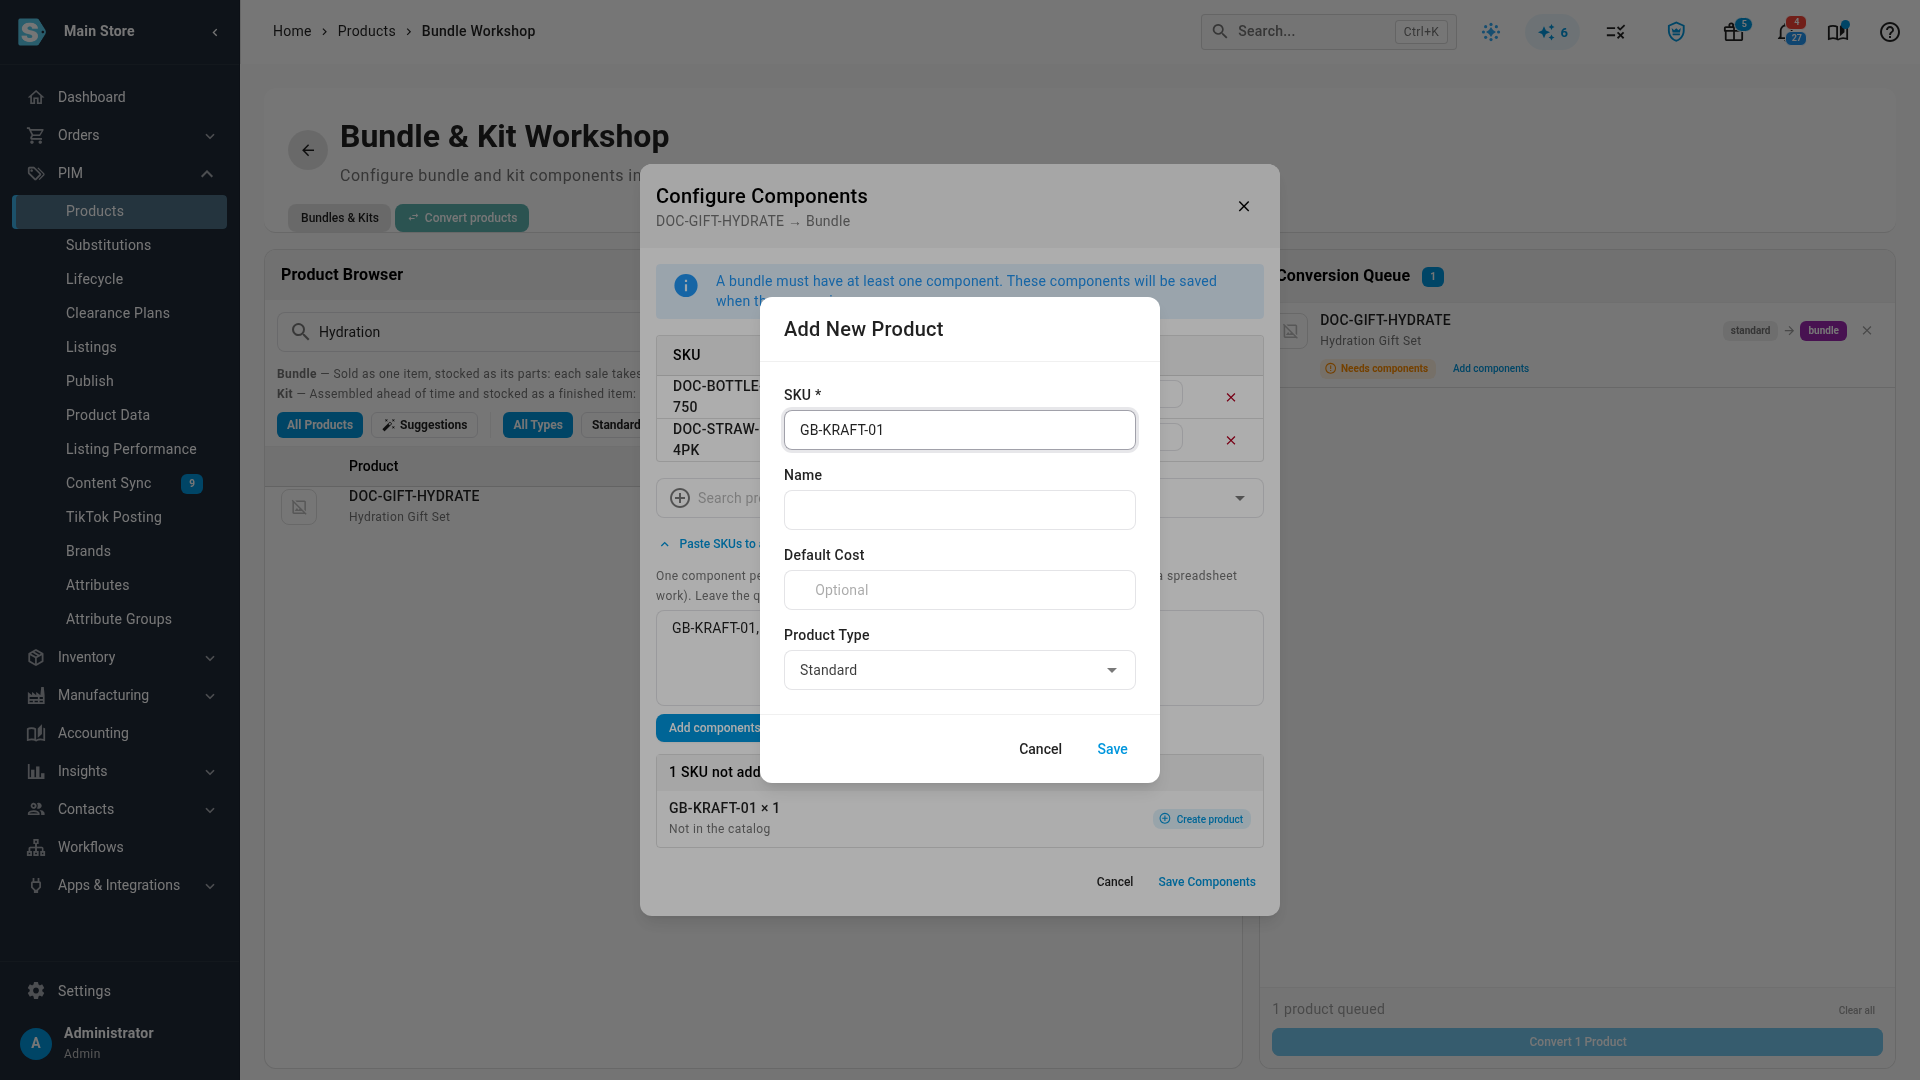
If a component isn't in your catalog yet, create it without leaving the dialog:
- From a search, click Create product "…" at the bottom of the list.
- From a paste, click Create product next to the SKU listed as Not in the catalog.
In Add New Product, check the SKU, add a Name and a Default Cost, and click Save. The new product joins this bundle or kit straight away, with the quantity you pasted.
-
Set each component's Qty, then click Save Components. The queued product now shows how many components it has.
Convert the queue
- Click Convert N Products at the bottom of the queue. It's available once every queued product has its components.
- Check the summary in Confirm Conversion, then click Convert.
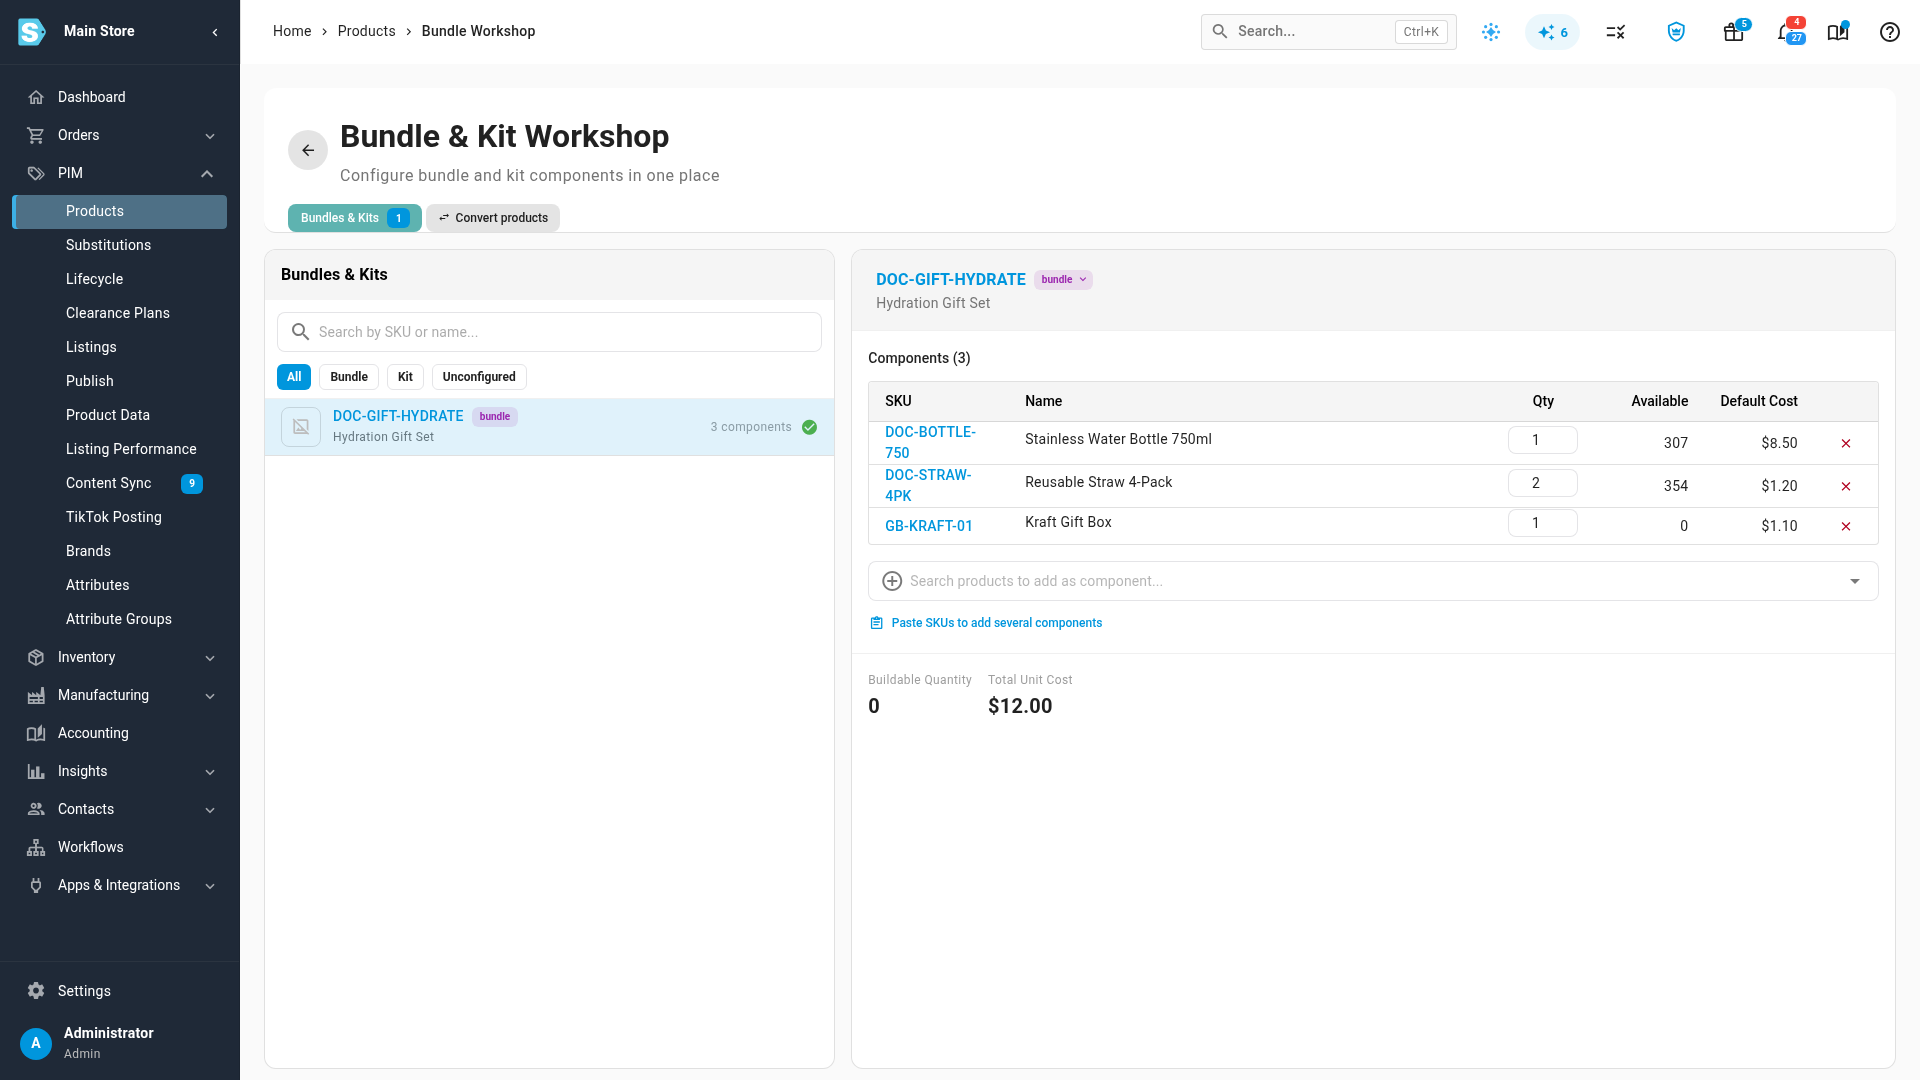
SKU.io converts each product, saves its components, and shows how many were converted. The Bundles & Kits tab opens with the list reset, so the products you just converted are on screen. Select one to check its components, Buildable Quantity and Total Unit Cost.
If a product was skipped, the message says how many. The usual reason is sales or assembly history on a product you queued as a bundle.
Next steps
- Build bundles & kits in the Workshop: change components and quantities after the conversion.
- Convert & auto-detect product types: convert one product from its page, find likely bundles by name, and the history rules that can block a conversion.
- Kits vs bundles: how the two types behave in stock, sales and assembly.