Work with listing drafts
Nothing you build in Publish goes straight to a sales channel. Each listing is first saved as a draft: the product, the channel, the category and template it uses, and every field value. You can check a draft, change it, publish it now, schedule it for later, or throw it away. The Drafts & Scheduled tab collects every draft in one place, so you can see what's waiting, what's scheduled, and what failed.
Before you begin
- The channel you're listing on is connected and can be published to. See Manage a connected app.
- Setting up a listing profile and a template for the channel first means each draft starts with most of its fields filled in.
How a draft is created
You create a draft whenever you start a listing in Publish:
- Click a product's cell for a channel in the Publish matrix on the All tab. The Publish listing window opens for that product, one row per channel.
- Select several products and choose Bulk publish. See Publish in bulk with resolved categories.
- Edit the fields of a listing that's already live. Your changes are saved as an Update draft, so the live listing doesn't change until you publish them.
The Publish listing window has Schedule, Close, Re-check all and Publish along the bottom. Publish sends the ready rows now. Schedule sets a time for them to publish instead.
Review your drafts
-
Go to PIM → Publish and open the Drafts & Scheduled tab.
-
Pick a view along the top of the Listing Drafts table:
View Shows Needs attention Drafts that failed to publish or need something fixed, with a count Scheduled Drafts waiting for their publish time, with a count All drafts Every draft 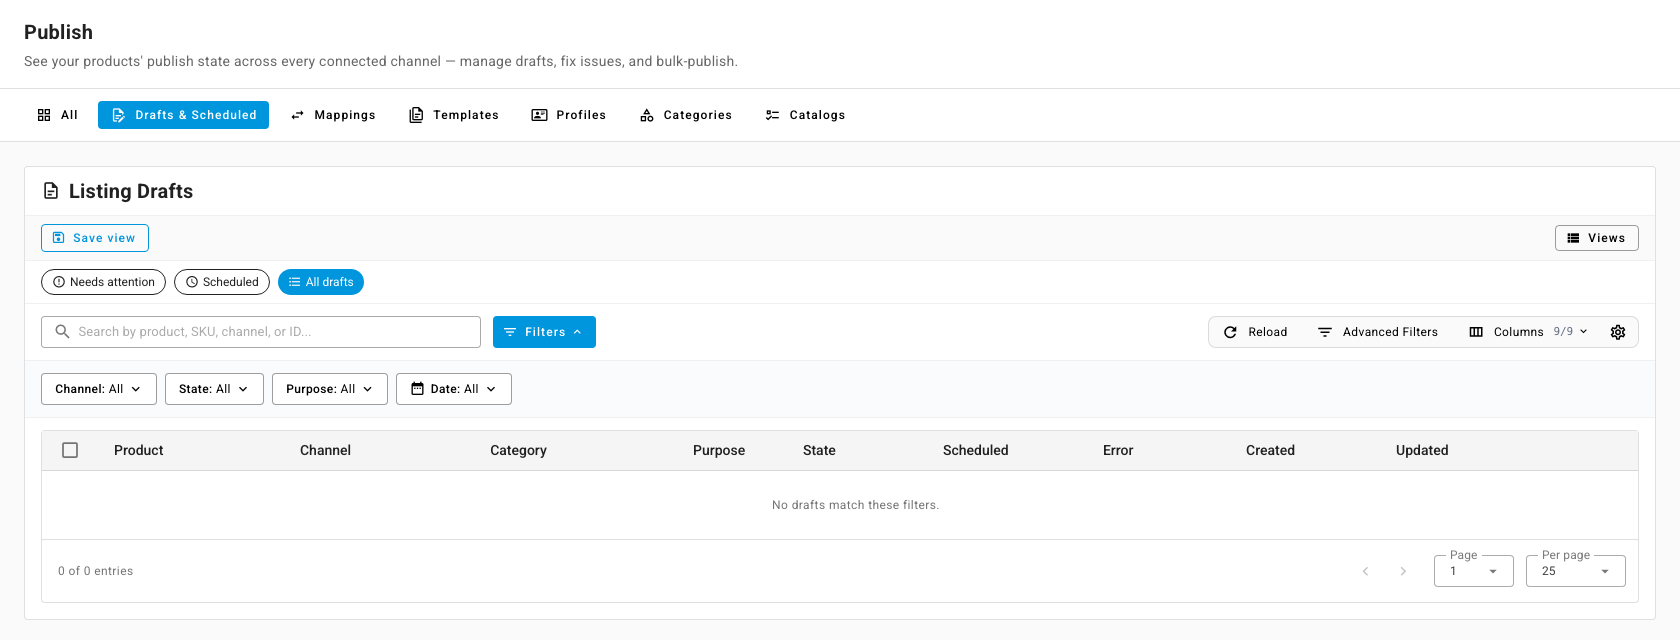
-
Narrow the list with Search by product, SKU, channel, or ID…, or with the Channel, State, Purpose and Date filters. Save a combination with Save view.
Each row shows the Product, Channel, Category, Purpose, State, when it's Scheduled, the Error if it failed, and when it was Created and Updated.
Purpose is Create for a new listing, or Update for changes to a listing that's already live.
State moves through these values:
| State | Meaning |
|---|---|
| Draft | Saved and still being edited. It hasn't passed the channel's checks yet. |
| Ready | Passed the channel's checks, and can be published |
| Scheduled | Will publish at its scheduled time |
| Publishing | Being sent to the channel now |
| Published | Live on the channel |
| Error | The channel refused it. The Error column says why. |
Act on a draft
Open a row's menu, or right-click the row, to:
- Open draft — check and change its fields, then publish or schedule it.
- View product or View listing — jump to the product, or to the live listing a draft updates.
- Publish — send a Ready draft now. On a draft that failed, the same action reads Retry publish: use it after you've fixed the problem.
- Unschedule — cancel a scheduled publish. The draft goes back to Ready.
- Discard — delete the draft. This can't be undone, and a draft that has already published can't be discarded.
To work on many at once, tick the rows, or filter the table and act on everything it matches, then use Publish or Discard in the toolbar. Bulk Publish only sends drafts that are Ready or in Error. Publishing runs in the background, and you can follow it in the job tray.
Schedule a publish
- In the Publish listing window, or when you open a draft, click Schedule.
- Choose In 1 hour, In 3 hours or Tomorrow 9 AM, or set Publish at (your local time) yourself. A time in the past isn't accepted.
- Click Schedule publish.
The draft moves to Scheduled and publishes at that time. To publish it sooner, Unschedule it first, then publish.
Next steps
- Generate listing content with AI — fill a draft's missing title, description and bullet points.
- Browse your channel listings — see the listings once they're live.
- Follow background jobs — track a bulk publish.