Set up listing profiles
A listing profile holds the parts of a listing that stay the same whatever the category: which product data fills the fields the channel asks for on every listing (title, description, price, barcode), and the channel's listing policies (on eBay, condition, handling time, and payment, shipping and return policies). Category templates that use the profile inherit all of it and only set what differs per category, so you don't build each listing from scratch.
Before you begin
- The sales channel is connected. See Manage a connected app.
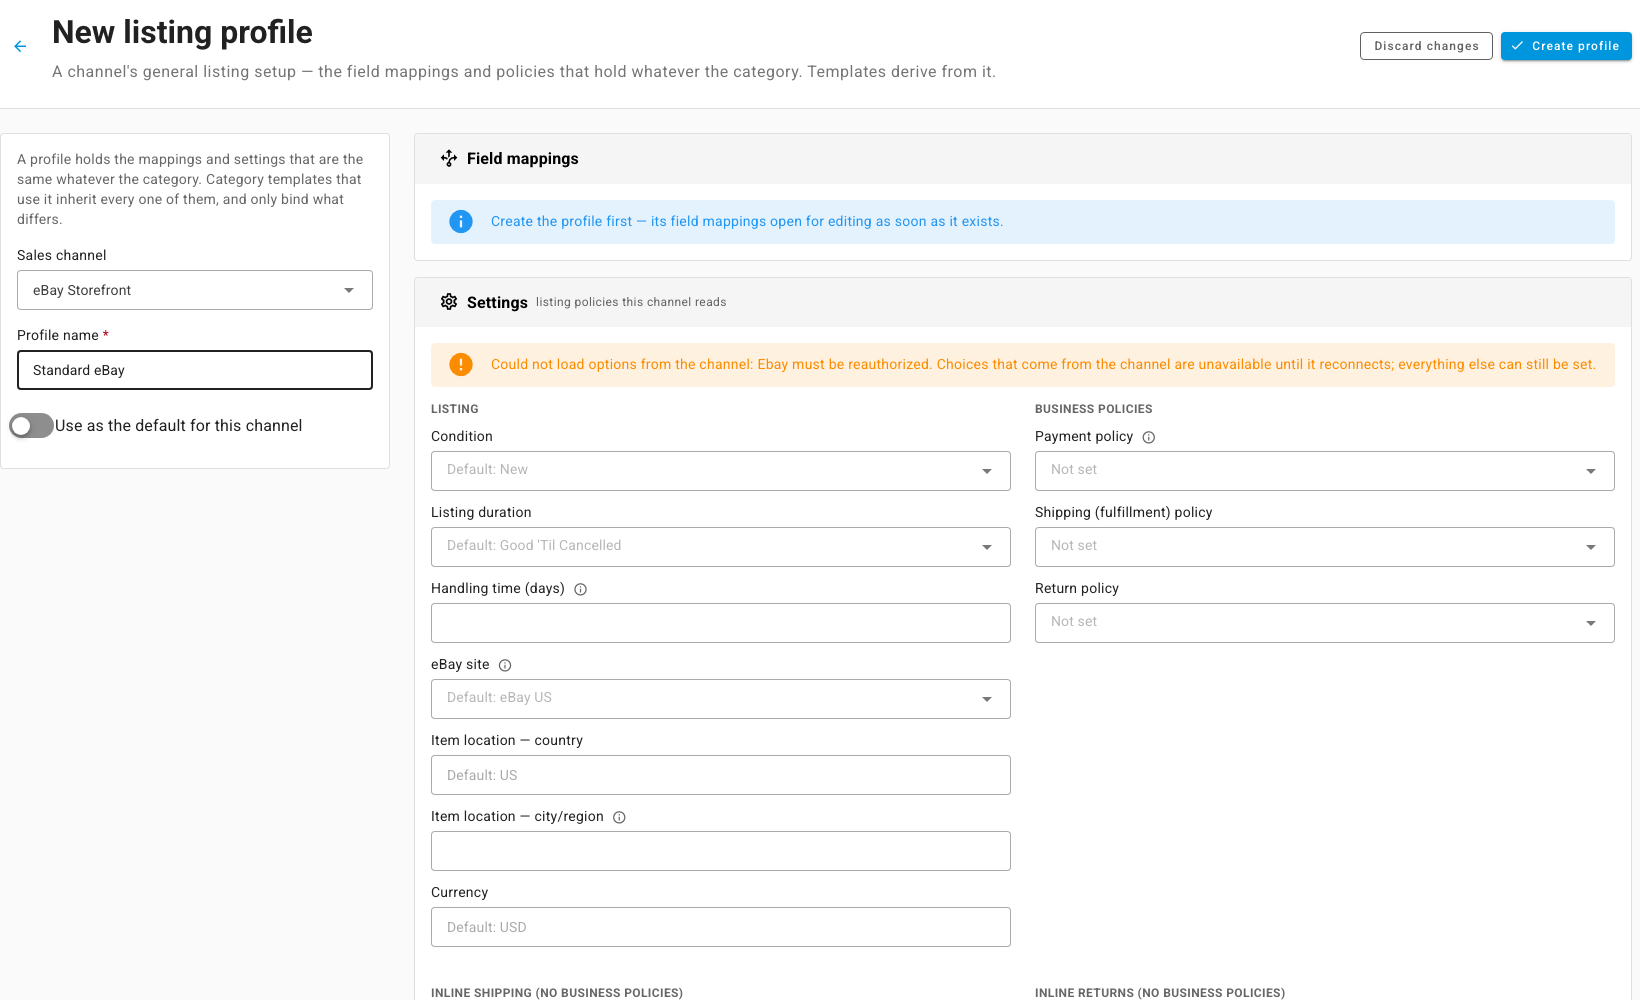
- Some settings offer choices that come from the channel itself, such as eBay's business policies. If the channel's connection needs re-authorizing, those choices are unavailable until it reconnects, and a warning above Settings says so. You can still set everything else.
Create a profile
-
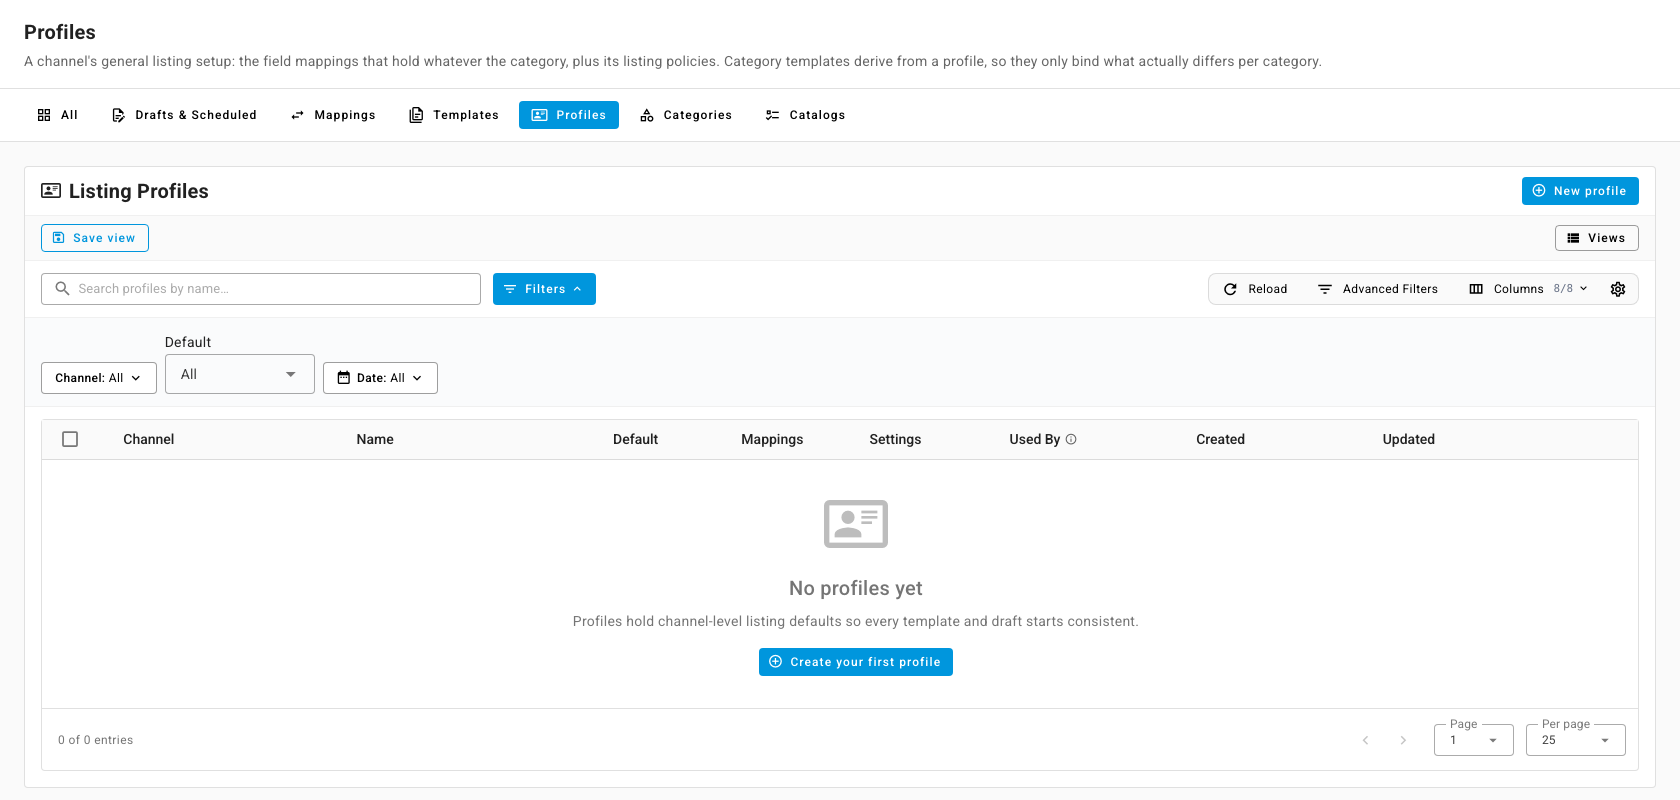
Go to PIM → Publish and open the Profiles tab. The Listing Profiles table lists every profile, with its Channel, whether it's the Default, how many Mappings and Settings it holds, and Used By, the number of templates and drafts that use it.
-
Click New profile (or Create your first profile when there are none).
-
Pick the Sales channel.
-
Enter a Profile name, for example Standard eBay.
-
To make this the profile the channel uses when nothing names another one, turn on Use as the default for this channel. Each channel has one default. It also applies when a product is published with no template at all. Making a new profile the default takes the flag off the old one.
-
Under Settings, fill in the listing policies this channel reads. Fields you leave empty show the channel's default in grey (for example Default: New, Default: Good 'Til Cancelled). Use Add another setting under Other settings for anything the form doesn't list.
 note
noteSome channels read no profile settings. Amazon, for example, takes everything from the listing itself, and the Settings card says so. On those channels a profile does its work in Field mappings.
-
Click Create profile. The page switches to Edit listing profile and the Field mappings card opens for editing.
Map the fields every listing needs
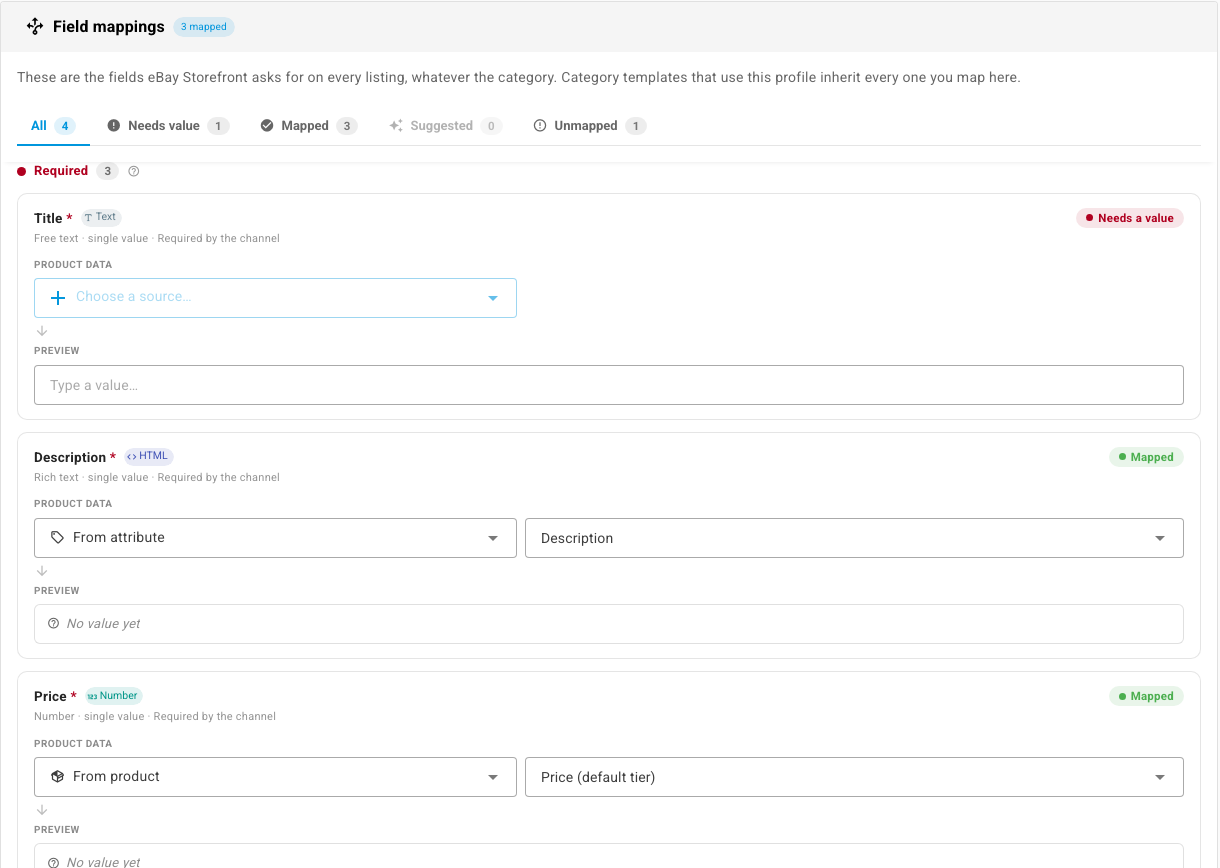
Field mappings lists the fields the channel asks for on every listing, whatever the category, grouped as Required and Recommended. The tabs above them (All, Needs value, Mapped, Suggested, Unmapped) filter the list.
- If SKU.io found likely matches in your product data, a banner says how many it suggested. Click Accept all to take them, or Accept / Ignore on each field.
- For any field still marked Needs a value, open Choose a source… and pick where the value comes from (From product, From attribute, and so on), then the specific field.
- Check Preview. It shows what the mapping produces for a real product, or No value yet when that product has nothing in the source field.
- Click Save changes.
Category fields, such as a size or material that only some categories ask for, belong in a template, not a profile. If a profile holds a mapping for one, a warning names it and offers Remove.
Use a profile in a template
When you create or edit a template on the Templates tab, choose the profile under Listing profile (optional). The template then inherits the profile's mappings and settings, and only has to bind what's specific to its category. A template with no profile uses the channel's default profile.
Change or delete a profile
- To change a profile, click its name in the Profiles table, edit, and click Save changes. Templates and drafts that use it pick up the change.
- To delete one, use Delete in the row's menu. If the profile is in use, the confirmation says how many templates and drafts use it: they keep their data but lose the link to the profile. Deleting can't be undone.
Next steps
- Generate listing content with AI — fill titles and descriptions for products that are missing them.
- Work with listing drafts — review and publish the listings these profiles feed.
- Map product types to channel categories — choose the category, and so the template, each product lands in.