Keep a contact book for customers, suppliers, and warehouses
One email address on a record is rarely enough. A wholesale customer has a buyer who places orders and an accounts team that pays them; a supplier has a sales rep and someone in shipping; a warehouse has a manager. Every customer, supplier, and warehouse in SKU.io has a Contacts tab where you keep those people, each with a role, so anyone on your team can see who to call about what.
Before you begin
- You need permission to edit the customer, supplier, or warehouse.
- The steps below use a customer. The Contacts tab works the same way on a supplier (Contacts → Suppliers) and a warehouse (Contacts → Warehouses); only the list of roles differs.
Add a contact
-
Go to Contacts → Customers and open the customer.
-
Open the Contacts tab. Its badge counts the contacts already on the record.
-
Click Add Contact.
-
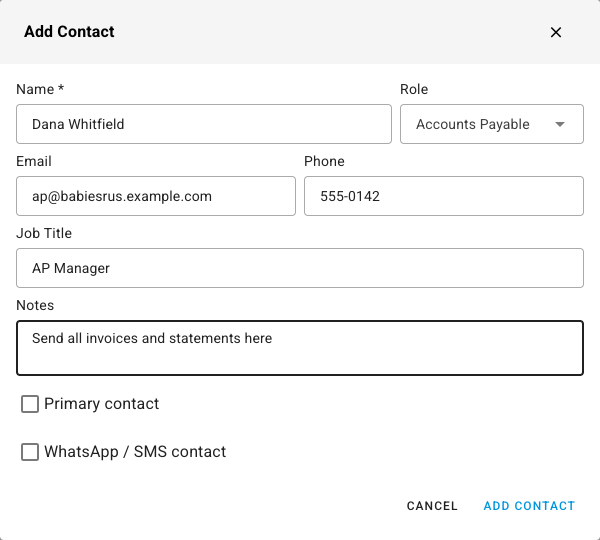
Enter the contact's Name.
-
Pick a Role. The roles fit the kind of record:
Record Roles you can pick Customer General, Accounts Payable, Billing, Customer Service, Account Manager, Purchasing, Owner, Other Supplier General, Sales Rep, Account Manager, Accounts Receivable, Purchasing, Shipping / Receiving, Operations, Owner, Other Warehouse General, Warehouse Manager, Shipping / Receiving, Operations, Other -
Fill in Email, Phone, and Job Title, and add Notes such as "Send all invoices and statements here".
-
Tick Primary contact if this is the person you deal with first. The first contact you add becomes primary automatically.
-
Tick WhatsApp / SMS contact if this is the person to message on those channels.
-
Click Add Contact. A "Contact added" message confirms it.
A record has one primary contact and one WhatsApp / SMS contact at a time. Ticking either box on a new contact moves it from whoever held it before.
Work with the contact list
The Contacts tab lists everyone on the record with their Role, Job Title, Email, Phone, and Notes. The primary contact has a star beside their name.
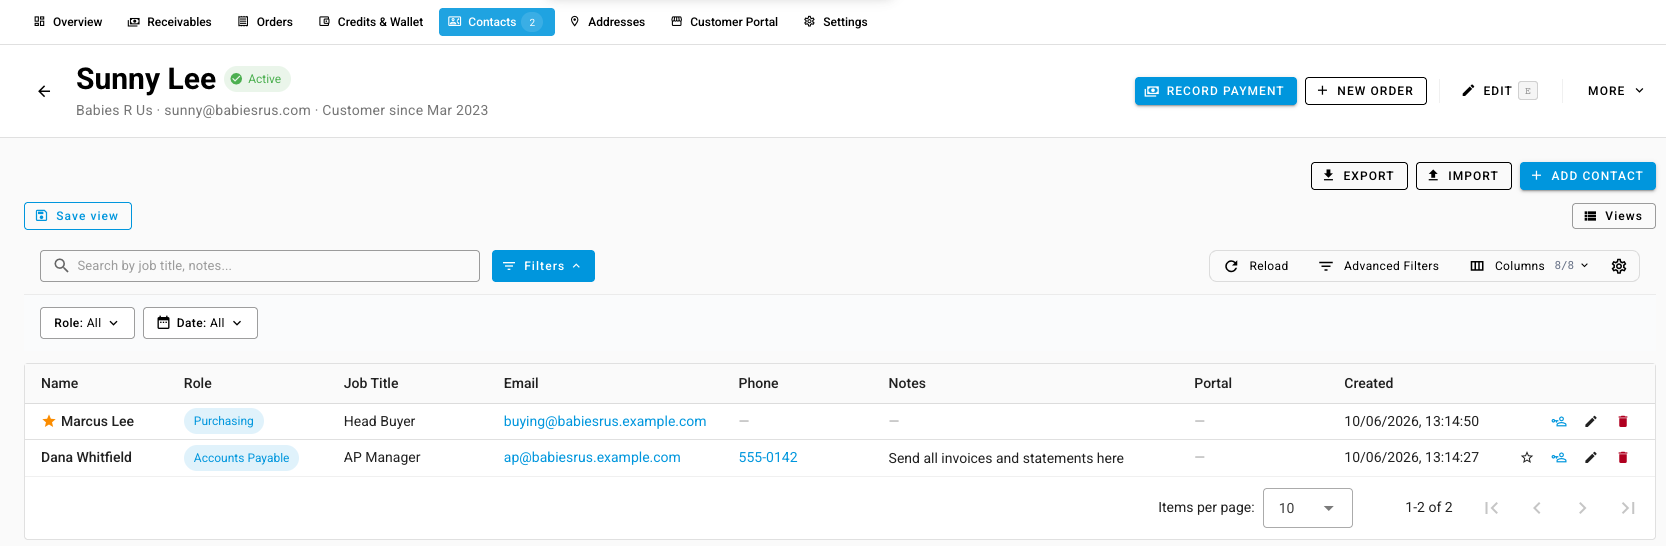
- Find someone: search by job title or notes, or filter by Role.
- Change the primary contact: click the star in another contact's row.
- Edit or remove a contact: use the pencil or the bin in the row.
- Invite a customer contact to the customer portal: use the invite icon in the row. The contact needs an email address first. The Portal column then shows where their invitation stands. Suppliers and warehouses have no portal, so their lists don't show this column.
- Load or download many contacts at once: use Import and Export above the list.
Next steps
- Create & edit a customer — the rest of the customer record.
- Create and edit a supplier — a supplier's addresses and purchasing defaults.
- Create and edit a warehouse — warehouse details and routing.