Turn on the POS register
Four settings shape how the point-of-sale register behaves for everyone in your account: whether the register is a click away from every page, whether a sale can go through without a customer, whether receipts print on their own, and whether new products show up on the register by themselves. They live together under Settings → Point of Sale → Register. Set them before your first in-store shift.
Before you begin
- You need the settings.update permission to change these settings.
- Cashiers need the Operate POS permission (
pos.operate) to use the register itself. See Sell at the point of sale (POS) for the full list.
Steps
-
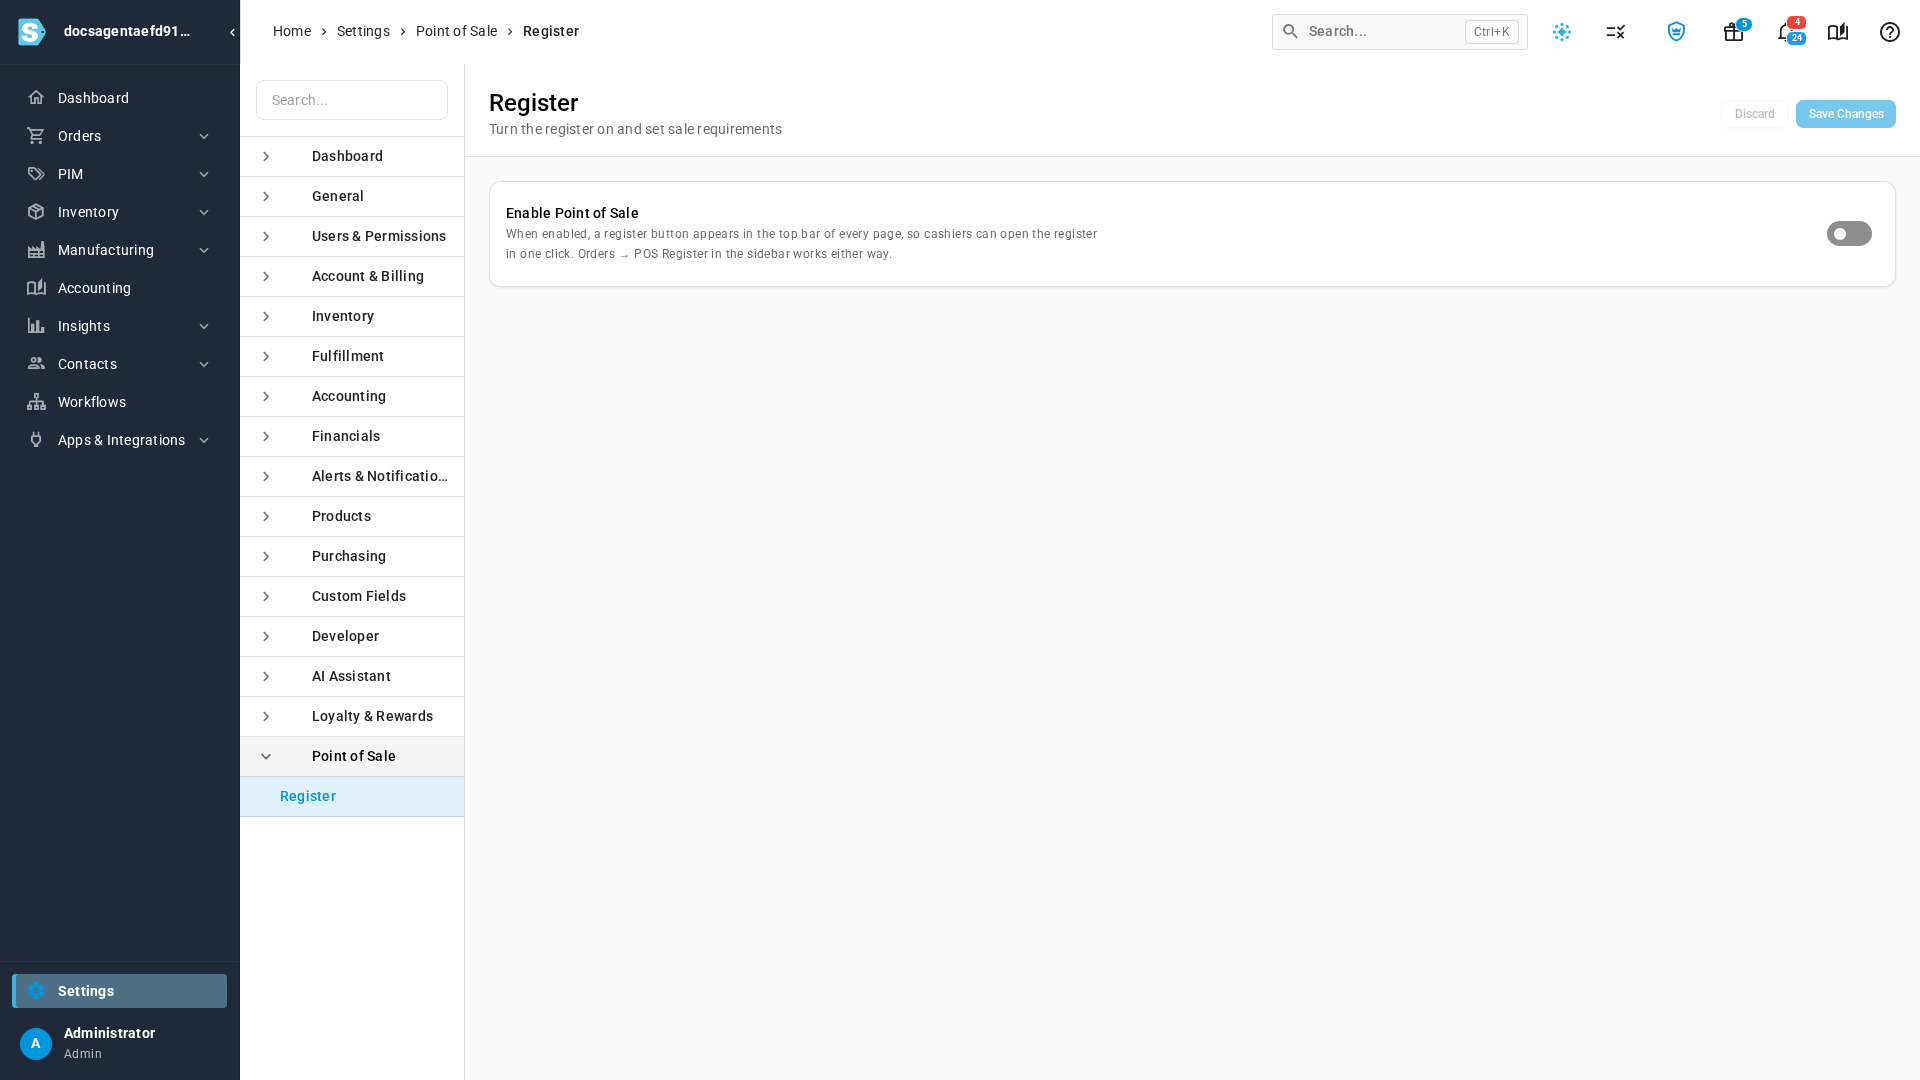
Go to Settings, scroll down to the Point of Sale card and click it, then click Register.
-
Turn on Enable Point of Sale. Three more settings appear underneath it.
-
To make every sale belong to a customer, turn on Require a customer on every sale. Use it when each sale must tie to a contact, for loyalty points or for paying on account.
-
To open each receipt for printing the moment a sale completes, turn on Auto-print receipt when a sale completes. Leave it off to print receipts by hand from Recent Sales.
-
Leave Automatically show new products in the register on to put every product you create on the register's product grid, or turn it off to add products to the grid one at a time.
-
Click Save Changes.
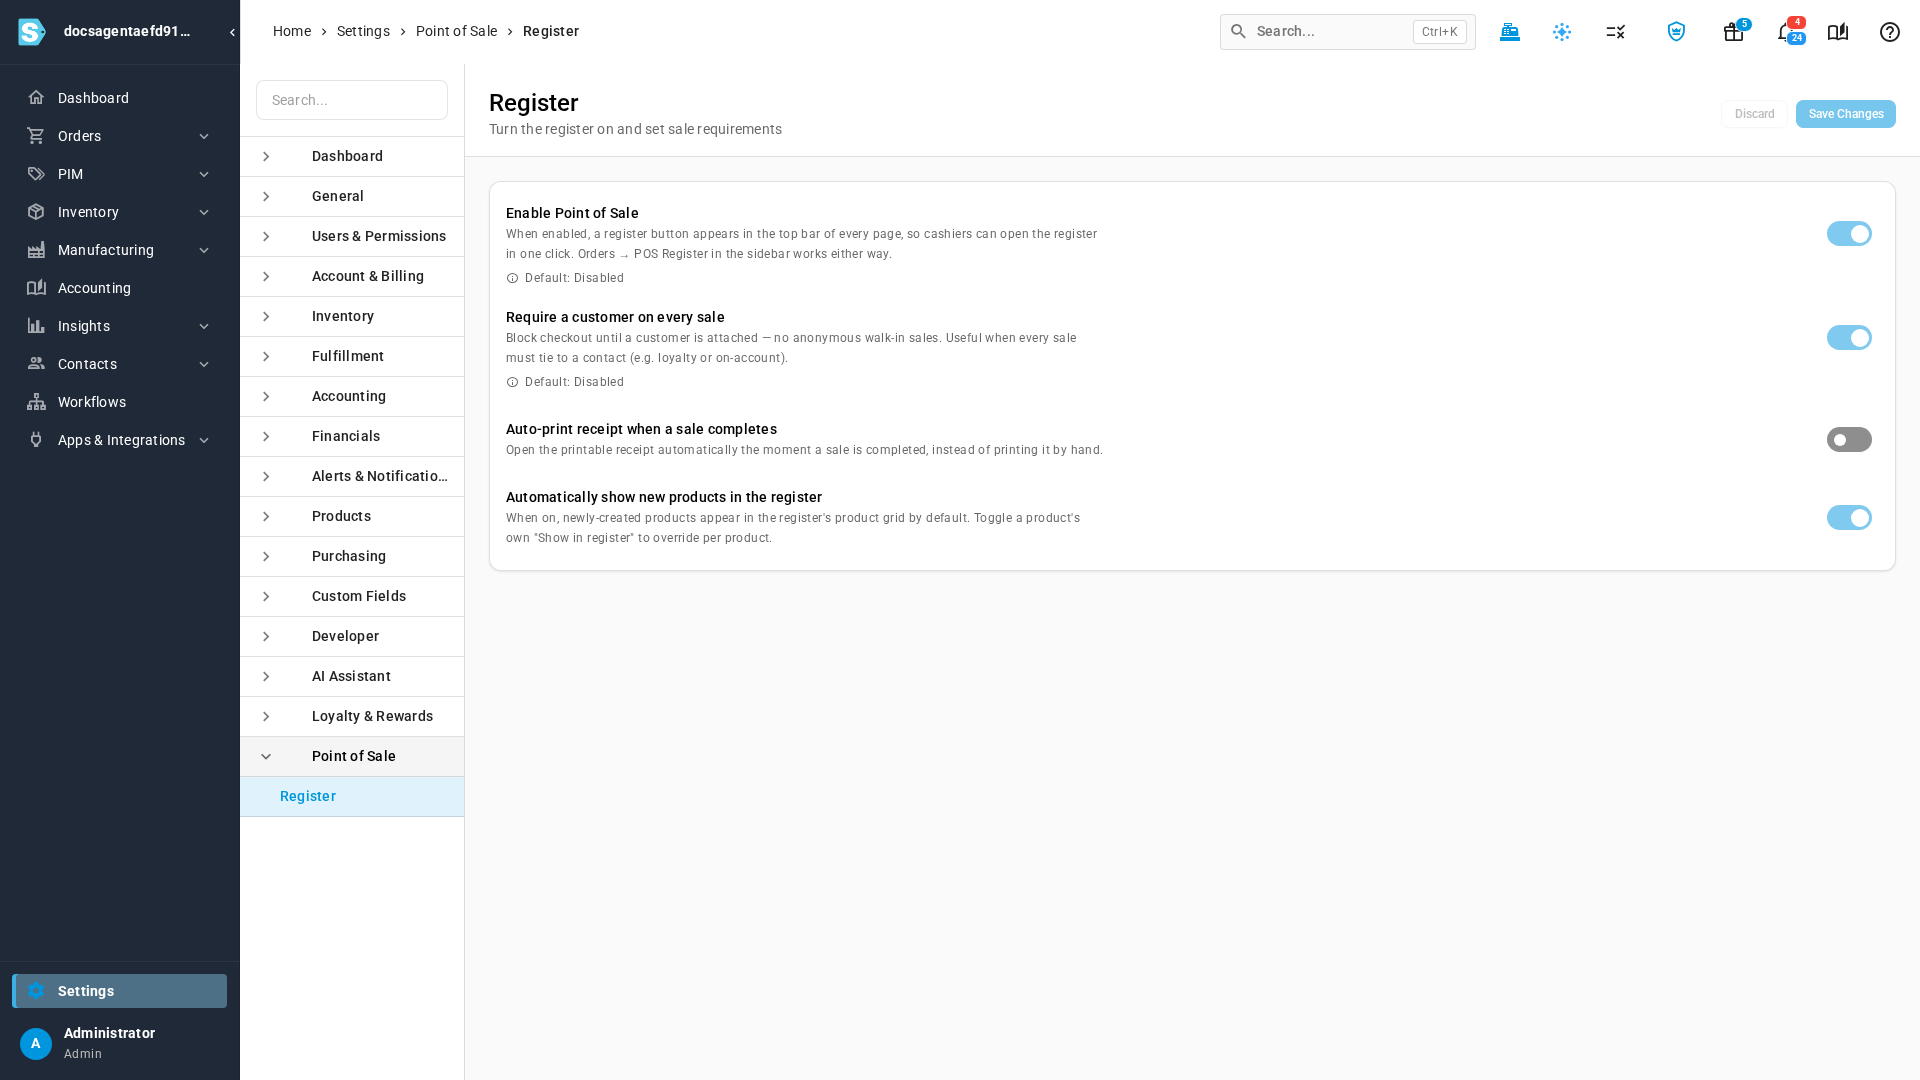
What you'll see: a Settings saved successfully message, and a register button (a cash-register icon) in the top bar. It stays there on every page; click it to open the register.
What each setting does
| Setting | When it's on | When it's off |
|---|---|---|
| Enable Point of Sale | A register button sits in the top bar of every page, so a cashier opens the register in one click. The three settings below appear on this page. | No register button in the top bar. Orders → POS Register in the sidebar still opens the register. |
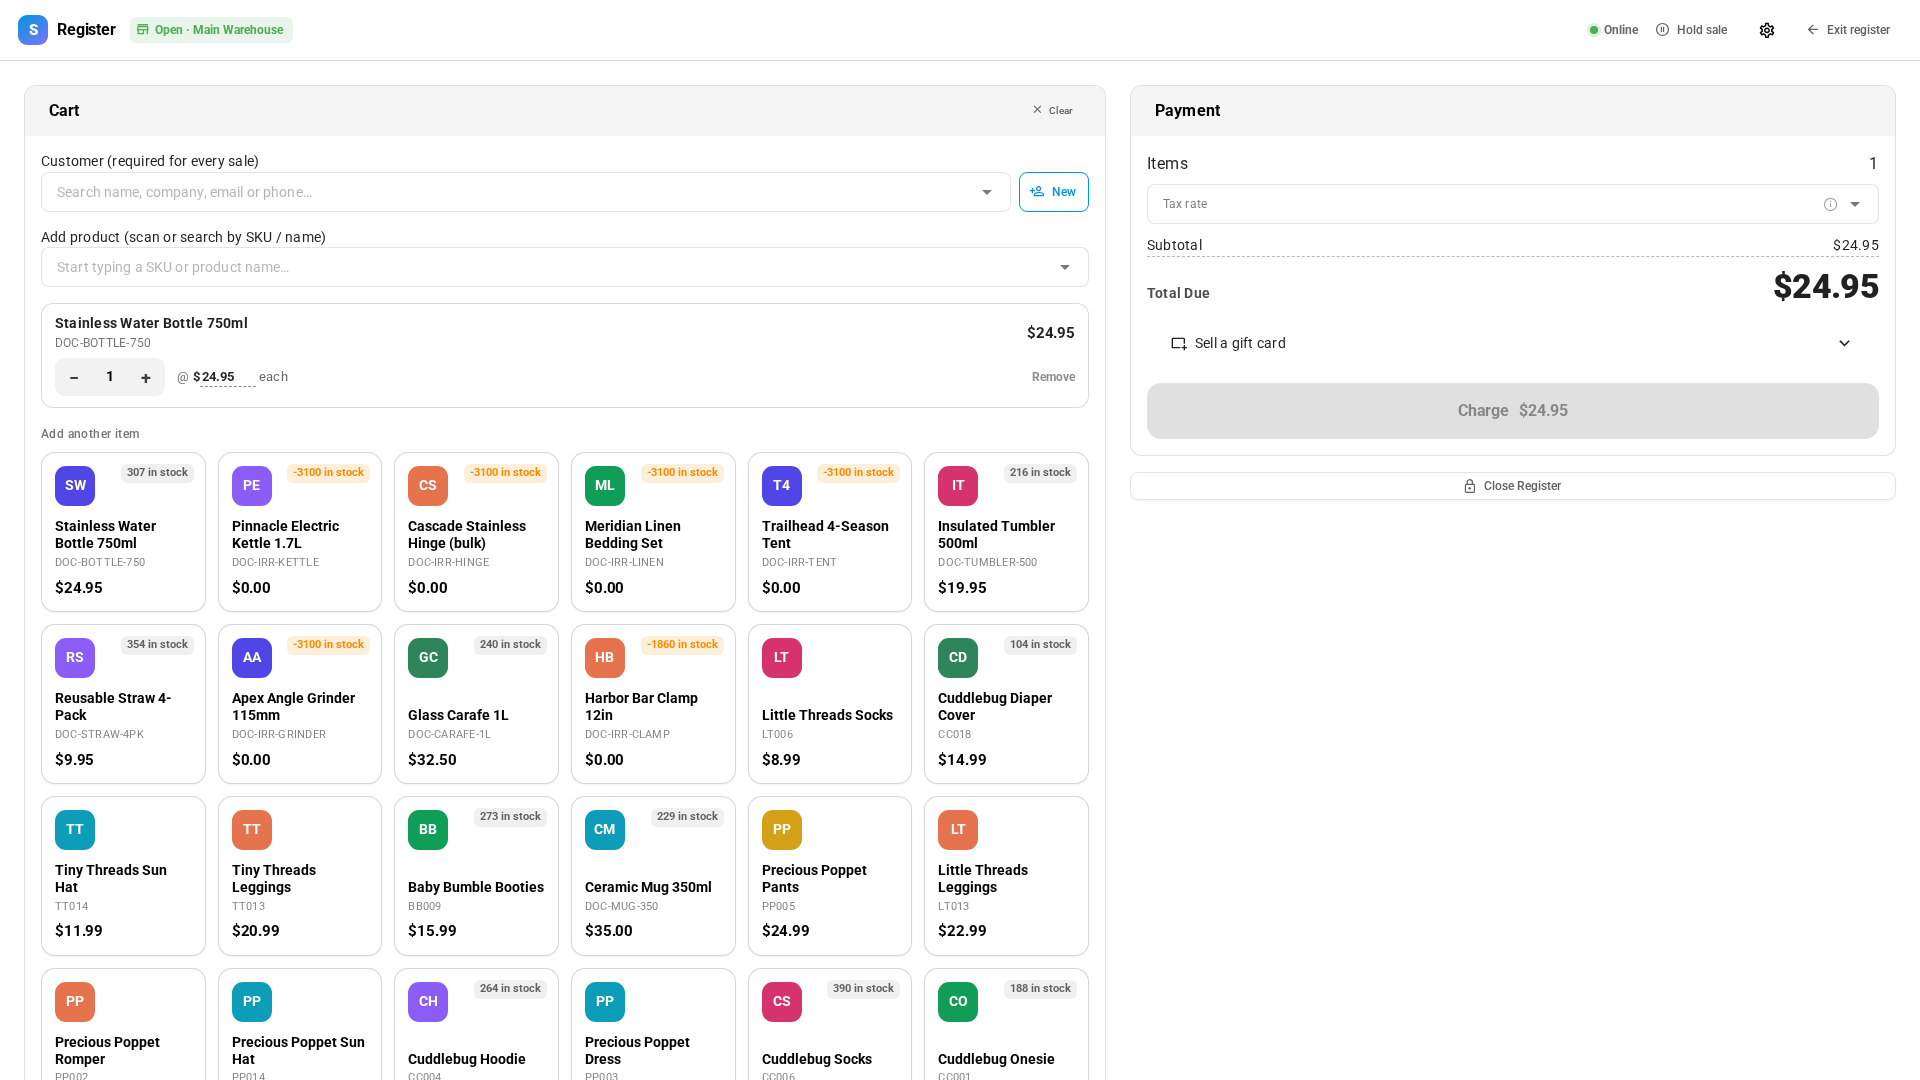
| Require a customer on every sale | The register's customer field reads Customer (required for every sale), and Charge stays disabled until a customer is attached. Its tooltip says Attach a customer before charging — required by POS settings. A sale sent without a customer is refused too, whichever way it reaches SKU.io. | A sale with no customer goes through as a walk-in. |
| Auto-print receipt when a sale completes | The printable receipt opens by itself as soon as a sale completes. | Print or send each receipt yourself from Recent Sales. |
| Automatically show new products in the register | Each product you create appears in the register's Browse products grid. On by default. | New products stay off the grid until you turn on Show in POS register on each one. |
Turning Enable Point of Sale off hides the other three settings on this page, but it doesn't reset them. They keep applying to sales made from Orders → POS Register.
Show new products in the register
Automatically show new products in the register only sets the starting point for products created from now on. Each product carries its own setting, shown as Show in register on the product's Overview tab, and that is what decides whether the product is on the grid. To change it for one product, edit the product's details and tick or clear Show in POS register.
Next steps
- Sell at the point of sale (POS) — open a drawer, ring up a sale, and close the register at the end of a shift.
- Run gift cards and loyalty points — set up what customers can pay with and earn at the register.
Video transcript
Before your team sells in person, turn on the register. Open Settings at the very bottom of the left sidebar. Scroll down until you reach the Point of Sale card, and click the card to expand its list. When it opens, click Register, the page that controls every register in your account. Switch on Enable Point of Sale at the top of the page. Three more settings now appear below the switch, ready to set. Turn on Require a customer on every sale when each sale must belong to a contact, for loyalty points or paying on account. The register then refuses to take payment for an anonymous walk-in. Auto-print receipt opens the printable copy the moment a sale completes. Leave it off if you'd rather handle each receipt yourself. Automatically show new products in the register puts each product you create on the register's product grid. Turn it off to add products to the grid one at a time instead. When everything is set, click Save Changes in the top right corner. A register button now appears in the top bar of every page. Click it whenever you want to open the register for a shift. To open a drawer as usual, search for the warehouse this till sells from, and pick it from the list. Then click Open Register below it to start the shift. The register loads with an empty cart, ready for the first sale. Add an item to the cart by tapping its tile. The customer field above it now reads required for every sale, so no walk-ins. Charge stays disabled until a customer is attached.