Review a workflow's run history
Every time a workflow runs, SKU.io records it as an execution: when it started, how long it took, whether it succeeded, and what each step received and passed on. Use the run history to confirm an automation did what you expected, or to find out why it stopped.
Before you begin
- You need at least one published workflow that has run. A workflow only runs once it's Active. See How workflows work.
- To start a run yourself instead of waiting for the trigger, open the workflow and click Run Now, or click Execute workflow in the builder.
See every run across all workflows
-
Go to Workflows and click Executions.
-
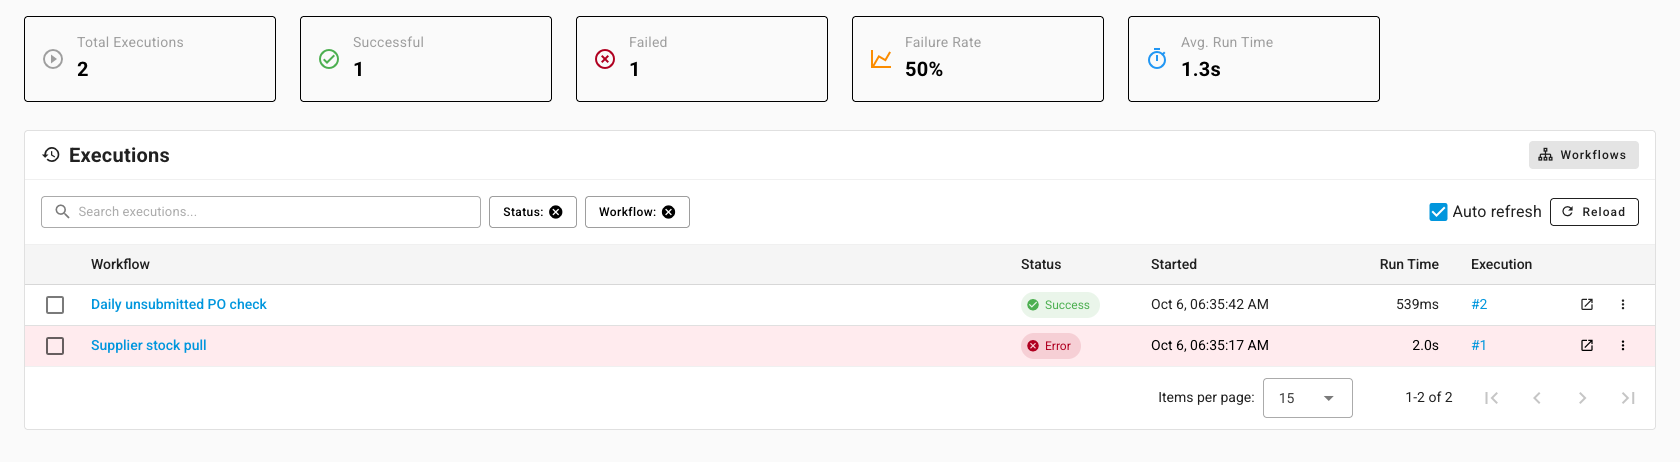
Read the totals across the top: Total Executions, Successful, Failed, Failure Rate, and Avg. Run Time.
-
To narrow the list, pick a Status or a Workflow, or search by trigger reference.
Failed runs are shaded red so they stand out. Leave Auto refresh ticked to watch new runs arrive, or click Reload.
-
Click the workflow's name to open it in the builder, or click the execution number to open that run.
Open one run
-
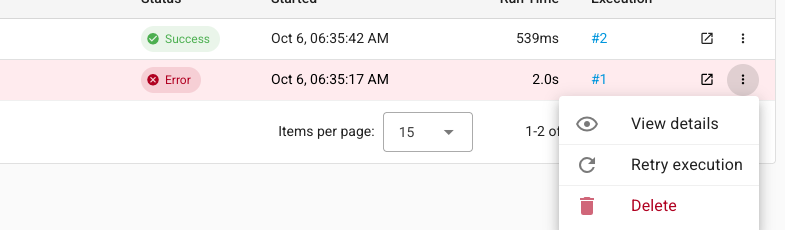
Click the execution number, or open the row's ⋮ menu and choose View details.
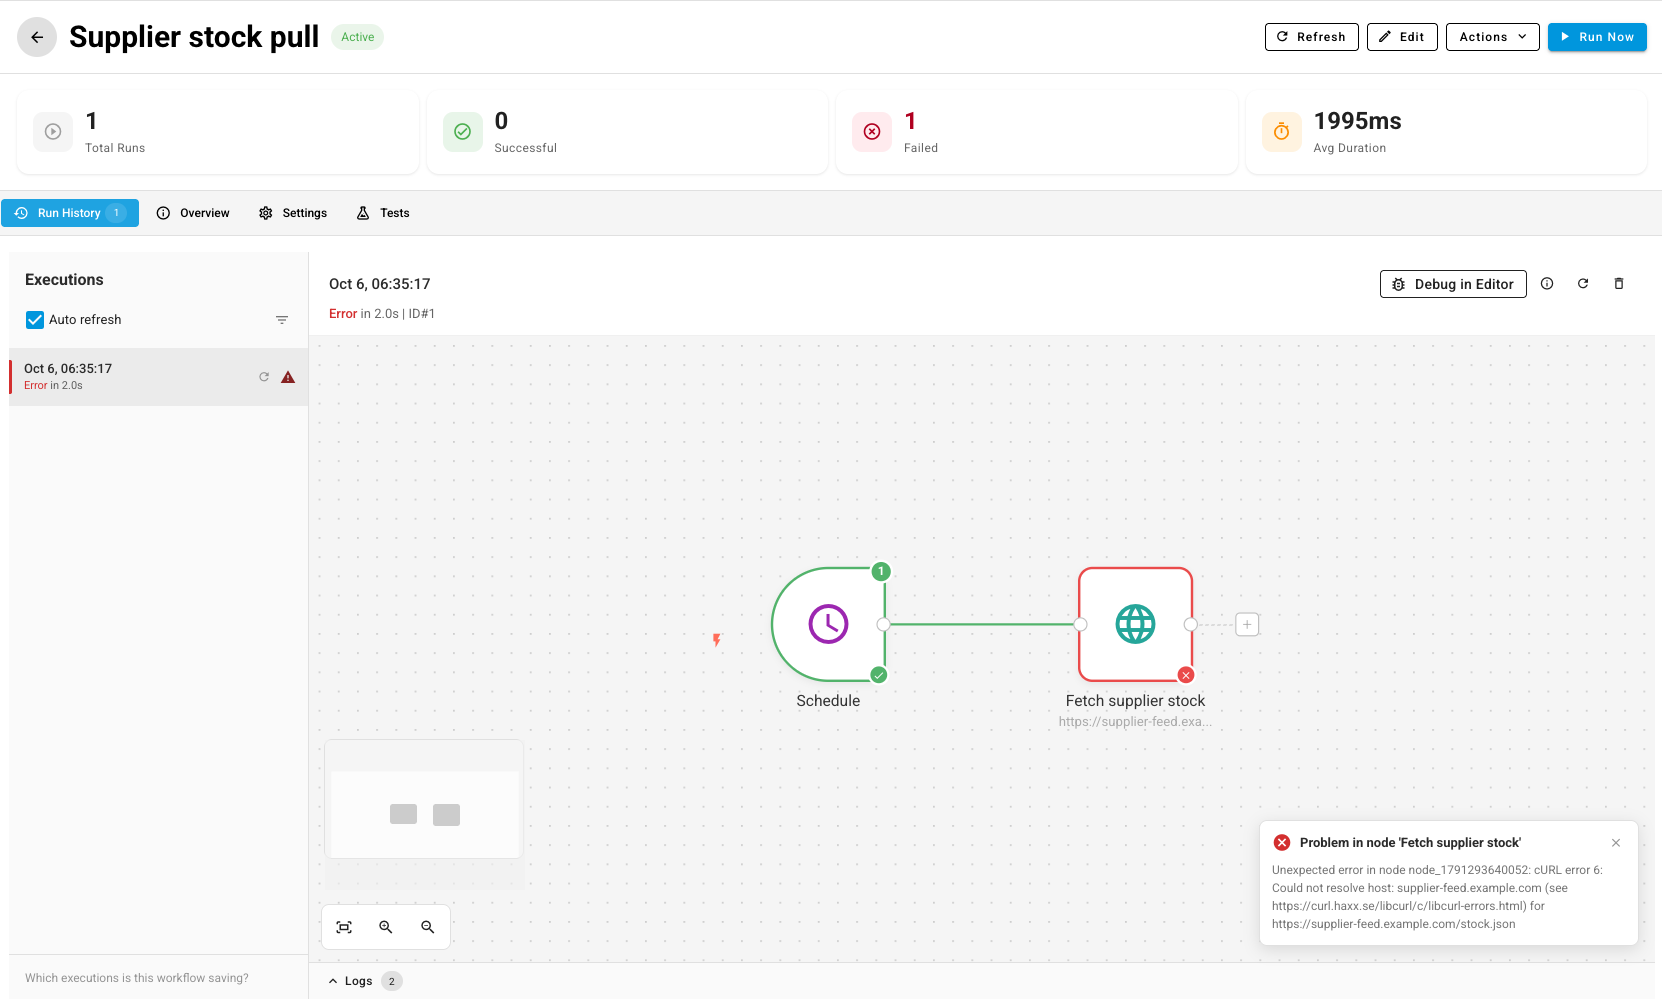
The workflow opens on its Run History tab. Its runs are listed down the left, newest first, and the selected run is drawn on the canvas.
-
Read the canvas. Steps that ran are outlined green, and the step that failed is outlined red. A card in the corner names the step that had the problem and quotes its error.
-
To filter the list on the left, click the filter icon and pick a Status (Success, Error, Running, Cancelled) or an Execution start window, such as Last 24 hours.
See what each step received and produced
-
Click a step on the canvas.
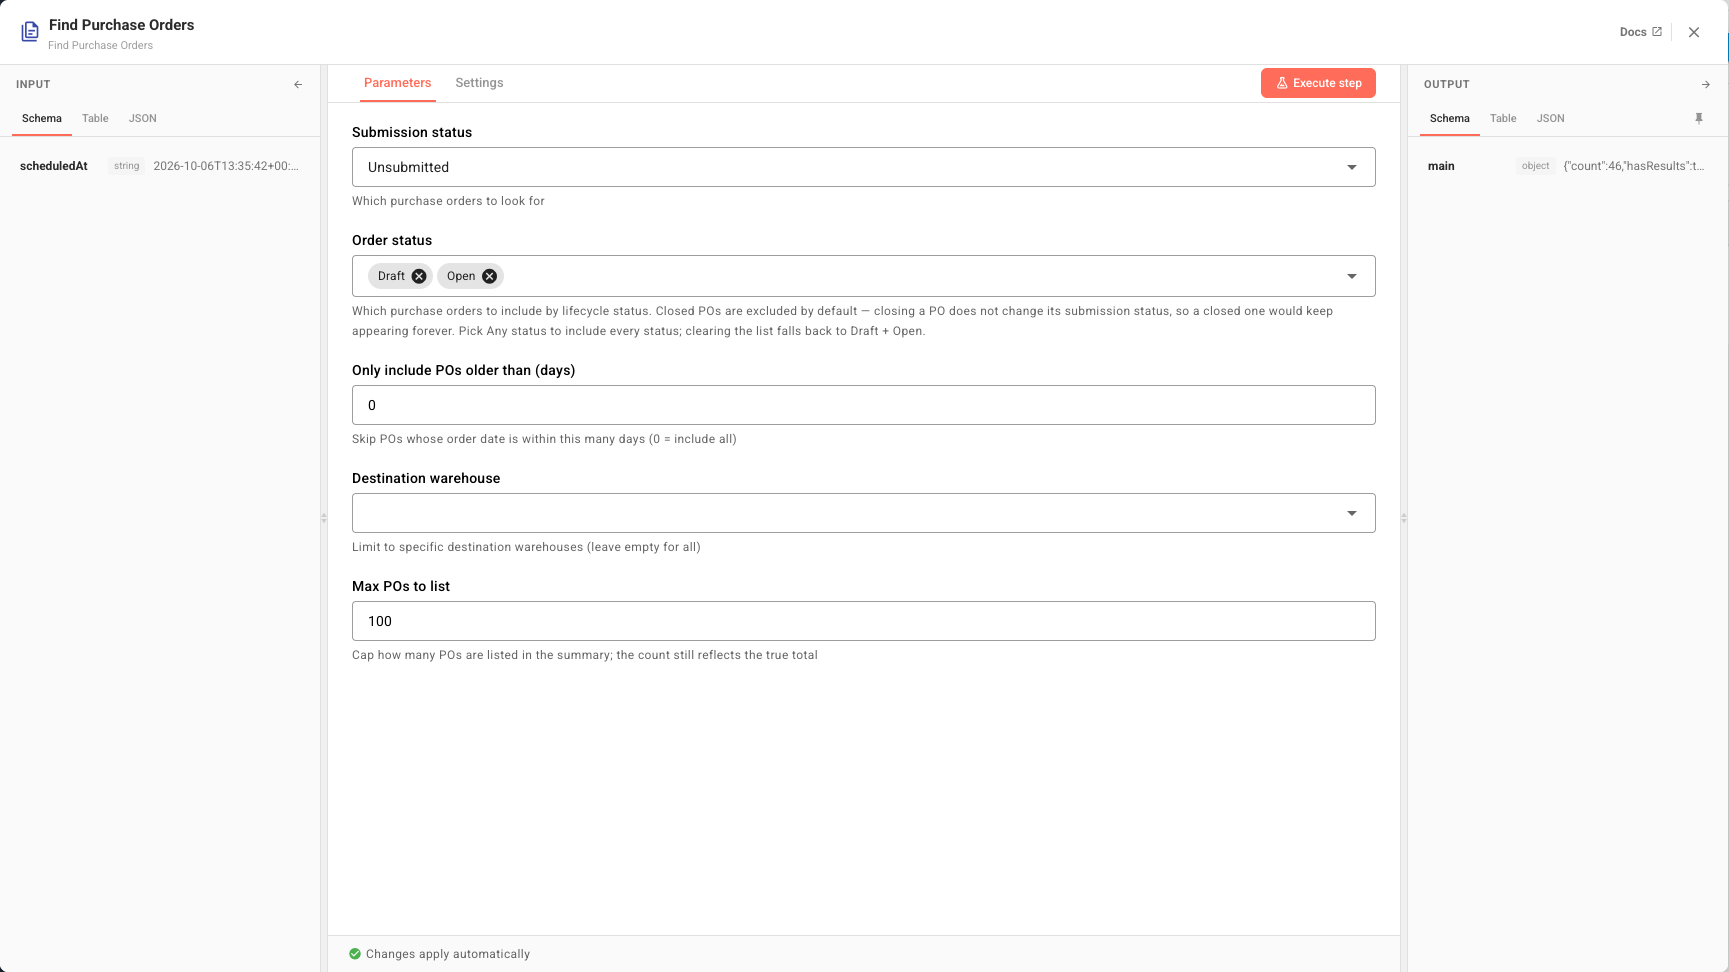
The step opens with its Input on the left, its settings in the middle, and its Output on the right, all from this run.
-
Switch between Schema, Table, and JSON to read the data the way that suits you.
-
Close the step to return to the run.
This is how you answer "why did it do that?": a condition that took the wrong branch, for example, shows the exact values it compared.
Read the details and the log
-
Click the ⓘ icon beside Debug in Editor to open Execution Details.
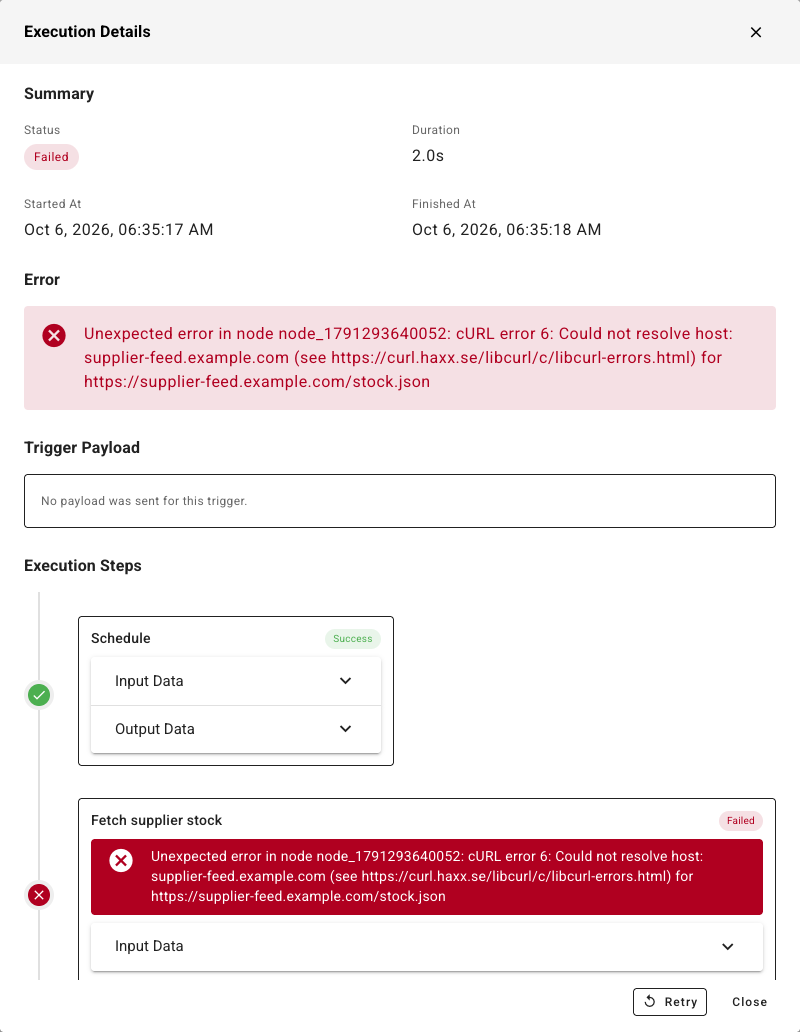
It shows the run's status, duration, start and finish times, the error, the Trigger Payload the run started with, and each step in order with its Input Data and Output Data.
-
Close the dialog, then click Logs under the canvas for a one-line result per step.

Fix and run it again
-
To correct a step, click Debug in Editor. The builder opens with this run loaded, so you can change the step and test it against the same data.
-
To run it again, click the retry icon and choose one of the two options:
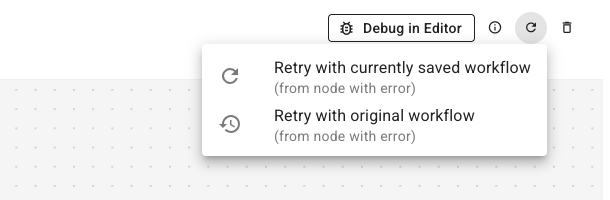
- Retry with currently saved workflow runs the workflow as it's saved now, from the step that failed, with the original trigger data.
- Retry with original workflow runs the version that was live when the run started, from the step that failed.
The retry is recorded as a new run, so the original stays in the history.
-
To remove a run you no longer need, click the bin icon. On the Executions page you can also tick several runs and click Delete selected.
Rehearse a workflow without changing anything
Before you trust a new workflow with live data, switch on Preview mode:
-
Open the workflow and click the Settings tab.
-
Turn on Preview mode — run without changing anything, then click Save Changes.
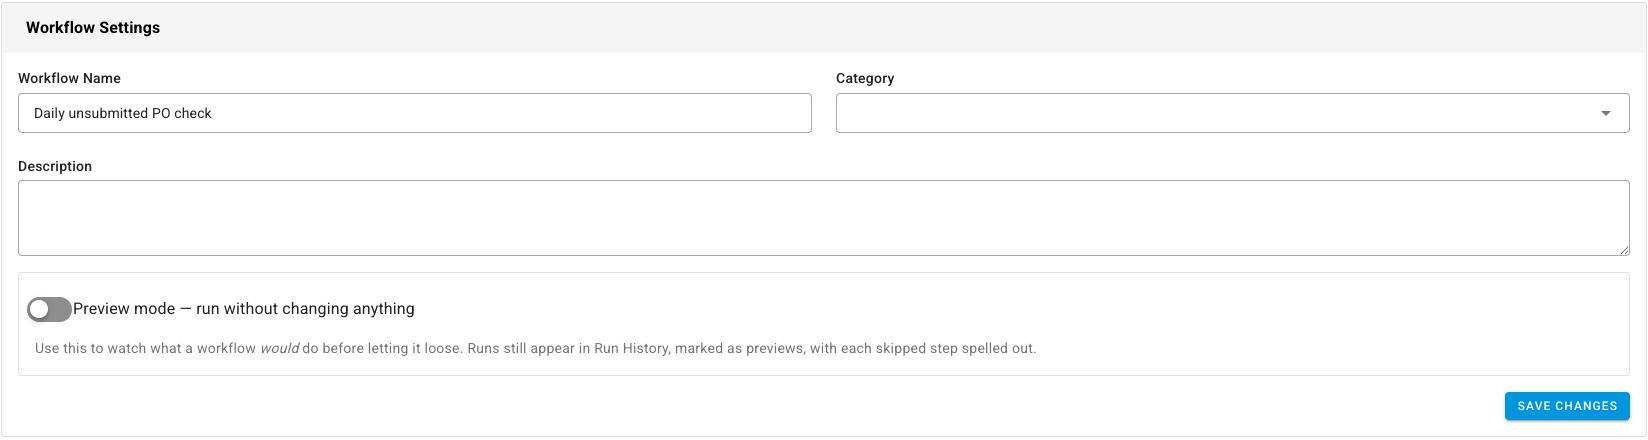
While it's on, every step that would change something, such as updating an order, writing to a sheet, sending an email, or calling a webhook, is skipped and logged instead. Triggers, conditions, and lookups still run for real, so the run takes the path it would take live. Preview runs are marked Preview run in the run history. Turn the switch off when you're ready to let the workflow act.
Next steps
- Store credentials for workflows — a common cause of failed runs.
- Build a workflow from scratch — add steps and test them.
- How workflows work — triggers, steps, and the draft-to-active lifecycle.