Route orders to the right warehouse automatically
When you hold stock in more than one place, someone has to decide where each order ships from. A workflow can make that call for you, on every order, using rules you write once.
This guide builds the rule that comes up most often: orders with more than one SKU go to one warehouse; single-SKU orders go to whichever warehouse can actually cover them. Two ordinary warehouses — Main Warehouse and Overflow Storage — no special setup.
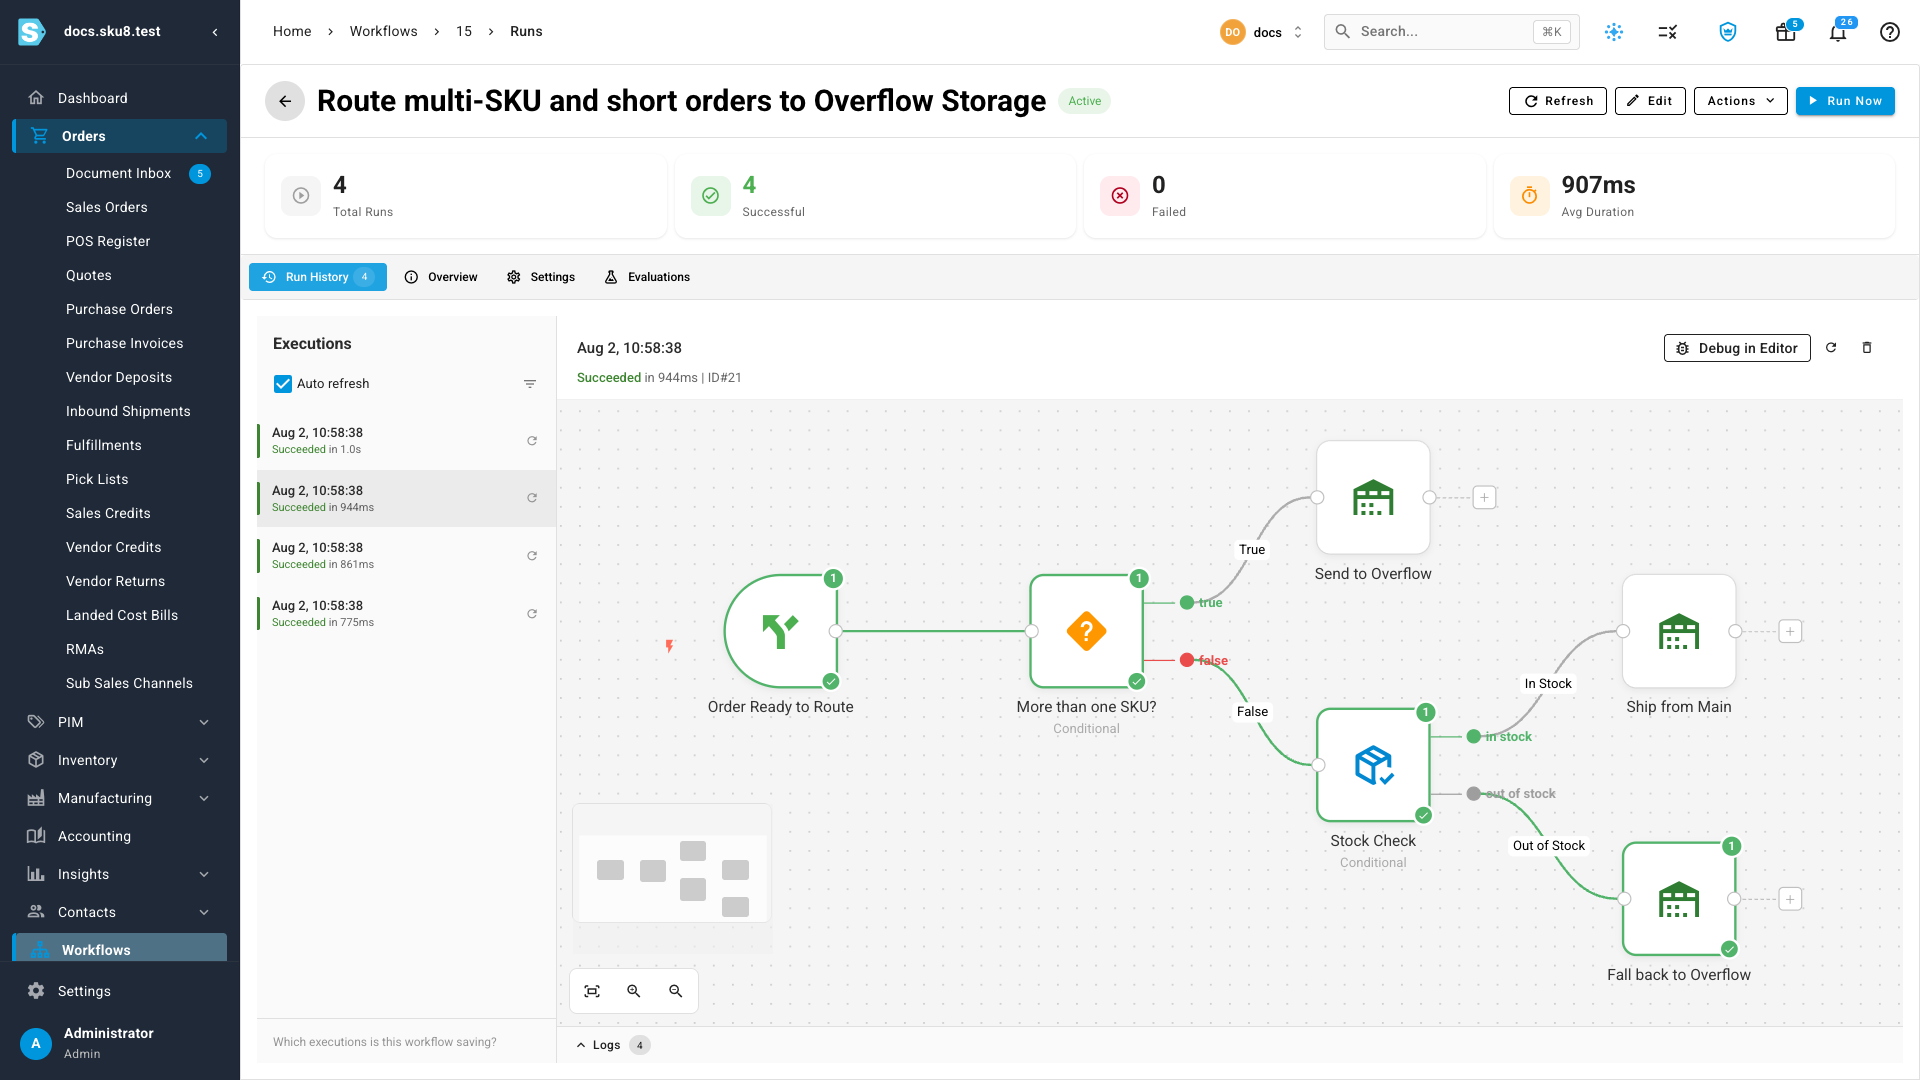
You'll build five steps: Order Ready to Route → IF → Set Warehouse, plus a Stock Check with a Set Warehouse on each of its two outcomes.
Before you begin
- Skim Build a workflow from scratch — this guide uses the same moves (add a trigger, chain nodes, publish).
- You need at least two warehouses. This guide uses Main Warehouse and Overflow Storage; substitute your own names throughout.
- Decide your rule before you build it. The one here is multi-SKU → Overflow; single-SKU → Main if it's covered, otherwise Overflow.
Start with the routing trigger
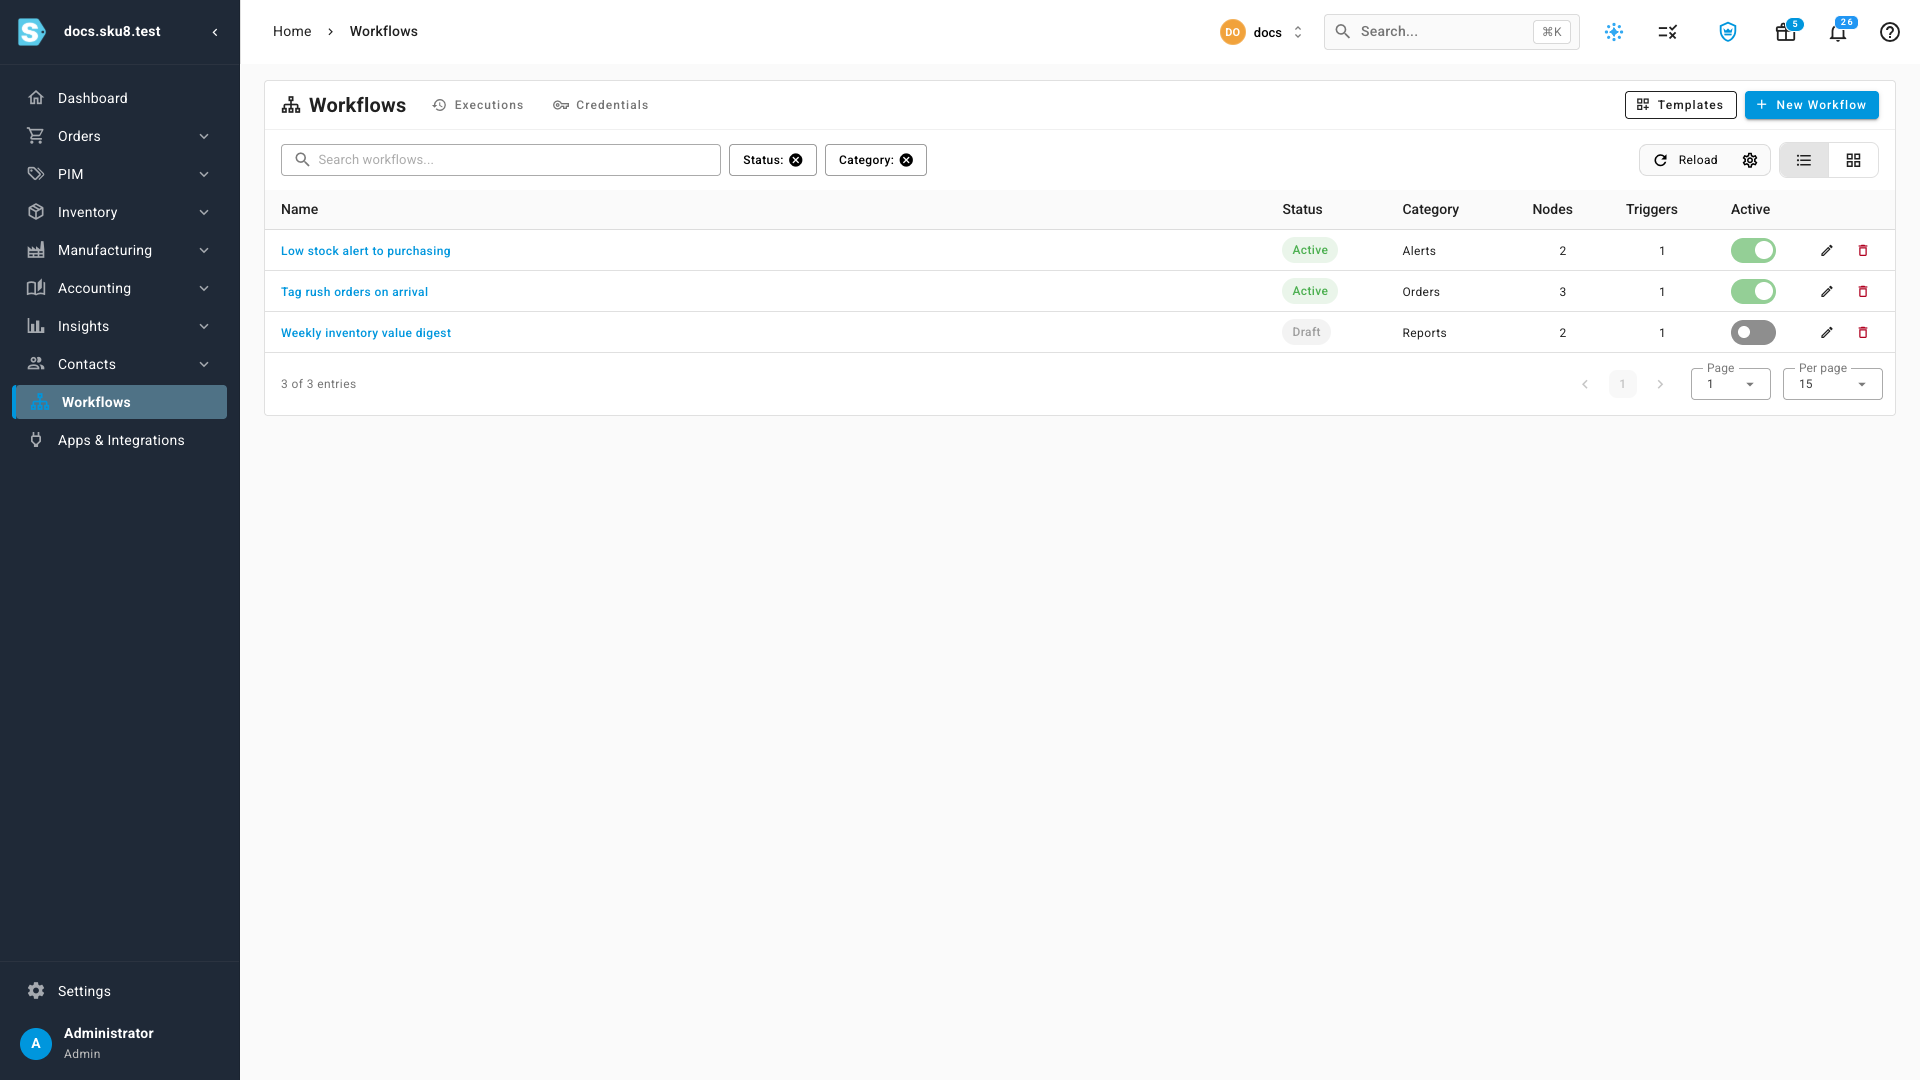
- Go to Workflows and click New Workflow.
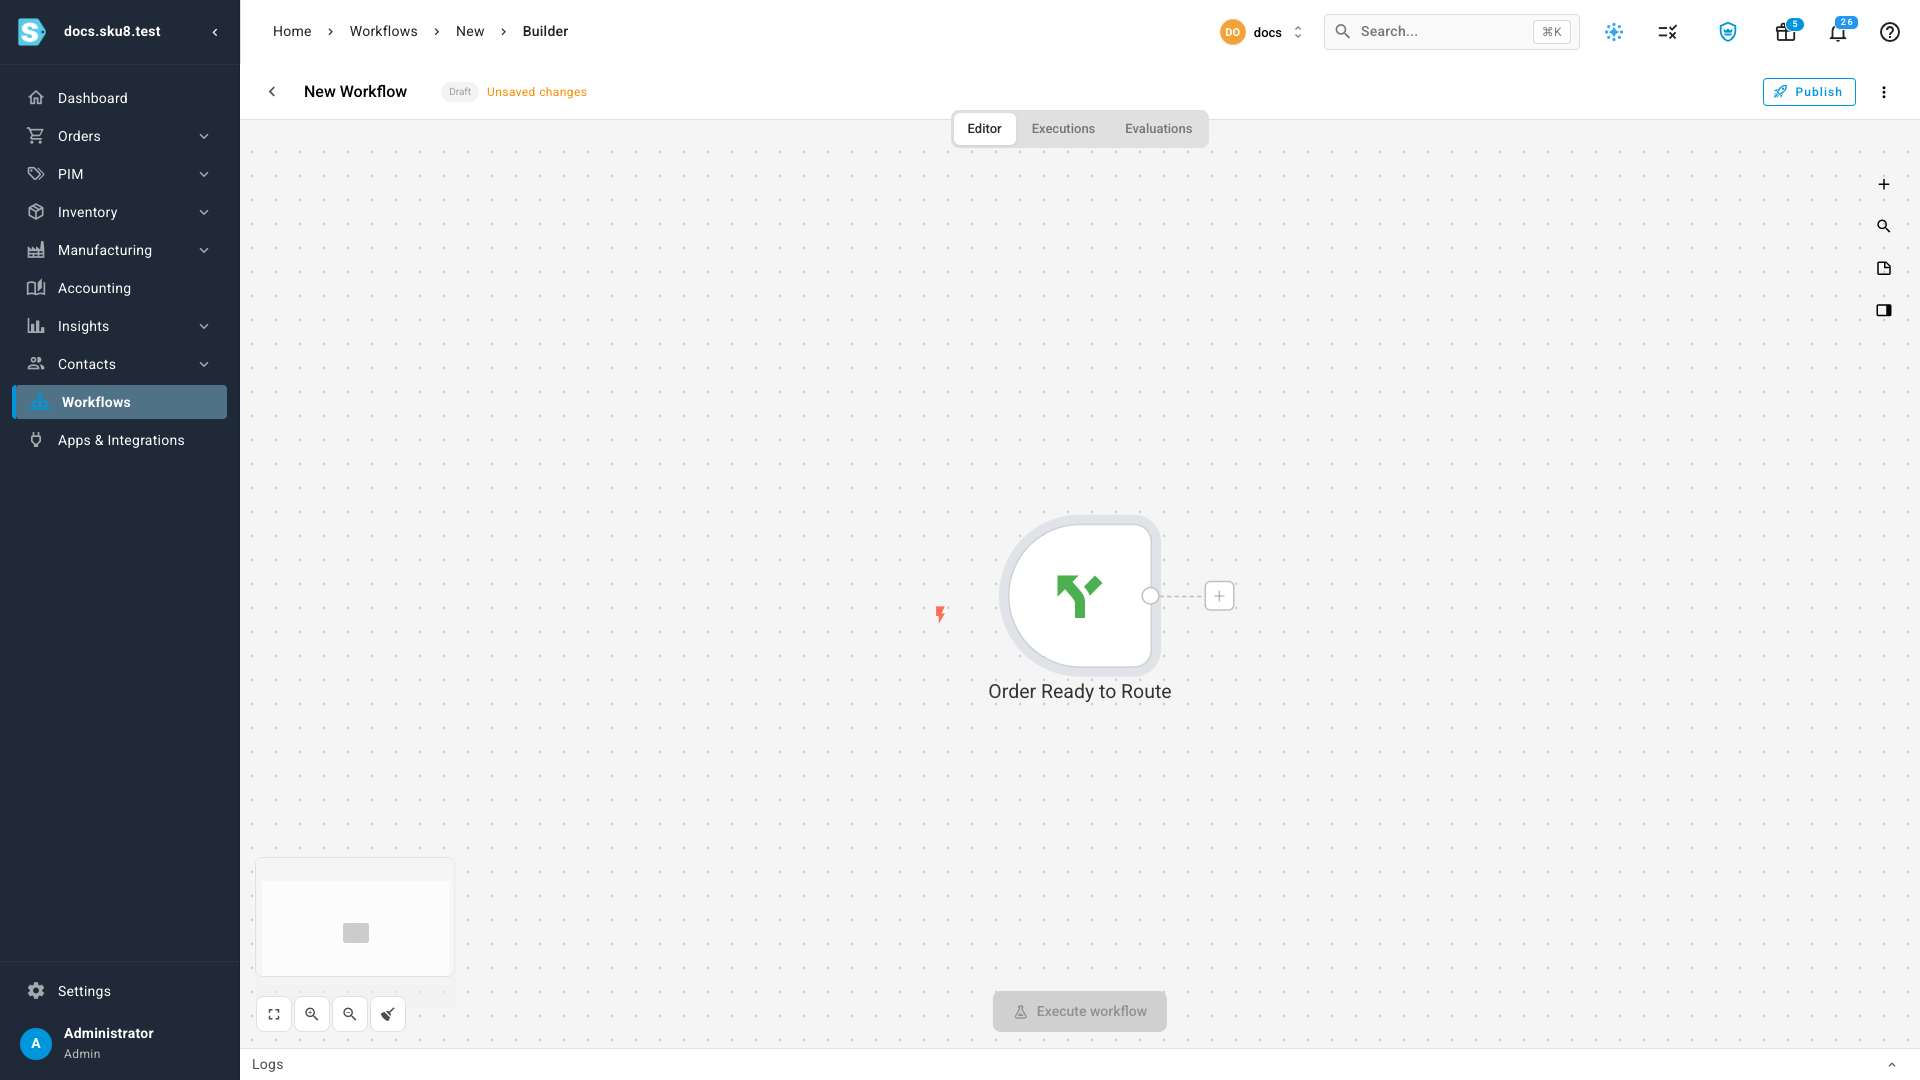
- Click Add first step…, then choose Order Ready to Route from the Triggers group.
Order Ready to Route fires at the last moment a warehouse can still be chosen — just before the order is dispatched for fulfillment. It hands the rest of the workflow the order plus its lines, including ready-made counts like Distinct SKU Count, Line Count, and Total Units, so most rules need no expression writing at all.
Two of its settings are worth knowing, though the defaults are what you want:
- Skip orders already pinned to a warehouse — on by default, so a warehouse someone chose by hand is never overridden by the workflow.
- Skip orders already committed to a warehouse — always on. An order that already has a shipment, or a fulfillment order handed to a 3PL, can't be re-routed without a cancel and resubmit, so routing leaves it alone.
You can also narrow what the trigger picks up with Sales Channels or Order Filters — leave both empty to route every order. Limit the workflow to one sales channel below walks through both.
Ask how many SKUs the order has
- Click the + on the trigger and pick IF from the Logic group.
- In the condition row, open the field dropdown (the second box) and choose Distinct SKU Count.
- Set the operator to is greater than and the value to
1.
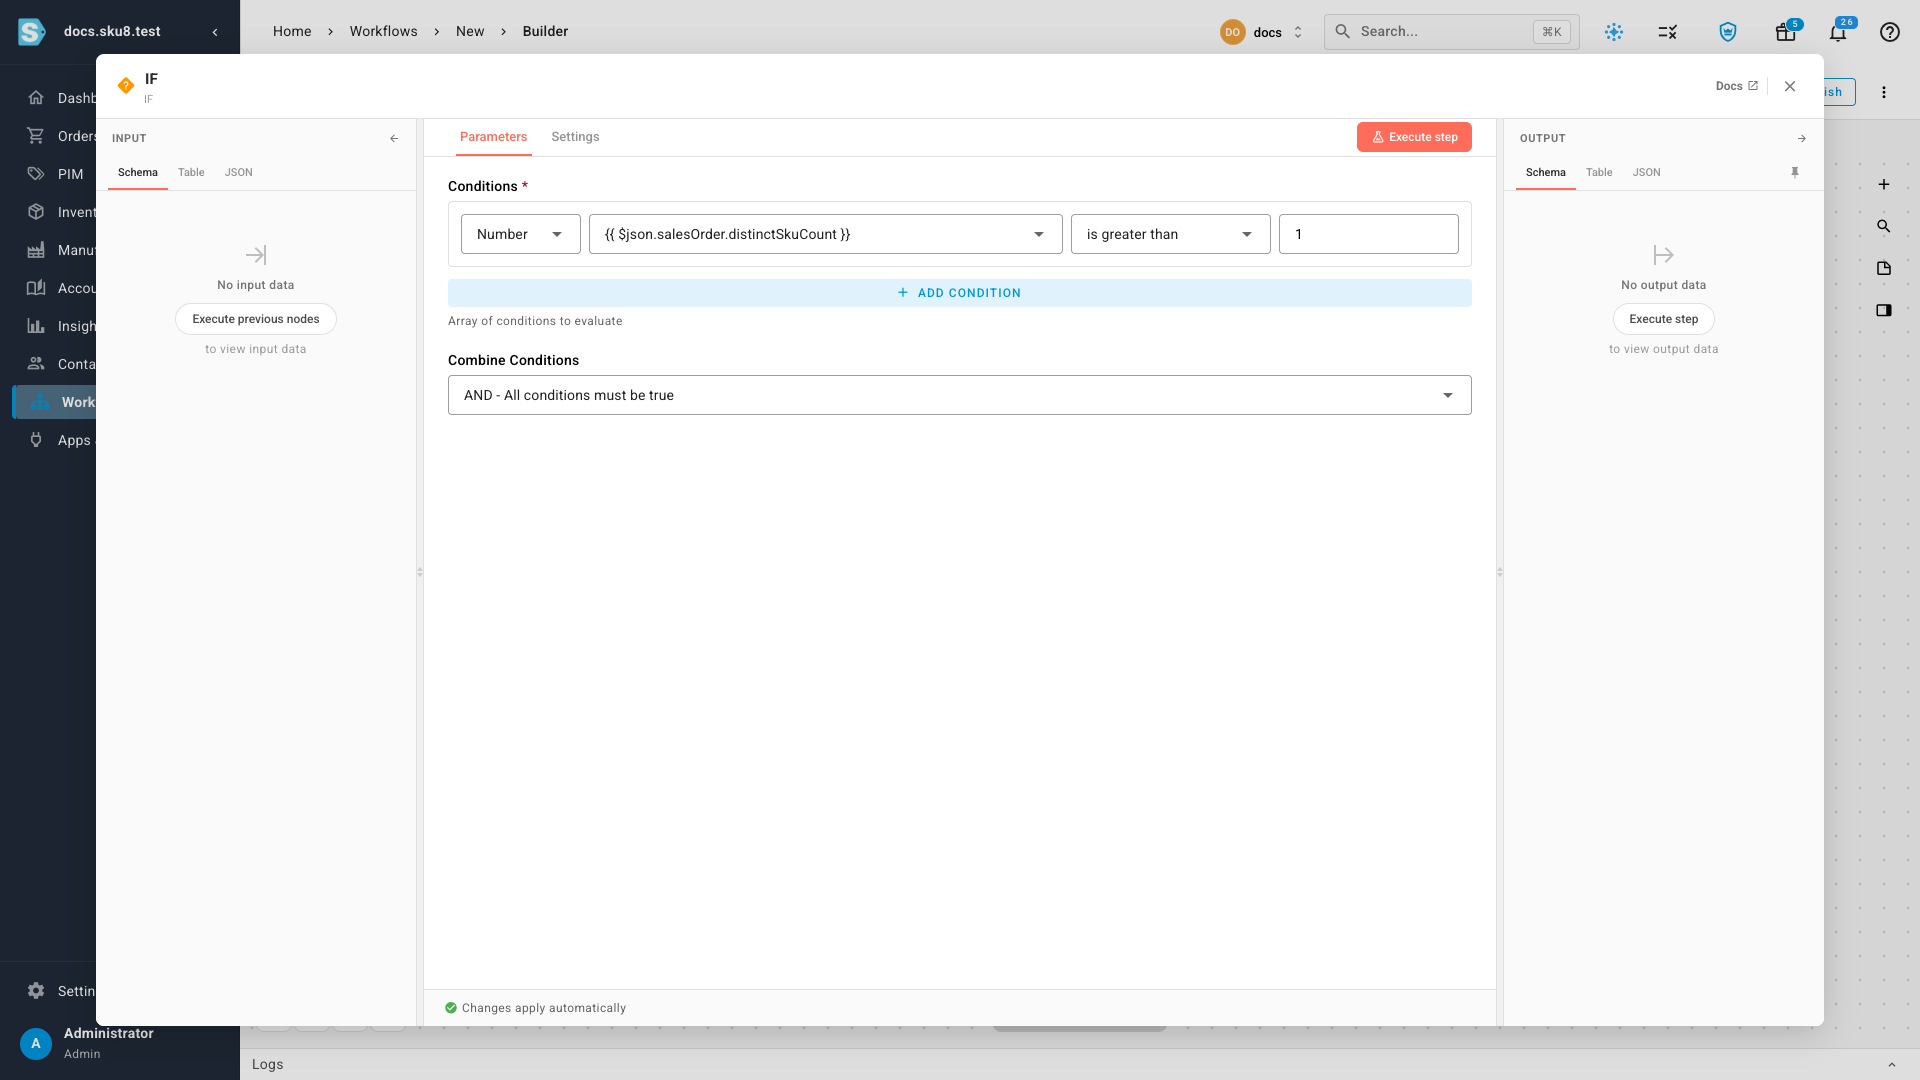
You don't need to touch the Type dropdown — picking a numeric field flips it to Number for you and offers the numeric operators.
Rename the step while you're in it. Click the node name at the top of the panel and type something like More than one SKU? — the canvas shows the name you give it, so a well-named node makes the finished diagram readable at a glance.
Send multi-SKU orders to Overflow
- Close the panel, then click the + on the IF node's True branch.
- Pick Set Warehouse from the Actions group.
- Set Warehouse to Overflow Storage.
- Rename the step to Send to Overflow.
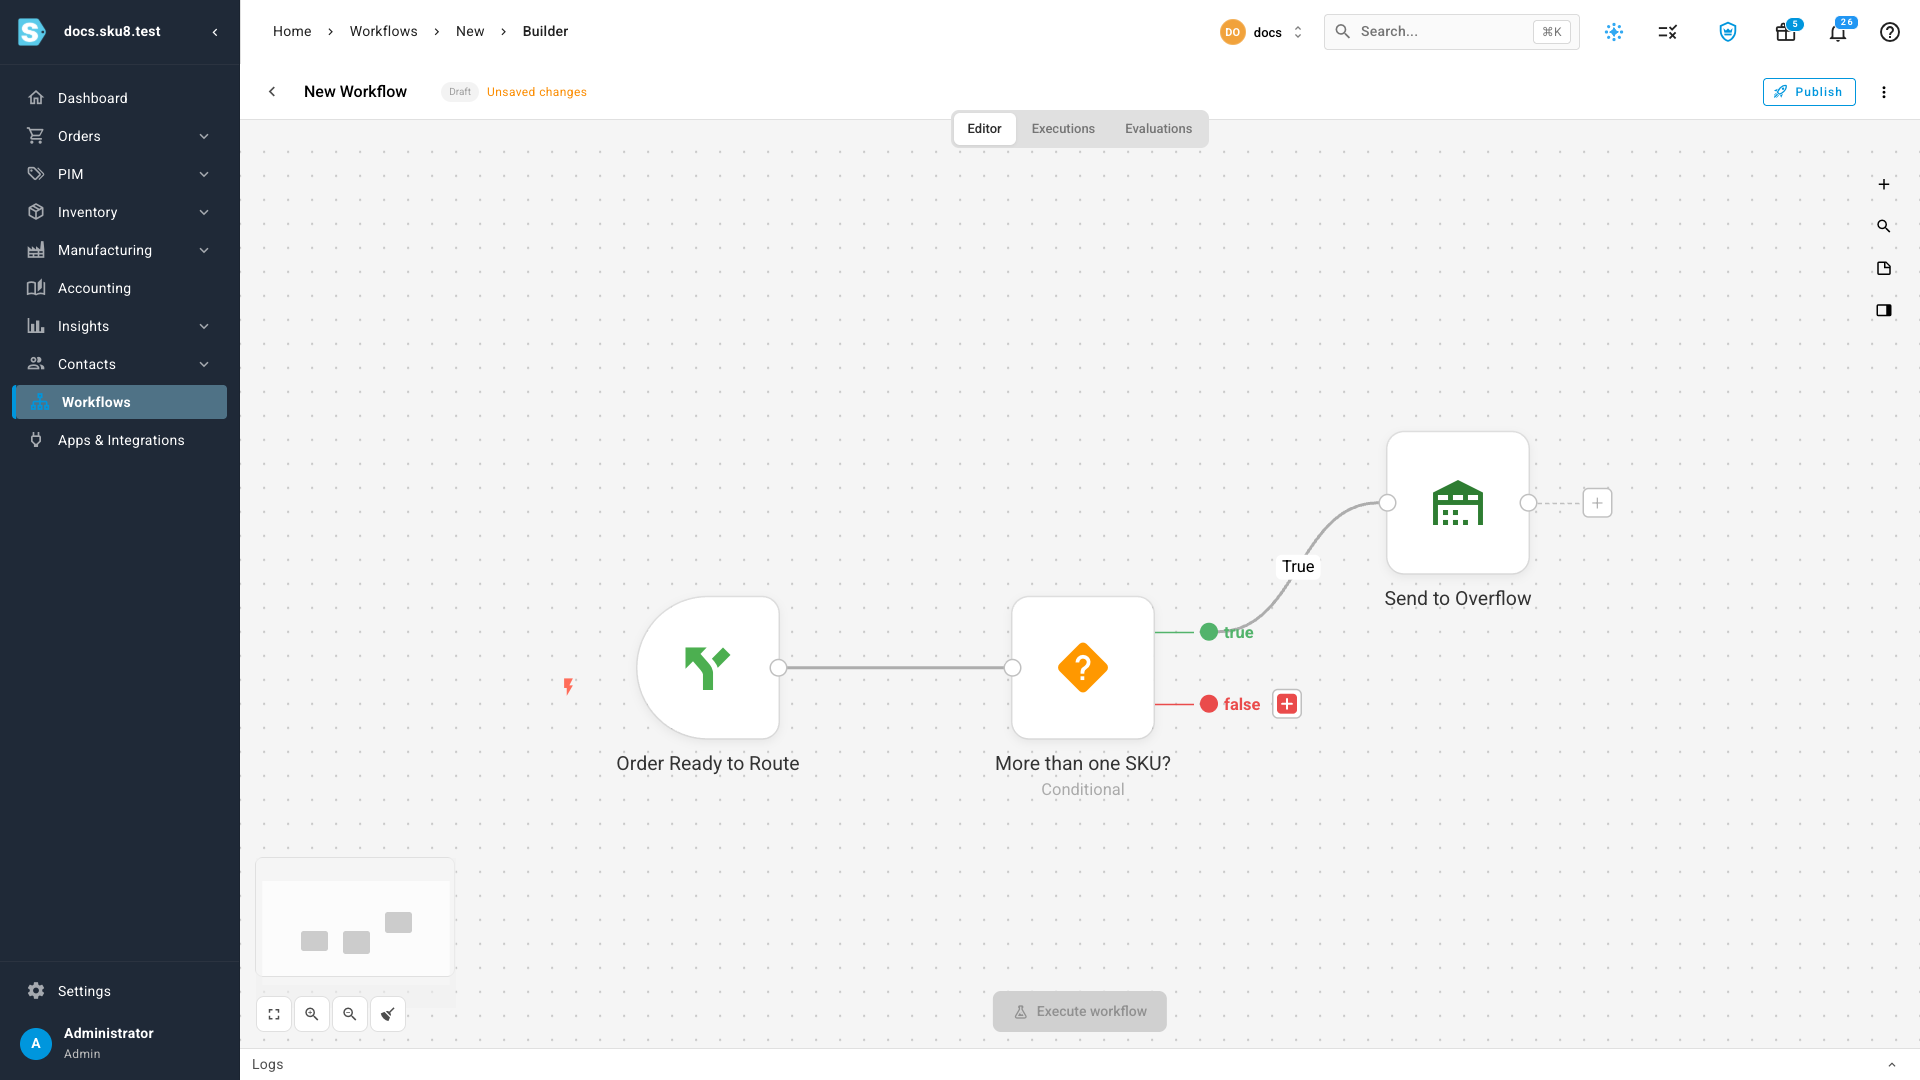
Renaming matters more here than elsewhere: you'll add three Set Warehouse steps in this workflow, and unnamed they're indistinguishable on the canvas.
Set Warehouse has two options, both off by default:
- Allow backorder — without it, an order the warehouse can't fully cover stays where it is rather than being routed into a backorder.
- Dry run — moves nothing and reports the coverage the move would have had. Turn it on while you're testing the rule on live orders — see Try it before it acts.
Check stock for single-SKU orders
Single-SKU orders take the False branch. Rather than sending them straight to Main, ask whether Main can actually ship them.
- Click the + on the IF node's False branch and pick Stock Check from the Logic group.
- Set Warehouse to Main Warehouse.
The remaining settings default to the whole-order behavior you want:
| Setting | Default | What it means |
|---|---|---|
| Consider in stock when | Every line is covered | The whole order has to be shippable. Use Any line is covered only to detect partial coverage. |
| Count | Available (net of existing allocations) | Stock already promised to other orders doesn't count. Switch to On hand to count everything physically in the building. |
| Require the full quantity | On | A line needs its whole ordered quantity. Turn it off and any stock at all counts as covered. |
| For FBA warehouses, use | SKU.io's inventory | Ignored for ordinary warehouses. For FBA, Amazon's own fulfillable quantity is what decides whether it ships today. |
Stock Check splits into two branches — In Stock and Out of Stock — so the next step depends on the answer.
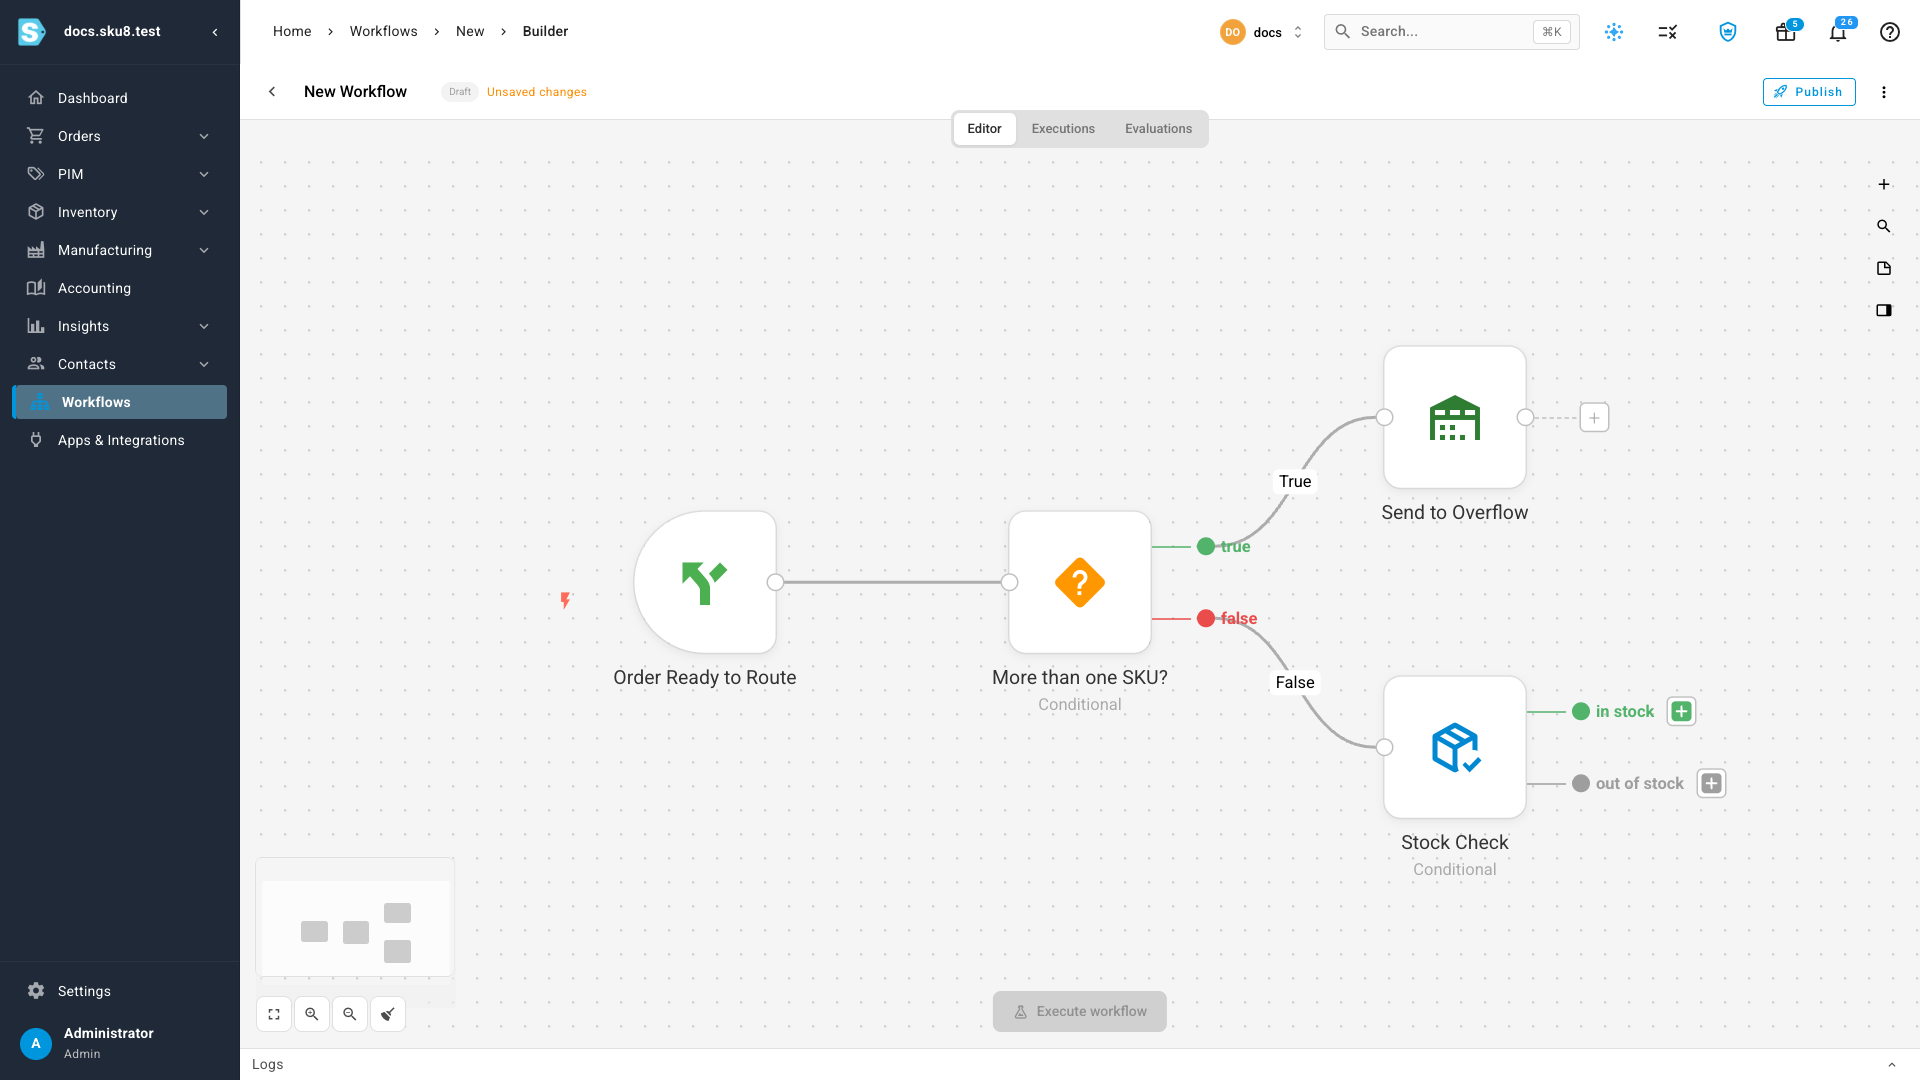
If the warehouse you're checking has been archived or deleted, the check takes the Out of Stock branch rather than failing the run — the order still ships from somewhere, and the problem is recorded in the run log. An order with nothing to check (no inventoried lines) also takes Out of Stock.
Route each stock outcome
Add a Set Warehouse step on each branch:
- In Stock → Set Warehouse on Main Warehouse. Rename it Ship from Main.
- Out of Stock → Set Warehouse on Overflow Storage. Rename it Fall back to Overflow.
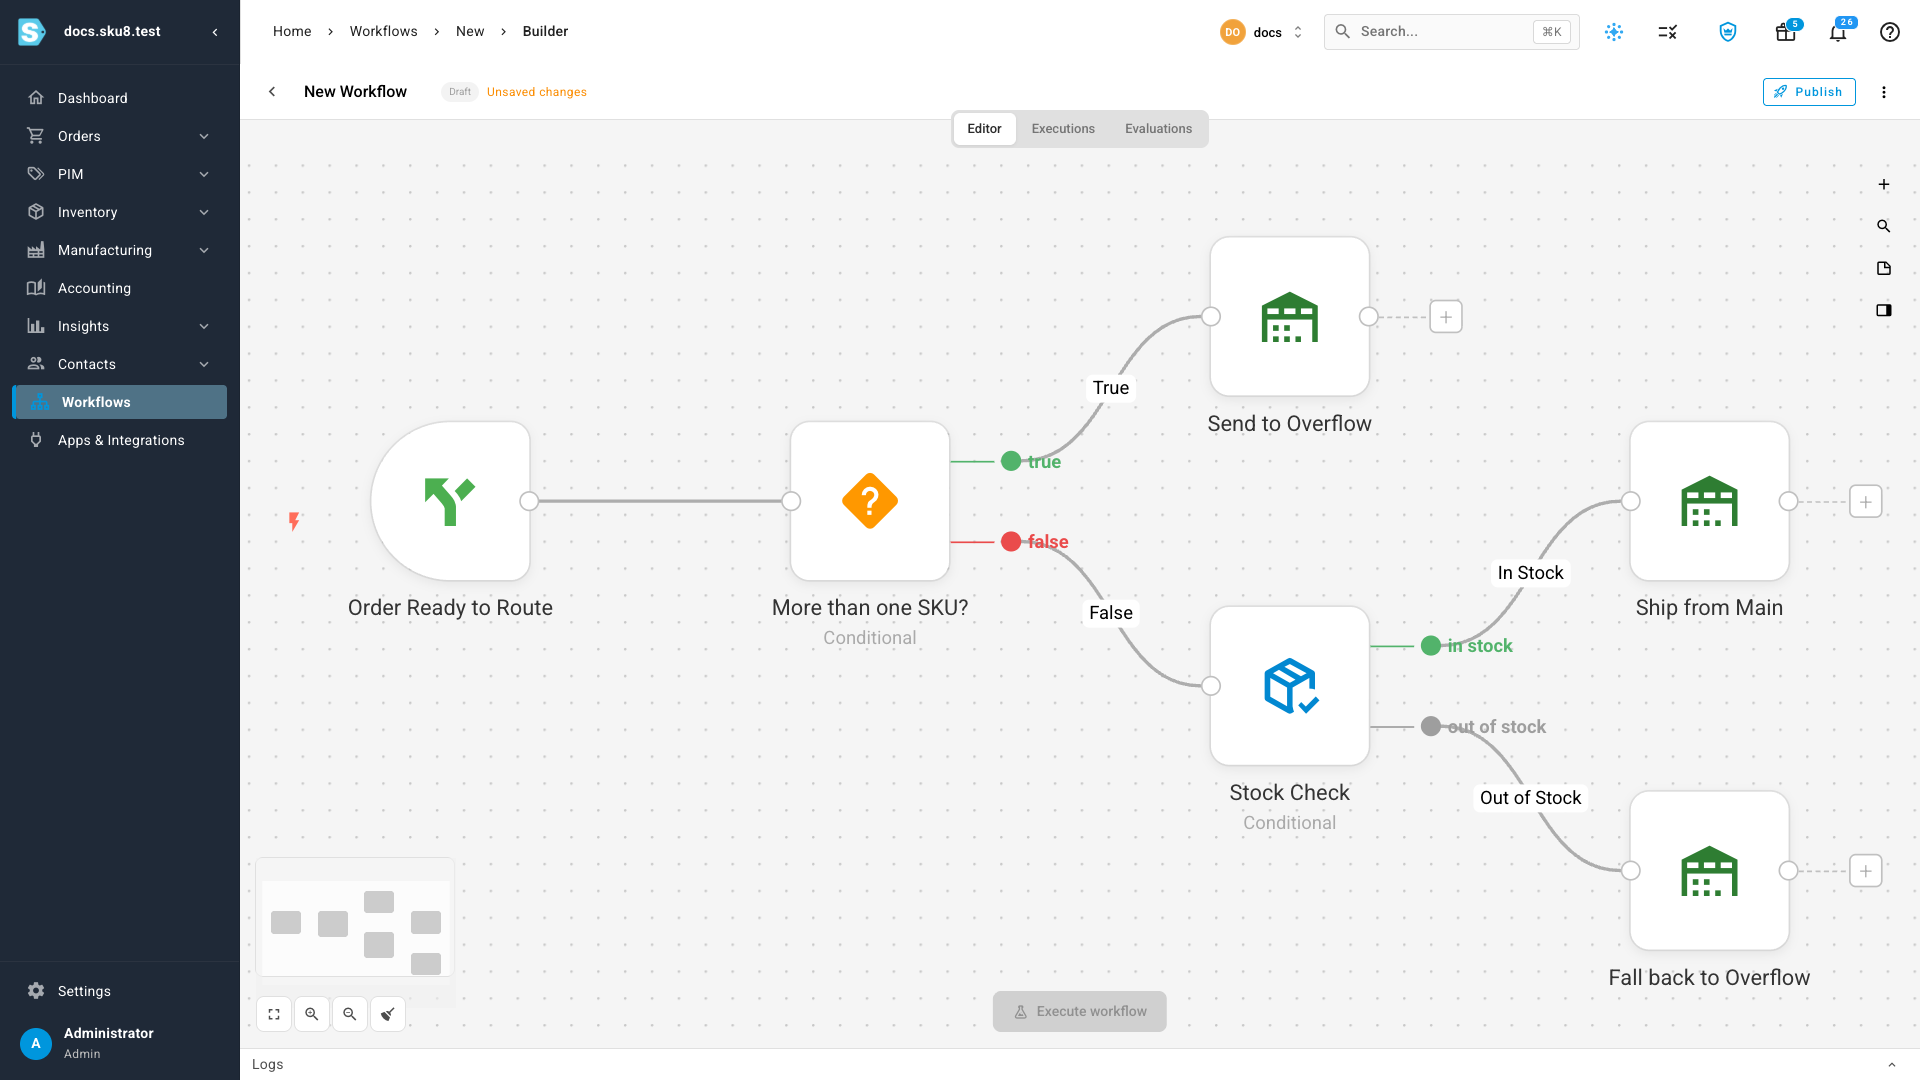
That's the whole rule. Every order leaves the workflow through exactly one of the three Set Warehouse steps, so there's never any ambiguity about which warehouse won.
Give every branch its own terminal step rather than pointing two branches at one shared node. It also reads better in the run history — the highlighted path shows exactly which decision was made.
Name it and publish
- Click the workflow name in the header and enter something descriptive, like Route multi-SKU and short orders to Overflow Storage.
- Click Publish.
The workflow flips from Draft to Active and starts routing new orders from that moment on. It doesn't touch orders that were already dispatched.
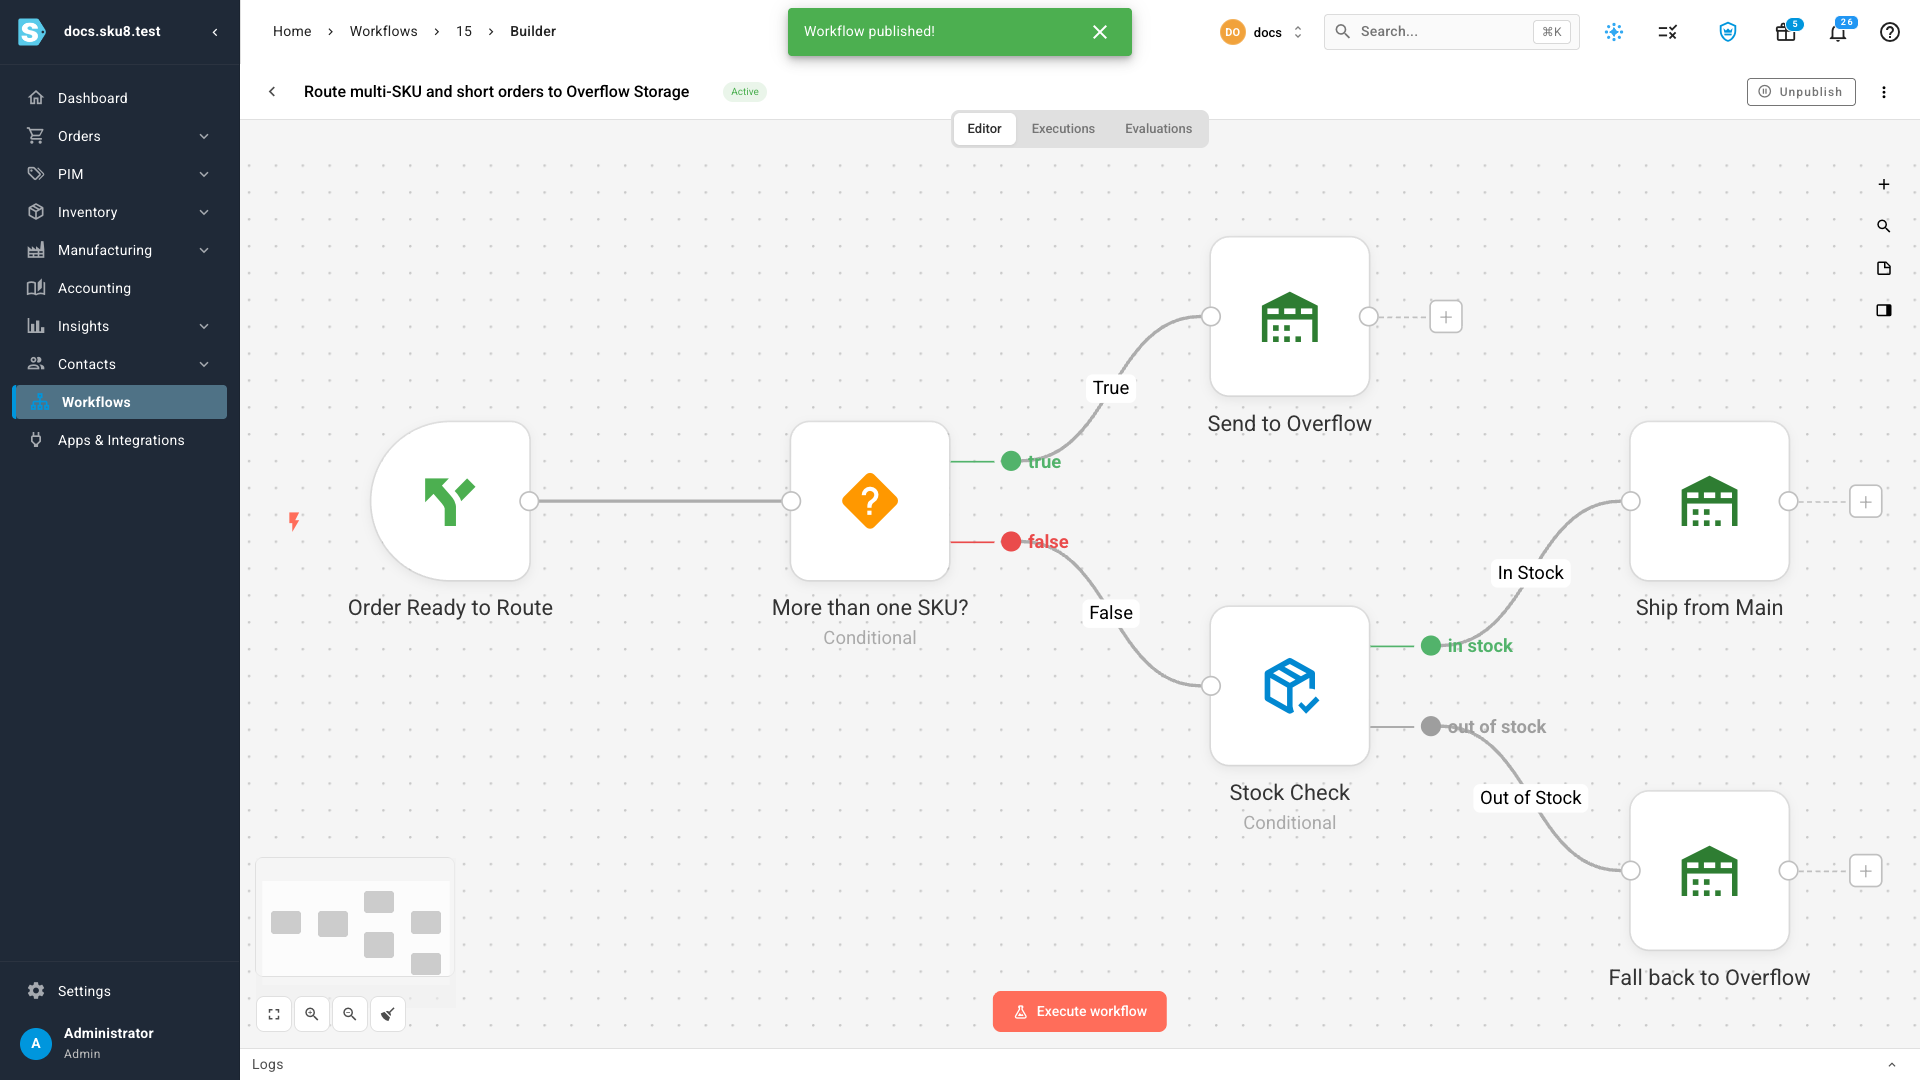
An order is routed by the first published routing workflow whose conditions it matches — the rest are skipped for that order. If you publish more than one, the Workflows list shows the evaluation order so you can see which wins.
Publish it in Dry run instead and read the decisions first — see Try it before it acts.
Try it before it acts
Dry run lets a published workflow make its decisions and record them without moving anything. You see which warehouse each order would have gone to, and turn it off once you're happy.
Turn it on for every Set Warehouse step:
- Open a Set Warehouse step.
- Switch Dry run on.
- Repeat for the other steps, then Publish.
There's no workflow-wide preview switch. Any step you miss stays live — its branch moves real orders while the others only report. This guide has three: Send to Overflow, Ship from Main, and Fall back to Overflow.
Dry run still needs a published workflow. Nothing reaches a Draft, so its run history stays empty — publishing is what starts producing runs to read.
Let some orders come through, then open the workflow's Run History. Each run shows the path it took, and the Set Warehouse step reports:
Dry run: would route to Main Warehouse
along with the coverage it found — including whether that warehouse could actually have covered every line. That second part is what tells you the rule would have worked, not just where it pointed.
When the decisions look right, switch Dry run back off on each step and publish again. There's no approval queue — a dry run is a report, not a move waiting for a green light — so turning it off is what lets the next order route for real.
Open a Set Warehouse step and click Execute step. It reports the same coverage for that step alone, never moves anything even with Dry run off, and works while the workflow is still a Draft. Useful for checking you picked the right warehouse before you publish at all.
See the decision on the order
Open any order the workflow has routed. Next to the order status you'll see a Routed by workflow chip.
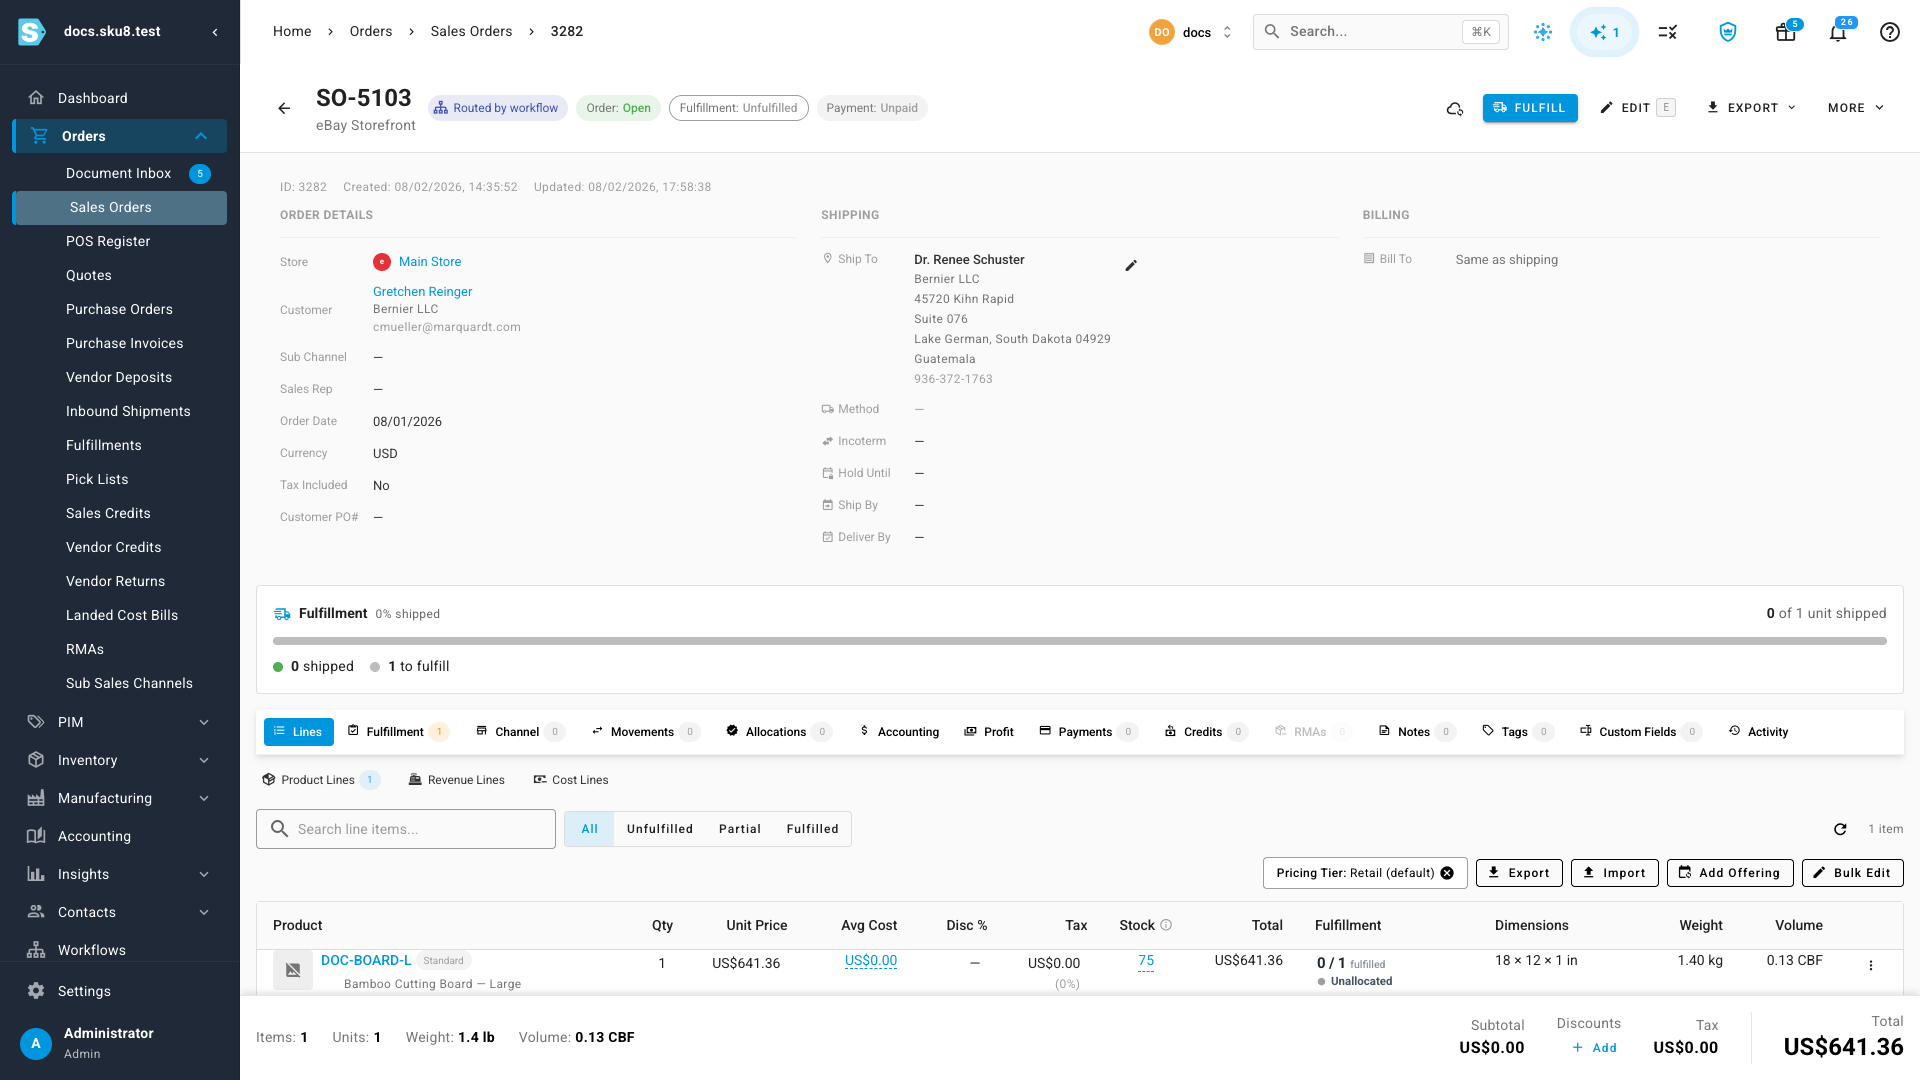
Hover it to see which workflow made the call and which run it was. Click it to open that exact run, with the path it took highlighted on the canvas — so you can see at a glance whether the order went out via the stock check or straight down the multi-SKU branch.
Limit the workflow to one sales channel
Everything above routes every order. More often you want the rule to apply to one storefront only — Shopify web orders ship from Overflow, and nothing else is touched. The trigger gives you two ways to say that, and they aren't interchangeable:
- Sales Channels — a picker listing the stores you've connected. Quick, but it works at whole-store granularity: choose your Shopify store and you get everything it sends, point-of-sale and draft orders included.
- Order Filters — a filter builder over the order itself. Use this when the rule needs anything finer than a whole store: a sub-channel, a country, a shipping method, an order total.
Which channel field is which
Order Filters offers four channel fields, all under the Order Info group, and they're easy to mix up:
| Field | What it matches |
|---|---|
| Integration | The platform the order came from — Shopify, Amazon, eBay. Covers every store you've connected through it. |
| Sales Channel | One specific connected store, chosen from a list of your connections. |
| Sales Channel Name | The same store, matched on that connection's name as text. |
| Sub Channel Name | A storefront within a channel. For Shopify this is the order's source — Web, Pos, Draft Order. |
With a single Shopify store, Integration and Sales Channel come to the same thing; pick whichever reads more clearly on the canvas. With several, Integration covers them all at once and Sales Channel singles one out.
Example: Shopify web orders only
- Open the Order Ready to Route trigger and find Order Filters.
- Click Advanced Filters.
- In the left panel, expand Order Info — or type into Search filters... — and click Integration. A condition row appears. Leave the operator on is and pick Shopify from the value list.
- Click Sub Channel Name in the same panel to add a second condition, again leave the operator on is, and pick Web.
- Click Apply Filters.
Both conditions land in the same group, joined by AND, so the workflow claims an order only when it is Shopify and Web. Back on the trigger, the Advanced Filters button carries a 2 badge and the two conditions appear as chips beneath it — click a chip to edit that condition, or its × to drop it.
The value boxes on both fields are lists built from your own data, so you're choosing a
real value rather than typing a name that has to match exactly. Sub Channel Name labels
each option with the channel it belongs to — Web (Shopify) — because the same sub-channel
name can exist under more than one store, and the condition matches all of them.
An order that fails the filter simply isn't claimed by this workflow. It moves on to the next published routing workflow, and if none matches, it falls through to your normal warehouse selection. Filtering the trigger narrows what the workflow takes responsibility for; it doesn't hold the order up.
For something like Shopify Web or Shopify POS, use Add Group in the modal. A sub-group carries its own AND / OR toggle, so you can keep Integration is Shopify at the top level and put the two sub-channels in an OR group beneath it.
Adapt the rule
The shape here — ask a question, check stock, route each answer — covers most routing policies. Some variations that need no new steps:
- Route by channel. Set Sales Channels on the trigger for whole connected stores, or use Order Filters for anything finer — see Limit the workflow to one sales channel.
- Route by customer or destination. Use the trigger's Order Filters to limit the workflow to orders you care about, and leave the canvas as is.
- Prefer one warehouse, fall back to another. Drop the IF entirely: trigger → Stock Check on the preferred warehouse → Set Warehouse on each branch.
- Chain more fallbacks. Put a second Stock Check on the first one's Out of Stock branch to try a third warehouse before giving up.
Whichever shape you land on, try it before it acts — Dry run reports the decisions without moving anything.
Next steps
- Build a workflow from scratch — the general canvas moves.
- How workflows work — triggers, nodes, and the lifecycle.
Video transcript
Splitting stock across two warehouses is common. Workflows let you decide which one ships each order. Open Automation, then Workflows. Click New Workflow, then add your first step. Choose Order Ready to Route. This runs just before an order is dispatched. Add an IF step. Ask whether the order has more than one SKU. Pick Distinct SKU Count, is greater than, one. Name the step so the canvas reads clearly. On the true branch, add Set Warehouse. Send multi-SKU orders to Overflow Storage, and name that step too. Single-SKU orders take the false branch. Add a Stock Check on Main Warehouse. It asks if every line is covered. In Stock ships from Main Warehouse. Out of Stock falls back to Overflow Storage. Add a Set Warehouse step on each branch, then rename them. Same rule, two ordinary warehouses. Name the workflow, then click Publish. It goes Active and starts routing new orders. Every routed order shows a Routed by workflow chip. Click it to see exactly which run made the decision.