Add an automation to a record
A record automation is a workflow that people run by hand, on the record they're looking at. It shows up in the record's Automate menu (the lightning bolt at the top of the page), and optionally as a button in the record's header. Use one for a job someone does over and over on one record at a time: add a standard note, flag an order for the warehouse, or hand a supplier to a script on your own machine.
Record automations work on suppliers, products, sales orders, purchase orders, and customers. This guide builds one on sales orders that asks for a note and adds it to the order.
Before you begin
- You can create and edit workflows.
- Know which type of record the automation should run on. Each automation runs on one type.
Steps
-
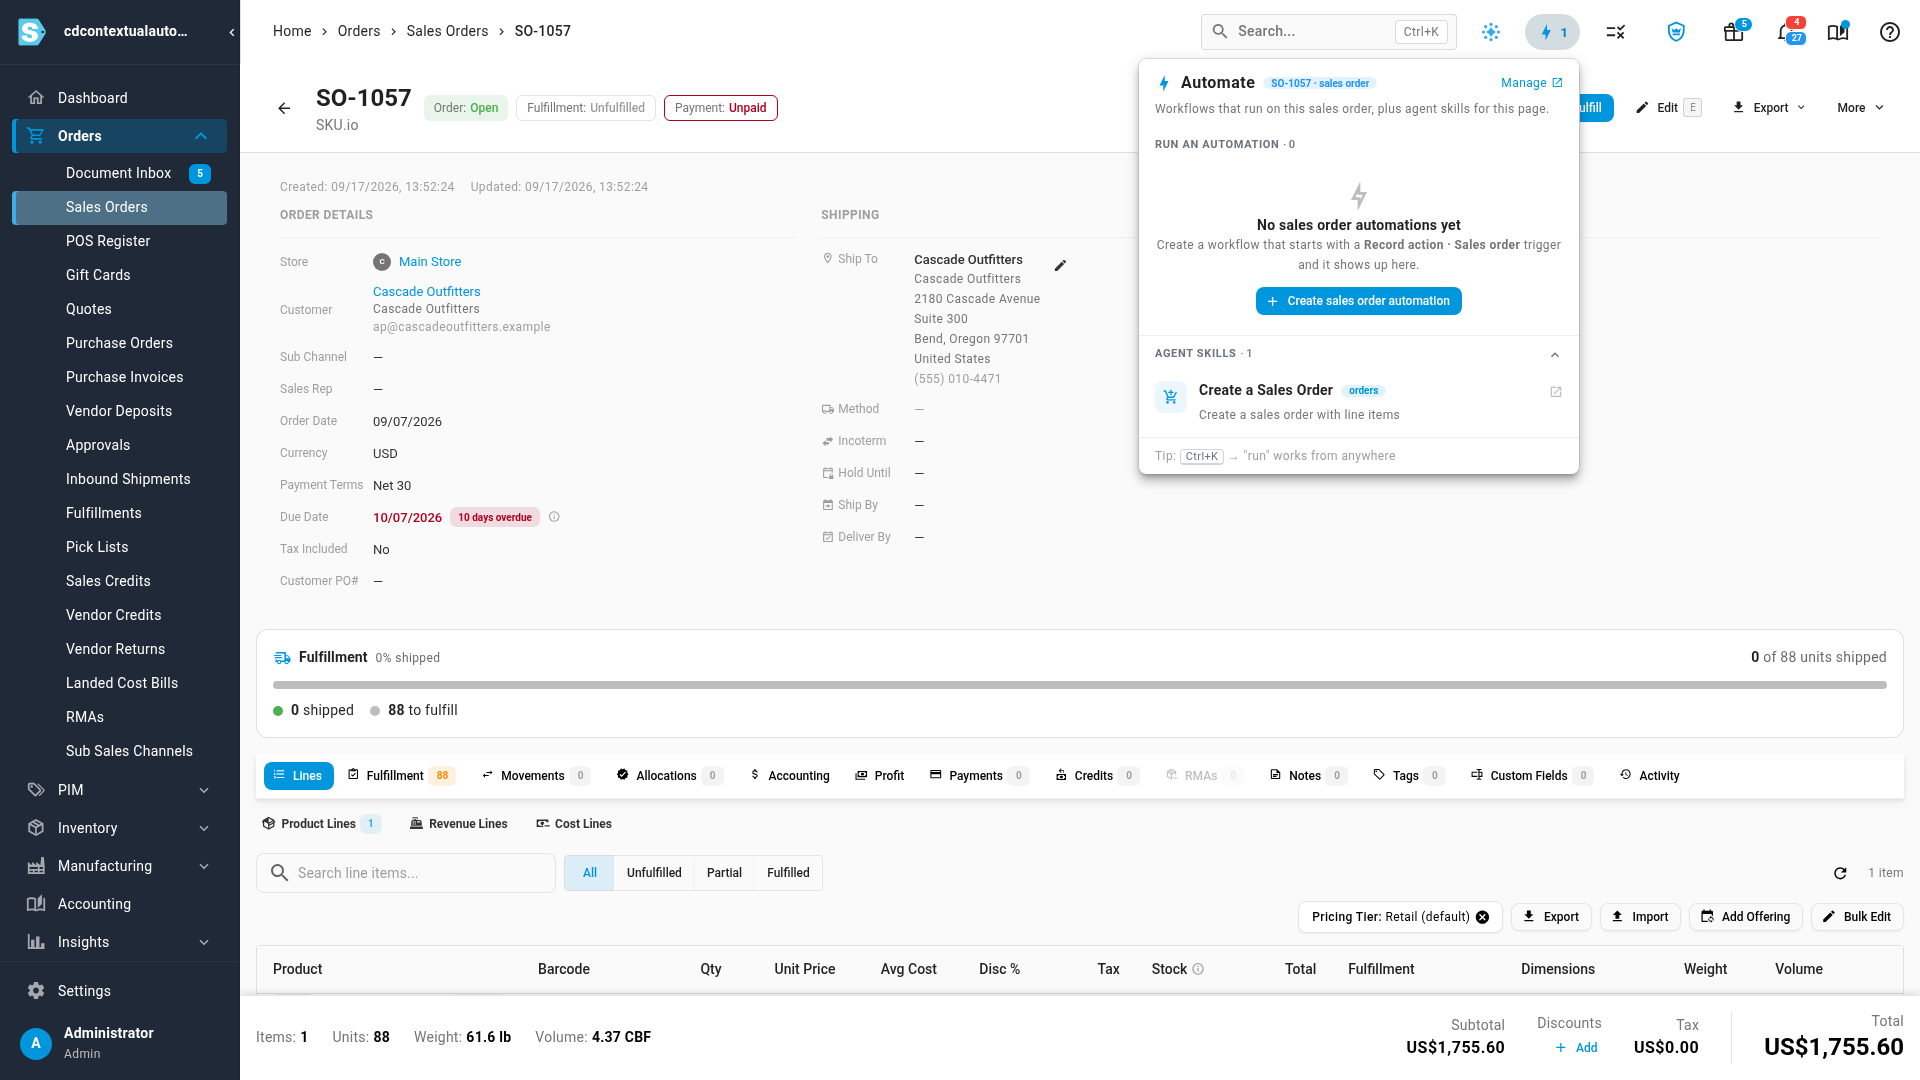
Open a record of the type you want, and click the lightning bolt at the top of the page to open Automate.
-
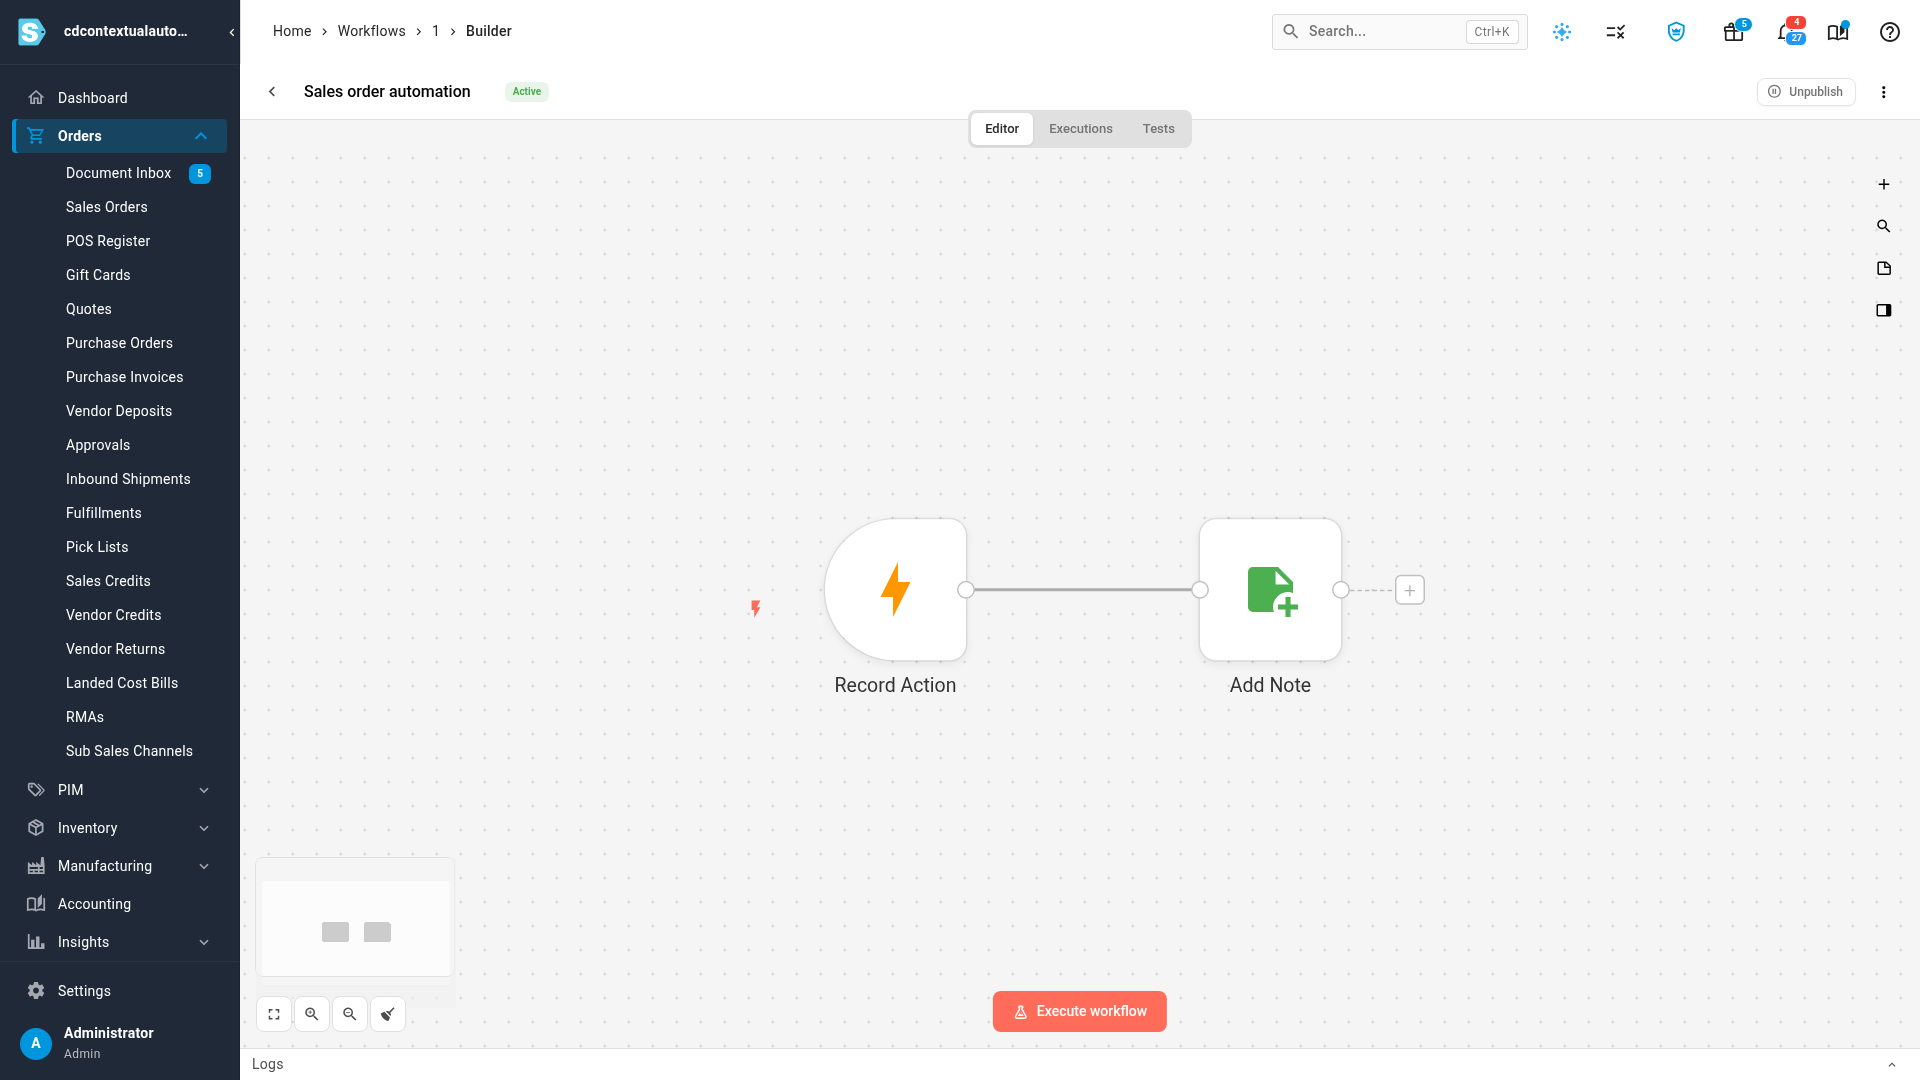
Click Create sales order automation. The button names the record type you're on. The workflow builder opens with a Record Action trigger already in place, set to run on that type of record.
If the menu already lists automations, click Manage and then New Workflow instead, and choose Record Action as the first step.
-
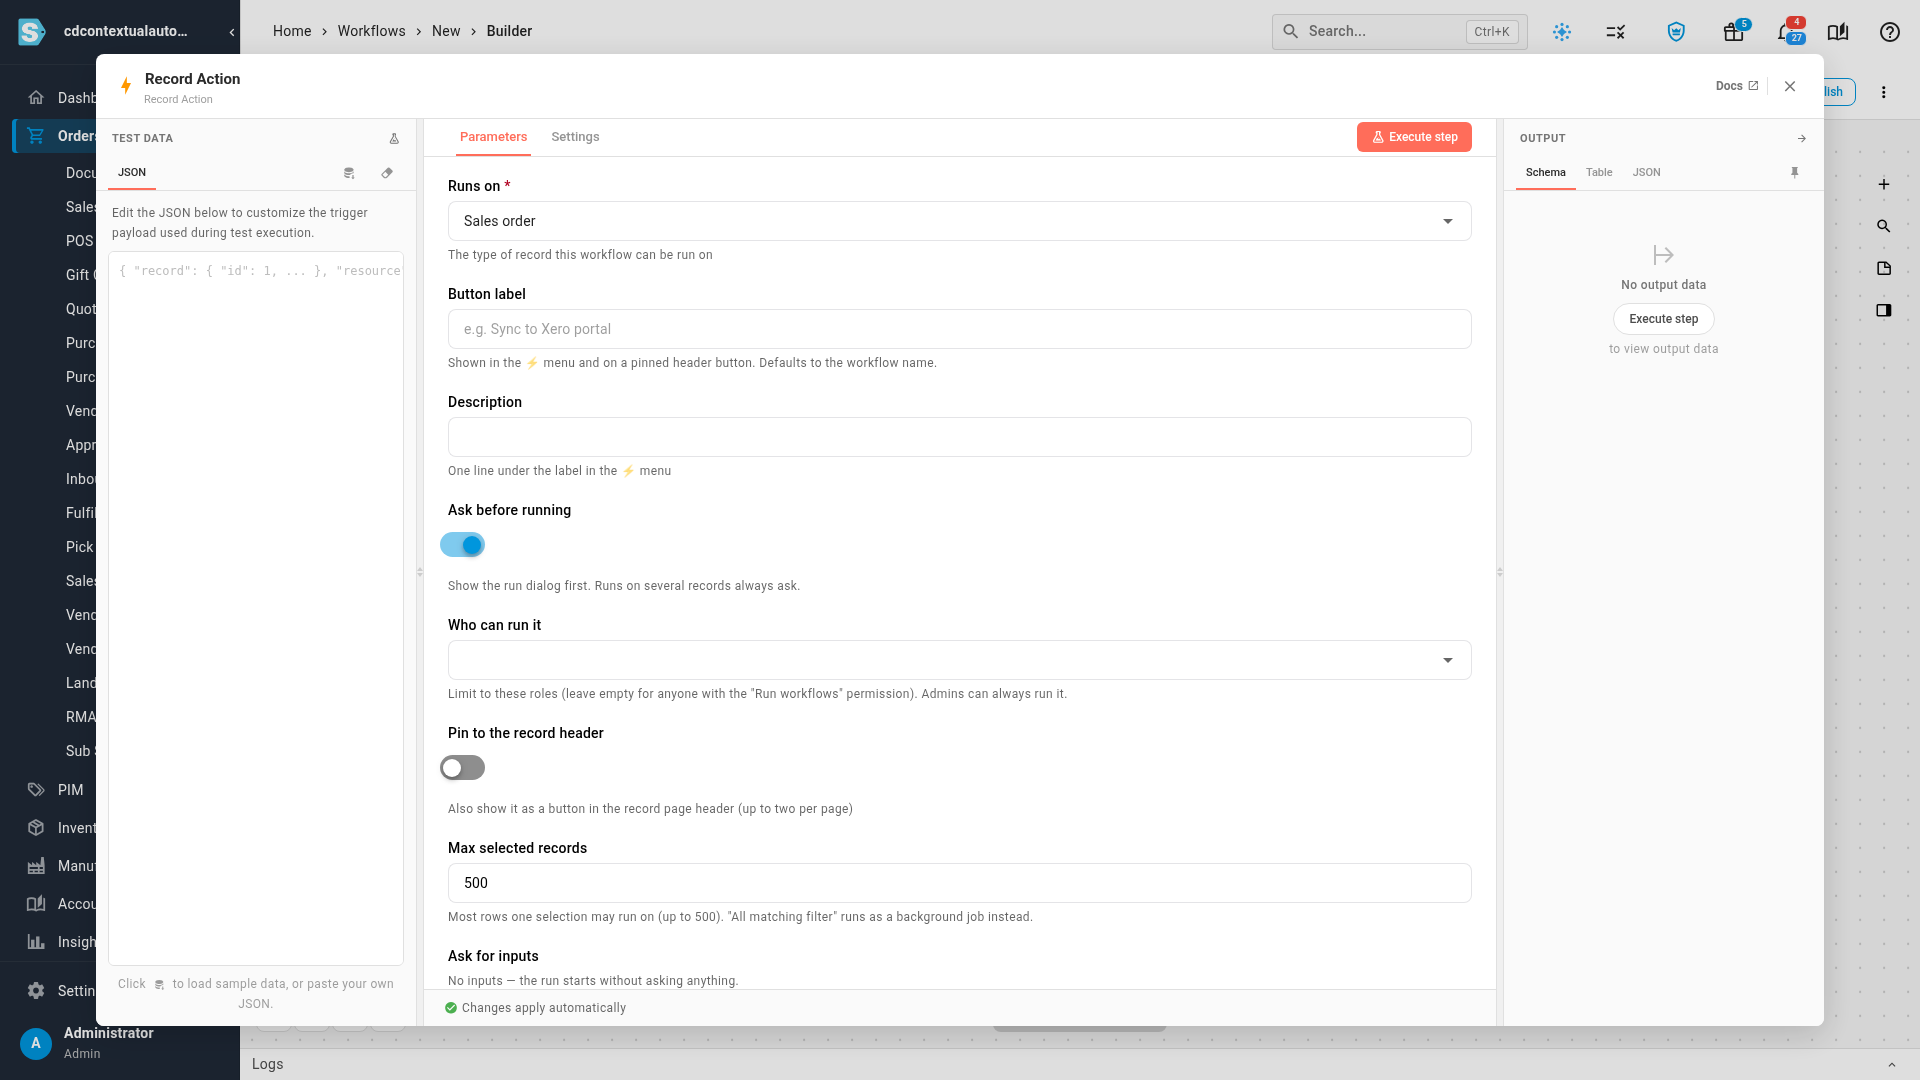
Double-click Record Action to open its settings. Runs on is the type of record the automation works on.
-
In Button label, type the name people see in the menu, such as Add a note. Leave it empty to use the workflow's name.
-
In Description, type one line that says what it does. It appears under the label in the Automate menu.
-
Leave Ask before running on to show a confirmation dialog before each run. Runs on several records always ask, whatever this is set to.
-
In Who can run it, choose the roles allowed to run it. Leave it empty to let anyone with permission to run workflows use it. Admins can always run it.
-
Turn on Pin to the record header to also show it as a button at the top of every record of that type. A page shows at most two pinned automations.
-
In Max selected records, set the most records one selection may run on, up to 500.
-
Under Ask for inputs, click Add input for each question people answer when they run it. Give each one a Key (such as
note), a Label (such as Note) and a Type, and tick Required if a run can't go ahead without it.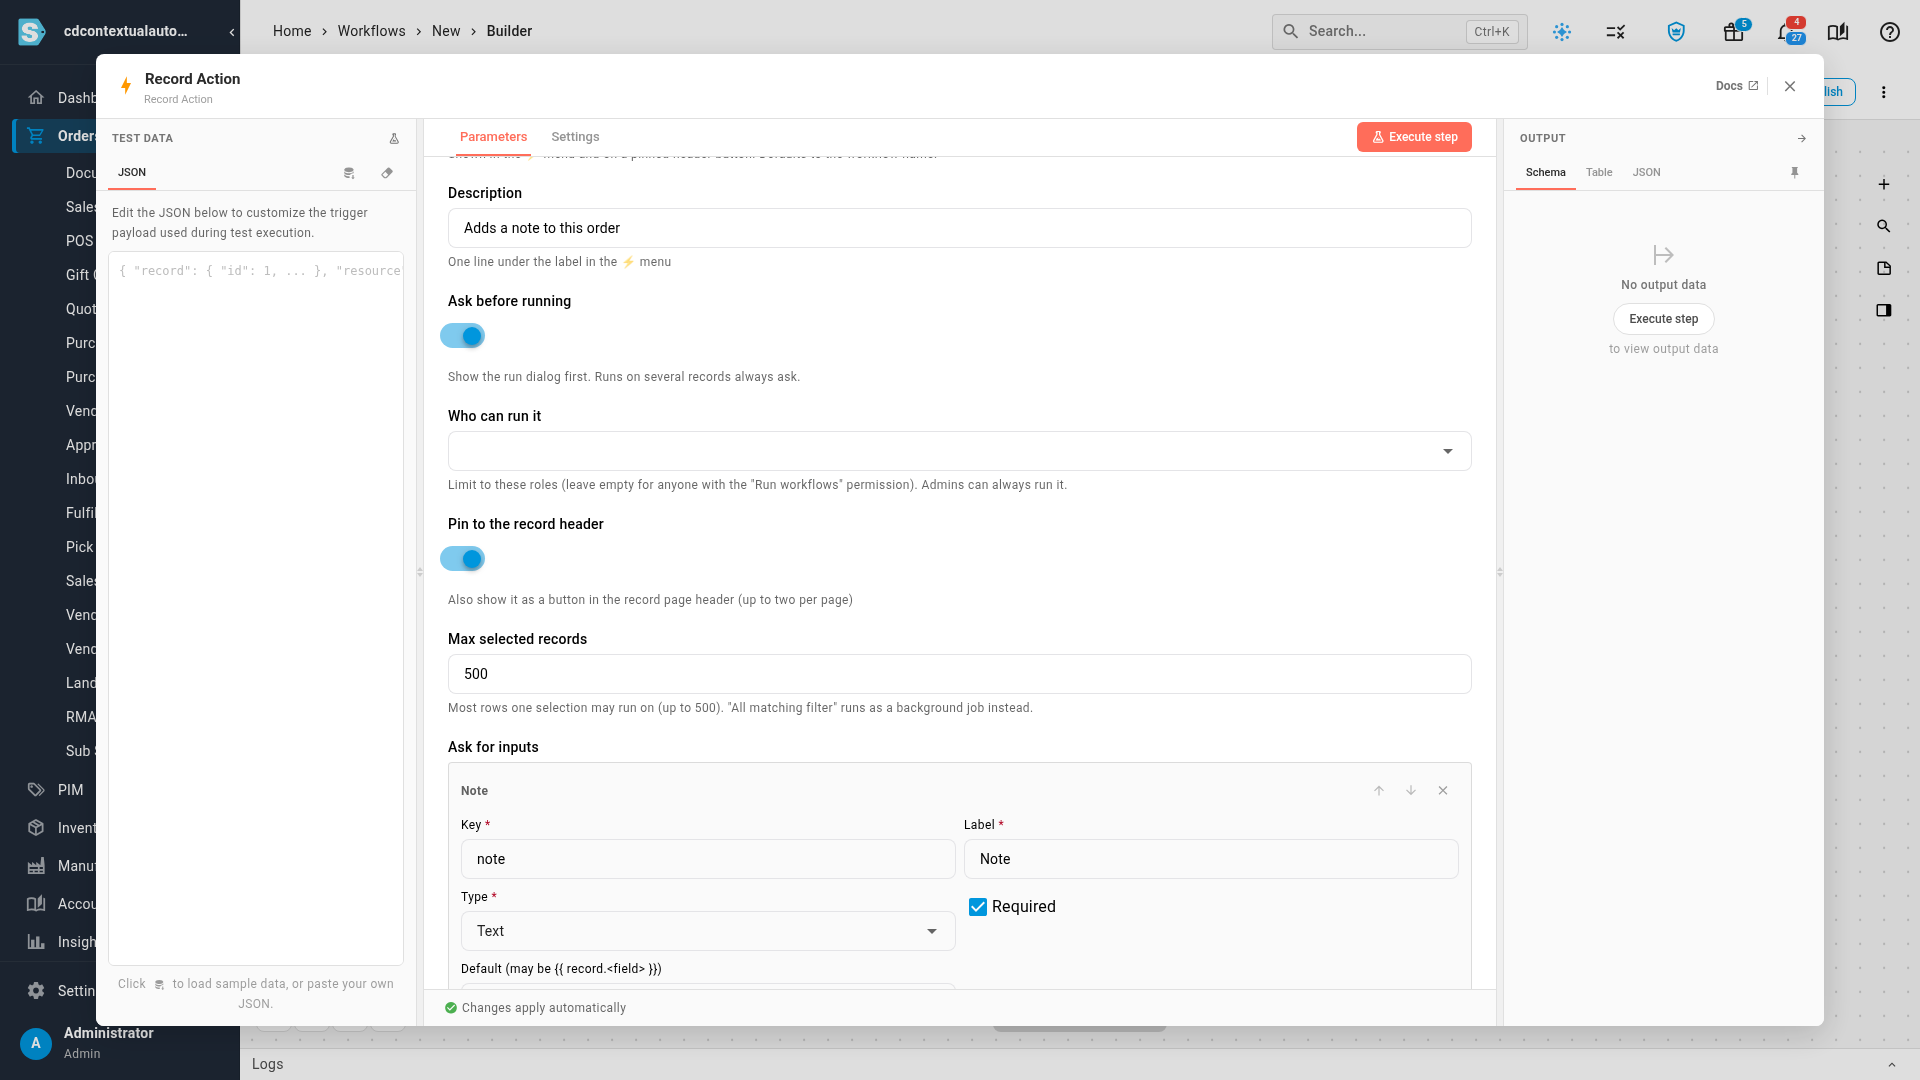
-
Press Esc to close the panel. Click the + after the trigger and add the steps that do the work. For this example, search for note and choose Add Note.
-
In the step's settings, use the answers and the record in expressions. Here, set Note Text to
{{ $trigger.inputs.note }}so the note is whatever the person typed.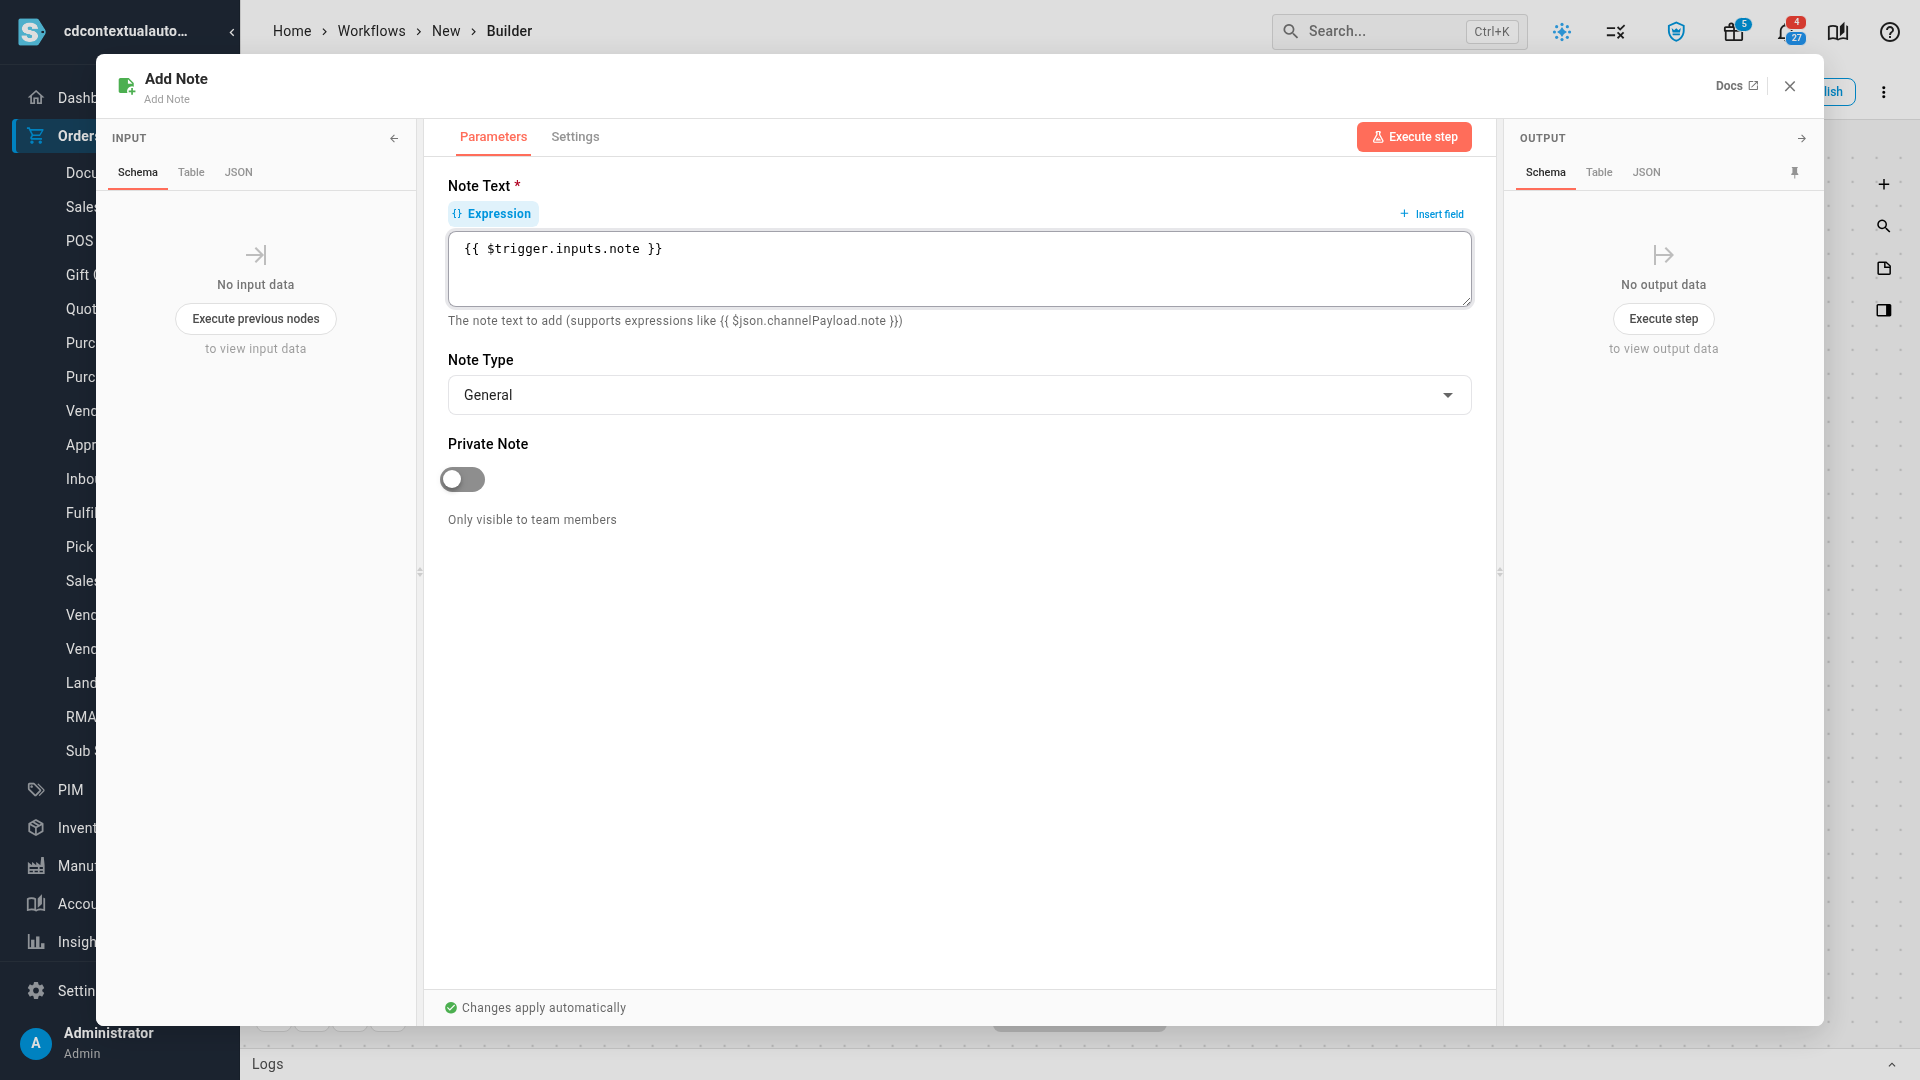
-
Press Esc, then click Publish. The automation is now live on every record of that type.
Try it on a record
-
Open a record of that type. If you pinned the automation, its button is in the header. Otherwise, open Automate.
-
Click the button, or click Run next to the automation in the menu.
-
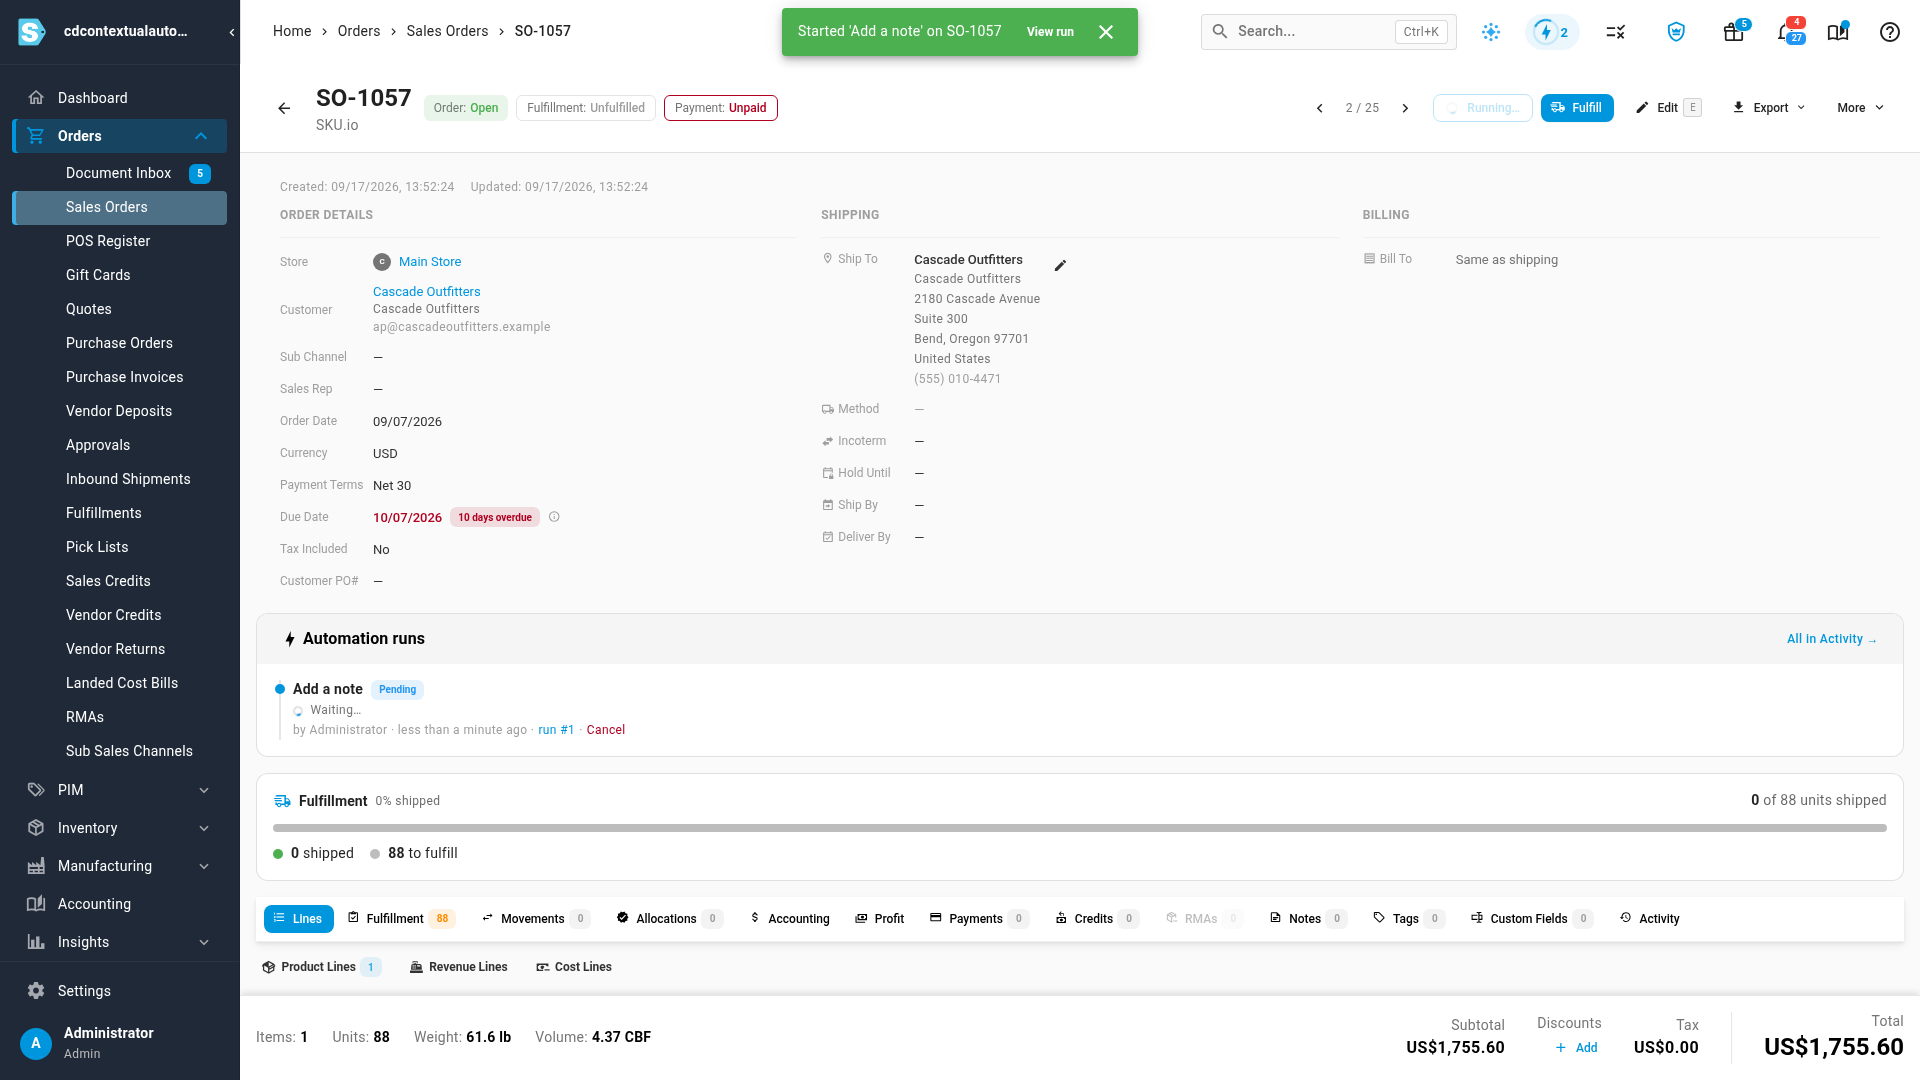
Answer the questions and click Run on 1 sales order. A message confirms the run started, and the run appears in the record's Automation runs card.
-
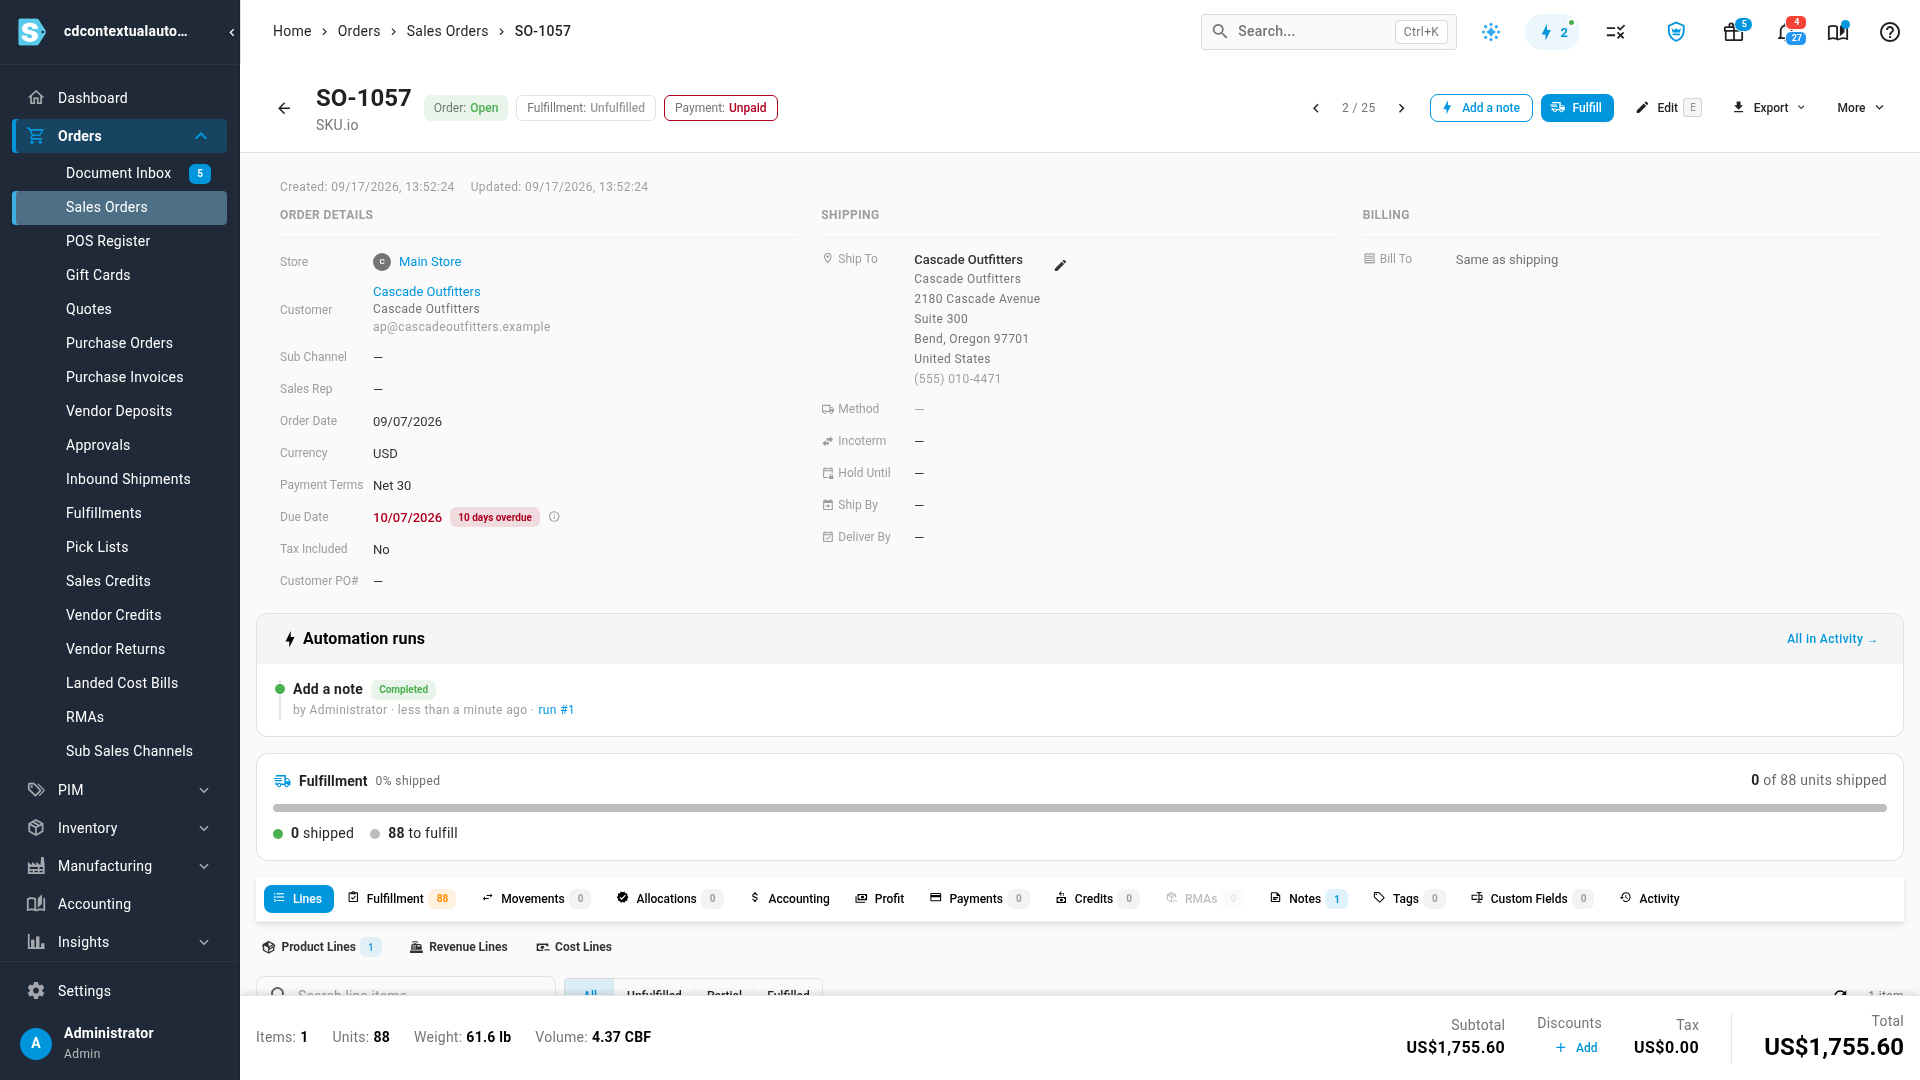
The card shows who started the run and its status. When it finishes, the change is on the record. Here, the note is on the order's Notes tab.
Use the record and the answers in your steps
Every step after the trigger can read what the trigger passes on:
| What | Expression |
|---|---|
| An answer to one of your inputs | {{ $trigger.inputs.<key> }}, such as {{ $trigger.inputs.note }} |
| A field of the record the run is on | {{ $trigger.record.<field> }} |
| The record's name or number | {{ $trigger.recordName }} |
| The name of the person who ran it | {{ $trigger.actor.name }} |
An input's Default can use the record too, such as {{ record.email }}, so the run dialog
opens with a sensible answer already filled in.
Input types:
| Type | The person sees |
|---|---|
| Text | A text box |
| Number | A number box |
| Boolean | A switch |
| Select | A list of the Options you enter. Tick Allow several to let them pick more than one. |
| Date | A date picker |
Show a result on the record
Add a Set Run Result step at the end to choose the line people see on the record when the run
finishes, such as Note added to {{ $trigger.recordName }}. Add a Link to point at what the
run produced, such as the record in another system. Without the step, the run shows its status
alone.
Test before you publish
In the trigger's settings, Test with record picks the record the builder's Execute workflow button runs on. It defaults to the newest record of that type. Testing runs the steps for real, so test an automation that changes records on a record you don't mind changing.
Next steps
- Run an automation on a record: the menu, header buttons, runs on several records, and following each run.
- Run a script or AI agent on your own machine: hand the work to a program on your computer or server.
- Build a workflow from scratch: more on adding and connecting steps.
Video transcript
To start, open Orders, then Sales Orders, and pick an order. Every record page has a lightning bolt at the top, next to the search box. Click it to open the Automate menu, which lists what you can run on this record. Nothing is set up here yet. To add one, click Create sales order automation. The workflow builder opens with the first step already in place. That first step is a Record Action trigger, set to run on sales orders. Double-click it to open its settings. Runs on sets the record type. Type a button label, like Add a note. This is the name people see in the menu. Then add a short description, which appears under the label. Who can run it limits the automation to certain roles. If you leave it empty, anyone with permission to run workflows can use the automation. Admins can always run every automation. Turn on Pin to the record header to show it as a button on every sales order. Next, scroll down to Ask for inputs, near the bottom of the panel. These are the questions people answer when they start a run. Click Add input to add one. Give it the key note, and the label Note. Then tick Required, so every run needs an answer. Close the panel. Now add the step that does the work. Click the plus after the trigger, and search the steps. Choose Add Note, and its settings open straight away. Set the note text to the trigger's note input. Whatever the person types is saved on the order. Close the panel again. Then click Publish, at the top right. The automation is now live on every sales order. Go back to Sales Orders, and open the same order. The new Add a note button now sits in the header. Click the Add a note button in the header. The dialog asks your question, so type an answer. Then click Run on 1 sales order. A message confirms that the run has started. Each run is listed under Automation runs, with its status and who started the run. When it completes, the note is on the order.