Map channel fields to SKU products
When SKU.io creates a product from a sales channel listing, it has to decide what goes where: which channel field becomes the product name, which one becomes the barcode, which one becomes the unit cost. Default Field Mappings is where you make that decision once, per connection, so every product created from that channel afterwards lands with the right values already in the right fields.
This mapping runs at creation time only — when a listing is auto-linked to a new SKU product, or when you bulk-create products from listings. It is not the ongoing sync. If you want channel edits to keep flowing into an existing product, that is content sync, which is configured separately and only governs eight fields.
Before you begin
- The channel must already be connected. See Connect a Shopify store or the setup guide for your channel.
- Run at least one product sync first. The mapping editor only offers channel fields SKU.io has actually seen on your listings, so an empty catalog gives you an empty list.
- You need access to the channel's Products or Listings page.
Saving a new mapping changes what happens to products created from now on. Products that already exist keep the values they were created with. To pull new values into existing products, use content sync instead.
Open the field mappings for a channel
- Go to Integrations and open the channel you want to configure.
- Open its Products (or Listings) page.
- If you have more than one store or account connected for this channel, make sure the right one is selected first. Mappings are saved per connection, not per channel, so two Shopify stores can map differently.
- Select Field Mappings.
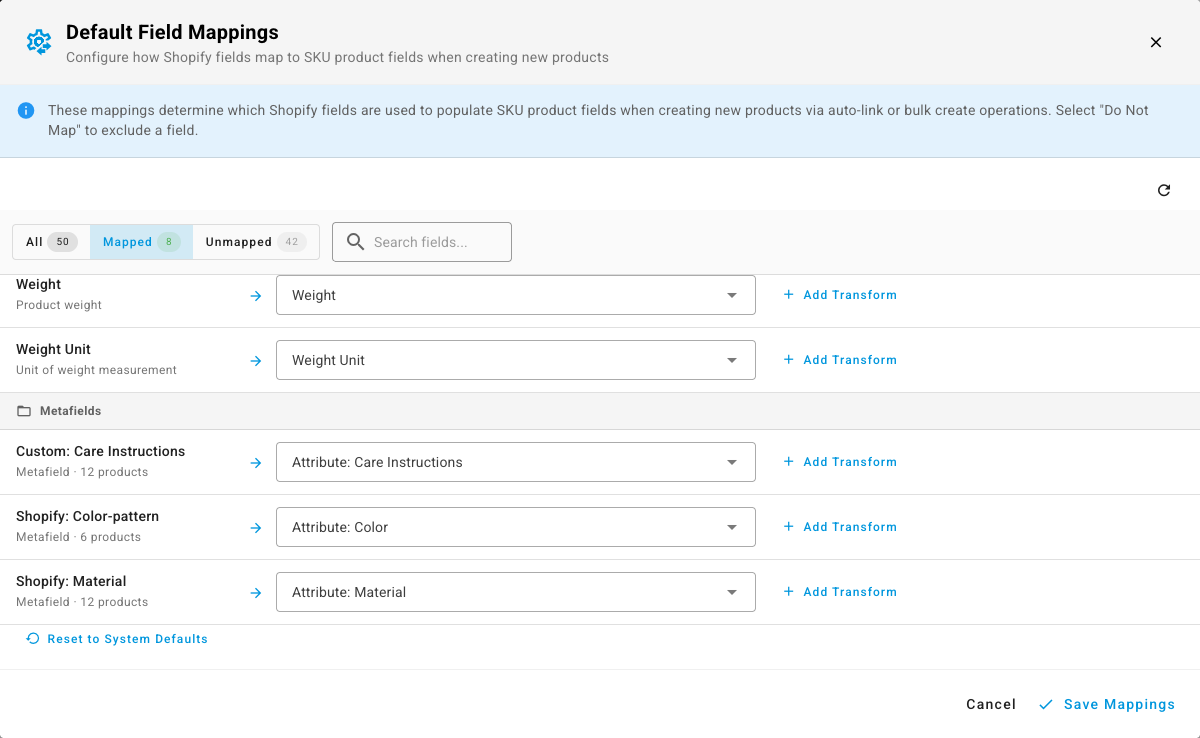
Read the editor
The modal lists every channel field SKU.io found, grouped by where it comes from, with the SKU product field it currently fills on the right.
| Control | What it does |
|---|---|
| All / Mapped / Unmapped | Filters the list. Each carries a count, so you can see at a glance how much of the channel you're actually using. |
| Search fields | Narrows the list by field name — the fastest way to find one attribute among hundreds. |
| Group headers | Group channel fields by origin: Basic Info, Variant Details, Pricing, Metafields, Custom Attributes, and so on. |
| The right-hand picker | The SKU product field this channel field fills. Its options are grouped too — Basic Info, Categorization, Media, Physical, Pricing, Product Attributes, Supplier. |
| Do Not Map | The empty state of the picker. A field left on Do Not Map is ignored entirely at creation. Clear a picker to put it back. |
To change a mapping, find the channel field on the left and choose a SKU field on the right. To stop using a channel field, clear its picker.
Switch to Unmapped after a first sync. That list is everything the channel is sending you that SKU.io is currently throwing away — usually where the useful merchandising data is hiding.
Map the channel's own attributes
Most channels carry a second vocabulary beyond their standard fields: attributes the merchant invented. These appear in the editor alongside the built-in fields, with a description telling you how many products carry them, so you can tell a real attribute from a one-off.
SKU.io discovers these from the products it has already synced — it doesn't ask the channel for a schema. An attribute that isn't on any recently synced product won't appear, and one that stops appearing is labelled as no longer seen rather than silently dropped.
Shopify: metafields
Shopify metafields show up in a Metafields group, named by their namespace and key —
custom.care_instructions is shown as Custom: Care Instructions, shopify.material
as Shopify: Material. Each is annotated with the number of products carrying it.
Typical mappings:
- Custom: Care Instructions → a Care Instructions product attribute
- Shopify: Material → a Material product attribute
- Custom: Country Of Origin → a Country of Origin product attribute
Anything Shopify-app-generated — review counts, Google Shopping category, marketing labels — is usually best left on Do Not Map.
Magento 1: custom product attributes
Magento 1 custom attributes appear in a Custom Attributes group, titled from their
attribute code — country_of_manufacture becomes Country Of Manufacture,
warranty_months becomes Warranty Months — with a product count next to each.
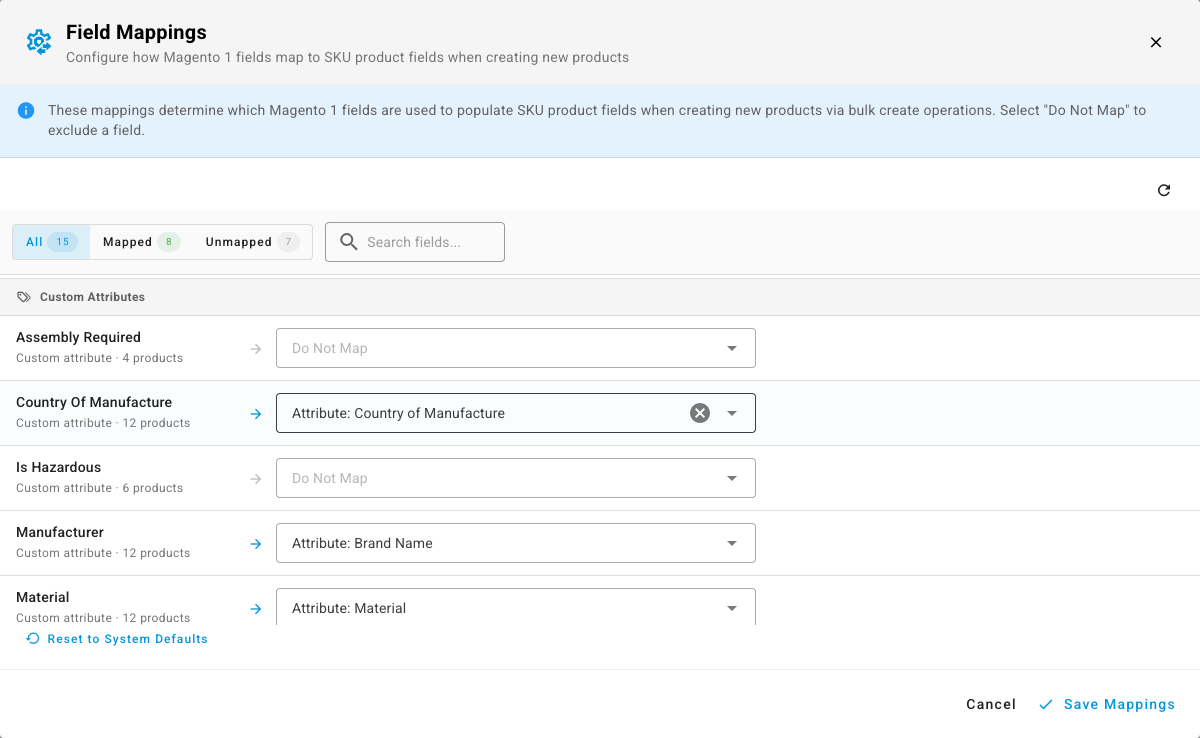
On Magento 1 the right-hand picker offers Product Name, SKU, the physical dimensions and weight, price and unit cost, pricing tiers, product attributes and supplier fields. It does not offer Brand, Barcode, MPN, Description or Weight Unit. If you need a Magento 1 attribute to land in one of those, map it to a product attribute instead, or set the value in SKU.io directly.
Magento 2: custom attributes
Magento 2 custom attributes also appear in a Custom Attributes group, and the same product-count annotation applies.
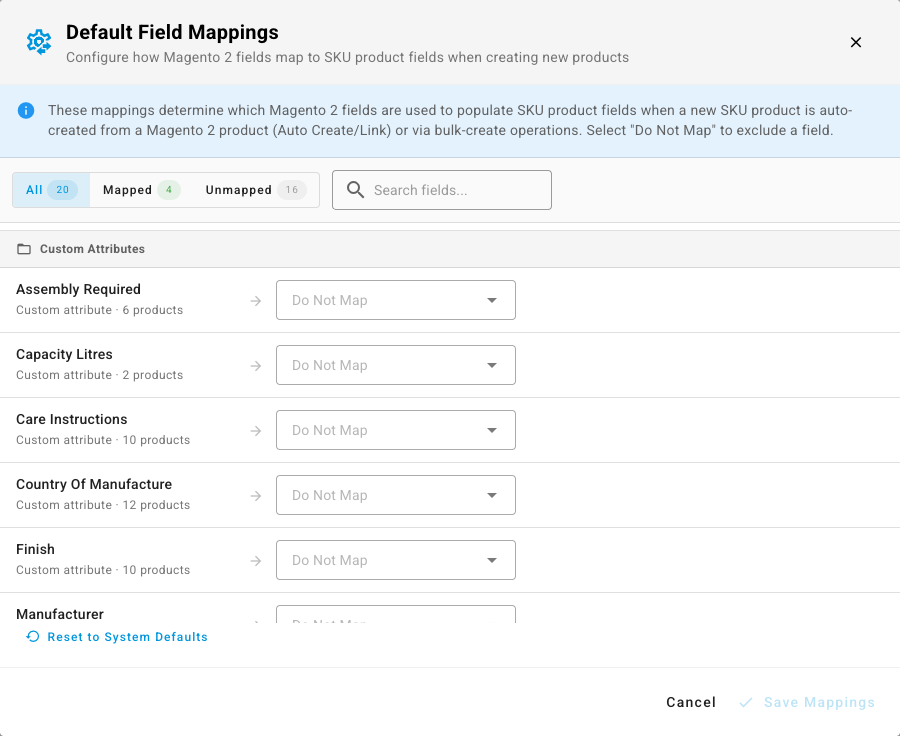
Magento 2 mappings can only target fields SKU.io can safely write on creation: Barcode, MPN, Product Name, SKU, the six physical fields (weight, weight unit, length, width, height, dimension unit) and Unit Cost. Plausible-looking targets such as Description or Brand are not offered, because they would be silently discarded rather than saved.
Magento 2 custom attributes feed this modal only. They are not available in content sync's Channel Attributes panel, so a Magento 2 custom attribute cannot be watched for drift after the product exists. Shopify metafields and Magento 1 custom attributes can be.
Clean up values as they import
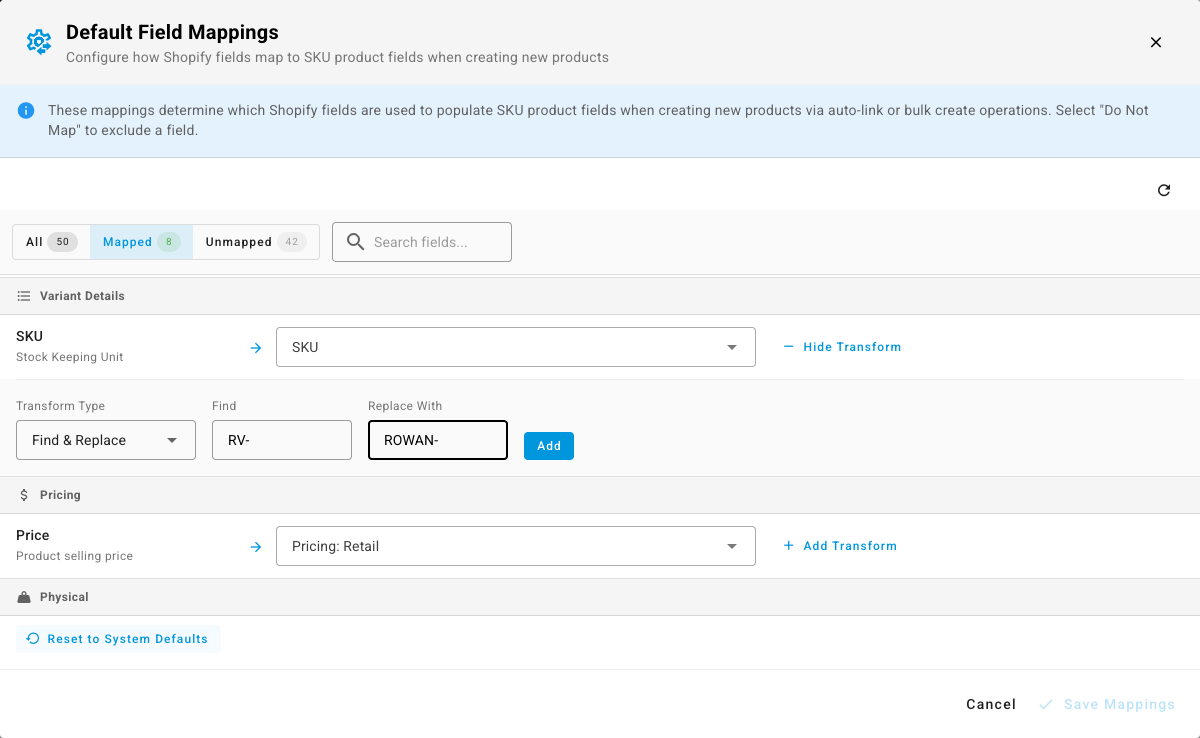
Some channels let you reshape a value on its way in, so you don't have to fix it in SKU.io afterwards — stripping a channel-specific SKU prefix, trimming a trailing size code, joining two fields into one. Where transforms are available, every row that already has a SKU field selected carries an Add Transform link.
-
Select Add Transform on the row you want to change.
-
Pick a Transform Type:
Transform What it does Remove Text Deletes every occurrence of the text you enter. Find & Replace Replaces every occurrence of one string with another. Leave Replace With empty and it deletes instead. Remove from Beginning Drops a fixed number of characters from the start of the value. Remove from End Drops a fixed number of characters from the end of the value. Append Field Joins another channel field onto the end of this one, with an optional Separator. -
Fill in the inputs. The Add button stays disabled until the transform is complete — hover it and a tooltip tells you what's missing.
-
Select Add. The transform appears as a chip on the row.
You can stack more than one transform on a field; they run in the order you added them. Remove one by selecting the × on its chip.
Transforms are available on Amazon, BigCommerce, eBay, Shopify, TikTok Shop, Walmart and WooCommerce. Magento 1, Magento 2, Faire and Temu map fields straight across with no transform step.
Save your mappings
- Save Mappings stores the mapping set against this connection. It stays disabled until you've actually changed something.
- Reset to System Defaults puts every row back to the mapping SKU.io ships for that channel. It doesn't save on its own — you still have to select Save Mappings.
- Cancel discards your edits.
If a channel field in your mapping set is no longer available on the store — an attribute that was deleted, or a field the store never had — SKU.io saves the rest and warns you how many mappings it skipped. Re-open the modal to see which rows survived.
What happens next
The saved mapping is applied whenever a SKU product is created from this connection:
- when a listing is auto-created and linked to a new product, and
- when you bulk-create products from selected listings.
It is not applied to products that already exist, and it does not run on every sync.
Keep values up to date after creation
Field mappings are a one-time hand-off. Once the product exists, the channel and SKU.io can drift apart — someone edits the title in Shopify, someone edits it in SKU.io, and neither knows about the other. Content sync is the surface that watches for that, shows you what changed, and lets you accept or ignore it. It has its own channel attribute mapping, which is where Shopify metafields and Magento 1 custom attributes go if you want them monitored rather than just imported once.
Next steps
- Review and apply channel content changes — keep mapped values current after the product exists.
- Browse your product listings — see which listings are linked to which products.
- Manage a connected app — control what each connection syncs.