Set up B2B pricing for Shopify
If you sell wholesale through Shopify's B2B features, SKU.io can publish each buyer's own prices to their company location — the same prices your tiers, contracts and volume breaks already produce for quotes and invoices. Your buyers log into your storefront as usual and see their negotiated pricing.
Nothing reaches your storefront until you approve a preview first.
Before you begin
- B2B is switched on in your Shopify store, and you have at least one company with a location. SKU.io adopts the companies you already have — it never creates them.
- Your products are listed on that store, so there are items to price.
- Your wholesale customers have a pricing tier in SKU.io. A customer with no tier resolves to no price, and their location keeps its retail pricing.
How buyers are grouped
Buyers whose prices work out identical share one Shopify catalog. If two customers are on the same tier with the same terms, they land in the same group and SKU.io publishes one catalog for both.
This matters because Shopify limits how many catalogs a store can have. Grouping means that limit tracks how many distinct price lists you run, not how many customers you have — a hundred buyers on standard wholesale terms need one catalog, not a hundred.
Steps
-
Go to Apps & Integrations, open your Shopify store, then the B2B Pricing tab.
-
Open Setup. Step 1, Connect & check, reports your plan, the permissions SKU.io has, and how many catalog slots the store has left.
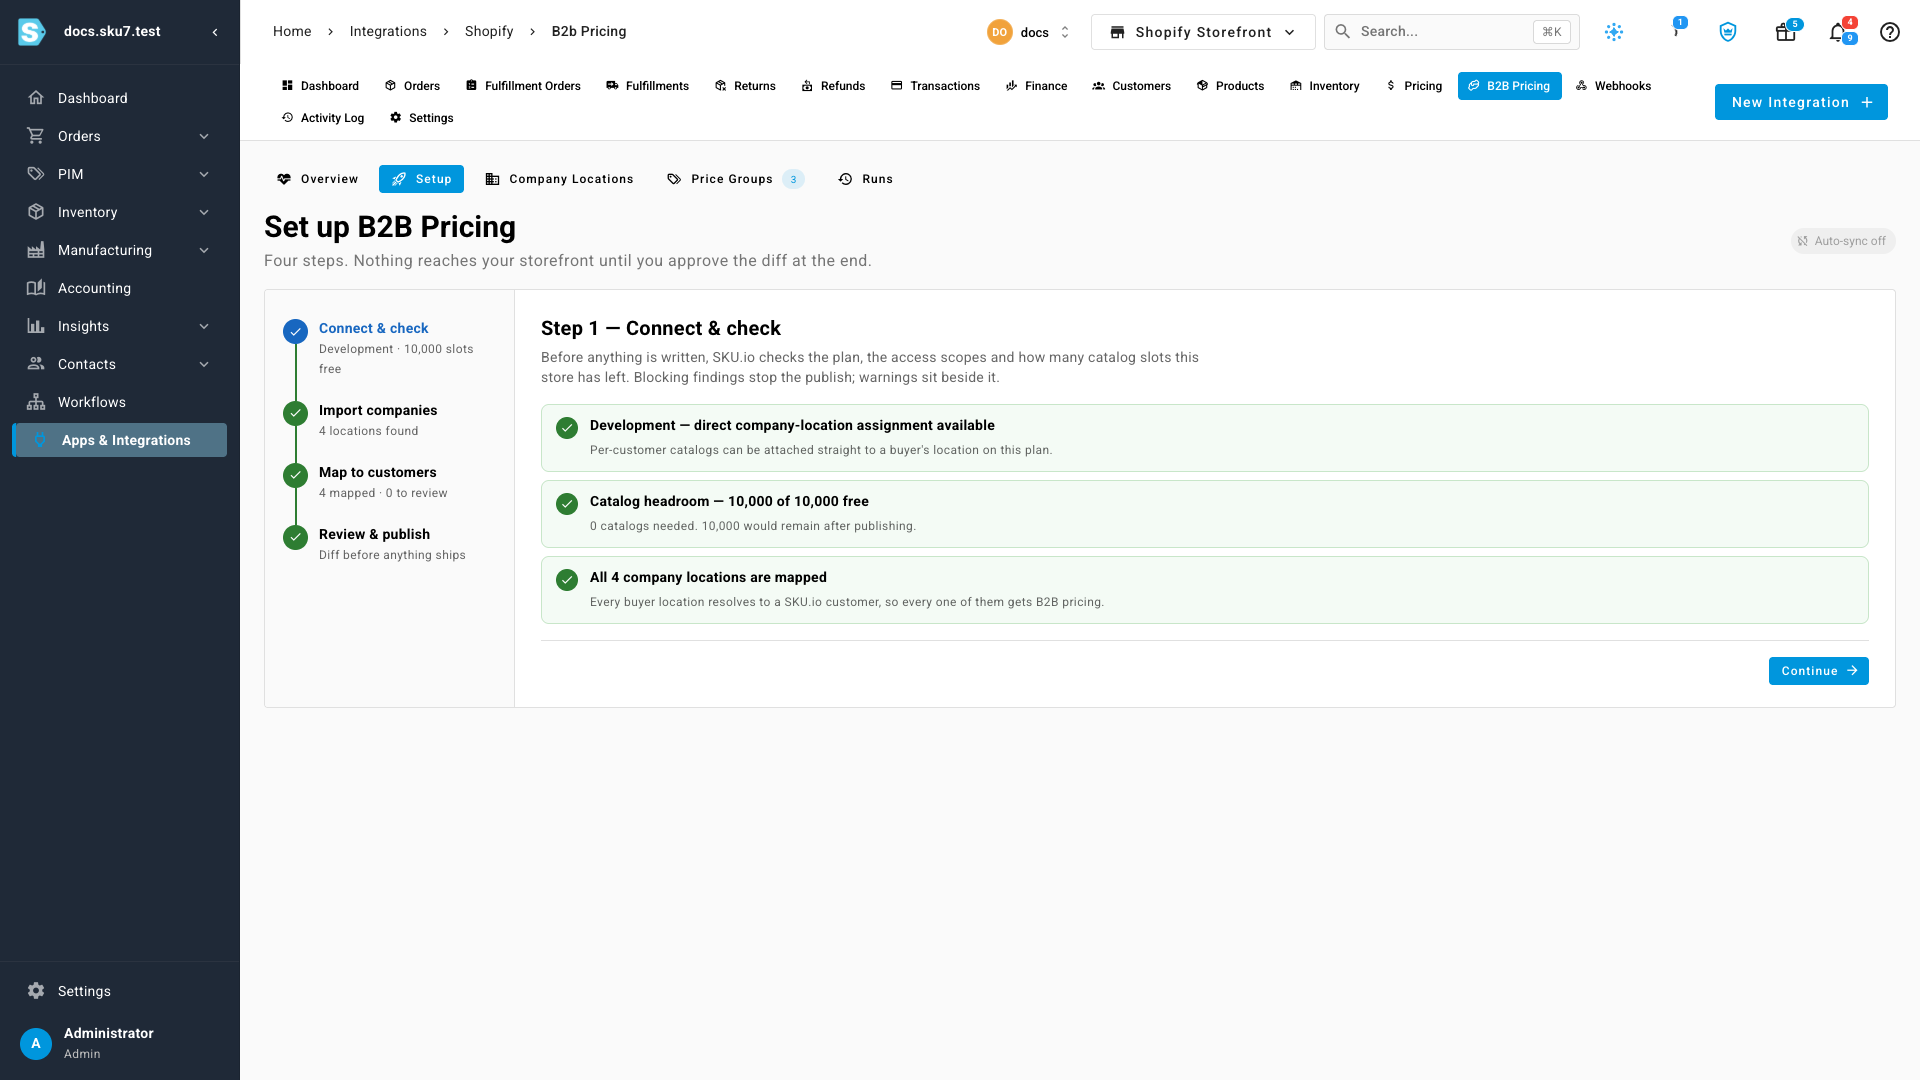
Findings marked Blocks publish stop the publish until you resolve them. Findings marked Warning only sit beside it for information. Before your first publish you will always see one blocking item asking you to preview the changes — that one clears itself once you have run the preview in step 4.
-
Click Continue. Step 2, Import your Shopify companies, pulls in the companies and locations the store already has.
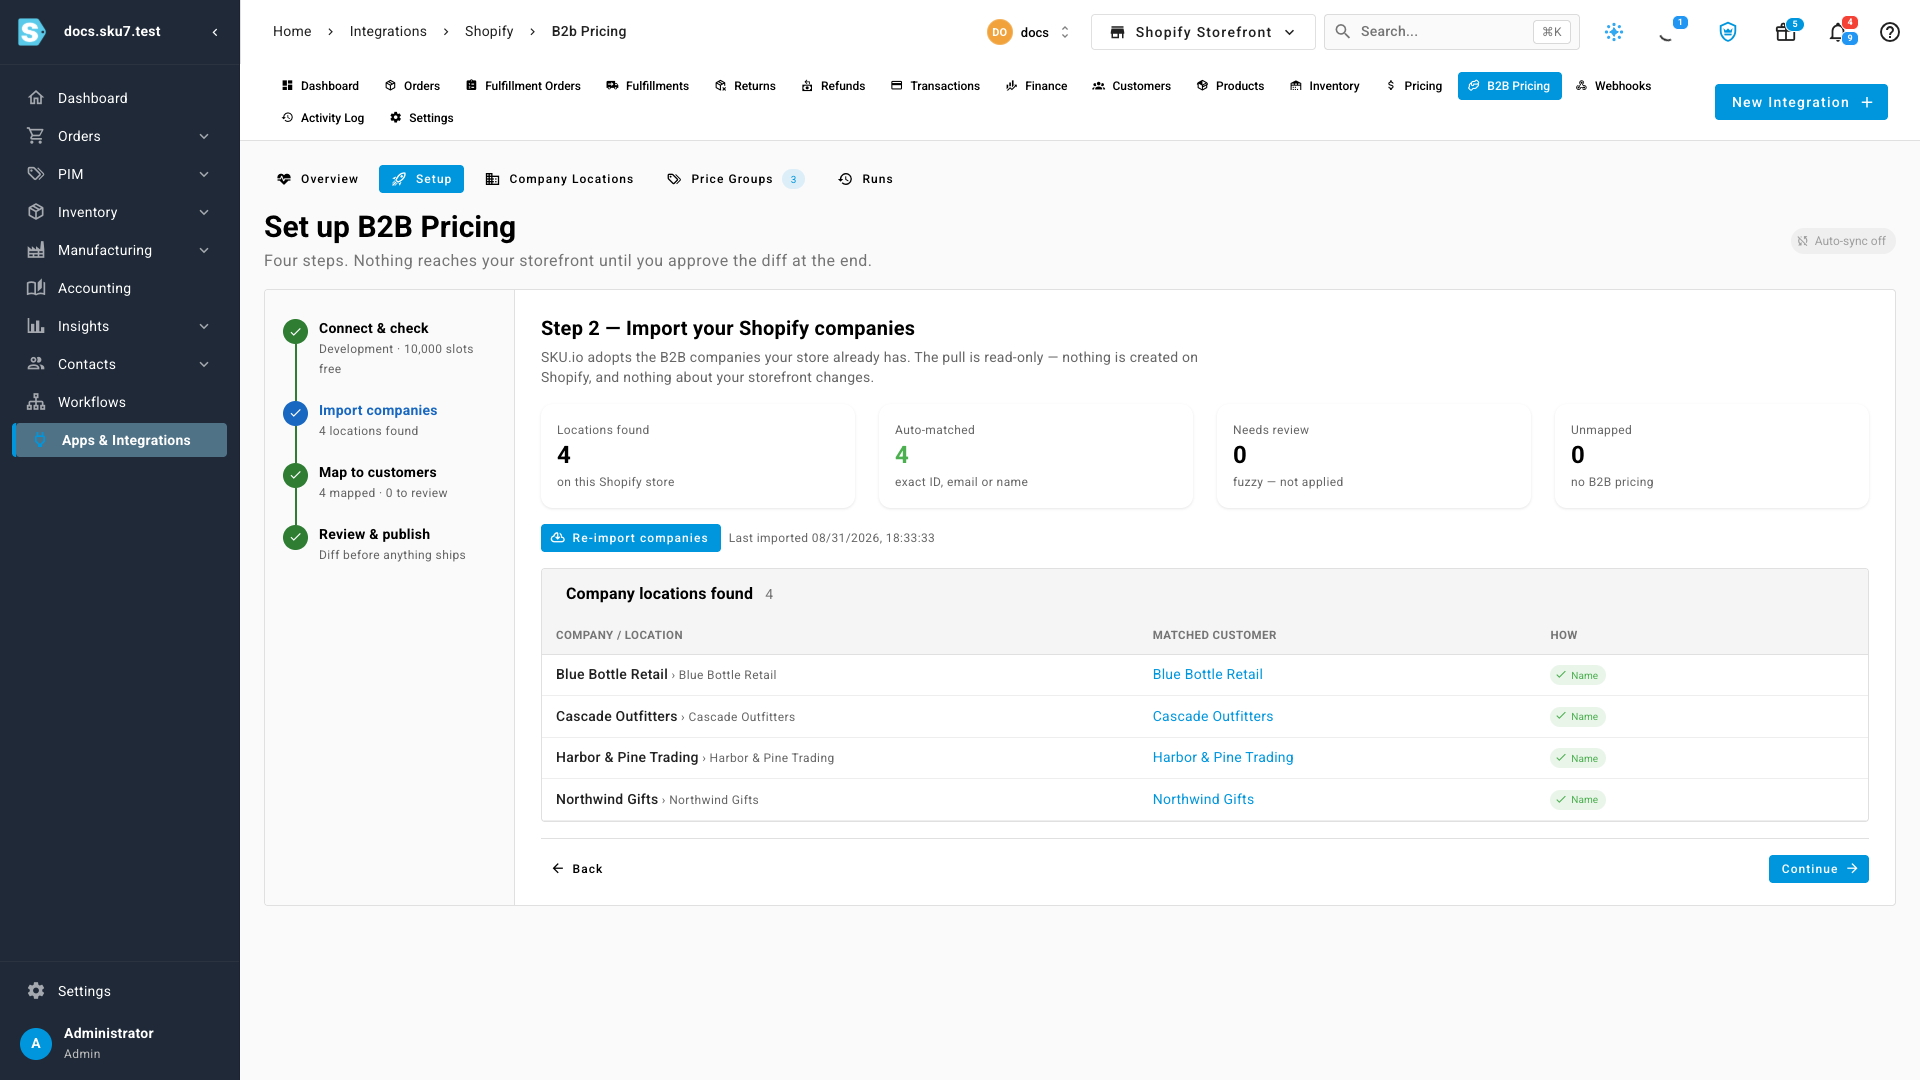
This reads only. Nothing is created on Shopify and your storefront doesn't change. Use Re-import companies whenever you add a buyer in Shopify.
-
Click Continue. Step 3, Map Shopify locations to SKU.io customers, is where each buyer location is tied to the customer whose pricing it should use.
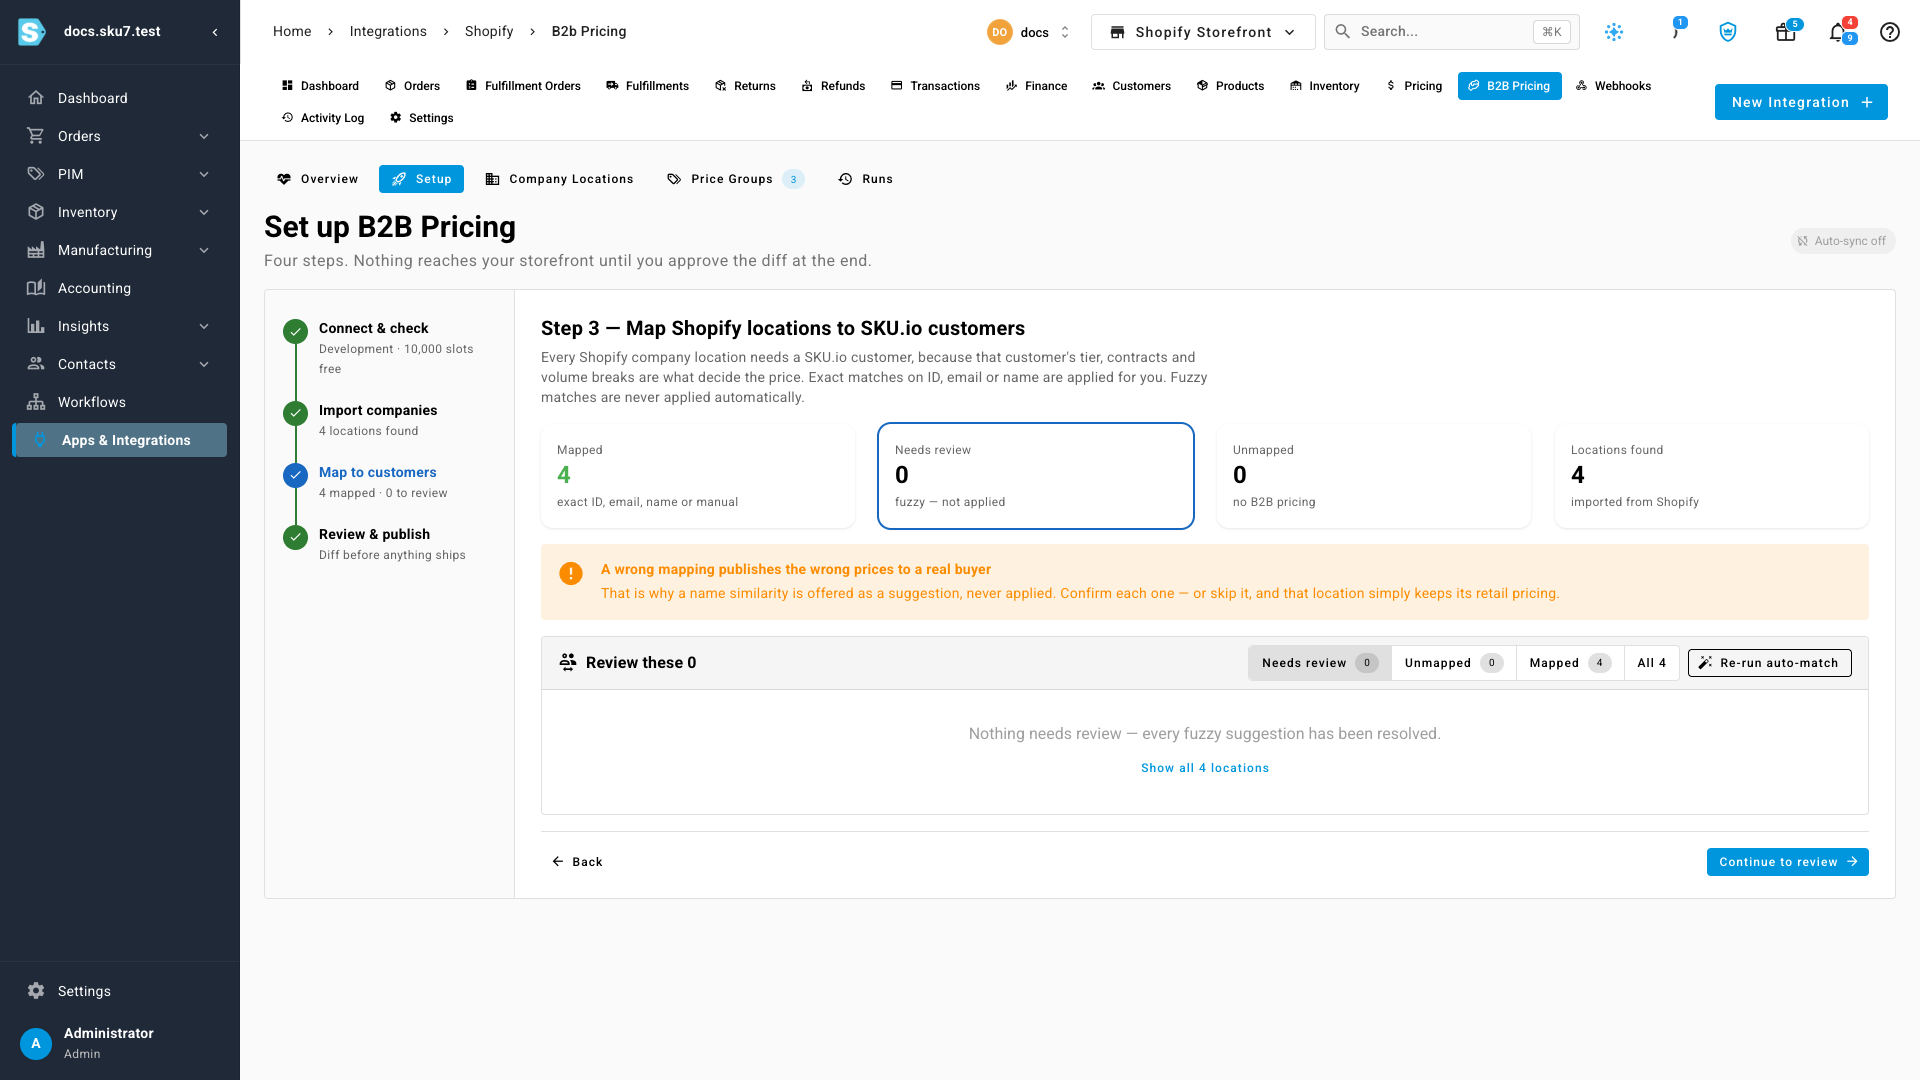
An exact match on customer ID, email or name is applied for you. A close-but-not- certain match is offered as a suggestion and waits for you to confirm it — a wrong mapping publishes the wrong prices to a real buyer, so SKU.io never guesses.
A location you leave unmapped simply keeps its current Shopify pricing.
-
Click Continue to review. Step 4 shows exactly what each buyer will be charged.
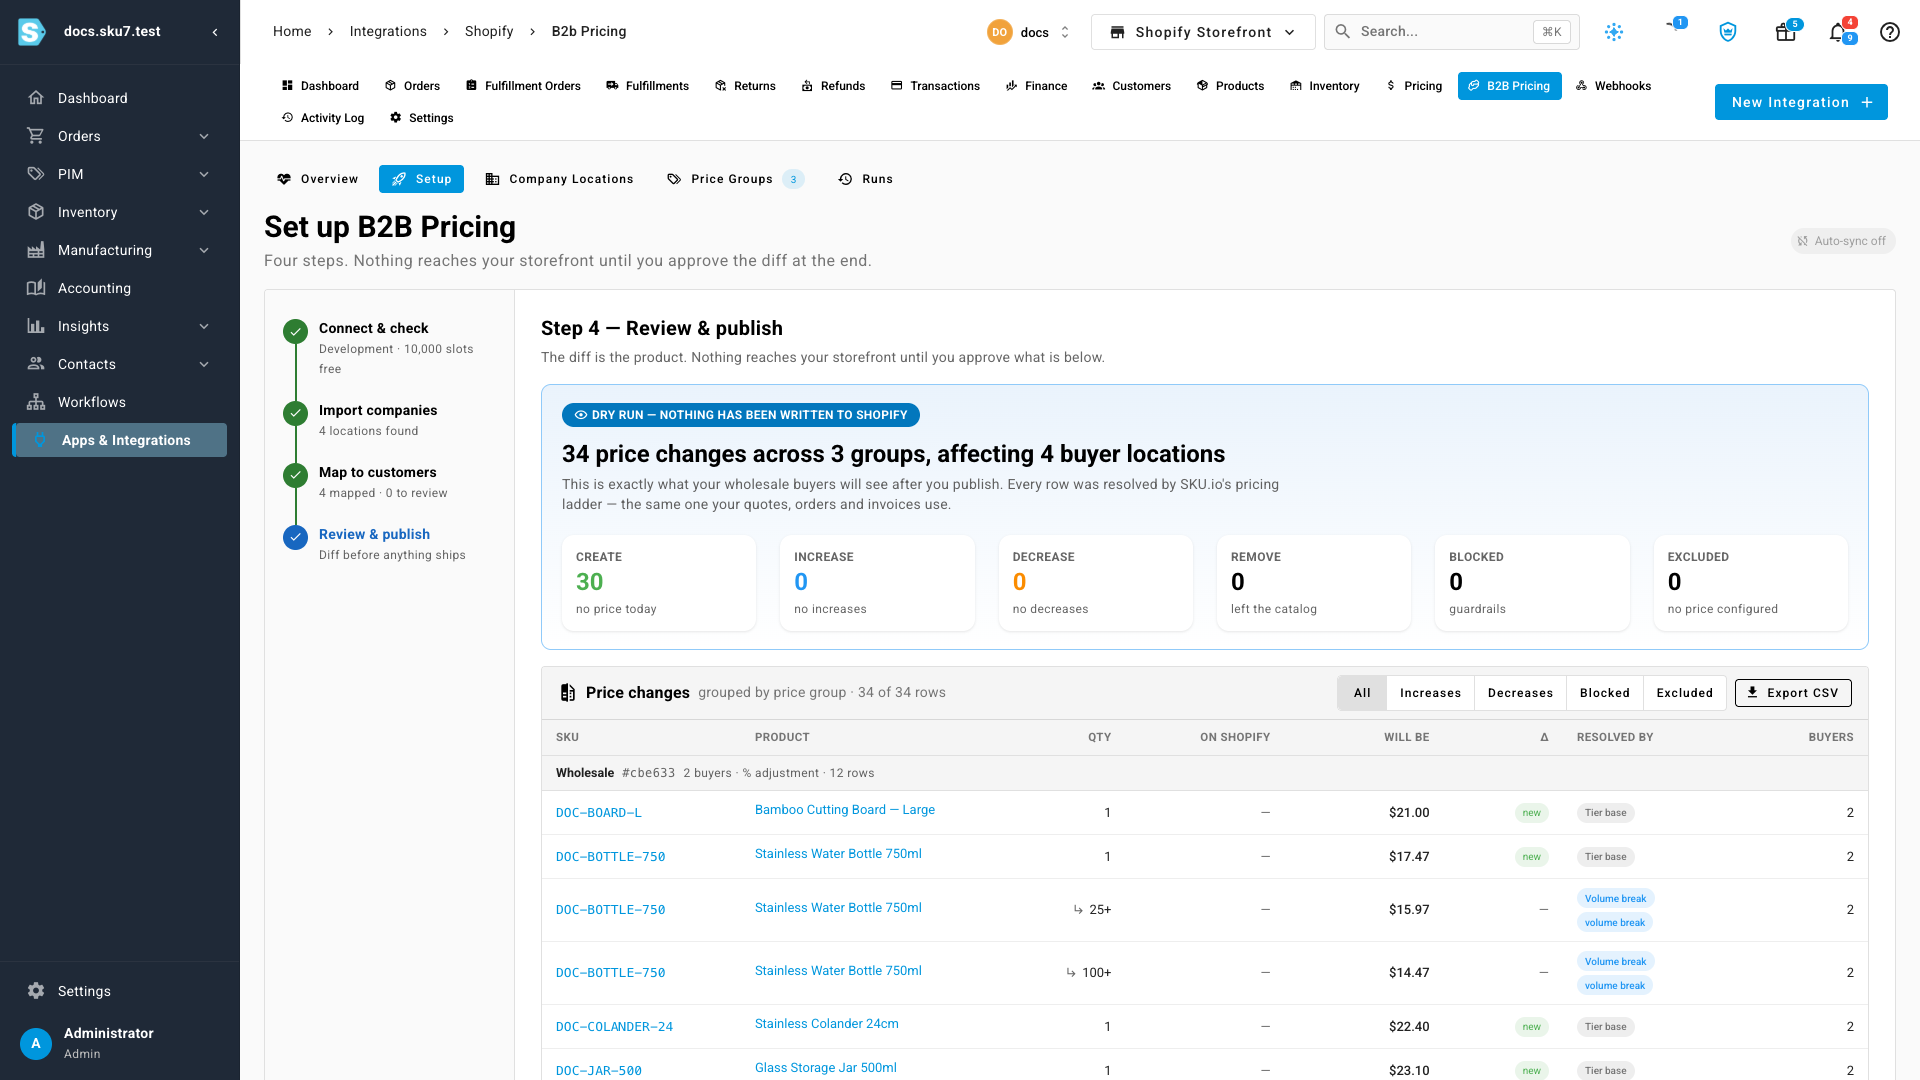
Read this screen before publishing — it is the point of the whole flow. Each row shows the product, the quantity the price applies from, what Shopify has today, what it will become, and under Resolved by, which of your pricing rules produced it: a tier's base price, a volume break, or a contract.
The counters across the top summarise the run: how many prices will be created, increased, decreased or removed, plus anything Blocked by a price guardrail or Excluded because no price is configured for it.
-
Click Run the dry run. This writes nothing — it records that you have previewed the changes, which is what unlocks the first real publish.
-
Click Publish. SKU.io creates a catalog per price group, writes the prices, and attaches each catalog to its buyer's location.
-
Go back to Overview to confirm the result.
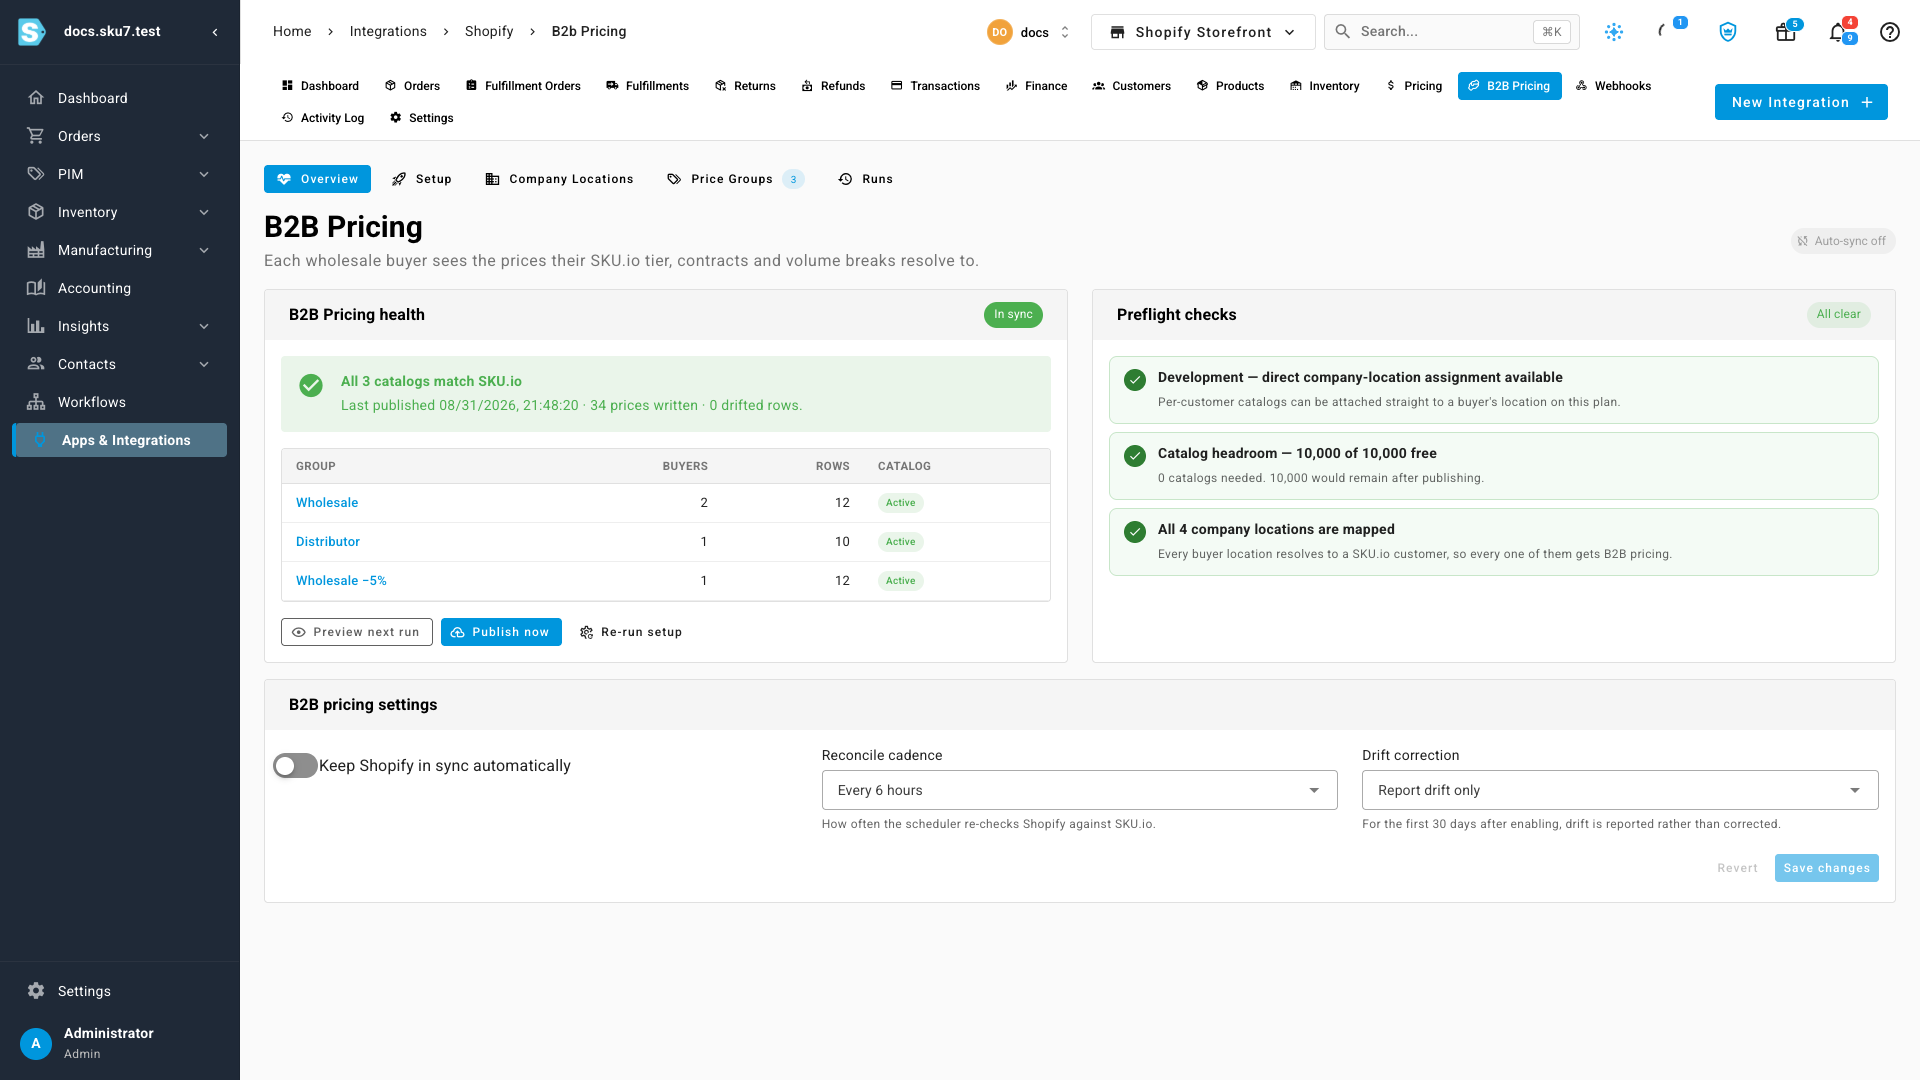
In sync means every catalog on Shopify matches what SKU.io holds. The table lists each group with how many buyers it covers and how many rows it publishes.
Keeping prices up to date
By default nothing republishes on its own — use Publish now when you want to push changes.
To keep Shopify in step automatically, turn on Keep Shopify in sync automatically under B2B pricing settings. Two settings shape what that does:
- Reconcile cadence — how often SKU.io re-checks Shopify against your prices.
- Drift correction — whether a difference found on Shopify is reported to you or corrected automatically. For the first 30 days after you switch syncing on, drift is reported rather than corrected, so you can see what would change before it does.
What this does not cover yet
- Removing a volume break. Adding or changing a break rung publishes normally, but removing one in SKU.io doesn't remove it from Shopify. Remove it on the store as well.
- Hiding products. B2B pricing sets what a buyer pays. It doesn't control which products a buyer can see — a product with no wholesale price stays visible at its retail price rather than disappearing.
Next steps
Video transcript
Your trade customers can see their own prices on your storefront, instead of your retail price list. In the sidebar, open Apps and Integrations. Choose the store that serves those buyers. Then open its B2B Pricing tab. You land on the health panel. Step one checks the store before anything is written. It reports your plan, the permissions SKU.io has, and how many catalog slots are left on the plan. Step two brings in the companies your store already has. Nothing is created on Shopify, and your storefront does not change. Each location needs a SKU.io customer, because that customer's tier and volume breaks decide the price. Exact matches on name, email or ID are applied automatically. Anything less certain waits for your confirmation. This next screen is the whole point of the flow. Before anything is written, you see every price each buyer will get, along with the rule that produced that price. Notice the first group covers two customers, because they are on identical terms. Publishing writes the prices, and attaches each catalog to its buyer. From then on, the health panel tells you whether the store still matches SKU.io. It also shows what changed on the most recent run.