Share a dashboard with your team
A dashboard doesn't have to stay personal. You can add panels to it by asking a question in plain words, share it with the whole workspace or with chosen people and roles, and export it as a PNG image or a PDF to send to someone outside SKU.io. Everyone who opens a shared dashboard sees the same layout, filled with the data their own permissions allow.
Before you begin
- You can share, rename and delete only the dashboards you own. To build your own, see Customize your dashboard.
- Ask for a panel uses the AI Assistant. It needs the AI Assistant turned on in Settings → AI Assistant, and your role needs permission to use AI. When it's off, the button is greyed out and its tooltip links to the setting.
- Panels that show money (revenue, stock value, payables) need the Financials → List permission, for you and for everyone you share with.
Ask for a panel
When none of the ready-made widgets answers your question, ask for a panel instead.
- On the dashboard, click Customize.
- Click Ask for a panel.
- Under What do you want to see?, type your question the way you'd ask a colleague, for example Number of purchase orders per supplier. You can also click one of the examples under Try one of these.
- Click Ask. SKU builds the panel from your own data in a few seconds. It only reads your data and never changes anything.
- Check the preview. It shows the panel exactly as it will look on the dashboard.
- Title: change the wording if you like.
- Show as: switch between the chart types that suit the data, such as Bar, Ranked list, Pie or Table.
- The note under the preview explains what the panel counts.
- Refine: type a follow-up, such as only Acme Supplies, and click Refine to adjust the panel without starting over.
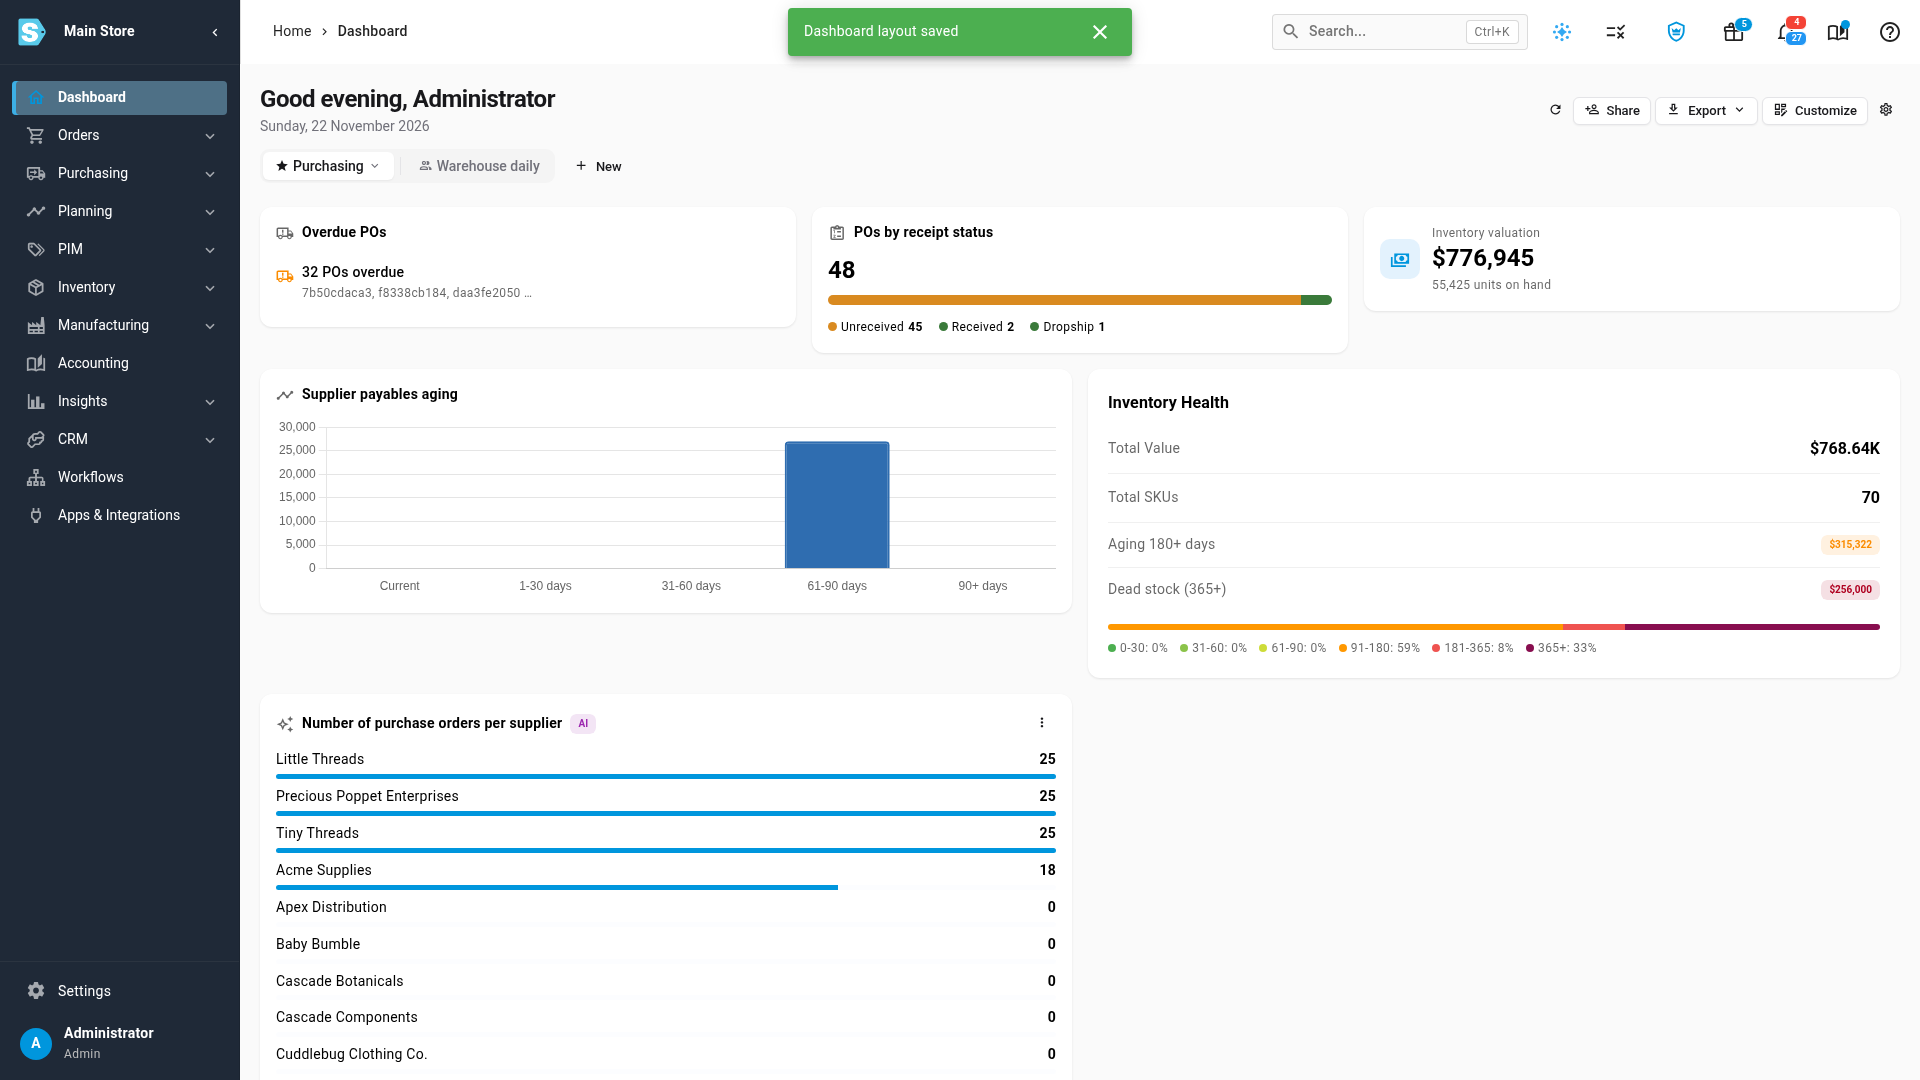
- Click Add to dashboard. The panel lands at the end of the layout with an AI label.
- Click Save to finish customizing.
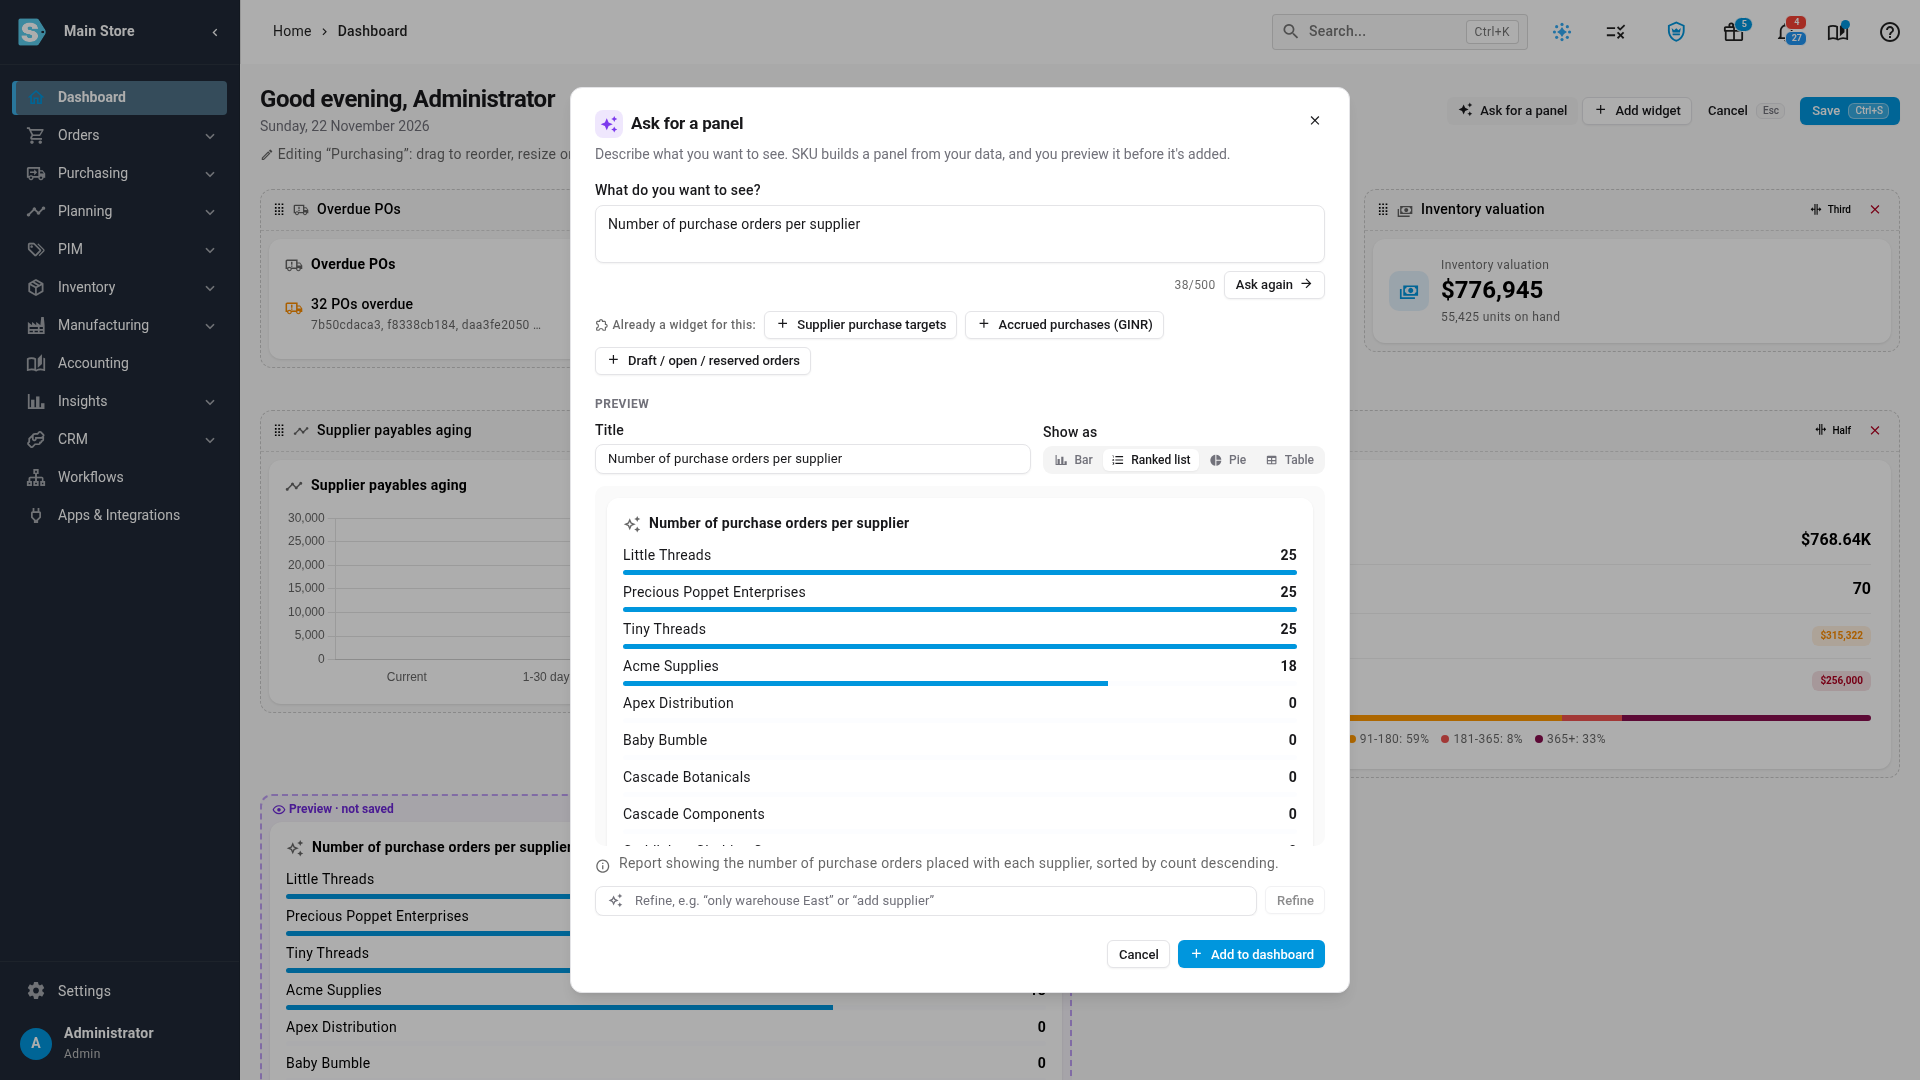
While you type, Already a widget for this lists ready-made widgets that cover the same question. Click one to add it instead: ready-made widgets are tuned for their job and need no AI.
If SKU can't build a panel from your question, it says why and nothing is saved. Click Try rephrasing and ask again with different words, or start from one of the examples. If the panel would show data your permissions don't cover, such as money amounts without Financials → List, the preview tells you which permission it needs.
Change an asked-for panel later
Open the panel's ⋮ menu on the dashboard:
- Edit question reopens the dialog with your earlier question, so you can refine it. Saving replaces the panel.
- Show as bar, Show as ranked list, Show as pie, Show as table (whichever suit the data) switch the chart type.
- Open as custom report creates a private custom report from the panel, so you can see every row and export the data as a file.
Share the dashboard
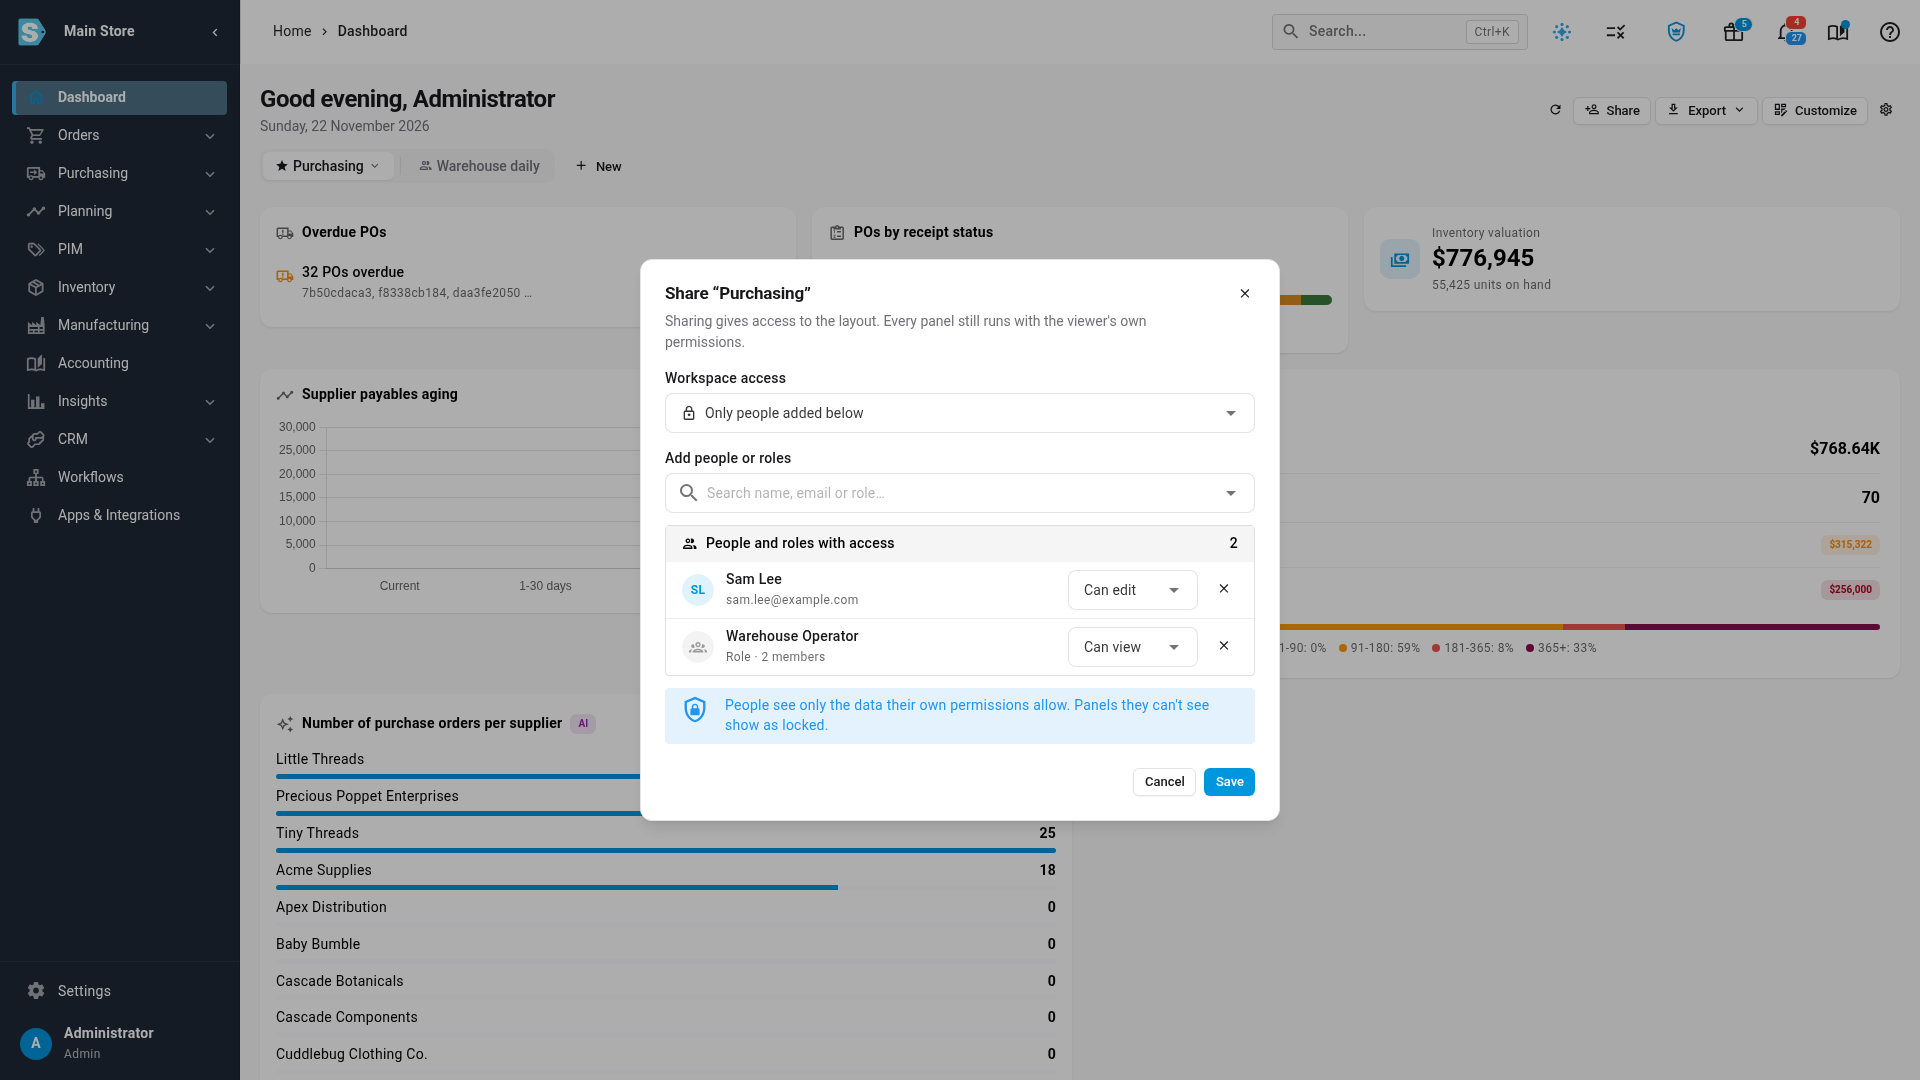
- Open the dashboard you want to share and click Share.
- Under Workspace access, choose who gets access without being added by name:
- Only people added below: only you and the people and roles you add.
- Everyone in the workspace can view
- Everyone in the workspace can edit
- Under Add people or roles, type a name, email address or role, and pick it from the list. People and roles are listed separately. A role shows how many members it has.
- Set each person or role to Can view or Can edit.
- Click Save.
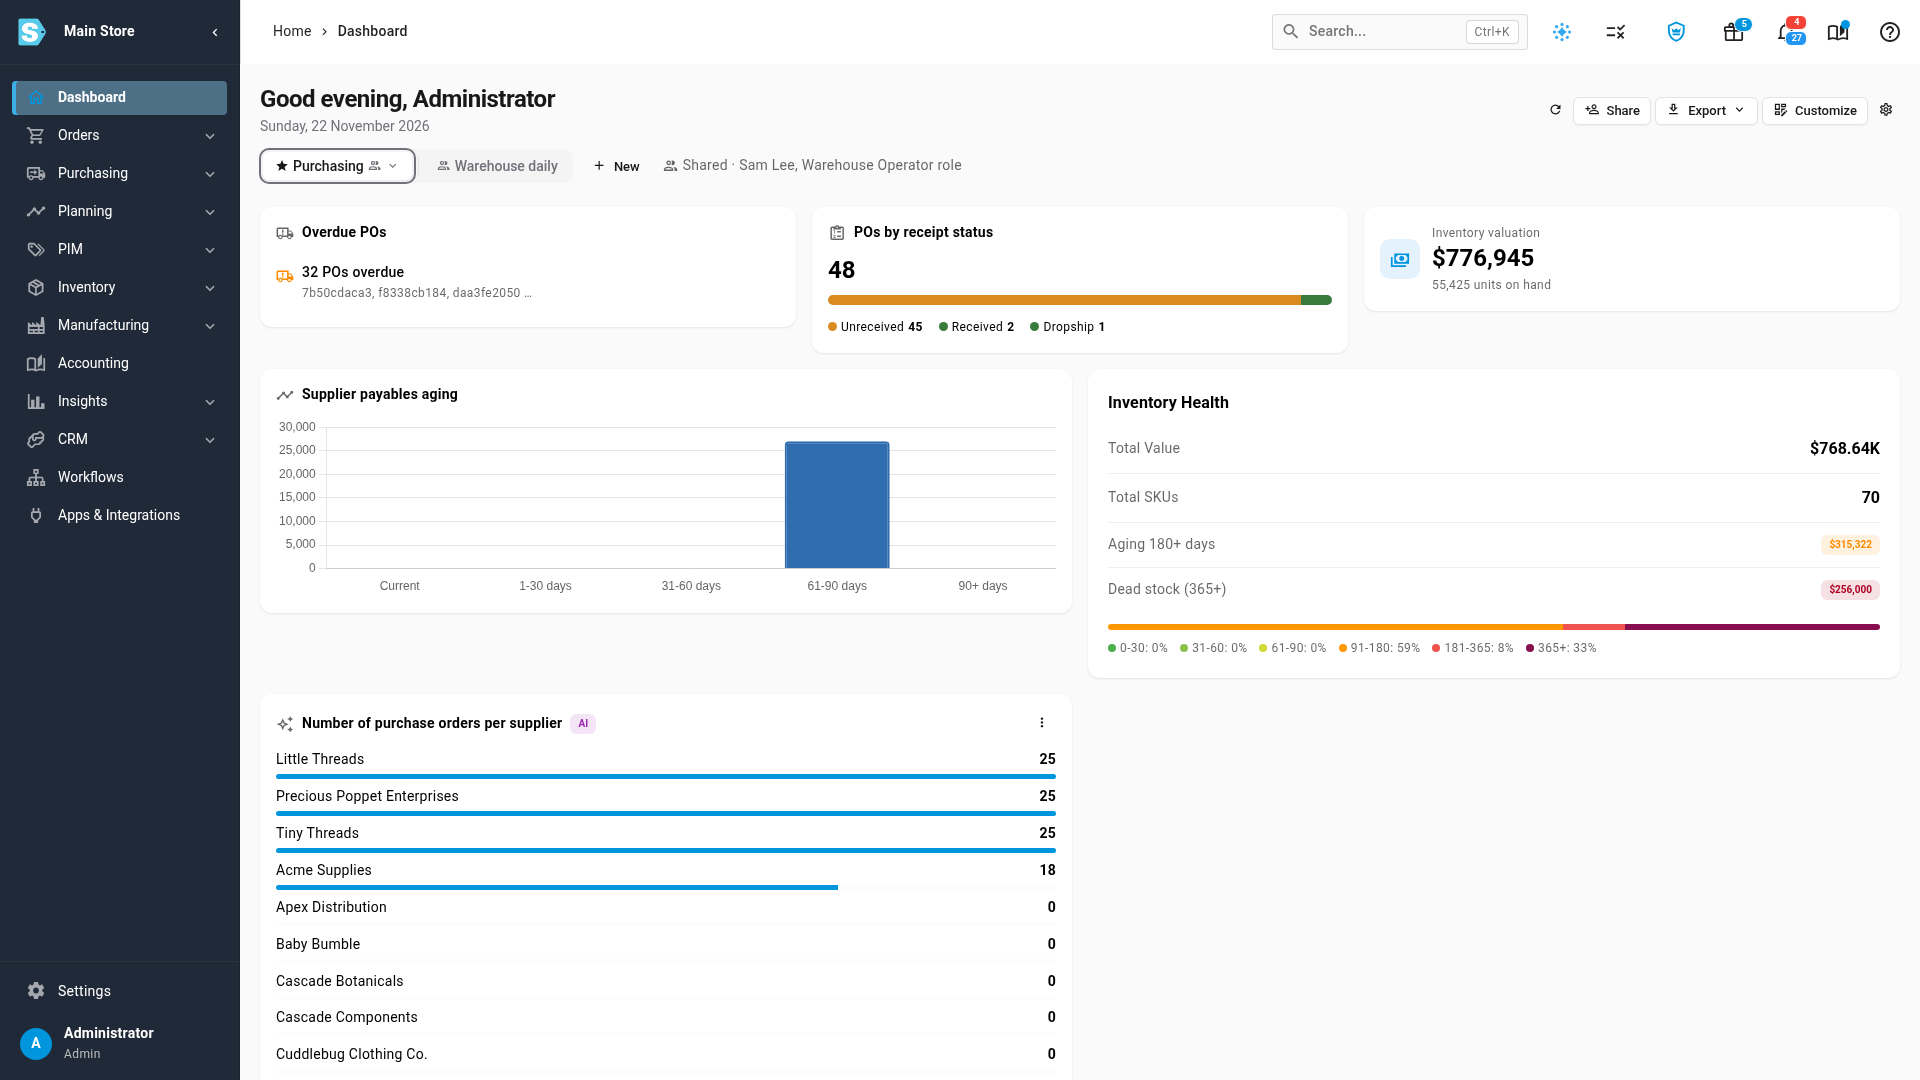
The line next to the dashboard tabs now shows who has access, for example Shared · Sam Lee, Warehouse Operator role. To stop sharing, open Share again, remove the person or role with × (or set Workspace access back to Only people added below) and click Save. The change applies the next time they load the dashboard.
Sharing with a role covers everyone who holds the role, including people who join it later. When someone gets access more than one way, for example through the workspace and through a role, the higher access wins.
What each access level allows
| Action | Owner | Can edit | Can view |
|---|---|---|---|
| View the dashboard, change its date range, export it | ✓ | ✓ | ✓ |
| Make it your default dashboard | ✓ | ✓ | ✓ |
| Copy it into your own dashboards | ✓ | ✓ | ✓ |
| Add, remove, resize and reorder panels; ask for a panel; rename it | ✓ | ✓ | |
| Share it or delete it | ✓ |
Making a shared dashboard your default only changes what opens for you. It never changes the owner's default.
Everyone sees only their own data
Sharing gives access to the layout, never to data. Each panel runs with the permissions of the person looking at it:
- A panel the viewer isn't allowed to see shows as a locked card with its title and the permission it needs, such as Financials → List. Its data is never sent to them.
- Someone who can edit a shared dashboard but can't see one of its panels can't remove that panel by accident: saving the layout keeps it.
- An export contains only what the person exporting can see.
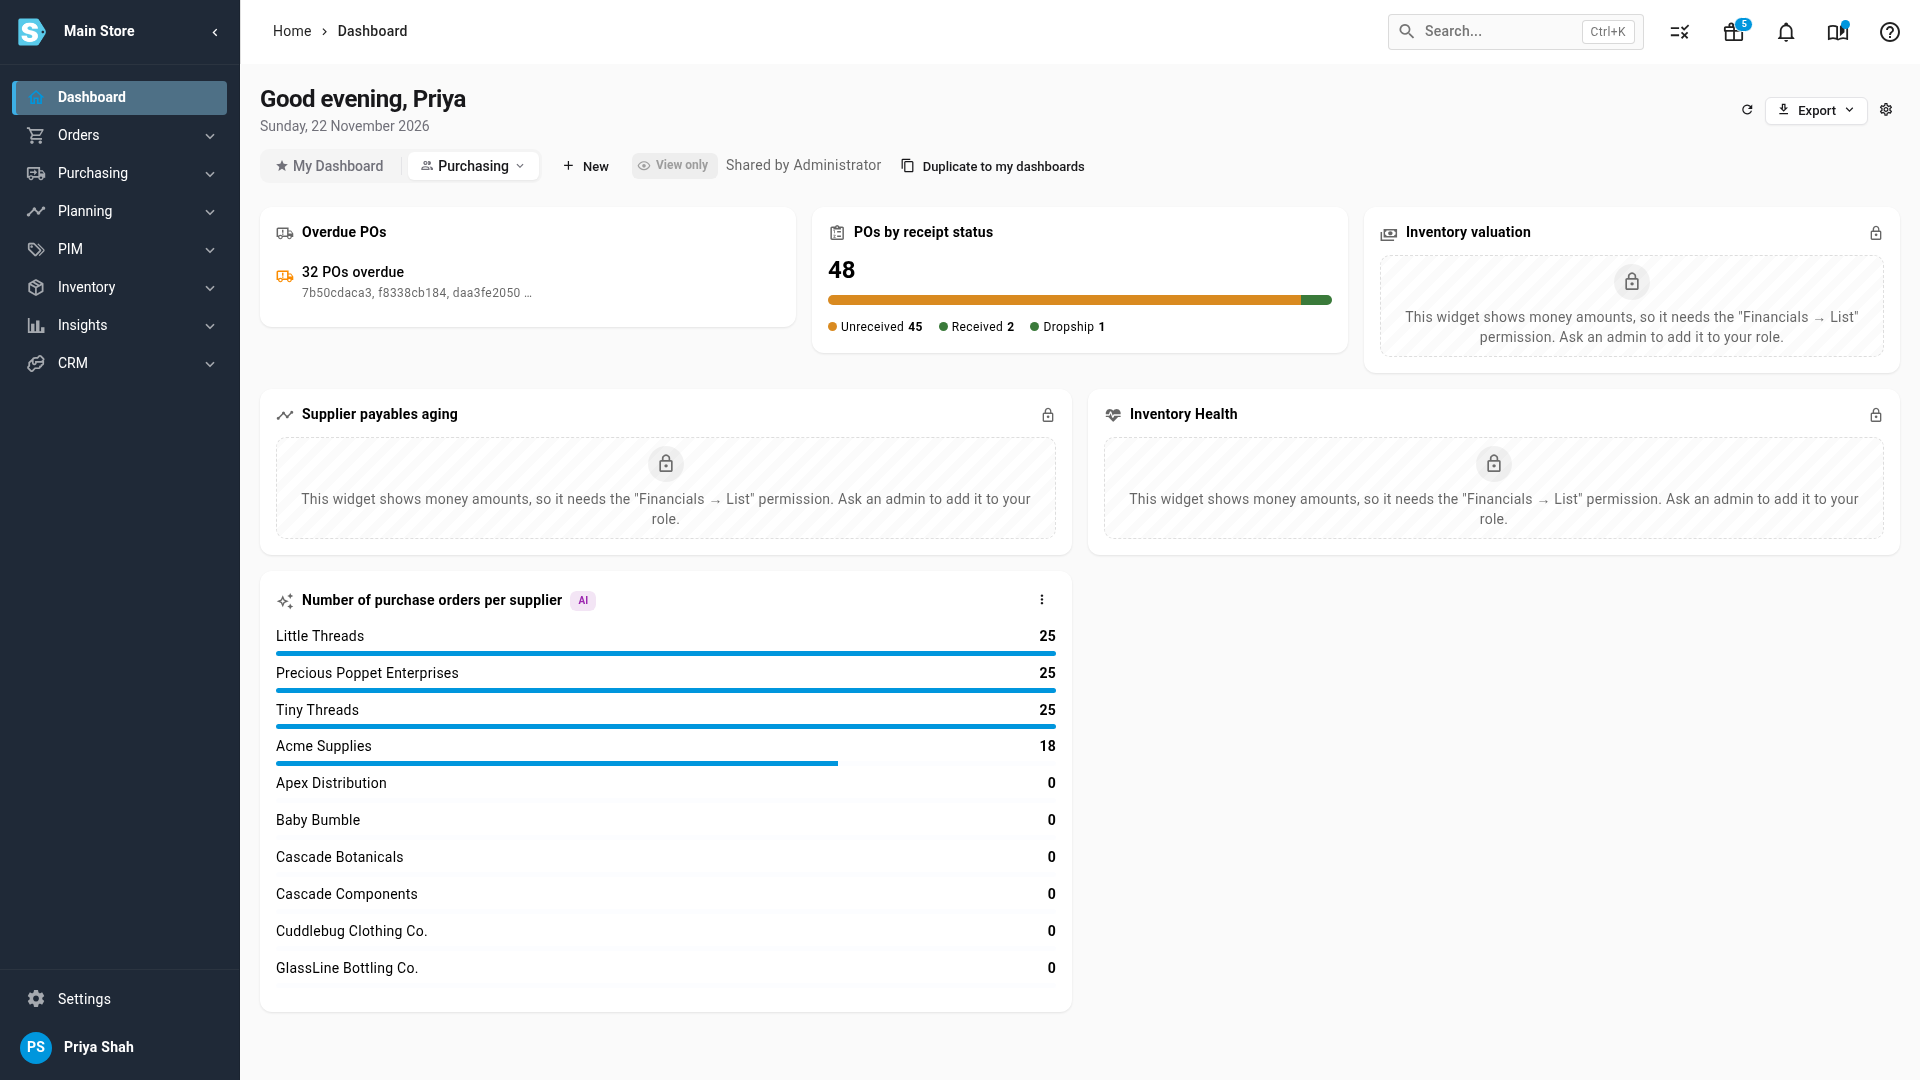
Open a dashboard someone shared with you
Dashboards your teammates share with you appear in the dashboard tabs, marked with a people icon.
- Click the tab, or open the active tab's ▾ menu and pick the dashboard under Shared with me. Each one shows its owner and View only or Can edit.
- On a dashboard you can only view, click Duplicate to my dashboards to make your own copy you can change.
Export to PNG or PDF
Anyone who can open a dashboard can export it.
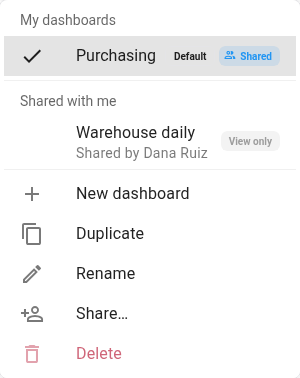
- Click Export.
- Choose a format:
- PNG image: one picture of the whole dashboard (every row, not just what fits on screen), at twice screen resolution.
- PDF document: landscape pages, with the paper size shown in the menu. Pages break between rows of panels, never through one, and every page repeats the header and a page number.
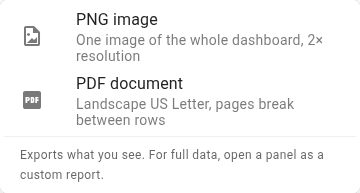
SKU waits for every panel to finish loading, then downloads the file, named after the dashboard and the date (for example purchasing-2026-11-22.pdf). The file has a header with the dashboard's name, your workspace, who exported it and when, plus the date range when the dashboard has panels that use one. Edit controls and menus are left out.
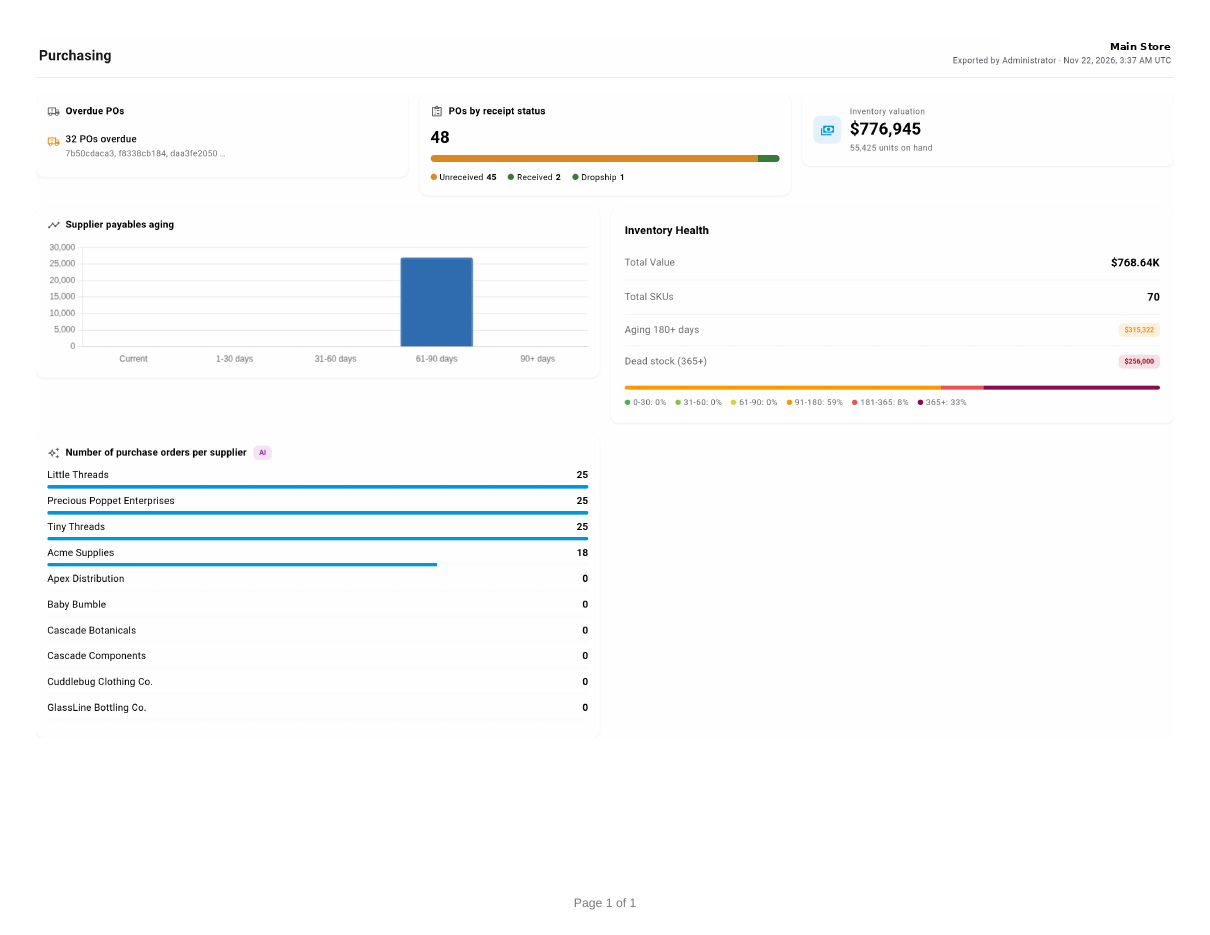
An export is a picture of the dashboard, so a table panel shows only the rows on screen. For every row, open the panel's ⋮ menu and choose Open as custom report, then export the report as a file.
Next steps
- Customize your dashboard: add, arrange and resize widgets, and keep several dashboards.
- Dashboard reference: what every widget shows.
Video transcript
This Purchasing dashboard tracks overdue orders, receipts and stock value. In this video, you add a panel by asking for it in plain words. Then you share it with your team, and export it as a file. When no widget answers your question, click Customize, then Ask for a panel. Type it the way you would ask a colleague. Here, the number of purchase orders per supplier. Then click Ask, and SKU gets to work. SKU turns your question into a report on your own records. Asking never changes a single order or product. Above the preview, SKU also suggests ready-made widgets that already cover the question. You can add one of those instead. The preview shows the panel exactly as it will look on the dashboard. Edit the title if you want different wording. Show as switches between the chart types that suit the results. The line of text underneath explains what the panel counts. To change it, type a follow-up in Refine. When it looks right, click Add to dashboard. The new panel appears at the end of the layout, with an AI label that tells your team how it was made. Then click Save at the top of the page to finish customizing. To share the dashboard, click Share. Workspace access sets the access level for the rest of your company. Leave it on Only people added below to pick each person yourself. Under Add people or roles, start typing a teammate's name, or their email address. Pick them from the matches that appear. They join the section below, starting at Can view. Switch them to Can edit, so they can change the layout as well. You can also share with a whole role, such as Warehouse Operator. Everyone who holds it gets access, including new hires who join later. Anyone set to Can view can look and export, but not make changes. And each viewer only ever sees the numbers their own permissions allow. Click Save to share the dashboard. Next to the tabs, a short line now lists everyone with access. Dashboards your teammates share with you appear in the same row. The menu on the active tab lists them under the heading Shared with me, below your own boards. Each one shows its owner and your level of access. Every viewer can download a copy as a file. Click Export, and choose PNG image for a single picture of the whole dashboard. Or choose PDF document for landscape pages you can print or attach. The file shows exactly what you see, under a header with the dashboard name and the person who exported the file.