Map your accounts to QuickBooks Online
When an entry syncs to QuickBooks Online, every line posts to the QuickBooks account linked to the SKU.io account on that line. Getting the books right in QuickBooks is therefore two choices: which SKU.io account each kind of posting uses, and which QuickBooks account each SKU.io account is linked to. This guide covers both.
Before you begin
- Connect QuickBooks Online under Apps & Integrations.
- Have your QuickBooks chart of accounts to hand — SKU.io imports it, and each SKU.io account pairs with one QuickBooks account.
Import your QuickBooks chart of accounts
-
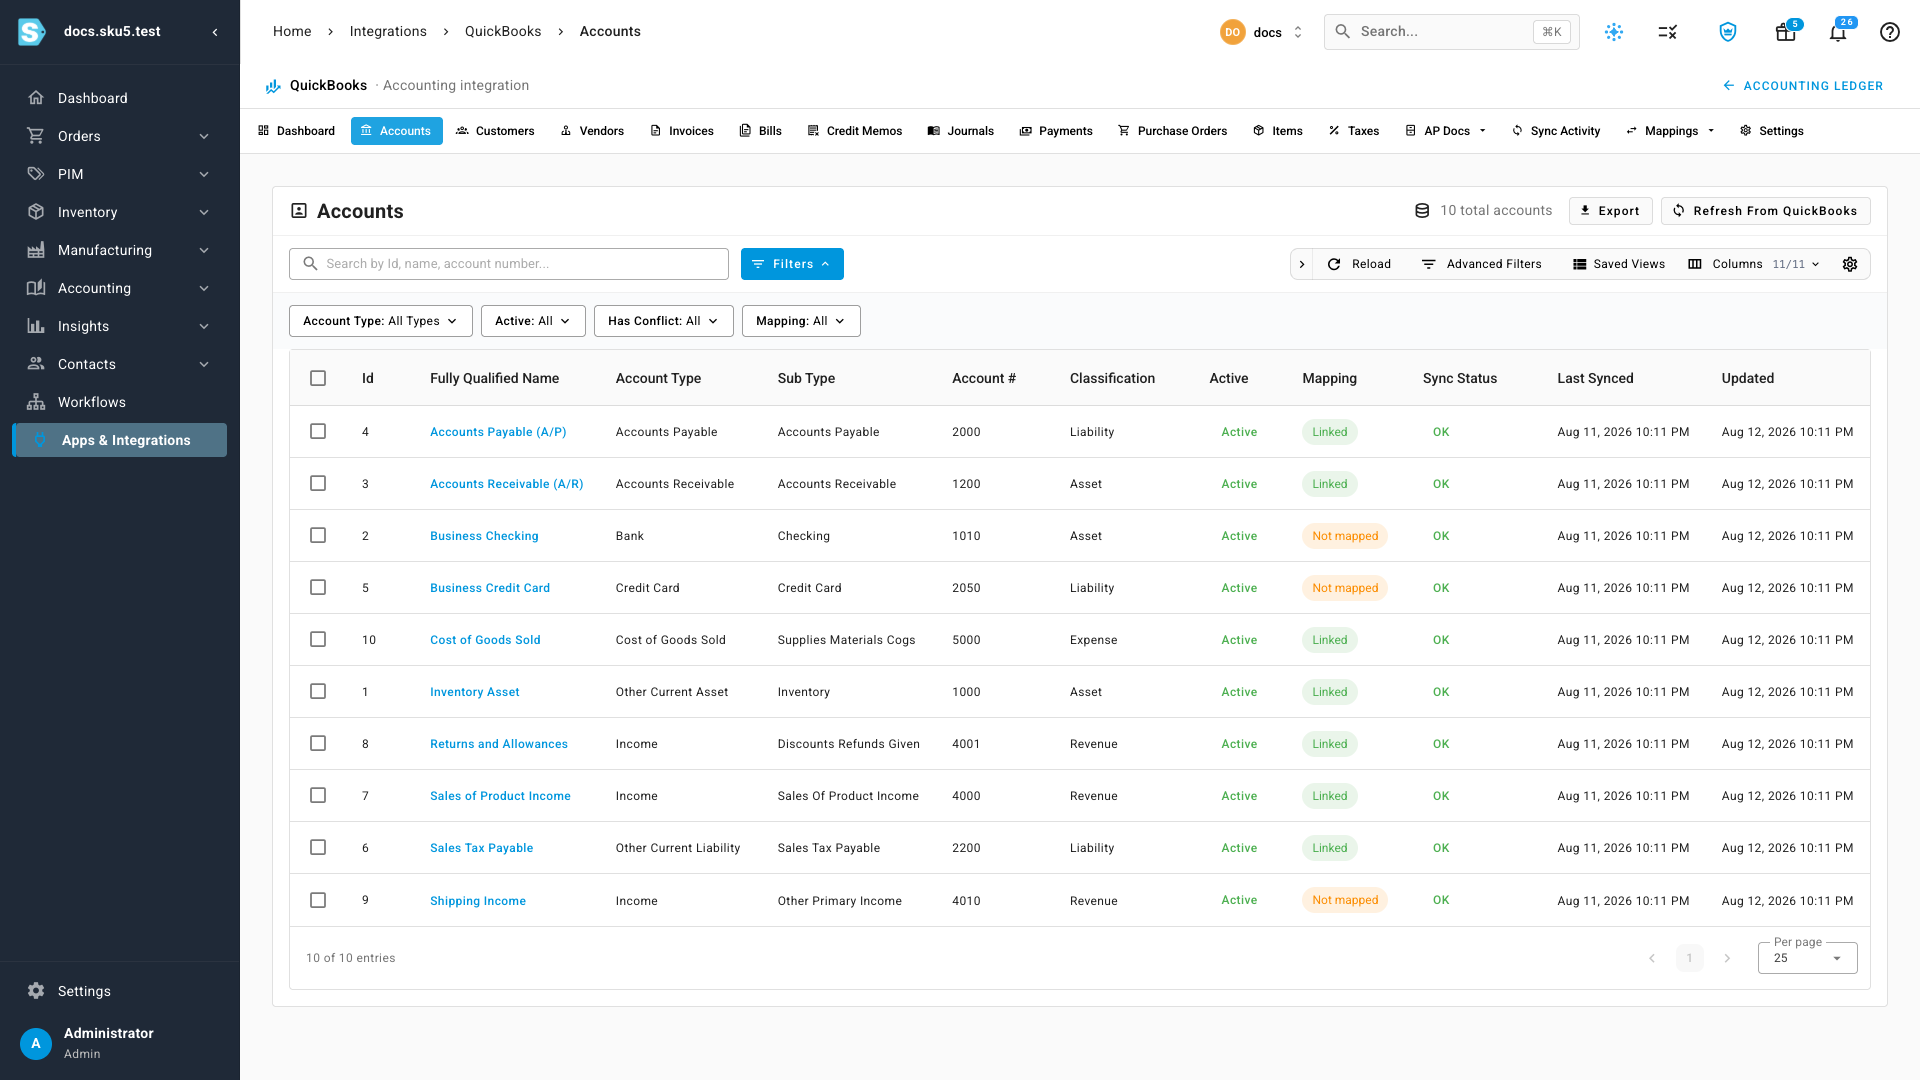
Go to Apps & Integrations → QuickBooks → Accounts. Each row is one account from your QuickBooks chart, with its type, number, and sync status.
-
Click Refresh From QuickBooks to pull in accounts you've added or renamed in QuickBooks since the last import.
-
To use a QuickBooks account in SKU.io, select its row and click Create Nominal Codes. SKU.io creates a matching account in its own chart and links the two — entries posted to the SKU.io account will land in that QuickBooks account.
Check where an account is linked
-
Go to Accounting → Settings → Nominal Codes and open an account — for example 5000 - Cost of Goods Sold.
-
The QuickBooks Online Account card shows the QuickBooks account this SKU.io account is linked to.

-
A Matched by code chip means no explicit link is stored — SKU.io pairs the two by their matching account code or name. That works, but renaming either side can silently re-route or break the pairing, so click Make explicit to pin the current match as a stored link.
-
The link works from the QuickBooks side too: open any account under Apps & Integrations → QuickBooks → Accounts and its SKU Nominal Code card names the linked SKU.io account — with the same Change action in reverse. The Accounts list's Mapping column shows every account's state at a glance (Linked, Name match, or Not mapped), and you can filter by it.
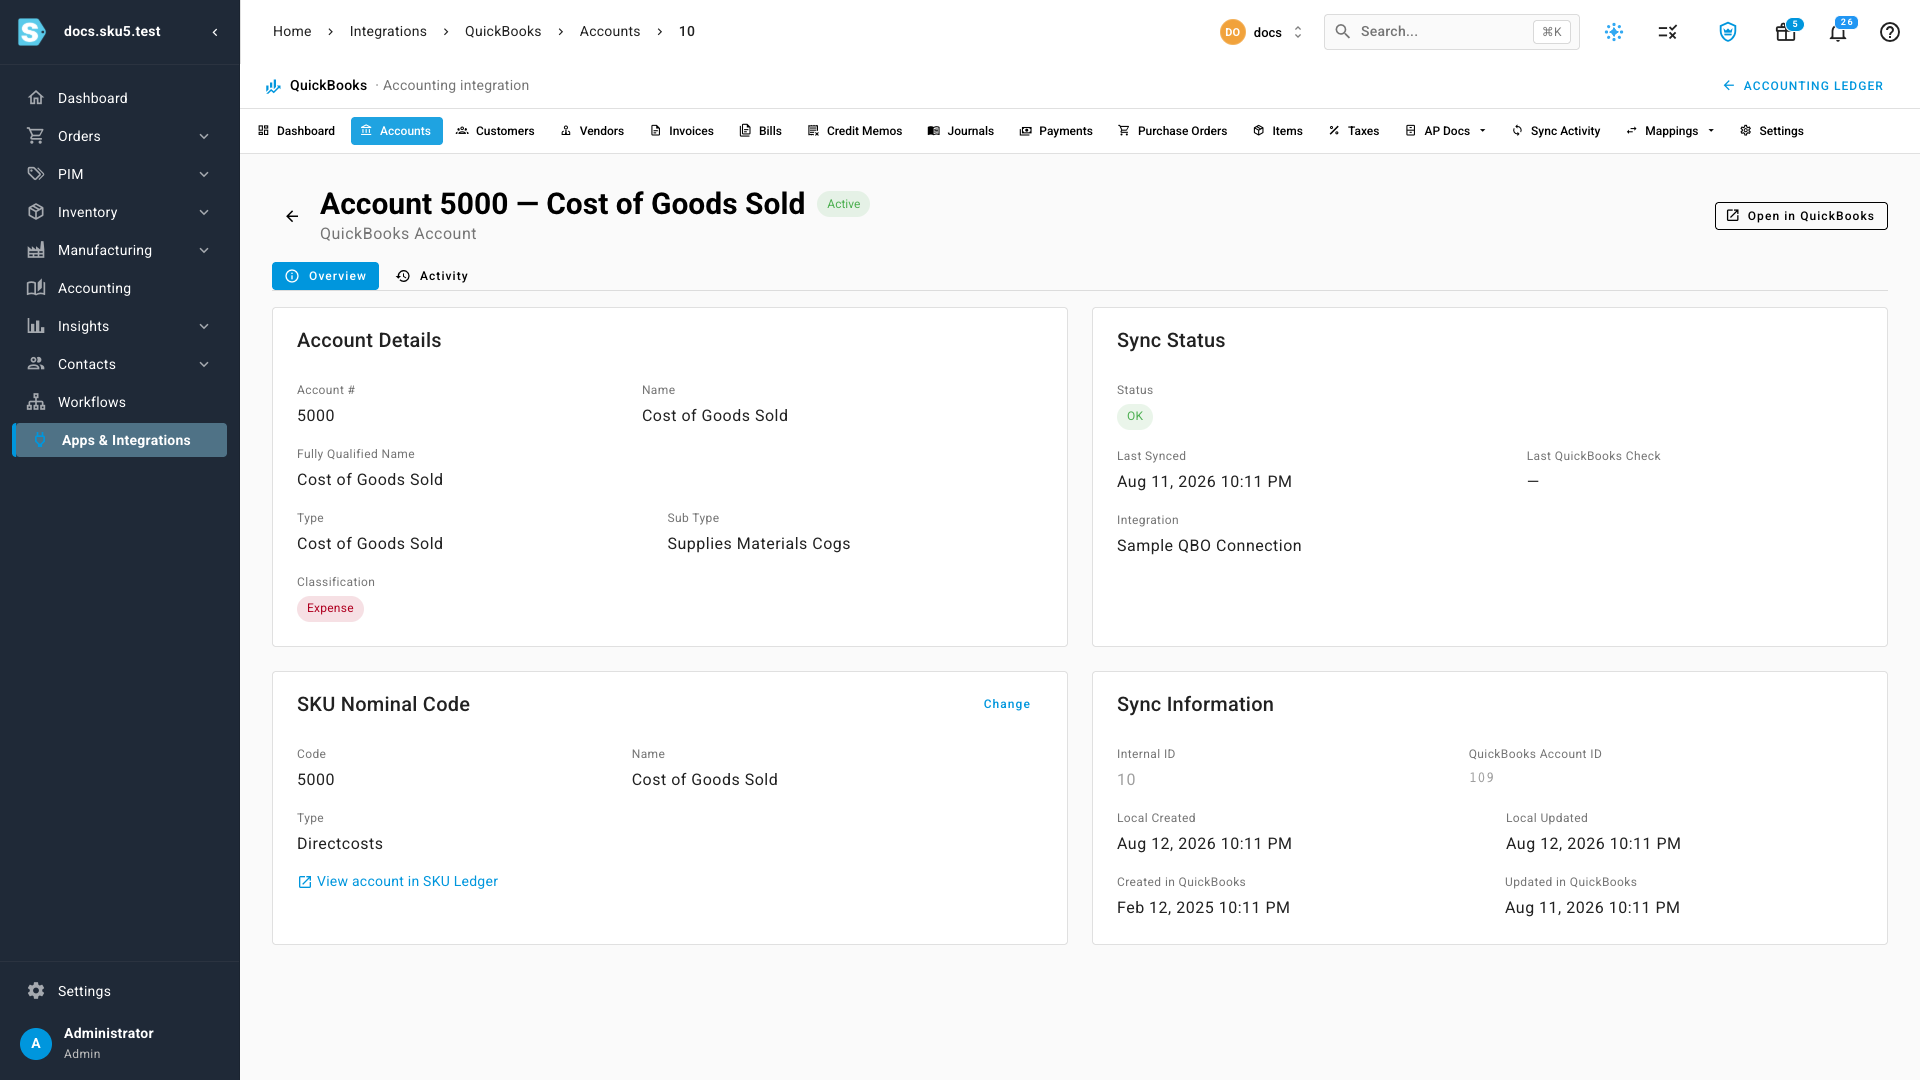
If an account has neither an explicit link nor a matching QuickBooks account, its entries can't sync — the entry reports a sync error with a Map account shortcut that opens the link editor.
Change or remove a link
- On the account's page, click Change in the QuickBooks Online Account card, search your QuickBooks chart, and pick the new account.
- If the account you pick has a different classification — a credit card for an expense account, say — SKU.io warns you and asks you to confirm before saving. That guardrail exists because a mis-pick here sends every posting on the account to the wrong place in QuickBooks.
- Save. The change applies to future syncs only — entries already synced to QuickBooks are not moved.
- Unlink removes the stored link; syncing then falls back to exact name matching, or fails with a sync error if nothing matches.
Choose the accounts your entries post to
-
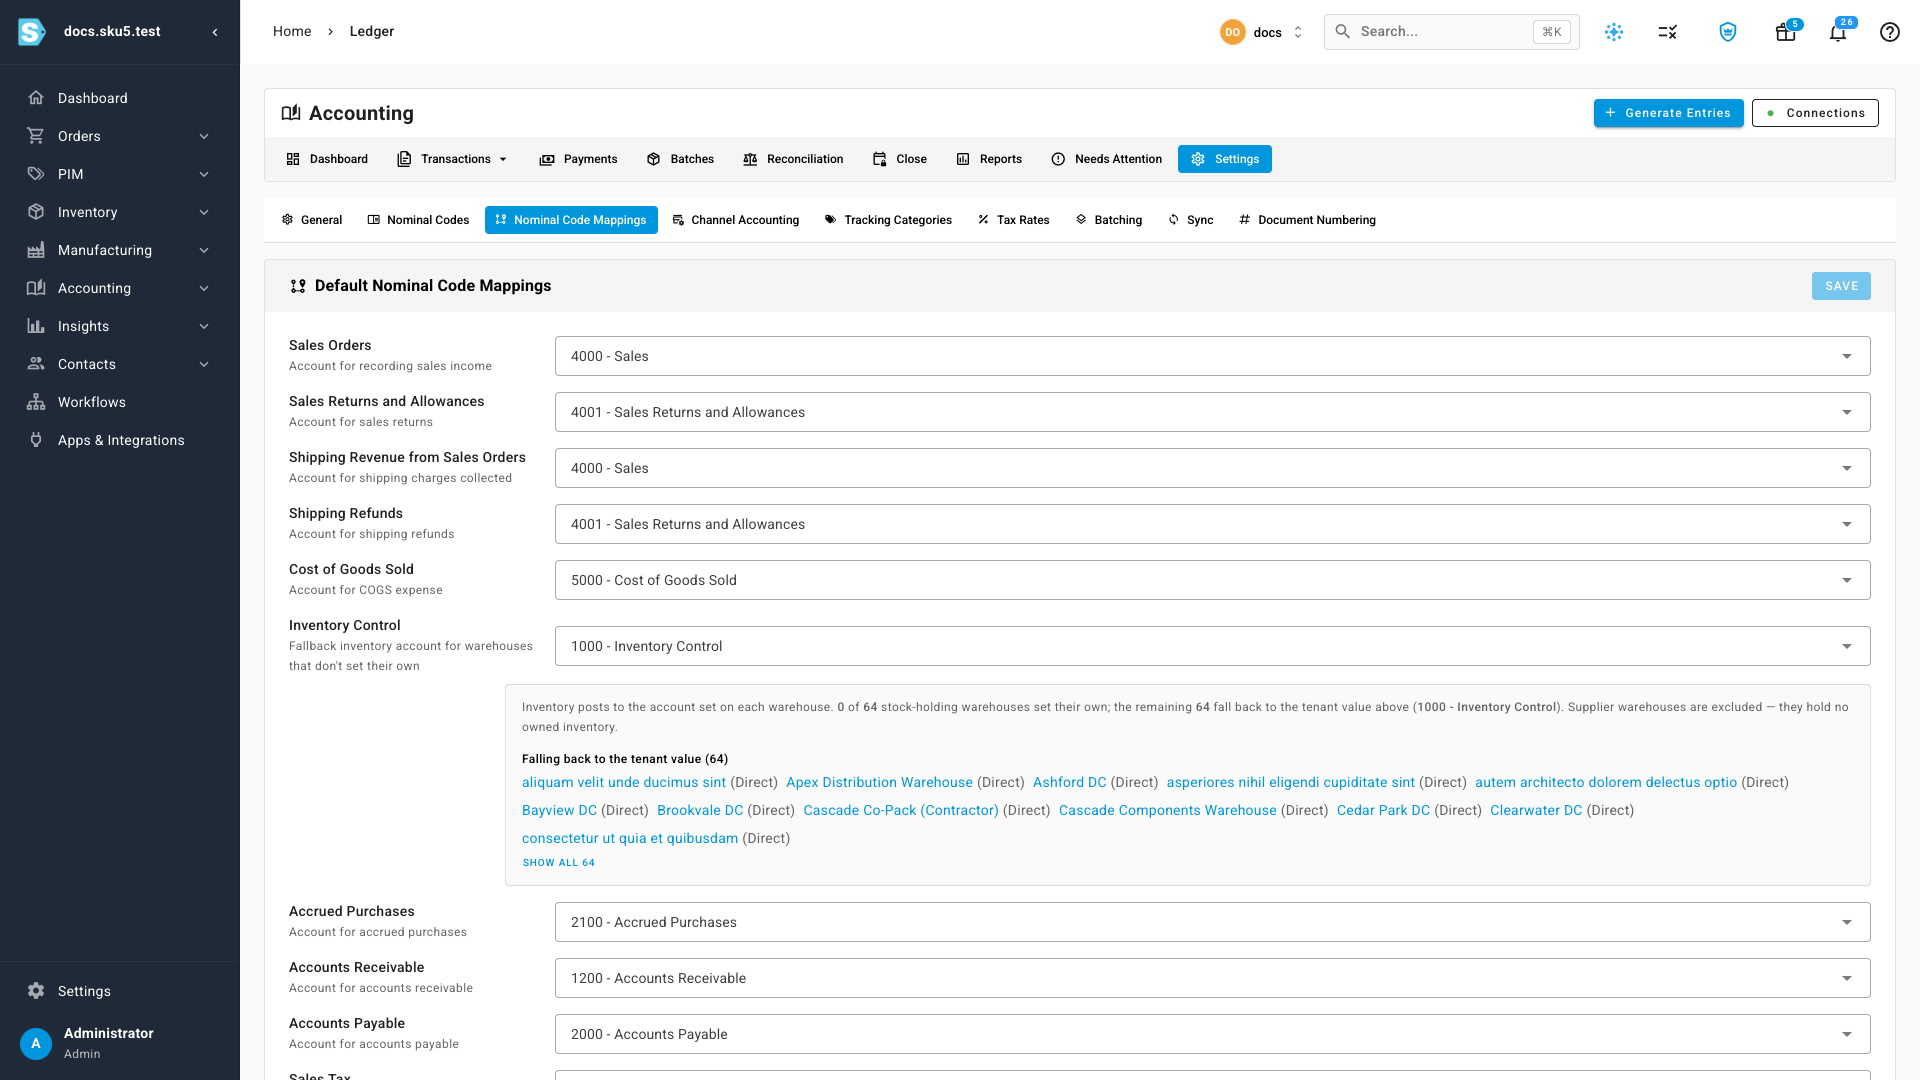
Go to Accounting → Settings → Nominal Code Mappings. Each row is one kind of posting — Sales Orders, Cost of Goods Sold, Inventory Control, and so on — with the account it posts to.
-
To change where a posting lands, pick a different account in its dropdown and click Save. From then on, new entries of that kind post to the new account — and sync to its linked QuickBooks account.
These are your company-wide defaults. A sales channel or an individual product can override them — see Use different accounts for each sales channel.
Next steps
- Fix entries posting to the wrong account — when something is already landing in the wrong QuickBooks account.
- Use different accounts for each sales channel — channel-specific Sales and COGS accounts.
- Chart of accounts reference — every default account and what posts to it.
Video transcript
When SKU syncs an entry to QuickBooks, every line posts to the QuickBooks account linked to the SKU account on that line. Under Apps and Integrations, QuickBooks, Accounts, you'll find your imported QuickBooks chart — and Refresh From QuickBooks pulls in anything new. Open any account to see its pairing. This QuickBooks Cost of Goods Sold account is linked to the matching account in SKU — created with the Create Nominal Codes action, so the link is explicit. And from the accounting side, View account in SKU Ledger opens the same pairing in reverse. The QuickBooks Online Account card shows exactly where this account's entries will land — and if it's ever wrong, Change re-points it in place. Which account each kind of posting uses is set under Accounting, Settings, Nominal Code Mappings. Here, Cost of Goods Sold points at account five thousand. Pick a different account and save — new entries follow it, in SKU and in QuickBooks.